


Share your craft projects
Make new craft buddies
Ask craft questions
Blog your craft journey

Mike40
1074 posts
and
35 followers
in about 12 years
in about 12 years
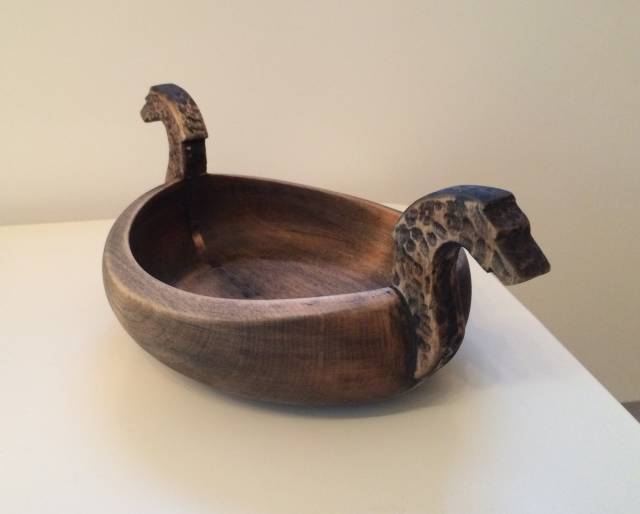
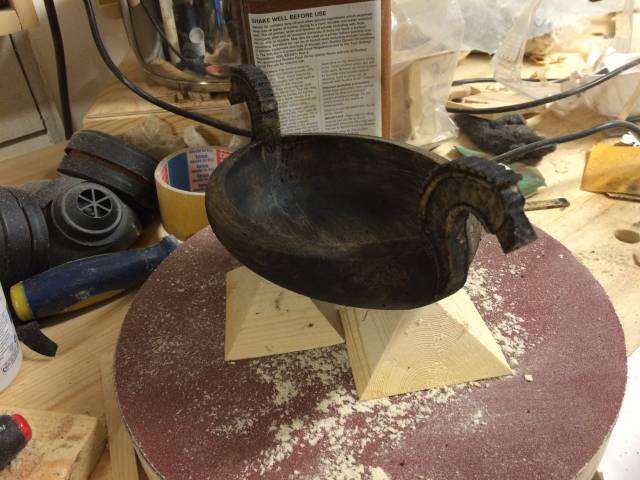
Making a Viking Candy Dish
You may have seen my project post here which explains the background for this design. Several readers expressed their interest in a blog to show how to make one of these, so here it is.
Background
Since this is not a replica of any genuine historic article, but rather a project inspired by the viking ships and their old time bear mugs you should feel free to put your own twist on this. That’s what the Viking carvers did anyway and no two of the inspirational pieces are alike anyway. The main difference here is that this one is turned and constructed rather than just being totally carved from a solid piece. In fact, I used a lot of different machine tools for most of the work and then did a little carving afterward on the handles. I made 3 of these. Two for my sons families and 1 for my wife and I. These are for fun and I did not try to make a prestige project out of them.
Quality concerns
If you look in the local museums around Norway you will find very few similar items that represent highly skilled woodwork. Most are somewhat crudely done, probably by farmers during the long winter months, but what they lack in professionalism they more than make up for it with charm. My work on these is about on parr with the farmers work I’ve seen around. So the message here is to have fun and don’t worry if they aren’t perfect.
Lets get started!
- Prepare the workpiece
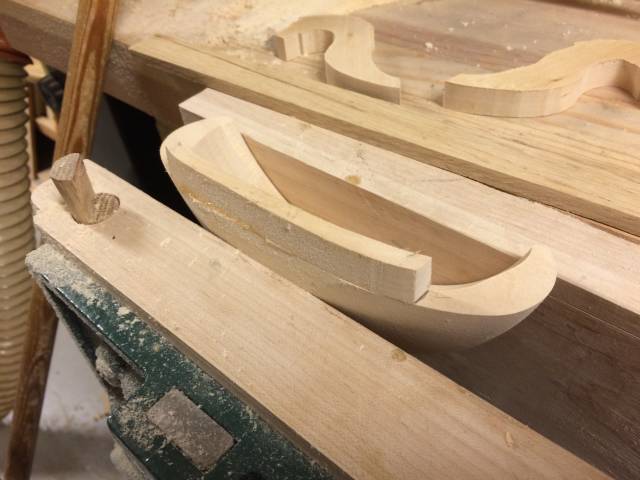
As you can see see, a piece of pine is inserted through the middle of the bowl blank. Paper is glued into the seams to make it easy to remove the pine strip after turning. See below
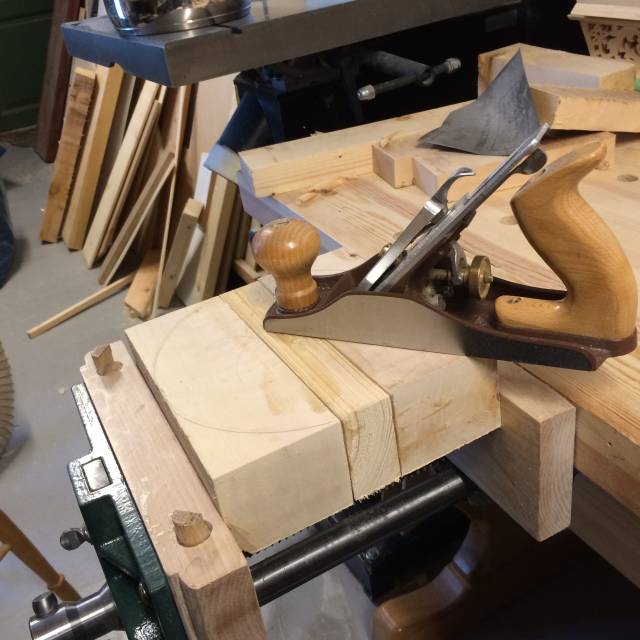
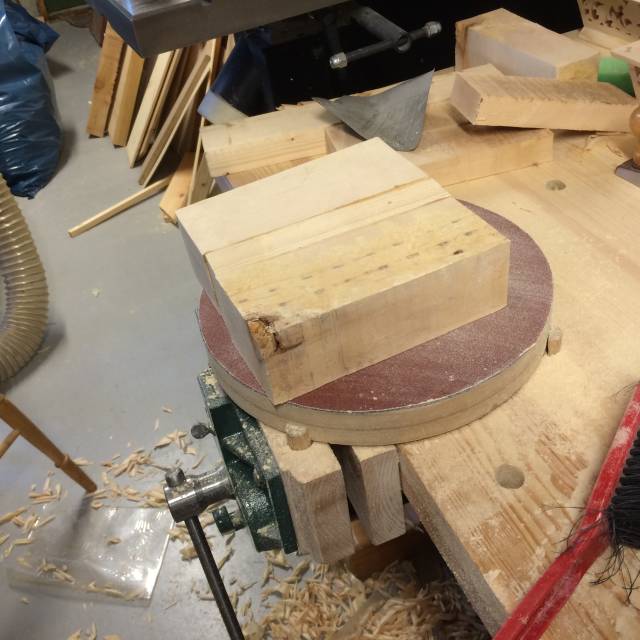
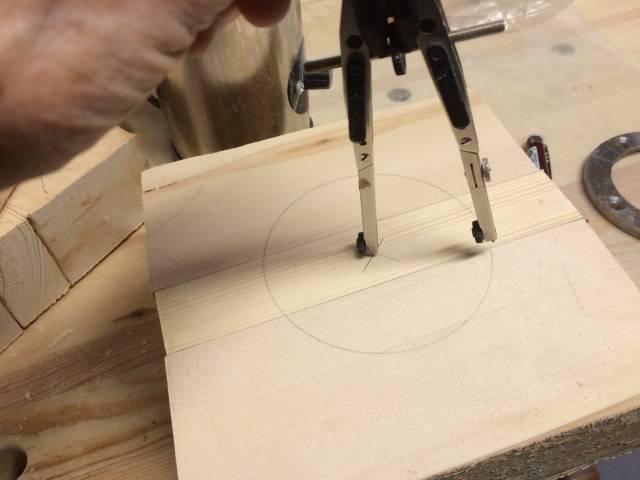
- Plane and sand to flat and then mount a faceplate or at least mark it’s location for mounting before cutting the workpiece round on the bandsaw. I wouldn’t go to all the trouble of flattening and centering for a solid blank, but it’s important that the faceplate be perfectly centere on this 3 part blank to insure that the two bowl halves will be the exact same size after turning. See below
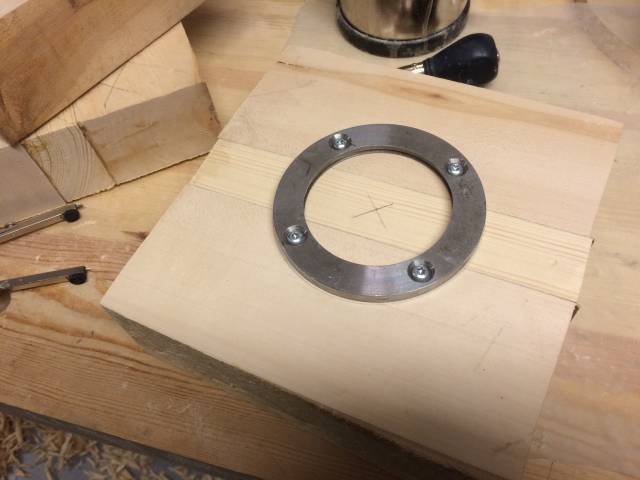
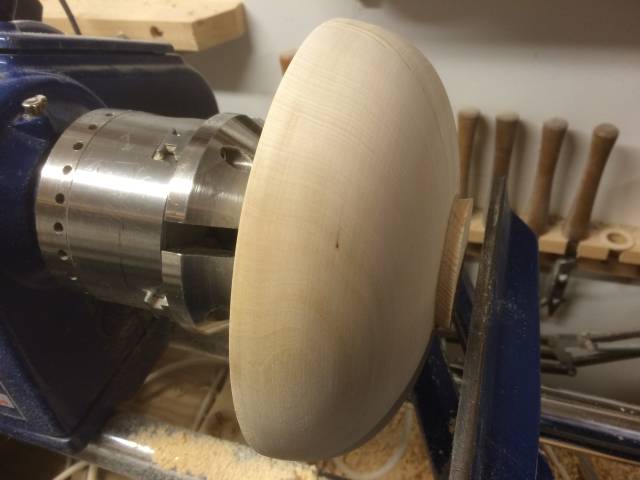
- Mount on the lathe and turn the outside perfect flat to mount a tenon using a paper glue joint. The tenon must have a low enough profile so that the chuck is snug against the workpiece when mounted on the lathe, otherwise it is likely to break off under turning. See below

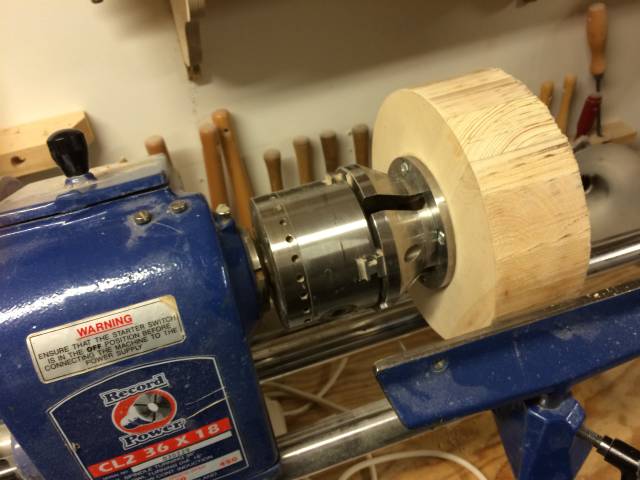
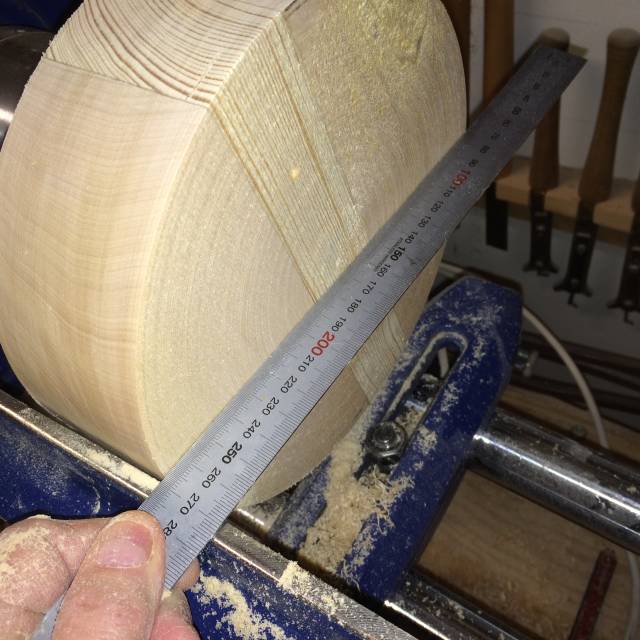
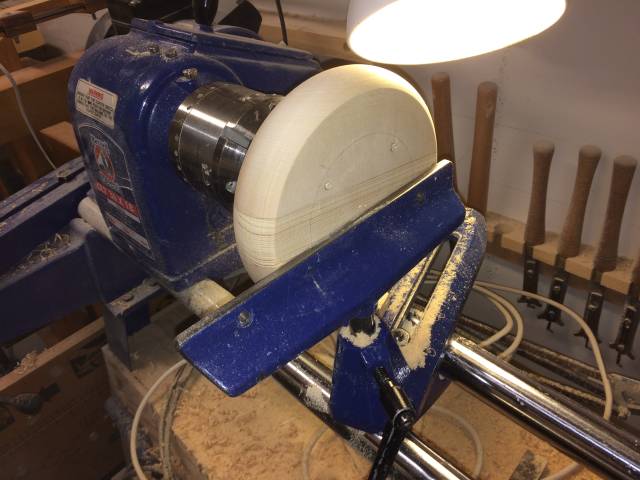
- Turn the bottom of the bowl and reduce the height of the tenon if necessary, which I have done here.See below
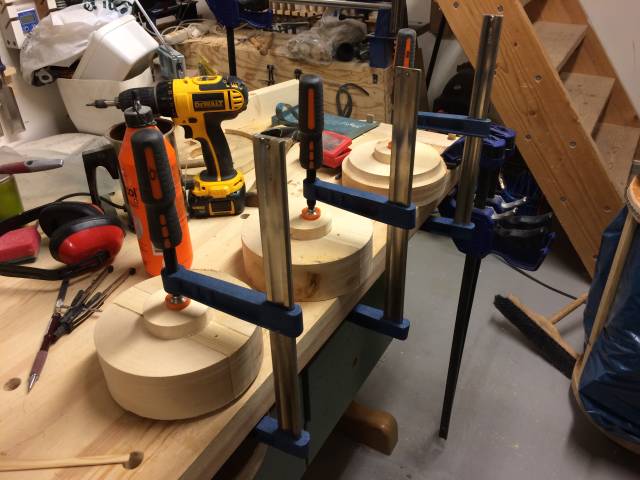
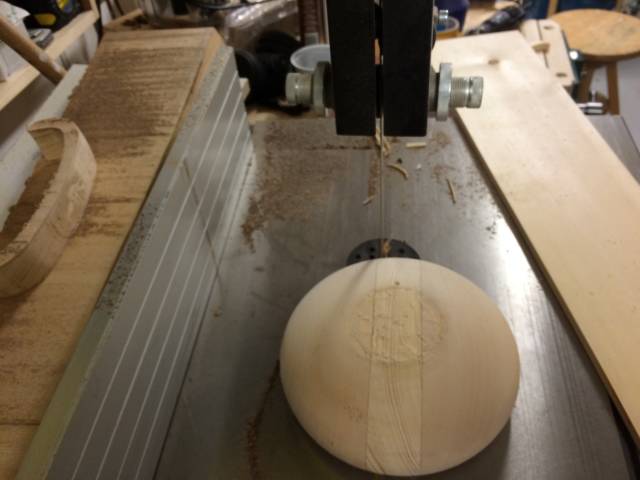
- The workpiece is then reversed for hollowing out the bowl, or as in this case 3 bowls. See below
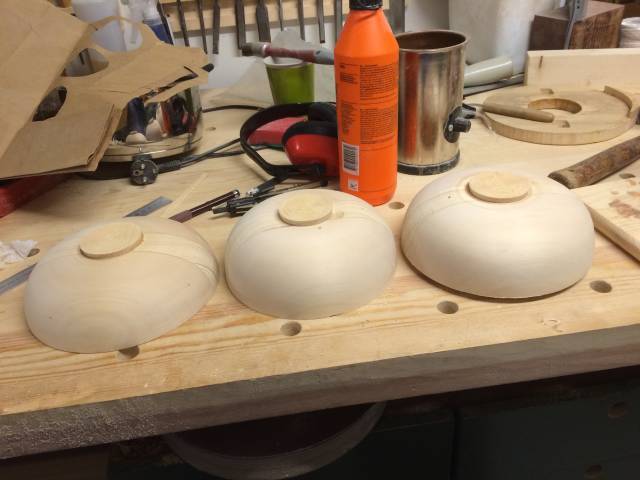
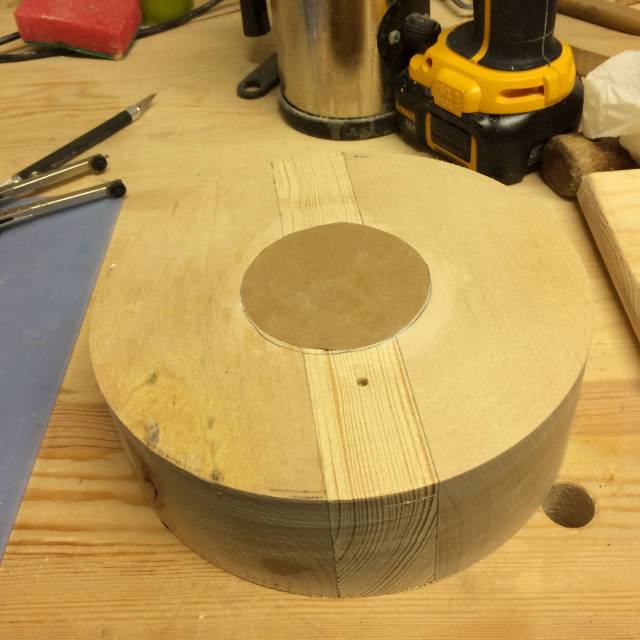
- The middle waste strip is then cut out with the band saw or you can use a chisel, but I like to saw it out staying slightly inside the glue joints and then using a knife to gently pry off the remainder so as not to risk damaging the bowl edges. After that I put some pencil marks on the edges and lightly sand them on my sanding board to remove any residual paper or glue and to ensure they are perfectly flat. See below
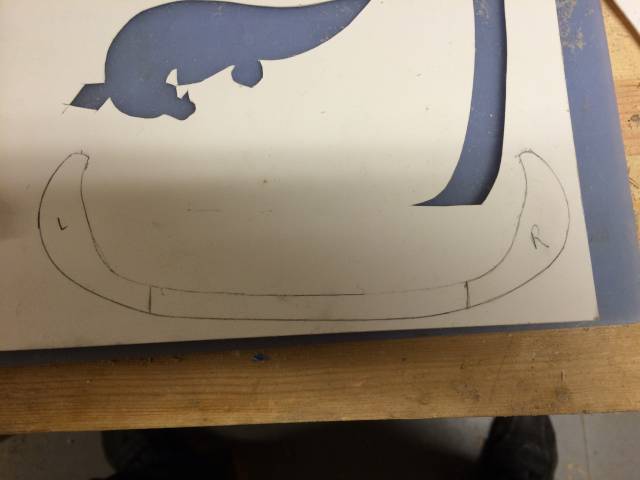
- Preparing the patterns
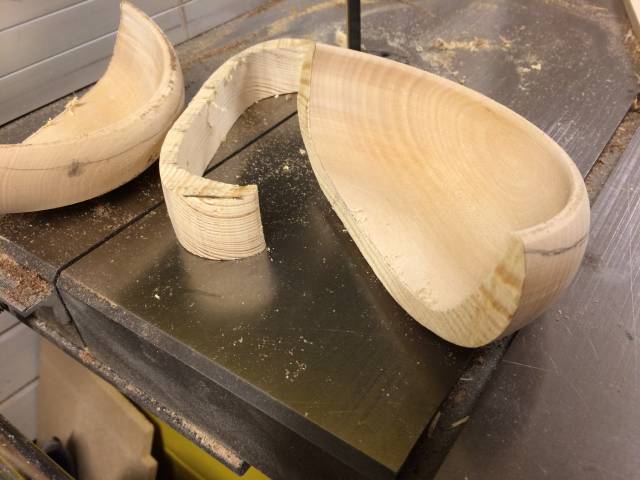
First I used 1/2 of the bowl to trace the profile onto a piece of poster board which will be used as tracing templates. the profile is used to to design the heads. Just one side is drawn as the template can be flipped to trace the other side. I wanted to use vertical grained wood for the head pieces, so I divided the the profile into 3 pieces Leaving a ‘keel’ and 2 heads. I then used the head piece and attached the end bowl profile to it to make my template for the vertical grain part which I traced onto the centerpiece wood and cut out with my scroll saw.
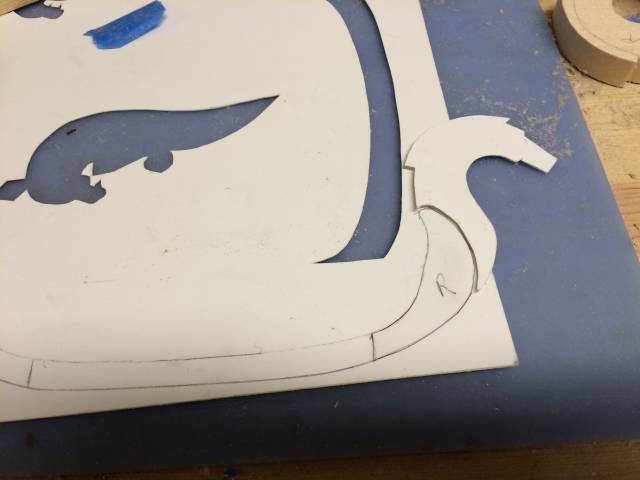
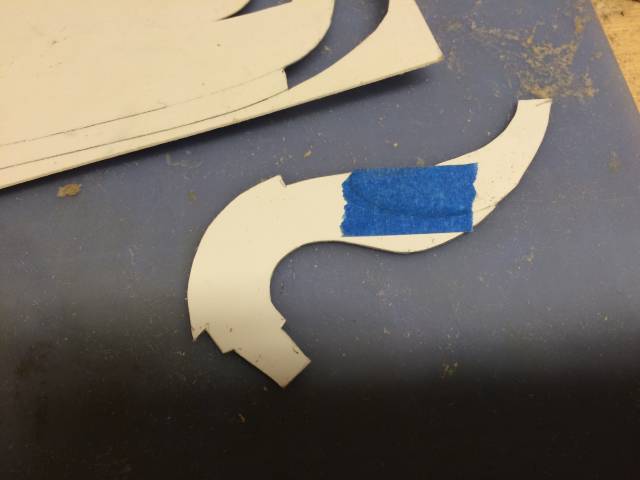
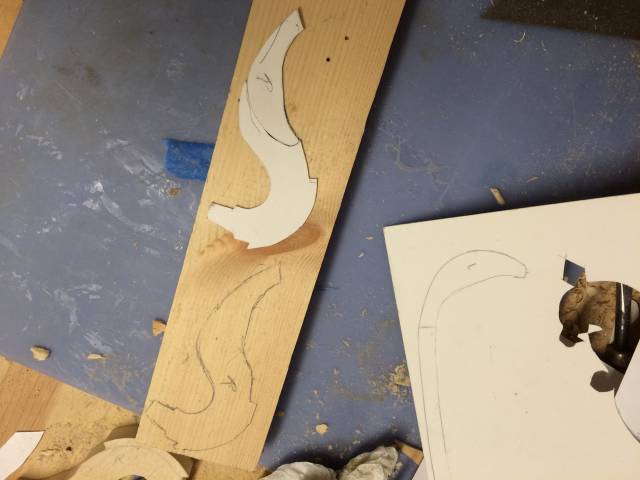
- These are the pieces that have been cut out with the scroll saw and are to be glued into the center of the bowl. These strips are more narrow than the original center insert and so the bowl will now be similar to a boat shape.
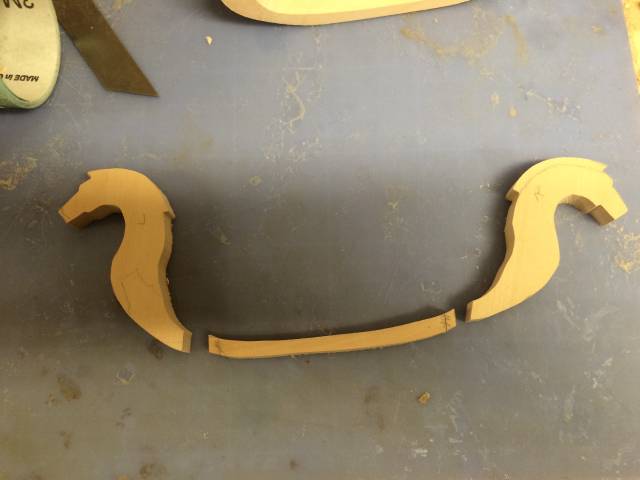
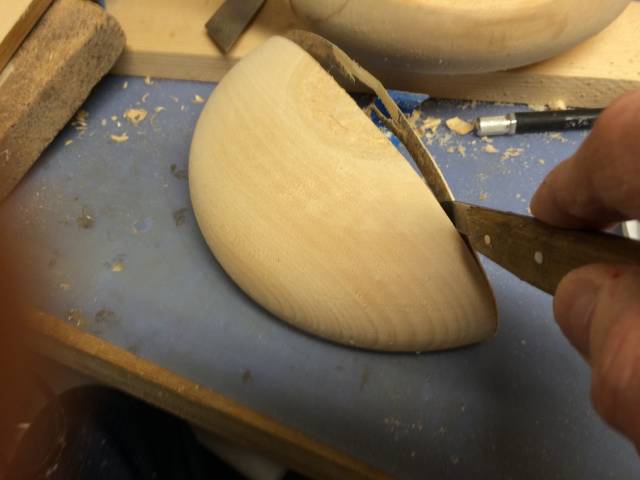
- Note that the above pieces have been placed onto the bowl edge to determine the exact location of the ‘keel’ piece and marked with pencil lines to insure proper positioning as this will be the first piece glued in as shown. A rub joint should be sufficient and once it is set then the heads can be glued on in a similar fashion and when they are set the other side of the bowl too.

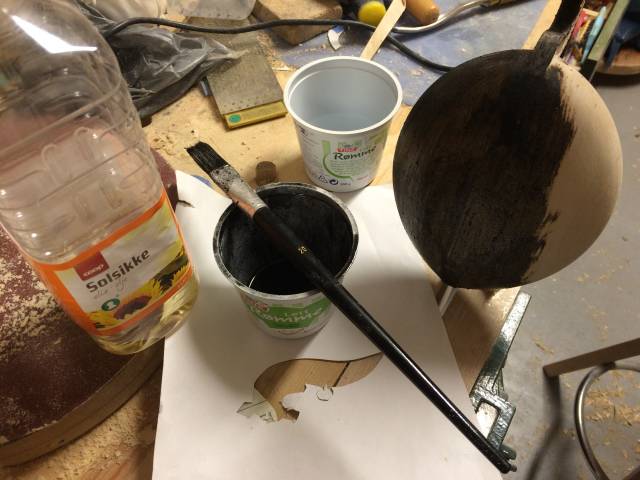
- After the glue is dry overnight the next step is to apply the finish. This consists of coal from the fire, ground up fine and mixed with oil. I have used sunflower seed oil, but any oil that dries reasonably well should work fine. I then let it dry overnight and then give it a good rubbing with 0000 steel wool and or some sanding with 180 grit until you get the look you want. I can see that I missed sanding off some hot glue residue off mine and I will probably have to redo some finishing tomorrow. No problem. I just left the brush in the cup and it won’t dry out overnight.
Tips
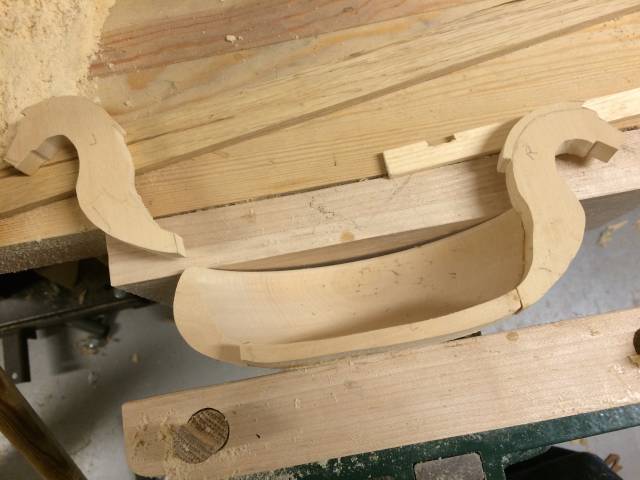
- it is most important that the center pieces are glued in so that they will leave the inside of the bowl smooth because it will be difficult to sand the inside after everything is glued up. On the other hand, small deviations on the outside are easily sanded.
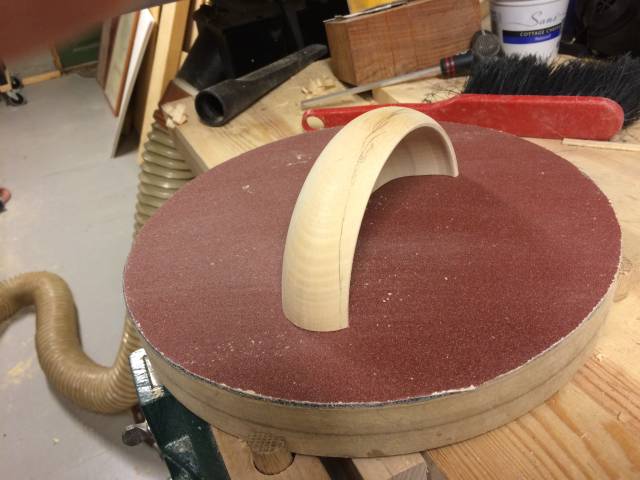
- It’s a good idea to sand the bottom of the glued up bowl on a sanding board to make the bottom flat enough to sit properly upright and stable. A lot of sanding is not required for this step, but it keeps the bowl from leaning or being wobbly.
I hope there is sufficient info above for you to do one of these, but please don’t hesitate to ask if you should have any questions. I found this project very enjoyable and I hope you will like doing it too. Thanks for reading.
PS my computer has been down for almost 2 weeks, otherwise I would have posted this sooner. I tried using my wife’s old computer, but that crashed too! I tried using my mobil phone to keep in touch on LJ, but that didn’t go very well. It’s great to be back in circulation again.
Mike, an American living in Norway
7 Comments

I knew it wasn’t that easy Mike.
Great blog. II envy your picture. Any particular setup or just point and shoot?
Abbas, Castro Valley, CA

Good tutorial Mike. You make it look easy.
The early bird gets the worm but its the second mouse that gets the cheese.
Thanks guys, It is real easy except for the rubbing and sanding after the finish has been applied. That takes some time. I’ll be posting my Dragon bowl on Monday. That one is a little different and a bit more like the beer cups than the bowls. I do hope I can get away from all these dragons soon. It’s not really my thing, but they are kind of fun to make or carve.
Mike, an American living in Norway
Abbas I used to use my regular camera for shop pics were a better quality, but I bought an iPhone about a year ago and I use only that now because it’s so easy to keep in my pocket and it still does a reasonably good photo. I do have very good lighting in my shop and I think that helps a lot regardless of the camera.
Mike, an American living in Norway
I have been wanting to build a light box for a wile.
I will borrow the iphone from my wife see how it goes.
Abbas, Castro Valley, CA
That seems a bit optimistic Abbas. Do you really thing you can get it away from her?, lol
Mike, an American living in Norway
I never thought about it from this angle…
Now you said it, she is always on it. Hmm, I will devise a clever way.
Abbas, Castro Valley, CA