


Share your craft projects
Make new craft buddies
Ask craft questions
Blog your craft journey
chair
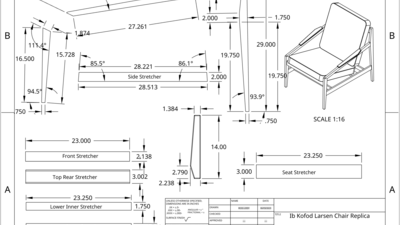

As with the other replica chairs I've made, it requires spending quite a bit of time looking at example photos from different angles in order to ma...
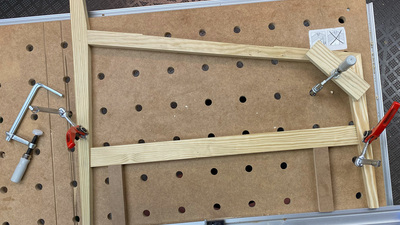
Simultaneously aligning all 4 components of a side assembly gave me fits. Very slight errors in length and/or angles meant that as I sequentially ...
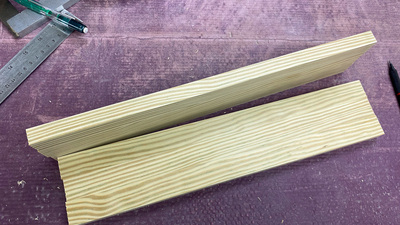
My last pair of blanks are for the armrests. I started by planing them down to 5/8" thick, which is the final thickness for rear of the armrest. ...

I completed the remaining stretcher mortises in the two pair of front legs and trimmed the outline on the test stretcher.
[20241124-IMG_9577.jpg...

With all the tenons cut on the stretcher blanks, I used a router template to cut them to final shape. I used the test front stretcher as my templa...


After finishing my stick chair almost a month ago, I finally got the video done for it. They were both a lot of work!
[2025-08-31_07-12-42.jpg]...
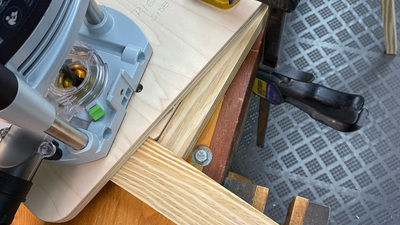
As mentioned earlier, the armrest will fit into a 1/8" deep recess on the top of the arm. I made this router jig (from scraps) to use to cut the r...
There were a couple things I wanted to verify before the final glue-up:
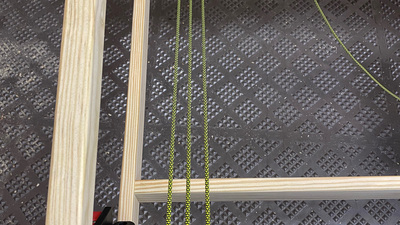
• Could I keep the paracord lacing tight enough so that it would support a ...

While I had been thinking about how to make the arms from the time I had started scheming to build this chair, by the time I got to this point, I s...

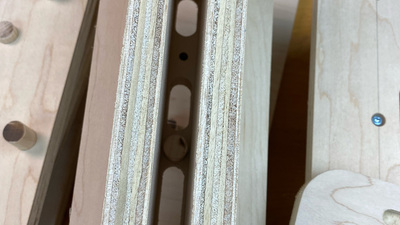
With all the major shaping and sanding completed, I had one last task before glue-up, and that was to pre-drill the seat frame for all the L-nails....
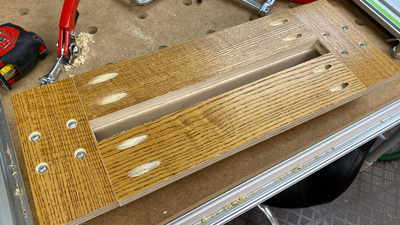
With the router jigs for the side assemblies completed, I could get to work cutting some mortises.
Cutting the mortise for the lower rear stre...
To cut the mortises for the stretchers (front/rear lower stretchers and upper rear stretcher), I needed a couple more jigs. In these, I used a com...