


Share your craft projects
Make new craft buddies
Ask craft questions
Blog your craft journey

Ron Stewart
953 posts
and
24 followers
in over 3 years
in over 3 years
More from Ron Stewart
 - Project by Ron Stewart")


Flexible Photo Frame System


I originally documented this project on August 14, 2020.
My wife and I just had our kitchen remodeled, and we wanted to fill a long blank wall beside the table with a grid of framed photographs. We had several requirements:
My wife and I just had our kitchen remodeled, and we wanted to fill a long blank wall beside the table with a grid of framed photographs. We had several requirements:
- We needed to display photos of various sizes (8"x8", 8"x6", and 9"x6") and orientations (landscape and portrait).
- We wanted an easy way to swap photos so we could add new ones and rotate in old favorites. Ideally, we'd be able to swap photos without removing the frames from the wall.
- We wanted the frames to stay level and evenly spaced over time. We've had problems before with frames tilting slightly after dusting, etc.
- We didn't want any glass in the frames. Even with non-glare glass, we see too many reflections, and our gallery wall is right beside a large bay window.
Our solution consists of several components:
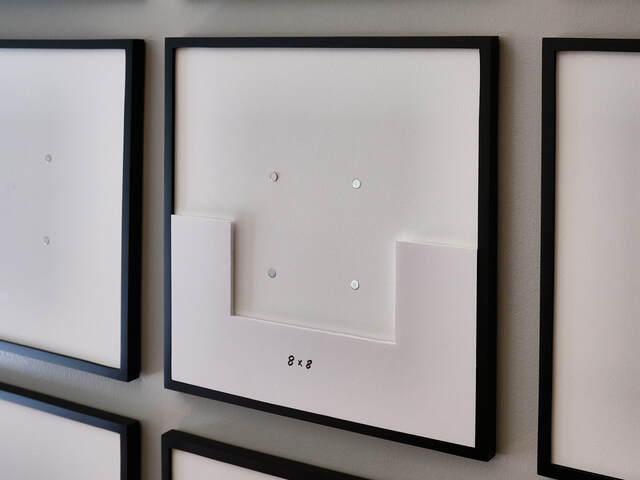
- Twelve frames with integrated matboards with embedded magnets.
- A set of templates (one for each photo size) for gluing steel discs to the backs of photo prints that align with the magnets in the frames.
- A set of templates (one for each photo size) for positioning the prints within the frames so the discs and magnets align.
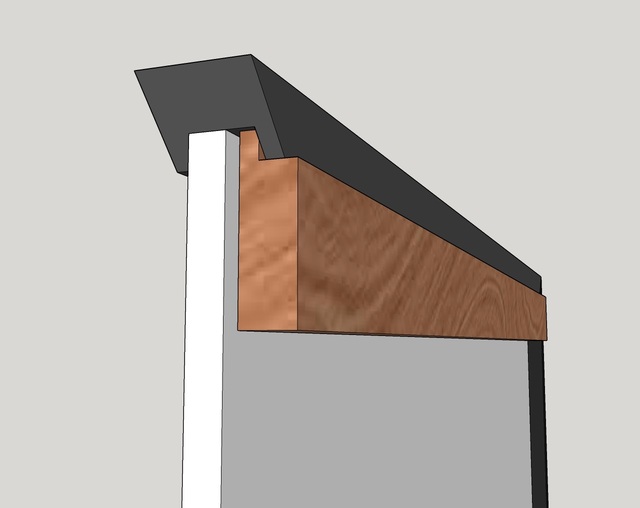
- Mounting cleats with tabs that fit into matching slots in the top rear segments of the frames. The cleats support the frames along their full width, preventing them from tilting.
- A cleat installation template that positions the cleats level and with the correct spacing.
Each frame is a 15 3/4" square with 1/2" wide, 3/4" thick, sides painted with Rust-Oleum Painter's Touch 2x Flat Black (sprayed). The matboards are 1/4" MDF, painted with Benjamin Moore Super White Matte (rolled on).
Below, I'll explain how we use the templates to mount prints. After that, I'll provide numerous construction details and photos.
Preparing a photo print for mounting
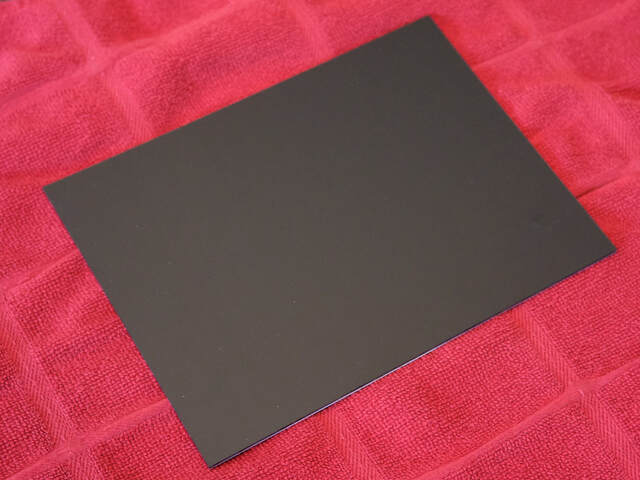
For this project, we ordered prints from Nation's Photo Lab, opting for mounting on 2mm black styrene backers. They are stiff and mostly flat.
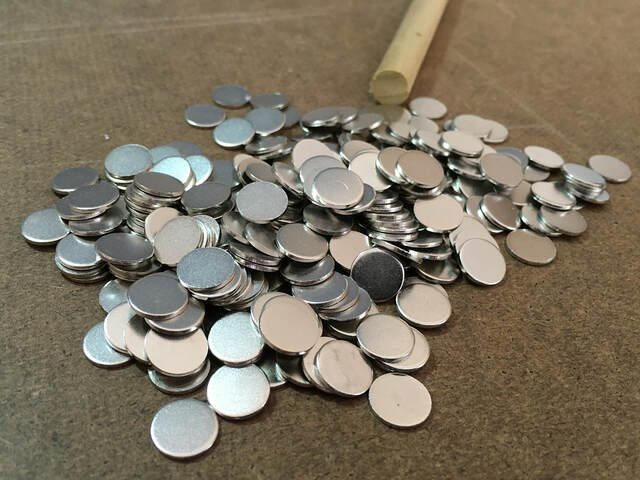
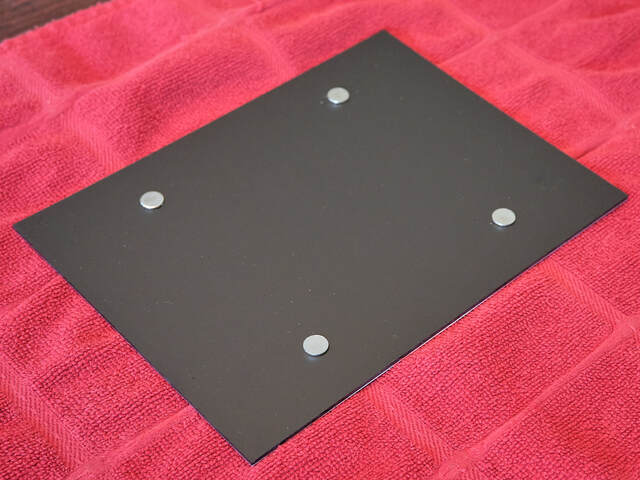
Each frame's matboard has four 3/8" disc magnets embedded in the center, spaced four inches apart (center-to-center). In order for a print to mount in the center of the frame, it needs four 3/8" steel discs glued to its back, centered and with the same 4" spacing.
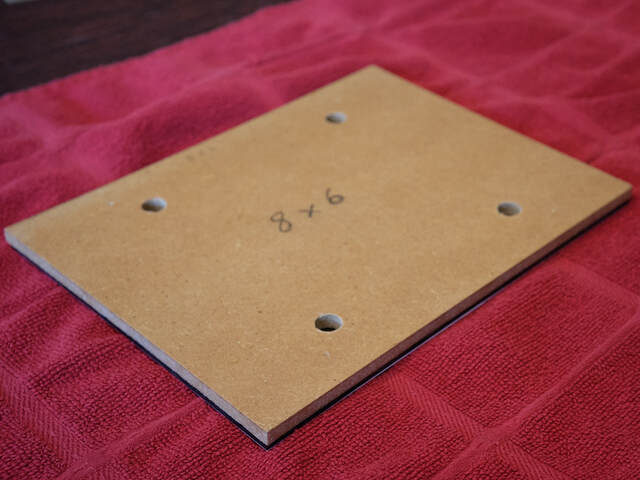
To simplify gluing the magnets, I made templates from 1/4" MDF for each of the three photo sizes we use. Each is exactly the same size as the corresponding print and has four oversized 3/8" holes in the center, spaced 4" apart. I finished the templates with shellac and wax to prevent glue from sticking to them.
Gluing the discs is simple. Start by placing the print upside down (on a towel or soft surface to avoid scratches).
Place the matching template on the print, aligning the edges.
For each hole, add a drop of super glue and slide a disc into the hole. Because the hole is slightly oversized, the disc drops onto the glue. Use a pencil, dowel, or other thin rod (I use an eraser stick) to gently press the disc onto the print's back.

Wait a few seconds for the glue to set, and remove the template by lifting it straight up. After the glue dries, the print is ready for mounting.
Mounting a photo print in a frame
To simplify mounting prints in the centers of frames, I made positioning templates from foam-core board. Each template fits inside a frame in one direction, extending half the inner frame width in the perpendicular direction, and has a cutout sized to match a particular print size. The templates for non-square prints can be used either horizontally (for landscape-orientation prints) or vertically (for portrait orientation).
Mounting a print is simple. Start by placing the matching positioning template in the frame.
Place the edge of the print inside the notch and rotate it to contact the matboard. The magnets snap it into place.

Remove the positioning template.

Now I'll move on to construction details.
Cutting and milling the frame segments
Due to Covid-19, I've been avoiding in-store visits to Lowe's and Home Depot. I have used their curbside checkout, but I didn't trust them to select lumber for me, so I decided to use materials on hand.
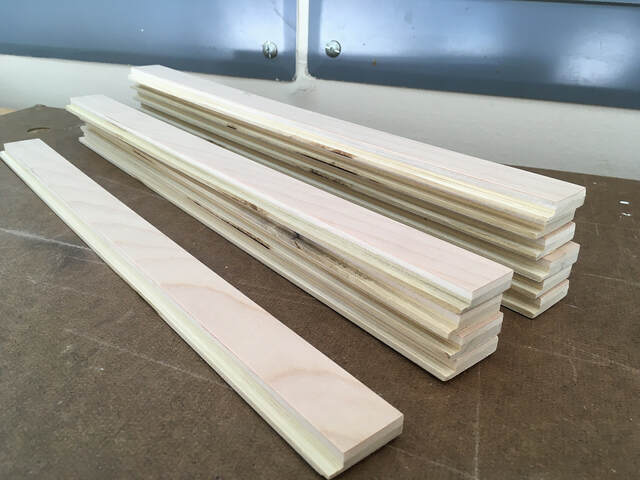
I had two short 3/4" thick basswood boards leftover from a previous project, and that was just enough to build the frames. We had planned on 16" frames, but the boards wouldn't accommodate that size, and I had to shrink them to 15 3/4".
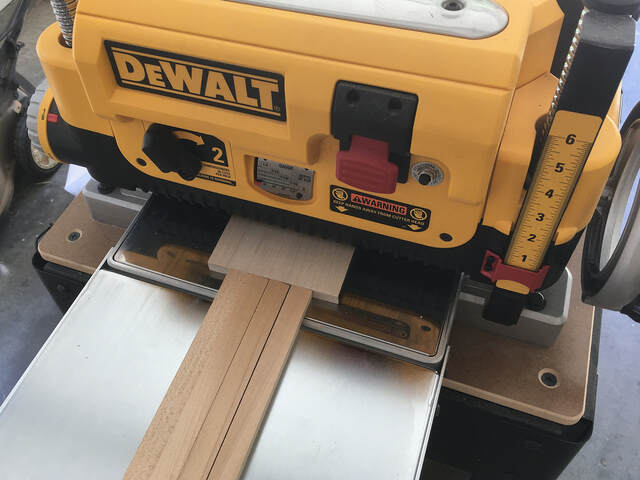
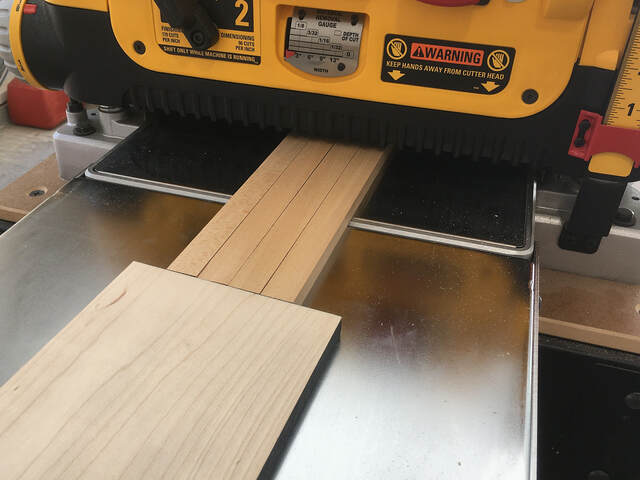
I ripped the boards into 9/16" strips, and then planed them down to 1/2".
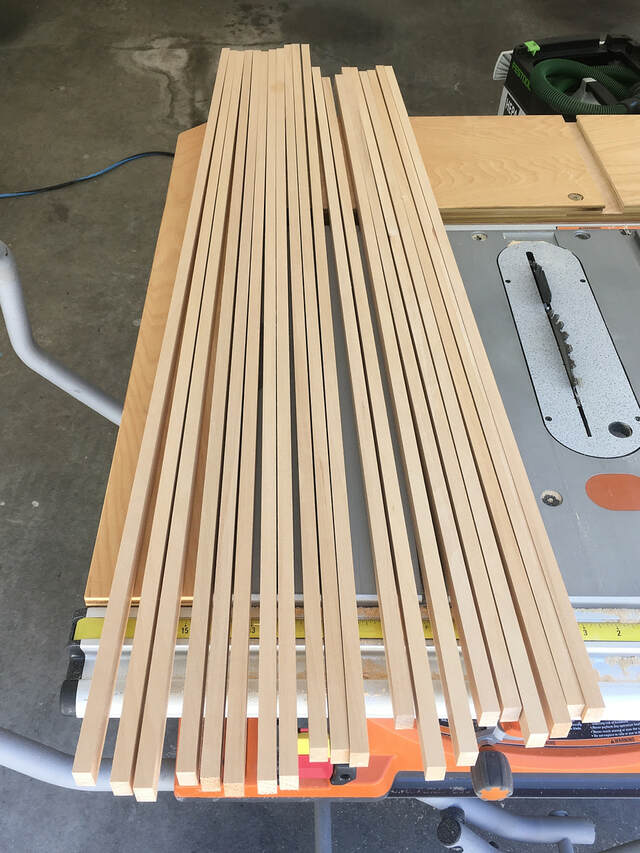
With my planer, I usually get a few inches of snipe at the leading and trailing edges of the boards. In most cases, I can cut away the sniped ends. In this case, I didn't have any length to spare, so I used scrap boards ahead of and behind the pieces to avoid the snipe on my frame stock.
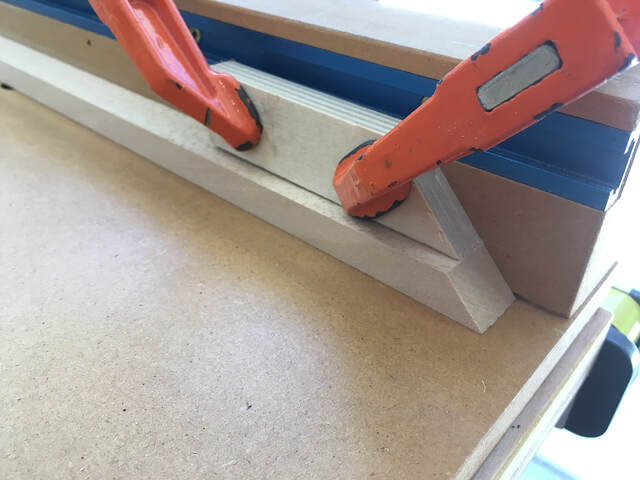
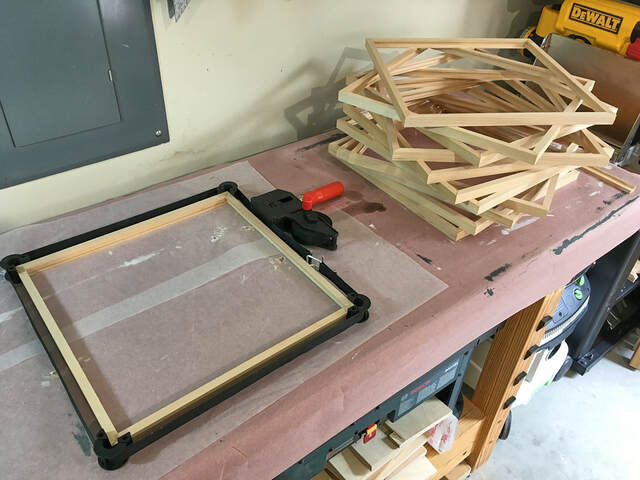
To miter the ends of the frame segments, I used my crosscut sled in its 45-degree mode. Unfortunately, my sled isn't wide enough to let me use its T-track stop block, so I had to improvise. I mitered a short piece of scrap and clamped it to the sled. To cut the second miter on each segment, I aligned the first miter with the scrap. That yielded segments with consistent lengths.

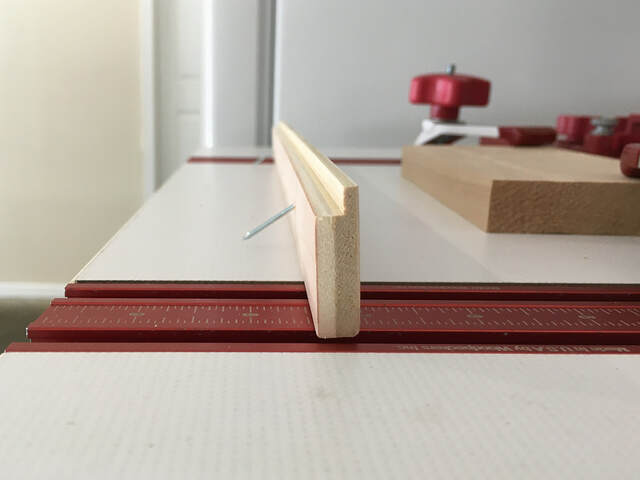
Routing the frame segments
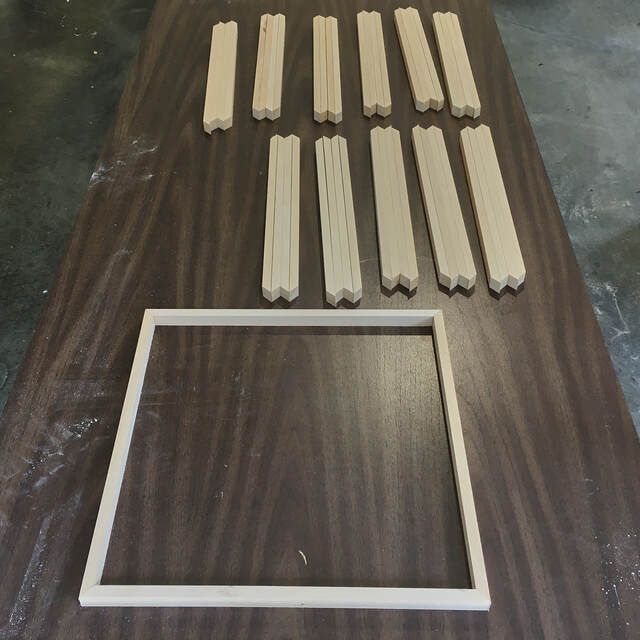
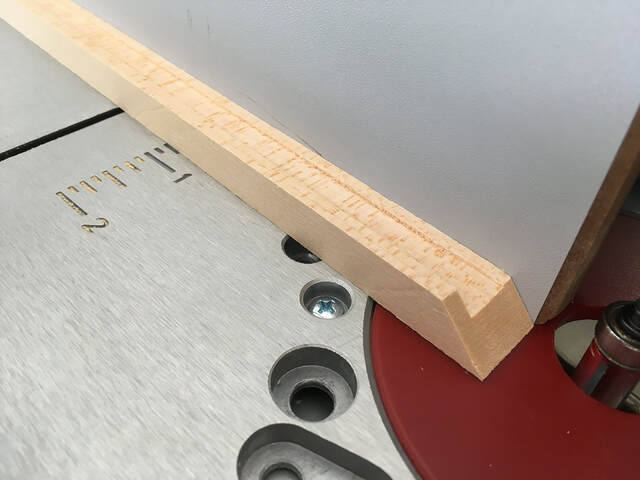
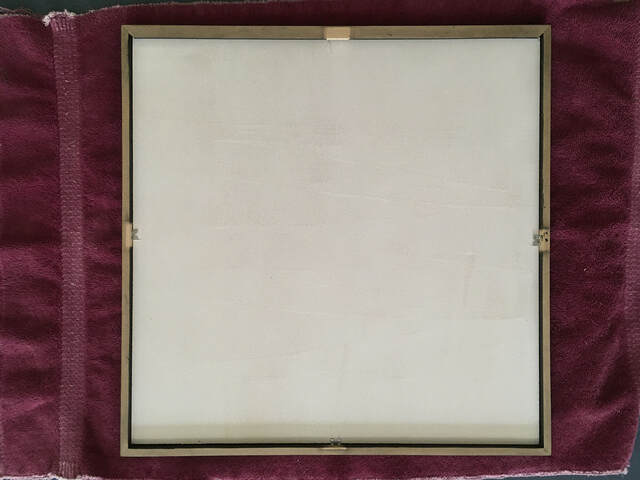
Typical frames have rabbets cut into the back of each side-the tops, bottoms, and sides are identical. In my frames, the bottom and the sides are identical (with a rabbet), but the top has a slot for the cleat tabs.
I started by routing slots in all of the segments. That took two partial passes with a 1/4" straight bit.
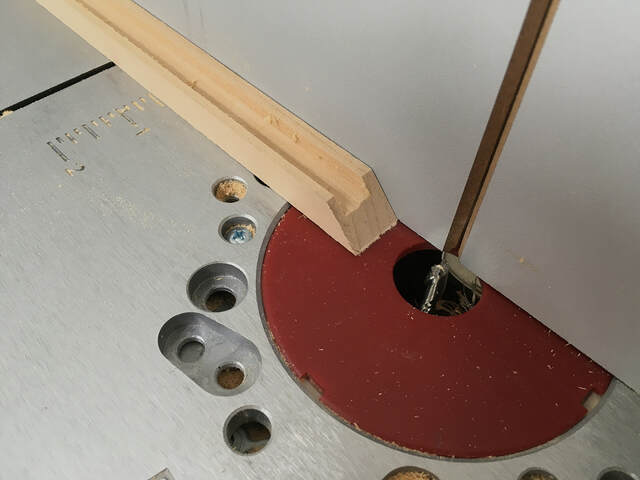
After that, I set aside the twelve top segments and used a flush-trimming bit to remove the back part of the slots on the remaining segments to form rabbets. That left tiny ridges on the rabbets that I cleaned up with a chisel.
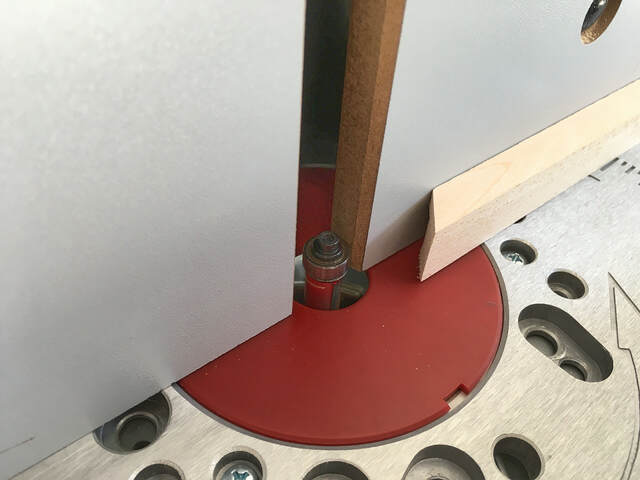

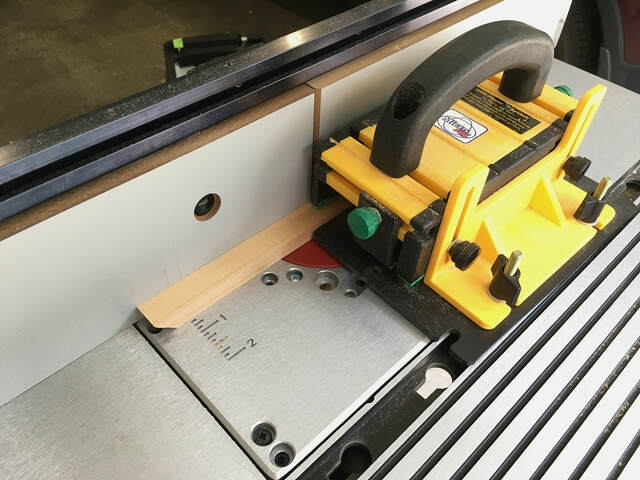
My GRR-Ripper push block made routing such thin pieces a safe operation.
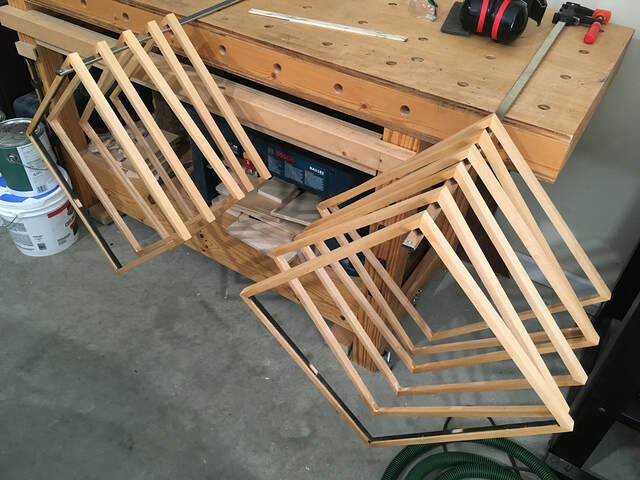
Gluing the frames
Gluing the frames was tedious and time-consuming, but easy and uneventful. I starting by partially sealing the ends of the miters with wood glue to keep them from absorbing too much glue during the actual glue-up. Then I glued the frames one at a time, using a strap clamp to keep them square.

There's very little glue surface on each corner, and I didn't add reinforcing splines. I was worried about the strength of those miter joints, but the frames proved to be strong enough.
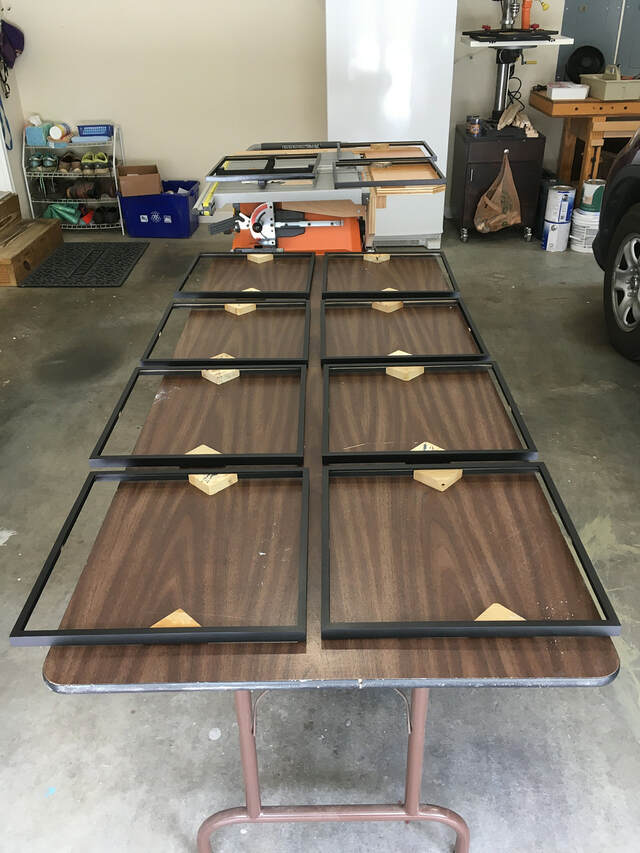
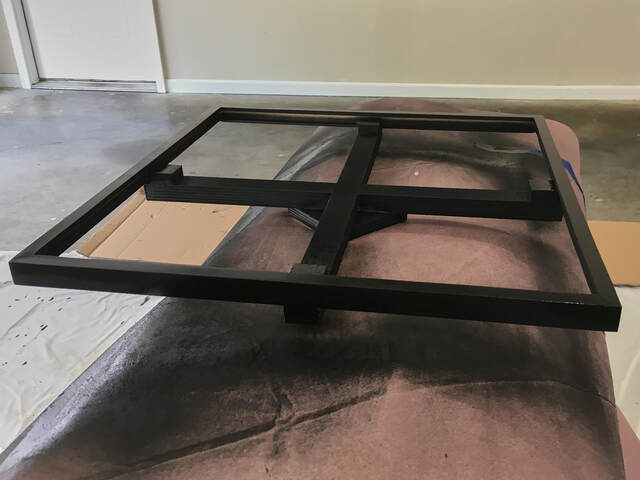
Painting the frames
Before starting to paint the frames, I built a simple turntable from scrap lumber and a dowel. The arms of the turntable have blocks that support the frames from the underside (inside the rabbet), leaving a gap between the back of the inner frame so paint wouldn't build up there.
I primed the frames with BIN 1-2-3 and a foam brush, then painted them with Rust-Oleum American Accents 2x Ultra Matte spray paint. The results were very disappointing. The paint was shinier than we wanted, but the biggest problem was that the finish wasn't smooth.
The culprit was (as it usually is with poor paint results) inadequate surface preparation. I hadn't sanded the frames well enough (mainly because I hadn't wanted to stress the corner joints too much). The primer also hadn't filled the wood as much as I thought.
After a lot of agonizing, I decided to sand the frames down to bare wood and start over. I used my Festool finish sander and progressed all the way to 280 grit. I sealed the frames with shellac and sanded with 280 grit again. Then I painted the frames again, this time with Rust-Oleum Painter's Touch 2x Flat Black spray paint, taking extra care with my technique.
I sprayed on several coats, let the frames dry for two days, smoothed the finish with a gray Scotch-Brite pad, and sprayed on a few more coats. This time everything turned out as we wanted. Whew!
That the frames held together over many passes of the sander made me feel much better about their strength.
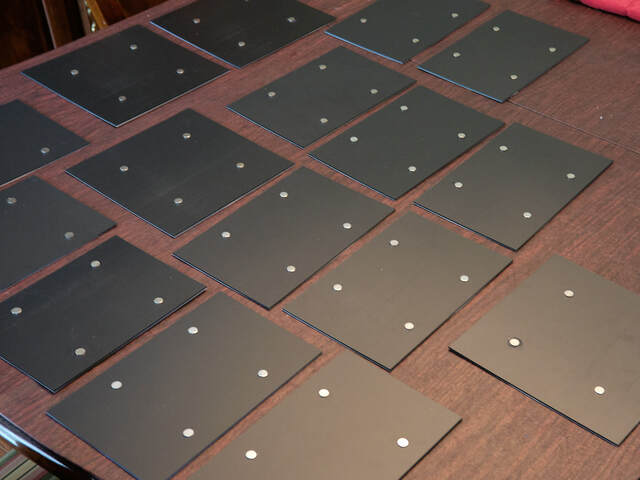
Painting the matboards and embedding the magnets
I cut the matboards from 1/4" MDF and primed them with two coats of BIN 1-2-3 (applied with a foam roller). I primed them in our garage, and it rained while and after I primed. That caused all of them to warp and dish considerably. The next day, I primed the back sides (just one coat) and brought them inside to dry for a few days. I stacked them (with wax paper in between) on a flat surface to try to flatten them.
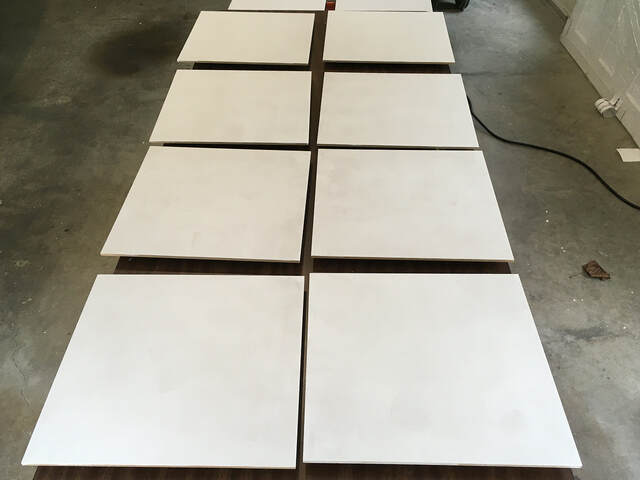
After a few days, the matboards had flattened slightly (enough to be usable, to my great relief). They were still dished a bit (approximately 1/8" deviation from flatness) but flattened with light pressure. I applied two coats of Benjamin Moore Super White Matte paint with a 1/4" roller, sanding lightly between coats.
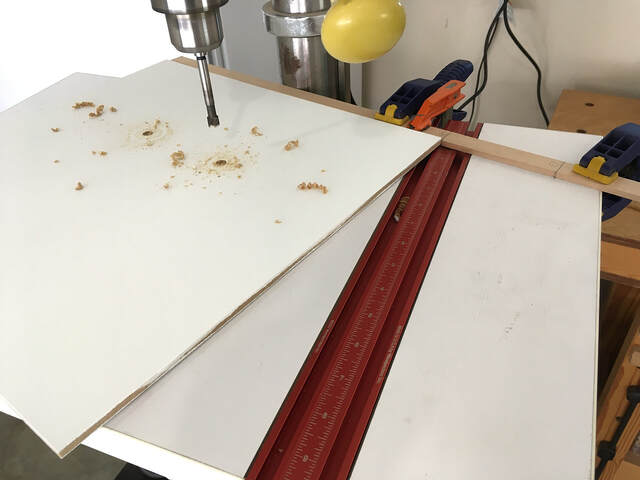
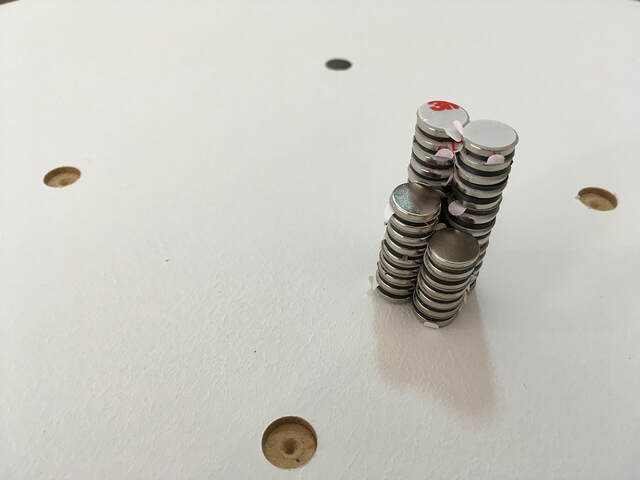
Embedding the matboard magnets
Adding the magnets was straightforward. I used a 3/8" Forstner bit and my drill press with the depth stop set to 1/16" to create recesses that matched the thickness of the magnets.
The only snag was that the magnets were far enough from the edges that I couldn't use my drill press table's fence. I was able to use a thin piece of scrap as a fence, clamping it at an angle to the table. I didn't try to improvise stops and resorted to alignment marks.
The magnets I bought have self-adhesive strips, so attaching them was trivial.
Mounting the matboards in the frames
At first, I had no real idea how I was going to mount the matboards in the frames. I thought I might just squirt some wood glue in the narrow gap between the matboards and frames, but I didn't want any glue to flow around to the front. I also thought about running a bead of silicone caulk in the gap. The problem with using any type of adhesive was the slightly warped matboards. I didn't want to use clamps to flatten the matboards while the glue dried because I didn't want to accidentally mar the paint on the frames.
My wife mentioned those framer's points we've seen on other picture frames, but I was afraid I'd push them all the way through the thin frame sides, and installing them seemed like a pain. It turns out that she was on the right track.
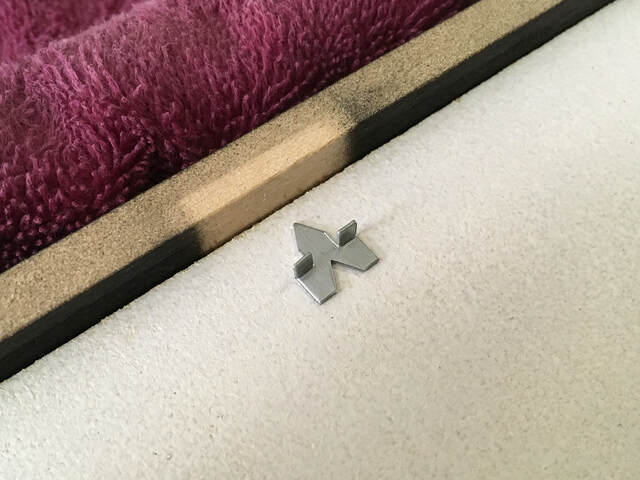
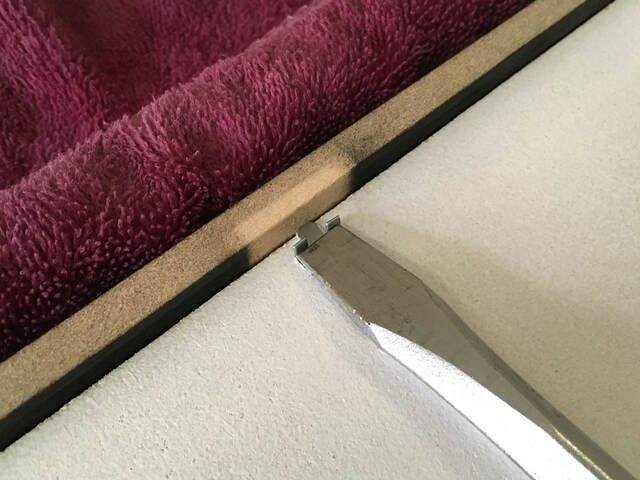
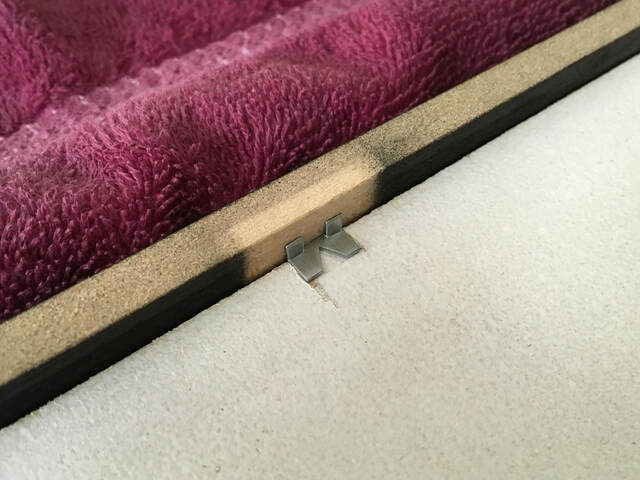
Eventually, my research led me to glazier's points, which are similar to framer's points, with a few advantages. They're tiny and have tabs that keep them from penetrating too far and which allow them to be installed (at least in basswood) with a flat-bladed screwdriver. They were the perfect solution. I ended up using just three per frame, and they are strong enough to hold the matboards in place and flatten the warp. I wasn't able to use them on the top edge, because the tabs were too tall to fit inside the cleat tab slots there.
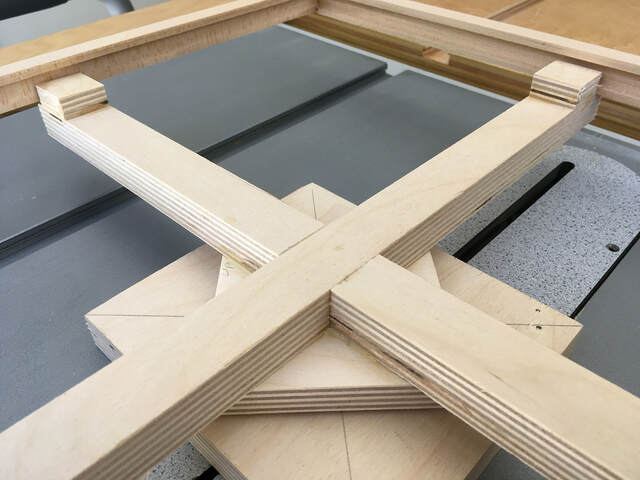
Making the mounting cleats
I made the cleats out of scrap 1/2" plywood planed down to 3/8" thickness. They're 15" long (about 1/8" shorter than the inside width of the back of the frames), 1" high on the wall side with a 1/8" wide by 3/16" high tab on the frame side. I created the tabs by cutting rabbets with my table saw.
I actually planed the cleats down to less than 3/8" to make the frames hug the wall more. That turned out to be a mistake.
I pre-drilled diagonal holes in the cleats for 16-gauge brads. I wasn't precise with the angle. I just used a 3/4" scrap board to tilt the cleats on my drill press. The pre-drilling made it easy to mount the cleats; very light taps with a hammer drove the nails in to the drywall without shifting the cleats down.

As I mentioned in the introduction, I made a mounting template for the cleats. I worked out the overall length and required cleat spacing to yield 2" between frames. The template was a huge help. I hate drilling holes in the wall, and I really didn't want to drill 24 holes (two per cleat) incorrectly.
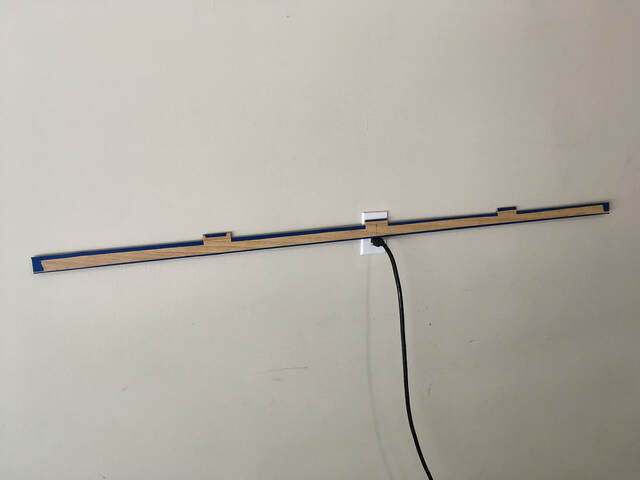

We installed three rows of four cleats, starting with the middle row. We wanted to vertically aligned the centers of the frames with the center of the nearby bay window, so I had to be careful with figuring out how far the cleat needed to be above the window's centerline. Once I knew that measurement, we positioned the template on the wall and made sure it was level. Then my wife held the template in place while I positioned and nailed the four cleats.
To install the top and bottom rows of cleats, we repeated the process. To get the vertical spacing correct, we held the template vertically (plumb) and marked the distance on the wall with tape. (The distance between the notches on the template is the same as the distance between the rows, so no measuring was needed.)
I didn't take any pictures of the installation process or the final cleats. We didn't make any mistakes, but the task was stressful. My wife had to hold the template in place for longer than she wanted, and she got a good shoulder workout from it. After we installed the cleats, we were so eager to hang the frames that I forgot to take photos.
Hanging the frames
Hanging the frames should have been trivial—just place the slots on the tops of the frames over the tabs on the cleats. The frames went on easily enough, but the bottoms of most of them tilted out away from the wall.
Two factors caused that problem. First, I mentioned earlier that I made the cleats thinner than 3/8" to make the frames hug the wall. That was an over-optimization, because it made the tops of the frames hug the wall too tighly. Second, the warping of the top edge of some of the matboards exacerbated the problem, because it squeezed the frames to the cleats even more.
We solved the problem by adding thin cork squares to the backs of the cleats (basically adding back the thickness I had planed off). That helped a bit, but I still had to thin the backs of the cleat tabs with a chisel (using it like a card scraper) to provide a little more space inside the frame slots. Those two changes solved the problem, and the frames no longer tilted out.
Conclusion
This project turned out to be more complex than I first thought it would be. It required a lot of problem solving, and I thought I should just start over more than once. It all turned out well in the end, though, and my wife and I are both extremely happy with the end result.
For anyone who made it this far, thanks for reading!
10 Comments

That's a really sharp looking wall. All that effort paid off!
The projects that look simple when finished are often quite deceiving.
The projects that look simple when finished are often quite deceiving.

wow! are those your photos, Ron?
Martin Sojka, Maker of Craftisian
Thanks, Steve and Martin!
I took seven of those photos, and my wife took the rest.
I took seven of those photos, and my wife took the rest.

That is a great display, and a wonderful write up. Very well done.
Main Street to the Mountains

wow what an ingenious system for a gallery wall.
working with my hands is a joy,it gives me a sense of fulfillment,somthing so many seek and so few find.-SAM MALOOF.
Thanks, Eric and pottz! Much appreciated.

Yeah, ingenious is the right word! Nicely done.
Ryan/// ~sigh~ I blew up another bowl. Moke told me "I made the inside bigger than the outside".

May have been a lot of work but it sure works and it is ingenious!
Nice work.
Nice work.
The early bird gets the worm but its the second mouse that gets the cheese.

I love pictures and so having a wall full is perfect! I agree that simple mitered corners are quite strong. Super outcome and interesting journey. Not without challenges, but it all worked out nicely in the end. Great project.

I love this project and write-up! We’ll photographed and documented. I’ve got some walls that would be good candidates for this kind of display. Add another to-do project to the list. Thanks for sharing, Ron.
More from Ron Stewart