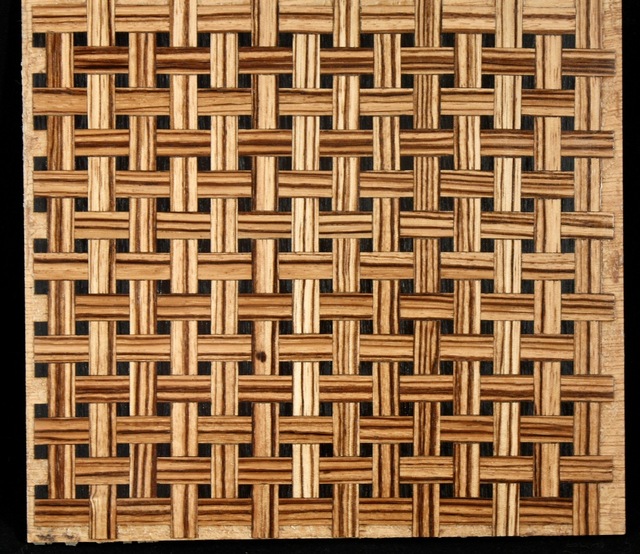
This was the by-product of making a parquetry panel, taking the wife's laser for another test drive.
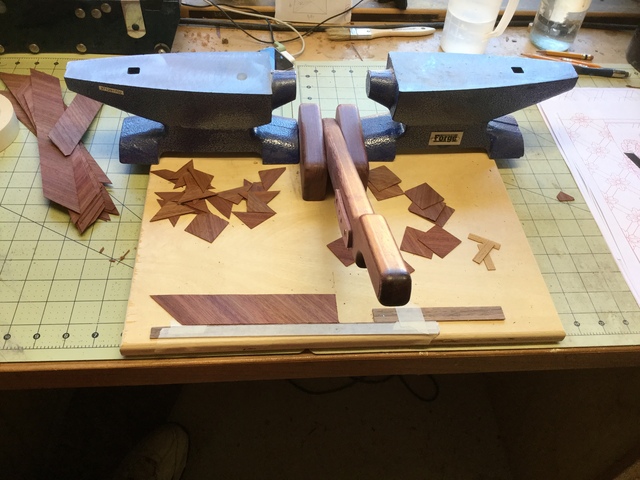
I cut a bunch of these wedges from mahogany, maple, and some fumed etimoe veneers I had. They are about 1" at the widest.
Sooo much more accurate to cut these parts out with the laser then trying this by hand. In fact, I would never have done this panel if not for the laser. I'm too much of a slacker.
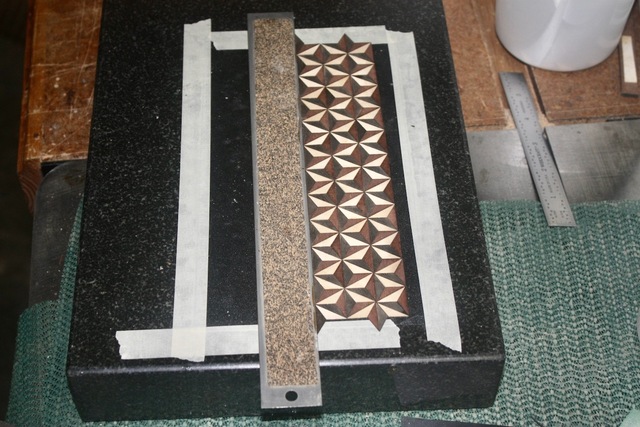
Pieced together on a strip of adhesive shelf paper, sticky side up and taped to my small granite surface plate.
A straight edge helped keep me true, but still went a little nuts arranging all these bits. Still takes several hours to assemble this 8"x5" field.
Last picture in the intro shows the assembly as one side of a veneered panel. No idea what kind of wood I used for the other side.
Now for making something that can incorporate this panel.
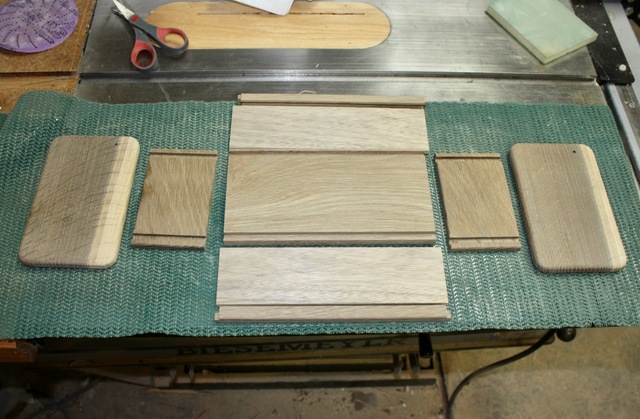
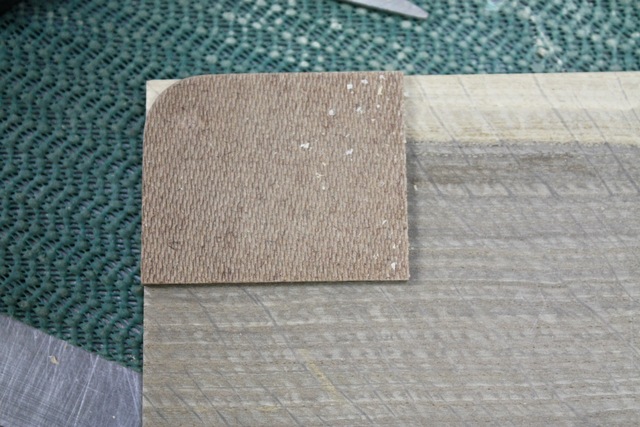
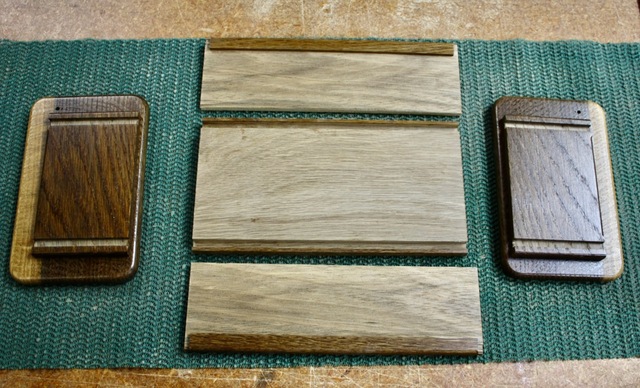
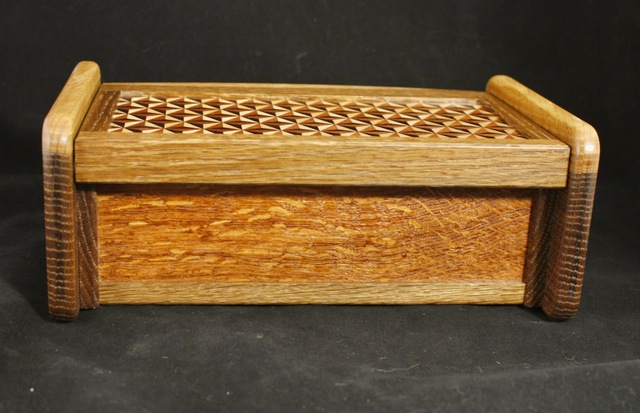
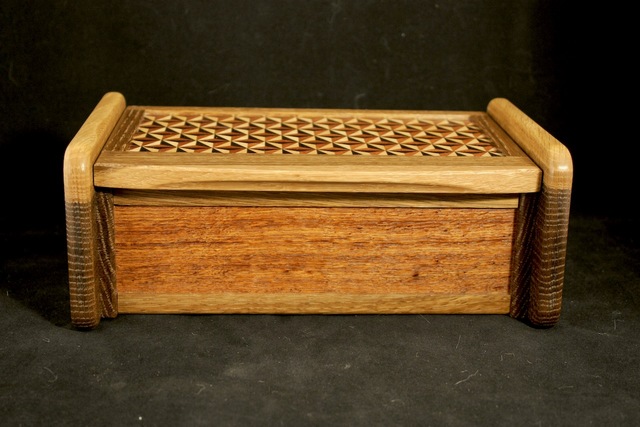
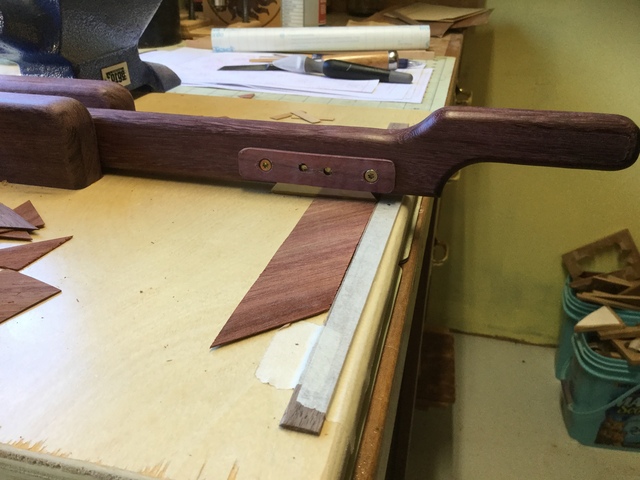
Simple box, made from fumed white oak cutoffs. Some sap wood, but I'm ok with that. Two 1/2" thick QSWO end caps, WO inner box side caps, bottom (center), and long rails. The two narrow panels between the rails and bottom are 1/4" plywood with the same mystery veneer on the inside (shown) and some oddly colored QSWO veneer on the outside. The end panels are just rectangles but I did radius the corners using a pattern bit and these handy masonite templates I batched out, DS taped to the board.
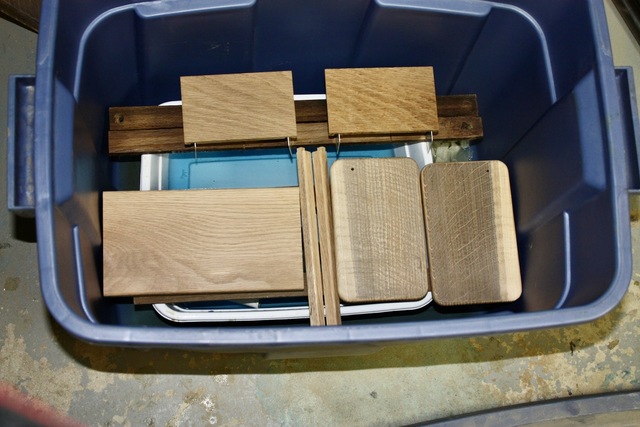
Once all cuts and sanding was finished, into the tub with some 10% ammonia for about 4 hours.
You can see how dark the end caps of the box portion got. Bottom has old comfy chair leather 3M77'd in place. Lid pivots on 1/8" brass stock, the lid has a "fat" back rail that acts as a stop.
Back view:
Slap on some oil and satin poly, call it another piece of experiment wood off the shelf and out the door.
Side view has really cool 3-D effect. So, how many times did you place one of those pieces only to have to unstick it and try again? The ammonia gasing thing is clever, but that only works with woods having high tannin content, Si?
Thanks Eric, Paul! I'd never try this free hand and at times it is still a struggle. You are a robo-artist Paul! 😬
Bently, Yeah, I'd never think that would be possible without Paul or some way to machine cut the curves.
It's just some overlapping circles, quick to CAD draw out or use the Laserburn software tools.
Of course the laser does burn the edges, but not the surfaces. If the fit is good the line between the parts is hidden. I do use a wipe-over with some clear filler (Aqua-Coat) to get a smooth surface in cross light. The panel is assembled, veneered, then sanded flat up to 300 P(the veneers are always slightly different thickness). It could be done on thicker woods but I haven't explored beyond my comfort zone yet.
The shelf paper allows me to stick it down and it stays, but I can pull it off to reposition if needed. Without the shelf liner. fuggetaboutit!
Si on the fuming. Woods need tannin and you can see the sap wood (no tannin) doesn't really change at all. Tricky stuff to get the same tint on all parts, darn near impossible if from different boards/tree as these parts are.
White oak, if it has the bronze color, turns a great chocolate brown. Other woods can get grayish or greenish but I will only do it with WO. Many of the veneers I have are factory fumed, The etimoe is nearly black.
Next time I think I'll make up more basket weave panels with the zebra wood so I can make a box basket! The grain gives a "curvy/twisted" look even though it is all linear layout.
Even without the laser your projects are something to behold. With the laser - wow!!
I'm going to have to look into the ammonia fuming a little further. I like the idea of using old style methods like fuming or ebonizing rather than just applying a stain.
I always hated darker stain on oak/ash, never seems to get into the deep grain lines and pores. Then there is the "enhancement" where the larger grain areas get more "contrasty". In my opinion, I like oak grain, just not the contrast so I try to keep the tone even.
The one neat thing I find useful about fuming is that it penetraits deep. This allows for sanding and some after work to balance the color. The best thing for me is it is a cheap way to really "stain" white oak. I've got another DVD cabinet project in recycled red oak for the same client and they want something darker. The previous version I toned the lacquer with TransTint. This time I might go ahead and try the dye directly, but at $20/bottle it eats up the profits fast.
Another beauty my friend. You might already know this, but Lightburn has a feature that will allow you to contract or expand your cut to allow for the kerf the laser makes. It's not always necessary, but when you need it, it can make a big difference in fit.
Very pretty box, Splint! Like the perseverance on the parquetry, and the fumed oak gives it a great look overall.
I started (two or three times) on a tiled pattern, similar to Bentley’s, but with straight edges. Basically took a 2x2 and planed and sawed it down to get the bow tie shape which would fit with itself rotated 90 degrees to fill a plane. Then sliced that into little pieces and tried a few different approaches to gluing them together to make a pretty patterned board. One of these days I’ll figure out a way to get the fit better so I won’t start gluing them up and then discover I’m off by a 16th (or more!) from one end of a row to the other.
Thanks Dave! There are ways you can do accurate stuff like this when making long sticks, then slicing off bits (i.e. opArt cutting boards), but even then you are 100% about the challenge to keep the pattern. Darn tolerances stack up!
YRTi, thanks! I never met Asanoha - Yosegi, but hopefully he recovers from the malady. Is it just his face or all over? 8^)
I'll have to duckduckgo him to see what other stuff he does.
John, a big yes to the kerf compensation built into LaserBurn. I "discovered" that after my first few panels. My diode laser has a rectangle when in focus and the kerf comp. makes a "more perfect" sized object. Way better, but not quite 100% perfect (the errors compound of course, just like wide box joints).
I've read, but not yet tried, to cut the rectangular parts laid out at a 45 degree angle to the lasers x/y axis. This makes all the cuts the same width WRT to the laser focus shape. Should make the fit even better. For me, a great feature of LB software is the art library. I can add notes like the angle, etc. so I don't forget about it a few minutes later. Also the ability to keep all the settings in a material library is great for the same reasons, keeping all the laser settings in place.