This mini-workbench is not to be confused with my Mini Office Workbench that I have been blogging recently here at CN. The Mini Office is a tiny bench designed to be taken into the house (office) and placed on the end of a computer table for miscellaneous light work in the comfort/warmth/cool/quiet/seclusion of the office (behind the missing locked door).
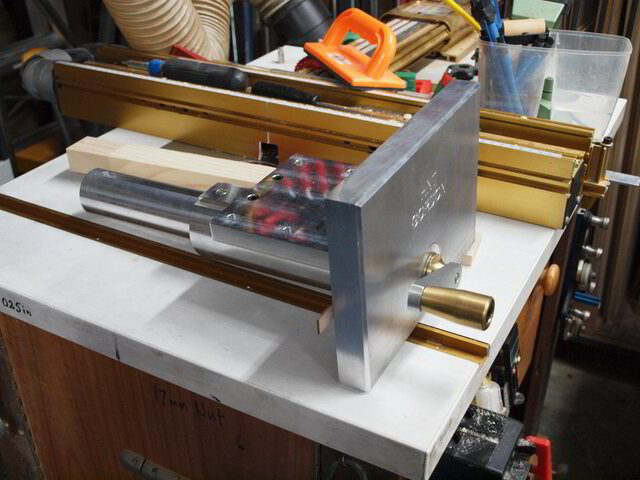
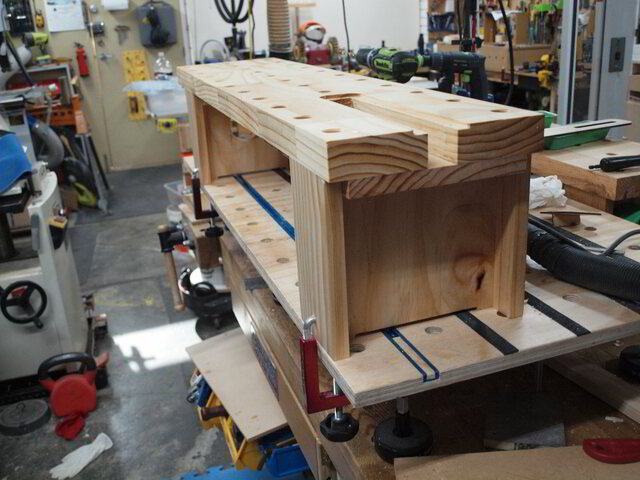
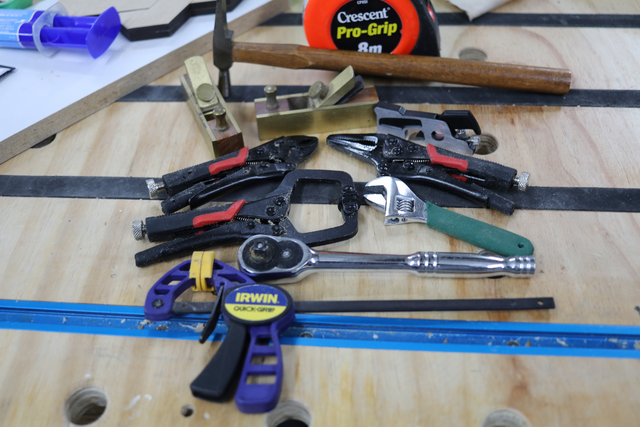
This Mini workbench is designed to supplement you shop work area and is primarily designed to be placed on top of the main/other workbench(s) to bring items to a more workable position should you prefer that. It incorporates the MFT style dogholes with some specialised clamps for those intricate/special work holding.
It was initially published at LJ on 20th. February, 2019.
The jury is still out as to which group I belong to… more shekels than I confess to the taxman or less brains than I brag to my kids about.
I have belatedly inserted this next paragraph for late comers… The mini-workbench is not intended to compensate for a bad back though it does save me bending over a normal height bench and may be a great health benefit in the future. It is more so intended to bring the work piece(s) closer to my failing eyes. With my new prescription bi-focals, the standard benchtop was just out of focus of either lens while the mini brings it into focal range. The bench can/is removed when I need to do standard workbench practices (like laying out… my lunch). You may notice an elevated tabletop with 20mm dogholes in some of the pictures… same reason. I still use the loupe headband to keep track of the hairs on my palms.
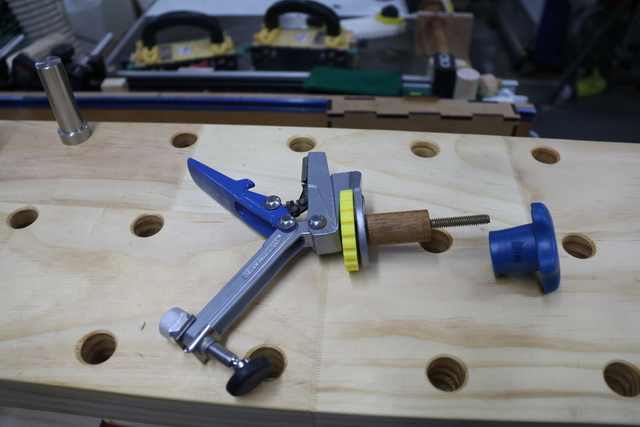
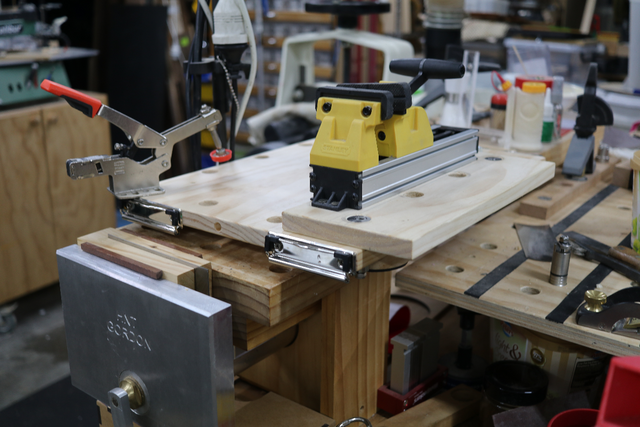
Last September (2018) I was at the very disappointing Timber and Working with Wood Show in Melbourne and out of sheer frustration from the presenters and content, I purchased this H & T front end vice,
I won't post the link to the WEB site in case I lose a few readers through cardiacs due to the realisation of my sheer extravagance when confronted with the RRP.
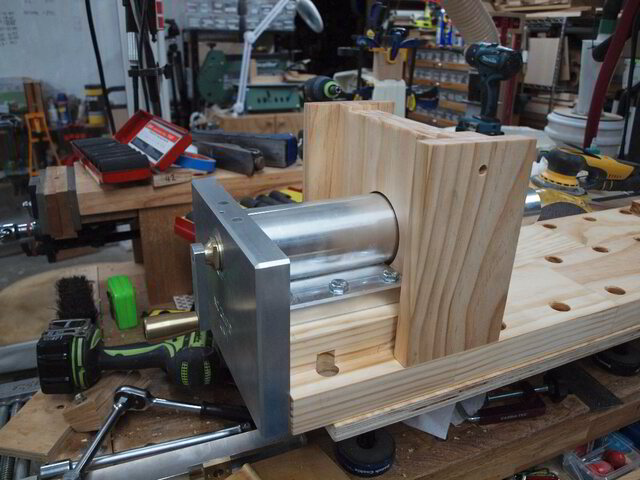
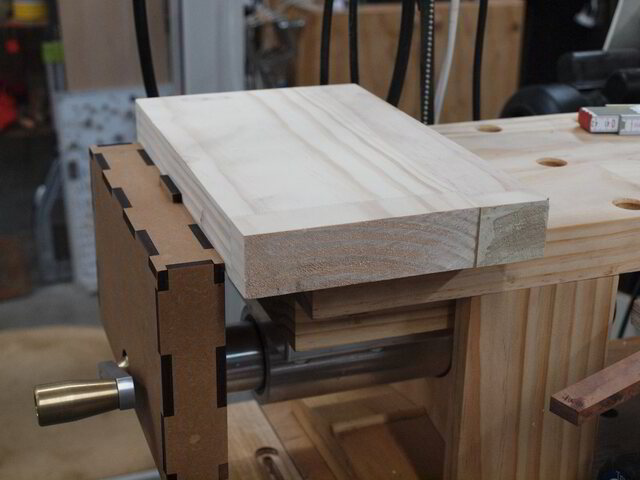
But where do I put it? I already had this H & T Gordon purchase,
from a previous brain freeze countless years ago. I planned to put it at the end of my old mini-workbench which I built circa June 2016. Now this workbench has been a gem and has served me well so I was hesitant in making a new one, however, the old one was heavy as it was out of hardwood and the vice was steel. I planned to make the new one out of lighter pine and the vice is aluminium… and why not add that shiny tail vice to complement this shiny front vice.
Didn't SketchUp this one as I had the basic measurements and design from the first one (self flagellation will follow).
Other than the vices, the major differences between the two was,
Use pine instead of hardwood to minimise weight.
Used my UKJ Parf jigfor exact placement of the dog holes rather than manual matrix layout.
Used wood threaded 10mm stainless hex head bolts instead of coach bolts and nuts.
Used 6mm metal bolts with wood threads rather than screws for breakdown purposes… (done before my Domino purchase after they released their "new" breakdown hardware).
Provided for using Rockler Universal Fence Clamps rather than bulky C/F/G type clamps.
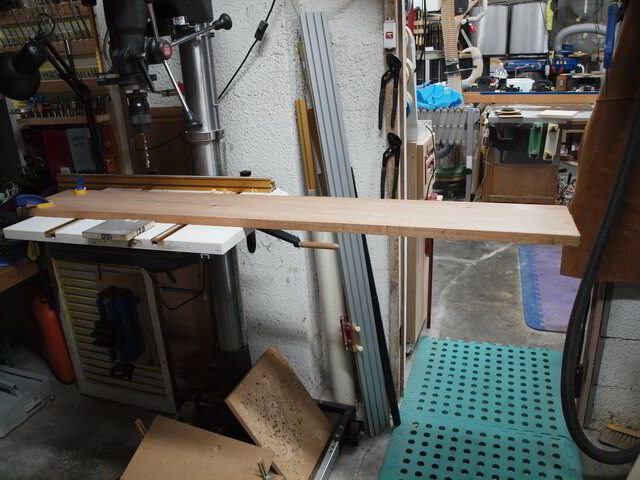
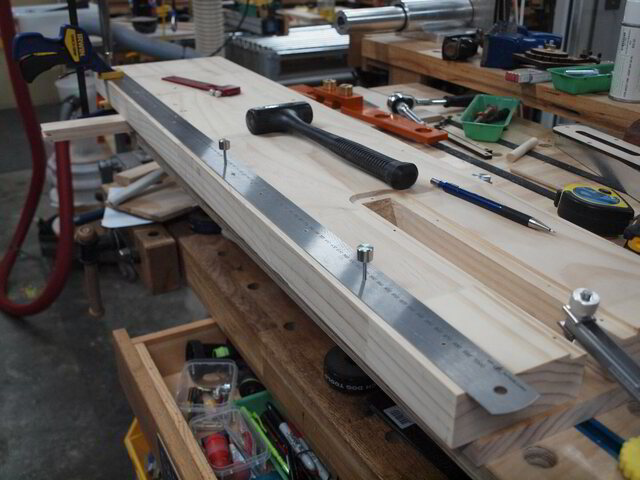
Down to the workshop and laminated 2 finger jointed pine planks (can't remember original dimensions) to give me an exact 40mm x 240mm x 1047.4mm tabletop. Exactly 1047.4mm you may ask… and I reply… well, as I plan all my projects, that's the length I finally finished up with, so I'm insisting that that's what I actually designed. FYI, the bench stands 200mm high (and of course 1047.4mm on it's end).
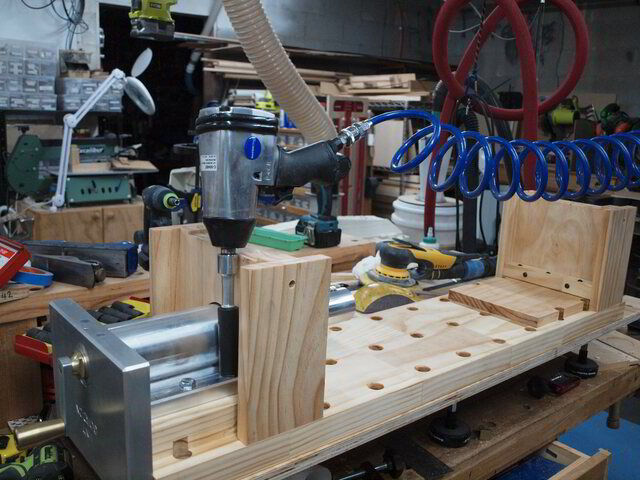
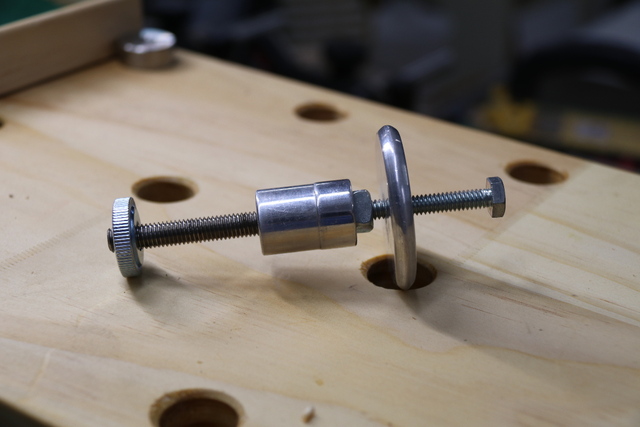
Glued some packers for the vices , marked the bolt positions and dragged it of to the drill press… figuratively speaking of course as being made of pine it didn't have to be physically dragged.
I clamped the workbench to to the drill press's top, but as the press's spindle couldn't be move, I found it a tad easier to add an extension plank,
for ease of alignment,
Drilled 6 guiding pilot holes.
Confirmed hole position and marked the bolt length/depth,
Drilled out the pilot holes with a 7.5mm drill bit to tap for 10mm bolts at a later time.
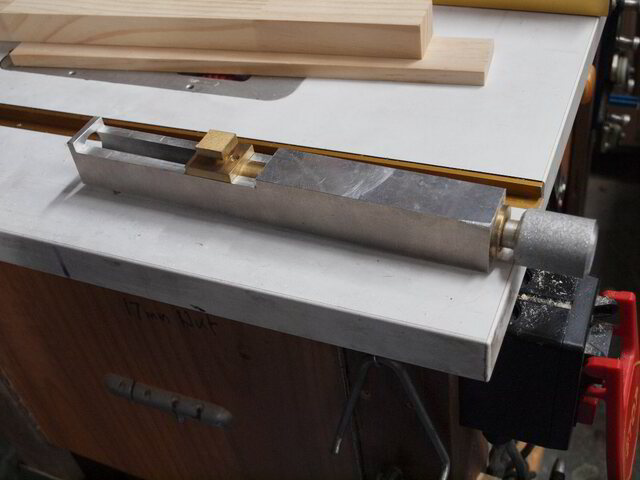
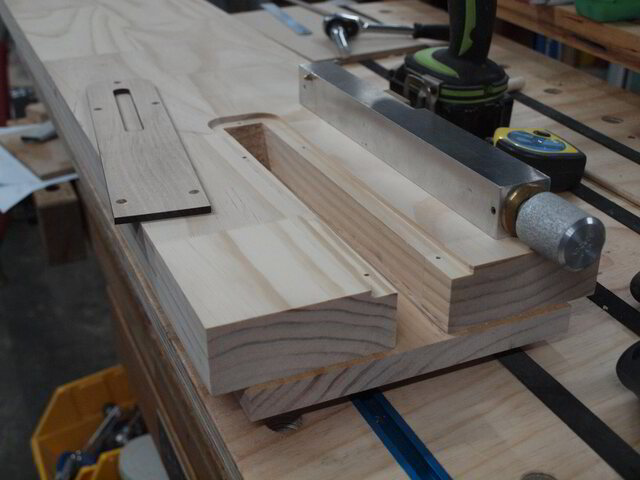
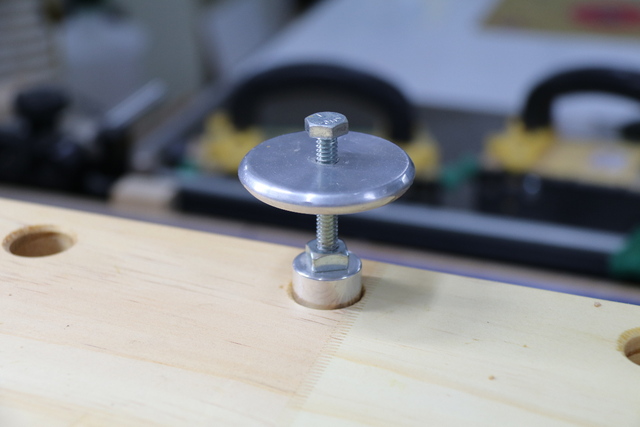
Hogged out the recess for the tail vice and then added a packer as the vice was thicker than the tabletop,
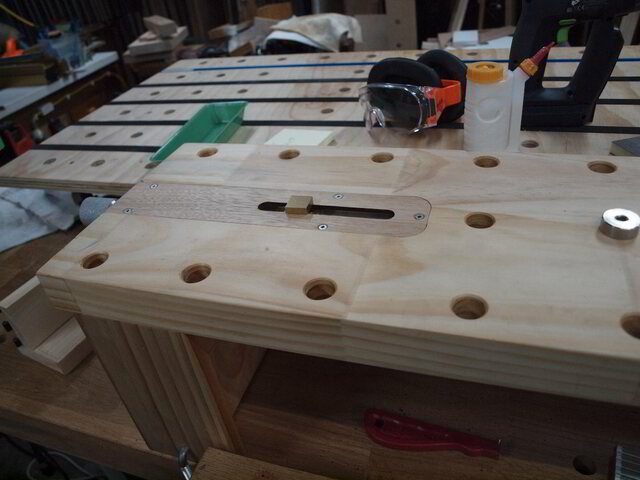
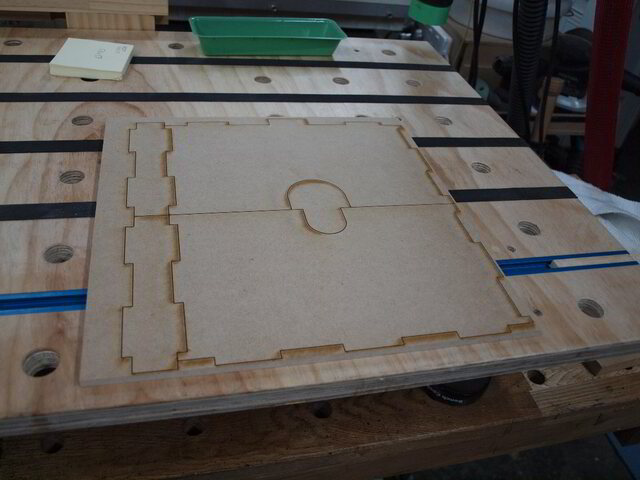
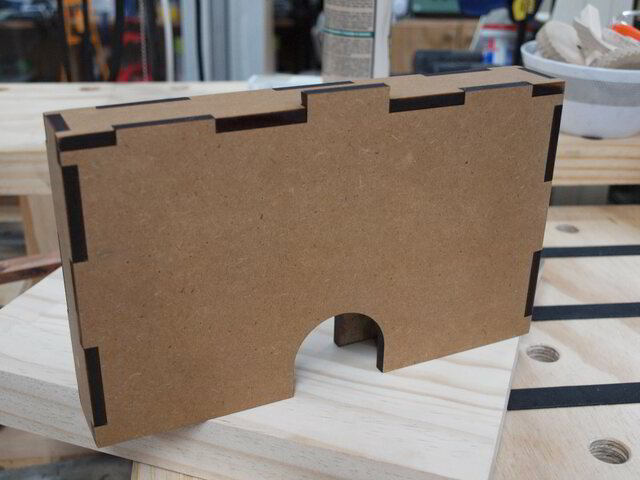
Used SketchUp (can't stay away from it) to design and laser cut a cover plate for the tail vice,
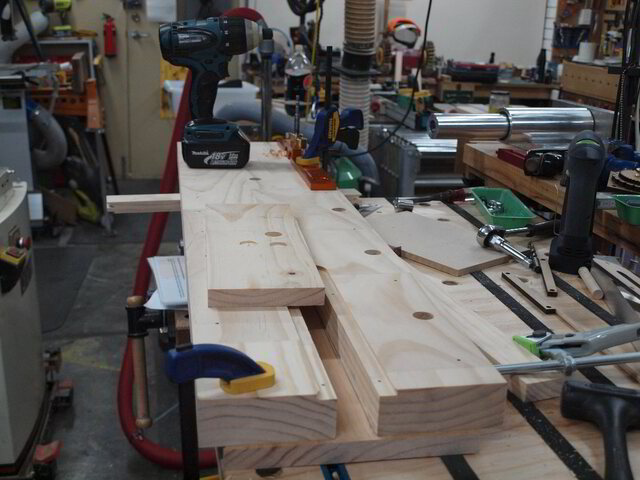
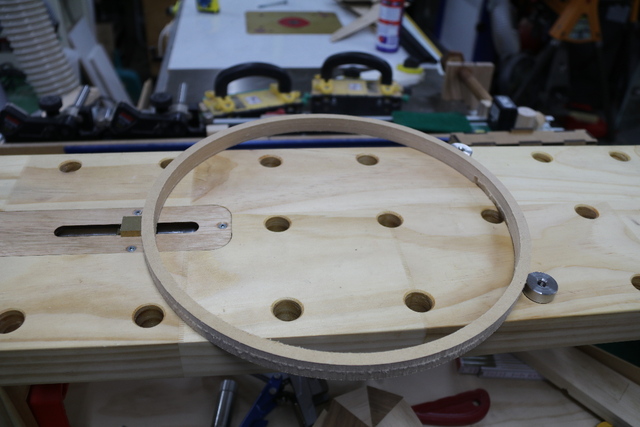
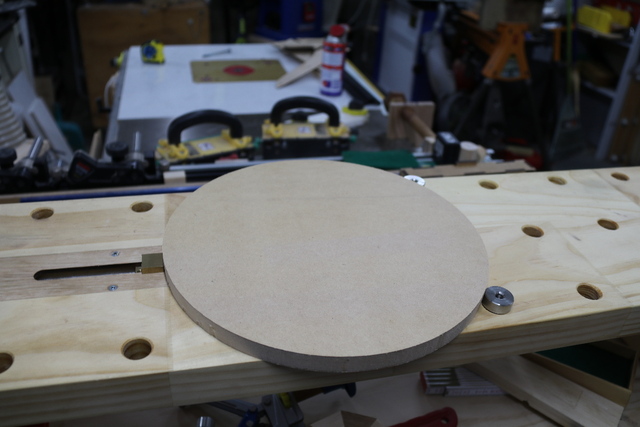
Using the UKJ Parf jig's rulers, I marked out the dogholes and drilled the required 3mm pilot holes,
Then followed the instructions (ugh… reading) and bored the 20mm holes using the 3mm pilot holes, the jig and a 20mm TCT forstner bit,
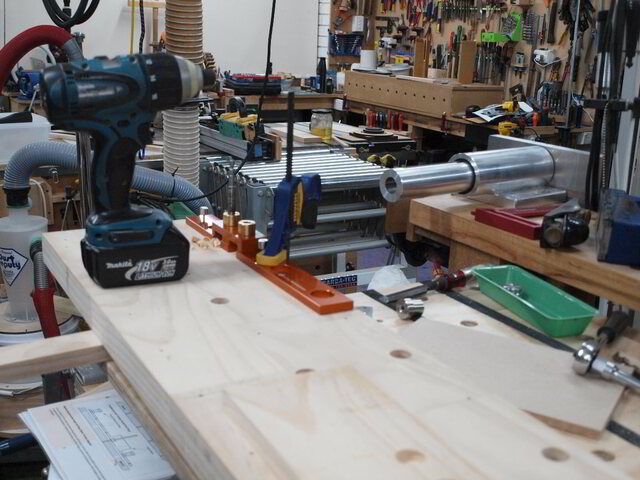
Made the legs and glued and bolted the support base (bolted to get better strength with 6mm x 70mm bolts using the wood threader),
The cylinder barrel of this vice made it easier to cut out the leg recess than the awkward shape for a "standard" vice. Tried using the method of cutting with the kerf on the edge to provide dust extraction relief and when I realised the hole had to be centered, I made another leg and used the relief hole principle.
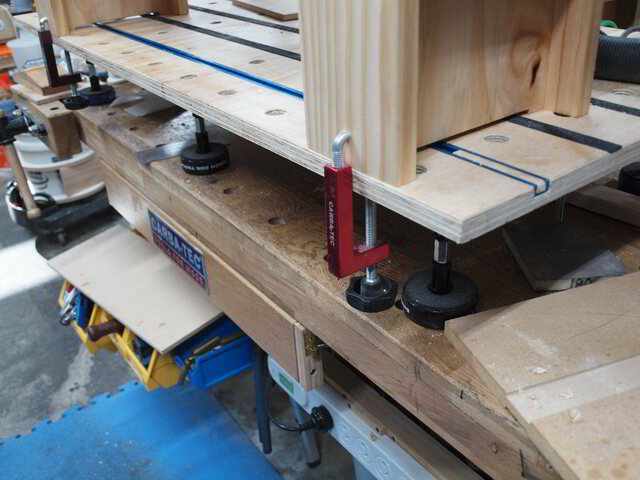
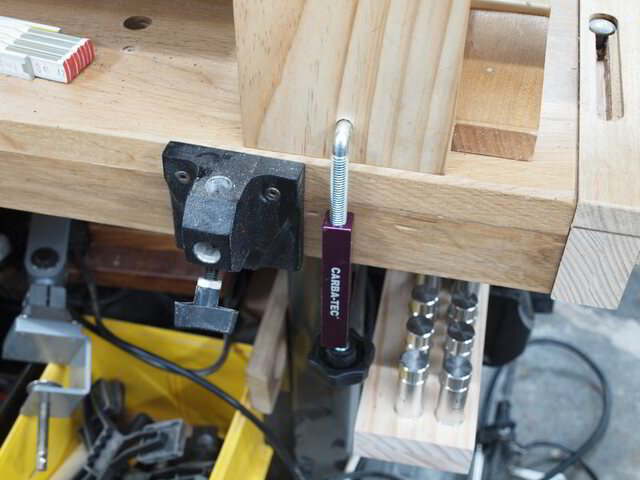
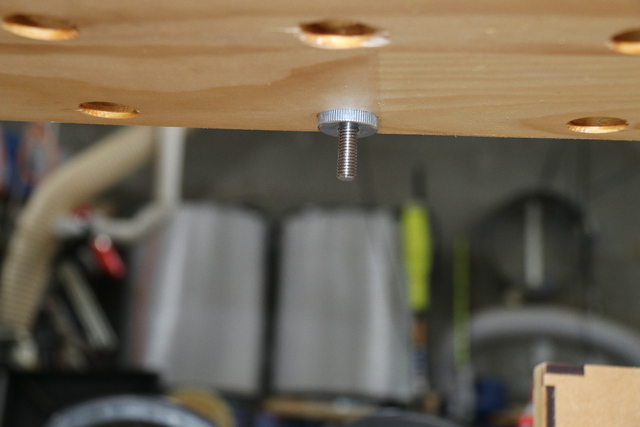
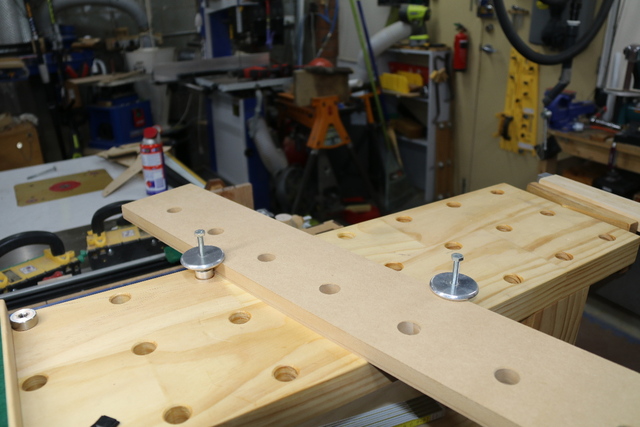
Drilled some 8.5mm holes into the legs to permit using Rockler Universal Fence Clamps for securing the mini-bench to a supporting surface,
(DOH! I had spare pictures)...
Drilled and tapped 6 holes to accept 10mm bolts. Ratcheted in the bolts and tested squareness and operation. I then soaked the bolt holes with tung oil and when it came to the final bolt insertion, I had to use a pneumatic gun to seat the bolts as the buggers were fighting back against a manual wrench.
Fitted the tail vice with the cover plate,
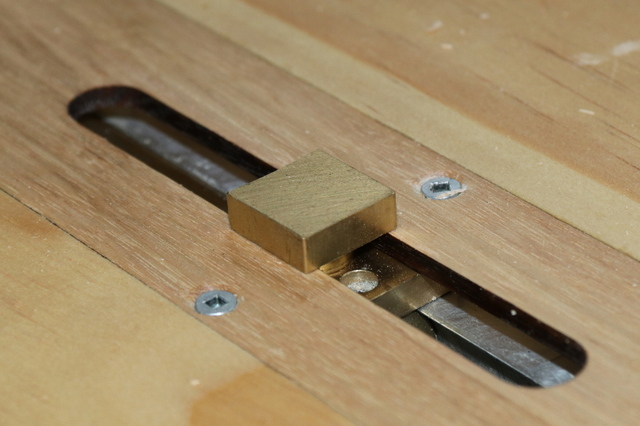
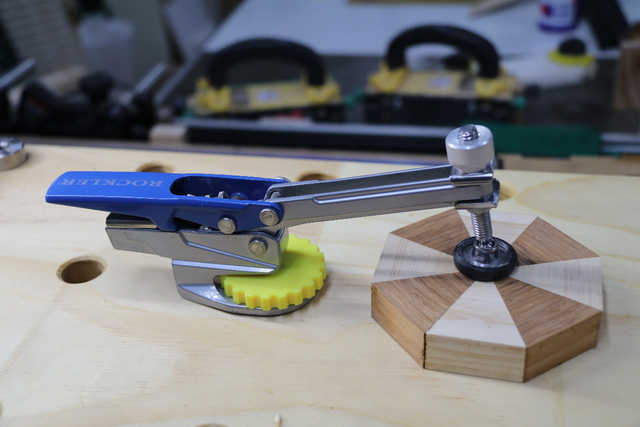
The tail vice comes with a profiled brass dog,
with the following four faces,
Flat face.
Slightly concave face for rough surfaces.
Slightly convex face for contoured surfaces.
The fourth face is reserved for thrillseekers that want to shape their own unique face,
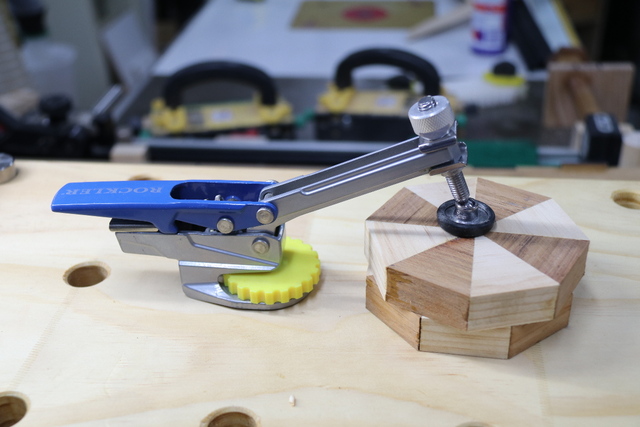
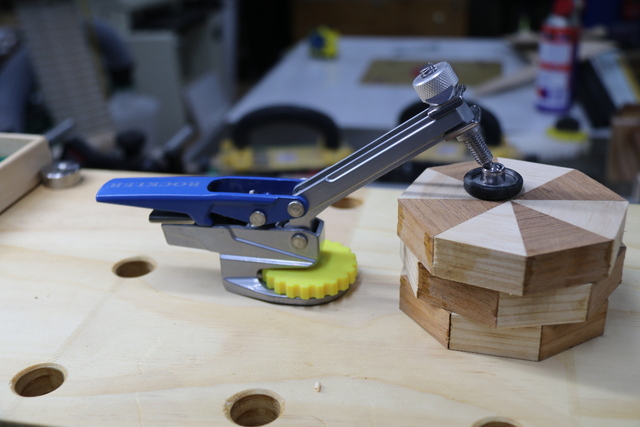
One of the features of this tail vice is it's movement. It comes with a small textured knob at the end which exerts incredible pressure with the minimum amount of force. Just two finger tightening will mar the wood if you insist on using brute force on the work to prevent any form of movement. Couple of pickies of it in use,
Now the main vice (called main to avoid confusing this tail vice with the other tail vice… I think I may have called it a front vice but I'd have to read to find, confirm and correct it) does not come with an onboard dog like most vices,
to permit clamping against dog(s) on the table top.
Being too gutless to drill holes into my shiny new (and expensive) vice I consulted SketchUp seeking a solution. It didn't say much back to me, but eventually I finished up designing a cover box and laser cut it after allowing for profiles to fit the curves of the vice,
I provided a pseudo-dog on top of the box to press against the work… DOH! The top of the box (out of 6mm MDF) naturally sat 6mm above the vice top (approx. 5mm above tabletop as the top of the vice is about 1mm below tabletop) so this extension was unnecessary,
It shall stay there until it really pisses me off and then there'll be a circumcision (snip).
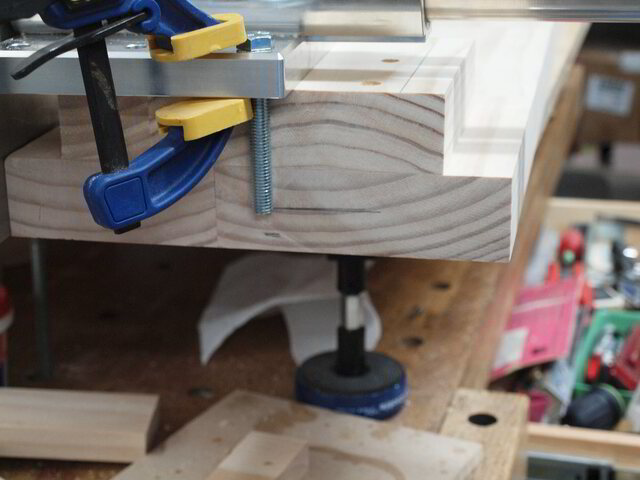
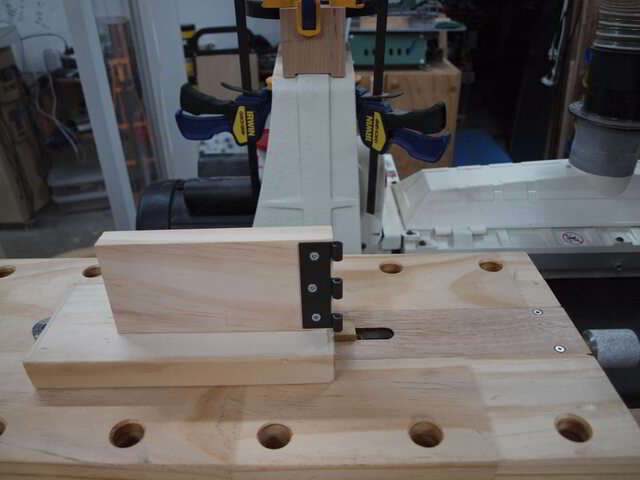
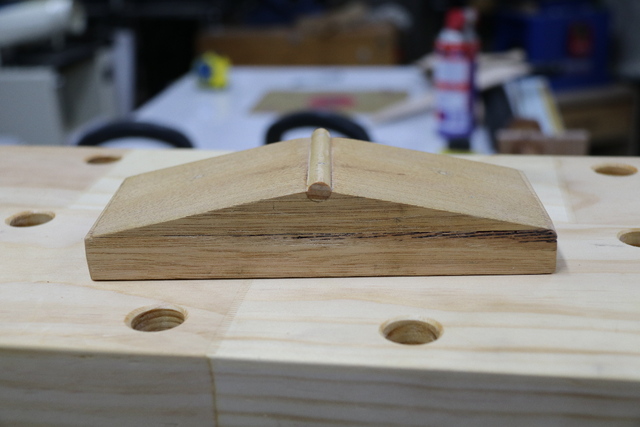
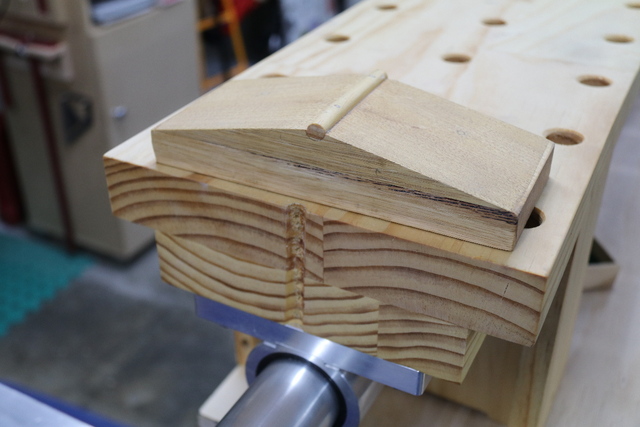
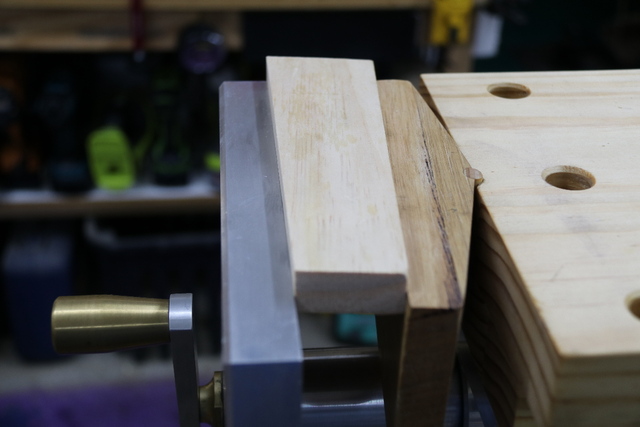
There have been times when I need to clamp non-parallel bits of timber,
for which I have made up this beveled jaw backing which pivots on a dowel,
that fits into a same diameter groove down the main tabletop "jaw",
For wider timber, I simply use the box with just one round dog in the middle of the tabletop for the brace. No picture provided as the non-parallel stunt timber refused to put on weight for just one photo shoot.
These Rockler Auto-Lock T-Track Hold Down Clamp have been customised to permit static fitting to the tabletop,
and can accommodate various thicknesses of timber without adjustment,
I also use these quick adjustment "clamps" to wedge long pieces of timber without the need for bulky clamps,
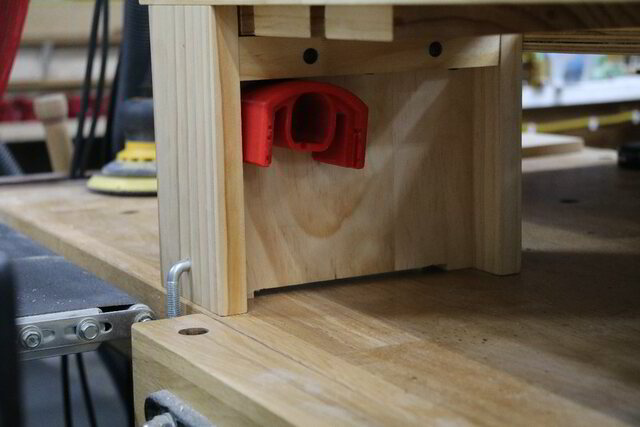
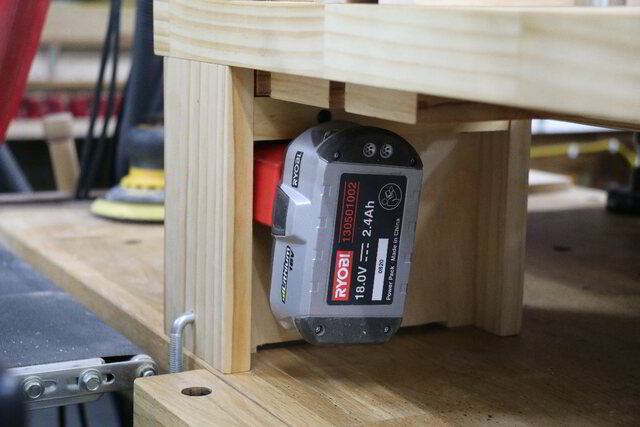
The bench also provides a resting place for a spare Ryobi battery,
for those times I'm too lazy to walk 2 meters to get another spare.
If you look closely, here is the resting place of the old mini workbench.
Now, as always… most of the time… only when I do it… for all of you that also hate reading… grab some popcorn, put in the ear plugs and don the sleep mask before you try to connect to this video
I made so you don't have to read the above.
PS. If you found the read boring and the video tiresome, save wasting your time on the above and check out this animation of this mini workbench
in SketchUp.
If your first cut is too short... Take the second cut from the longer end... LBD
Duck you have one exceptional Mini work bench, so many good features. Should be a joy to use. the workmanshp looks excellent, and the pictures and videos are awesome. I think you have more good tools and gadgets than the Big box, and Hardware storers have. Good Job Duck thanks for posting..
There is some fine engineering details in that mini bench! If I had space (even your mini requires a matching amount of clear bench to install) I'd copy that in a second (in my mind, take another year to build).
As others mention, that vise doodad is the cats meow!
This bench was made (hell) 4 years ago. It's primary purpose was to bring the work into focal distance of my "computer/reading" glasses and stop me from stooping bringing on that bad back I'm fortunate enough not to have, yet.
It was made to provide anchors for my H & T Gordon vises... Could easily be substituted by a moxon style vise...
It's main features are (over the "traditional" moxon (if there's such a thing), it has a reasonable height and length to handle those in between jobs... and most are in between... though mine have graduated into the tiny size.
I probably wouldn't mount a vise on it but resort to this Stanley vise,
Oh me oh mi, that is some serious gear right there...... Terry Gordon makes some seriously good gear and it is reflected in the rrp as you say. I've one of his tail vices and it's one of my better investments wood work wise. Great you took the time to share, so thanks. Cheers
Kerry - Working with wood, the smell the feel, is such a joy, its a meditation of sorts.
Thanks A'L'... was an impulse buy, but it was one of those too good a product to refuse... I'm just glad I could incorporate it into some useful purpose rather than just sit back and look at it on my shelf..
If your first cut is too short... Take the second cut from the longer end... LBD


 on demand. - Project by LIttleBlackDuck")