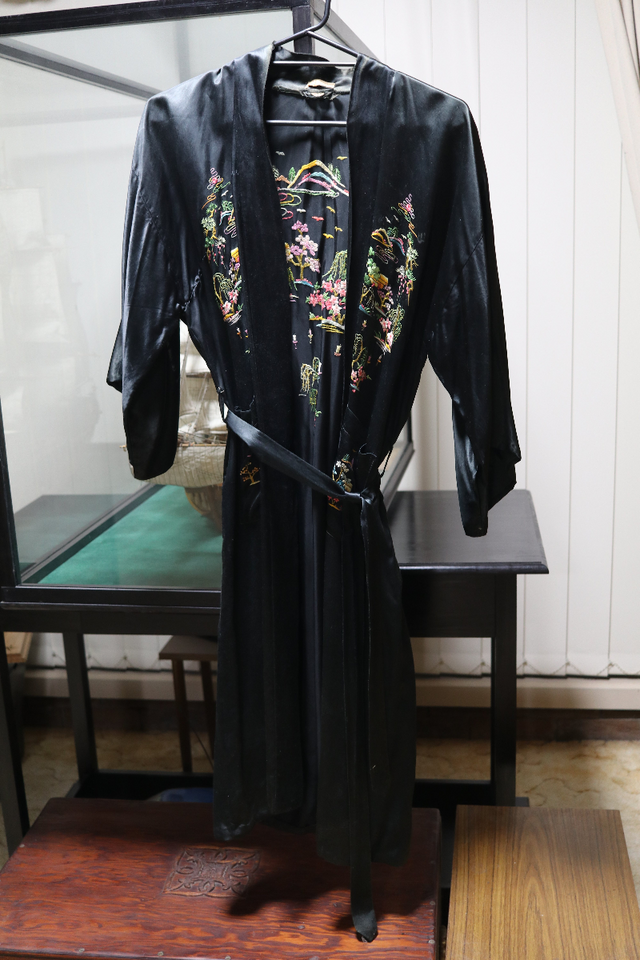
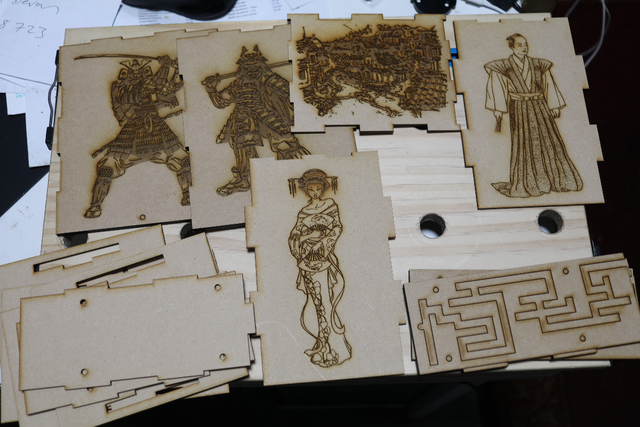
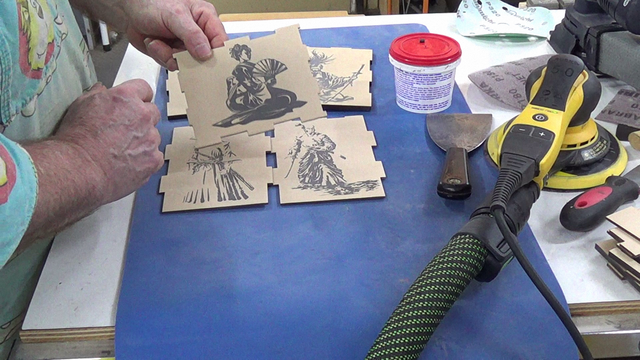
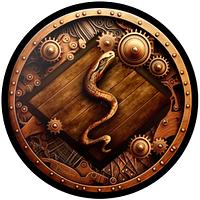
Now don't confuse me with WildBrianWoodor Madburg... My only affiliation with Japan is the possession of a 53 yo kimono,
that I've kept as moth fodder, and the "Japanese" themed clip art I randomly downloaded from the internet to engrave on the box
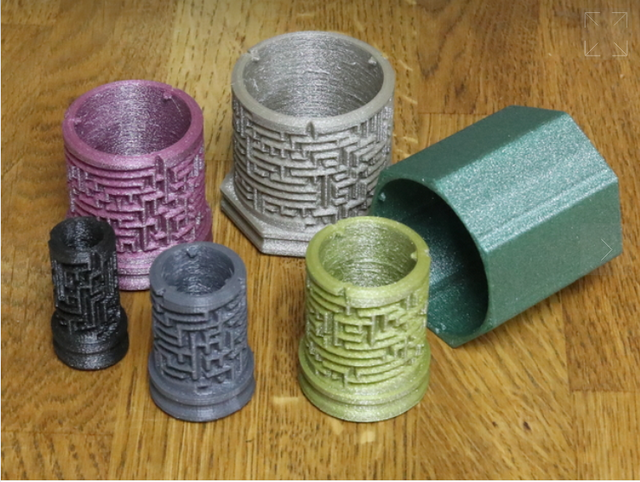
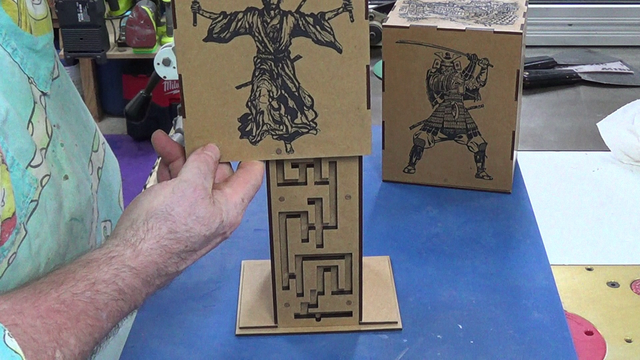
While gas-bagging on the Box Swap 2023 forum a while back, Keebler made a reference to a box maze puzzle, that unfortunately (for me) turned out to be a 3D printed puzzle,
but I got the bug… and went into SketchUp to see what damage I could do.
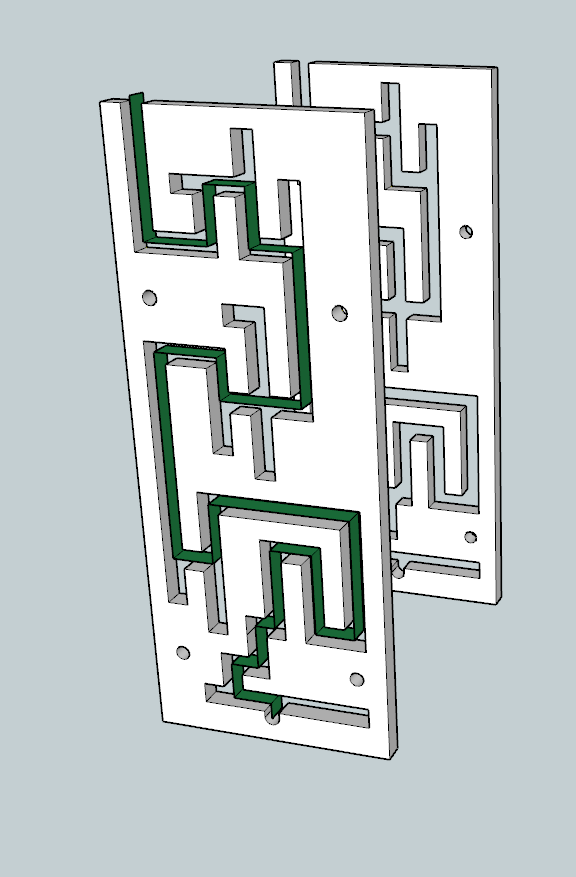
I came up with a form of a maze and a path
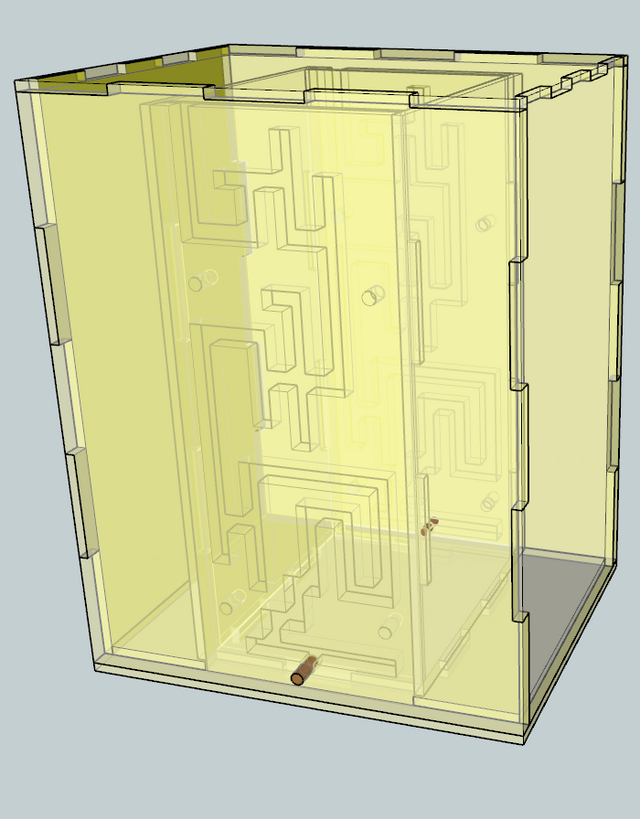
and tried to incorporate it into a box, and after a bit of trial and error (basically just using the SketchUp model) I came up with a box design.
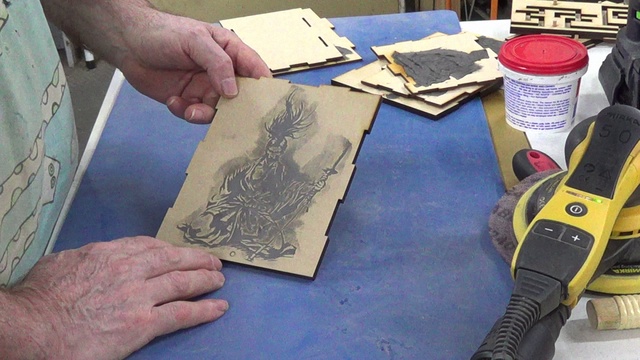
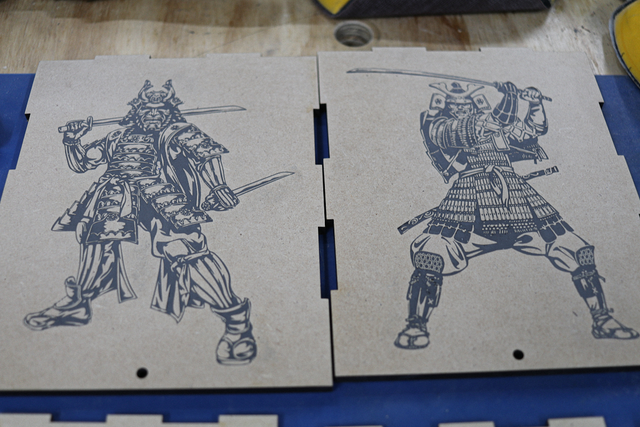
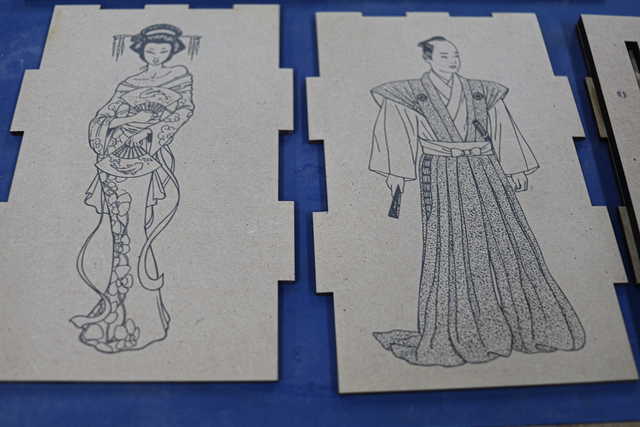
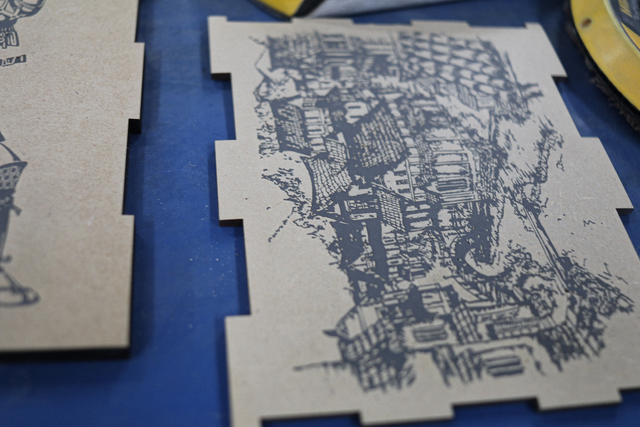
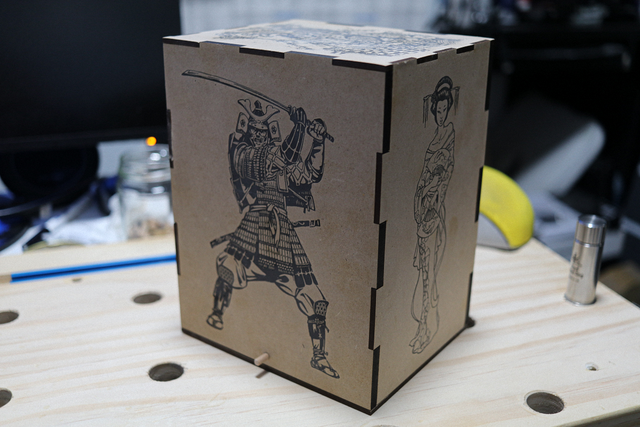
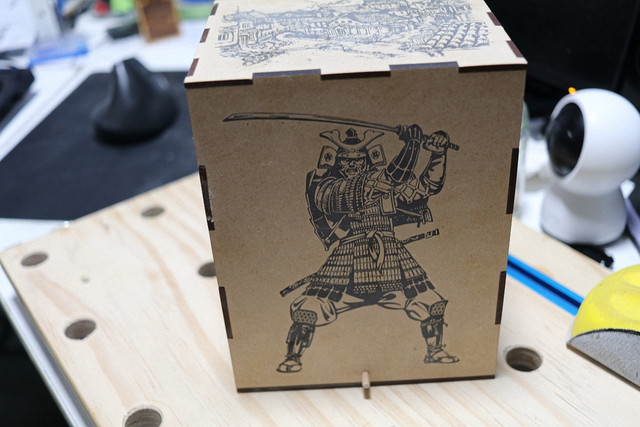
Speaking with WildBrianWood, the Japanese theme emerged and armed with a few Japanese clip arts I’ve downloaded from the internet, I tried to pretty up the SketchUp model,
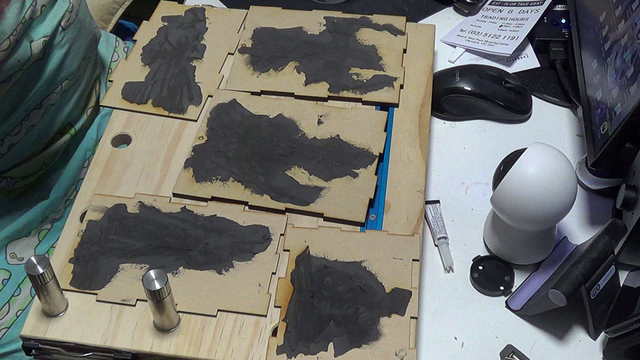
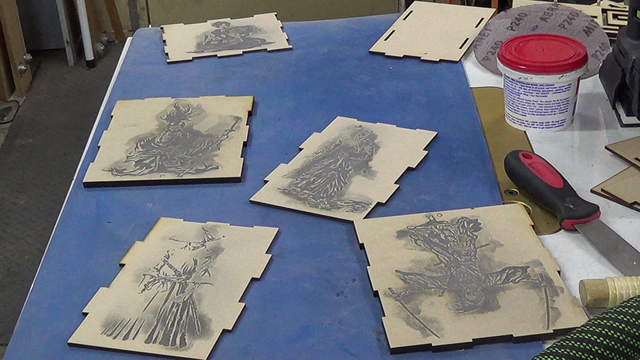
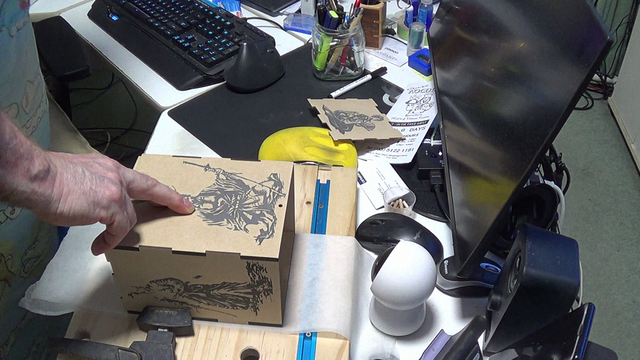
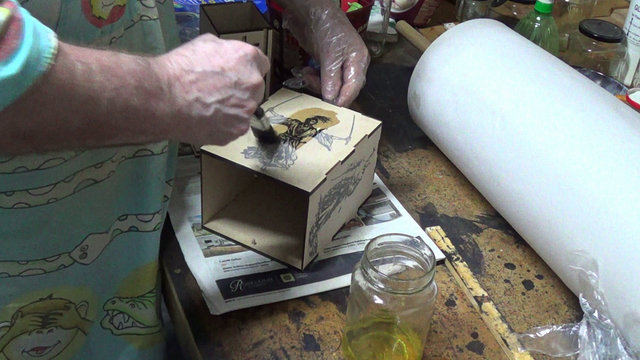
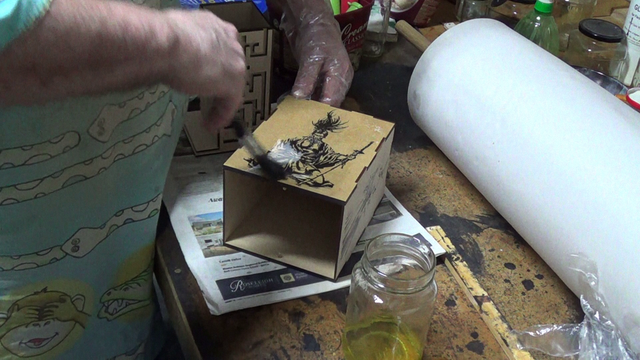
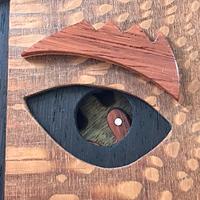
After engraving the clip art,
I used Timbermateebony wood filler to fill the engraving
for what I consider a more presentable effect.
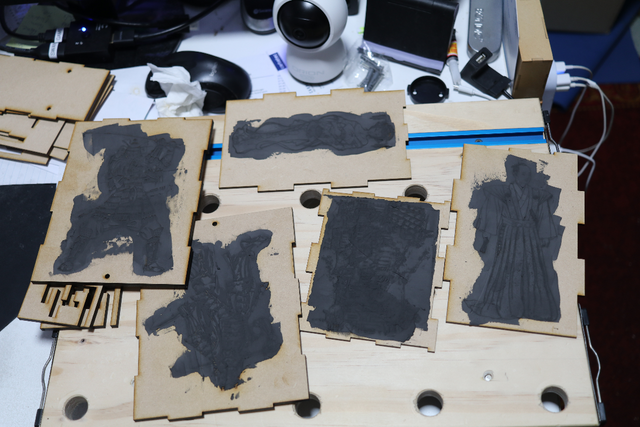
Tested the maze part of the box’s internals for fit,
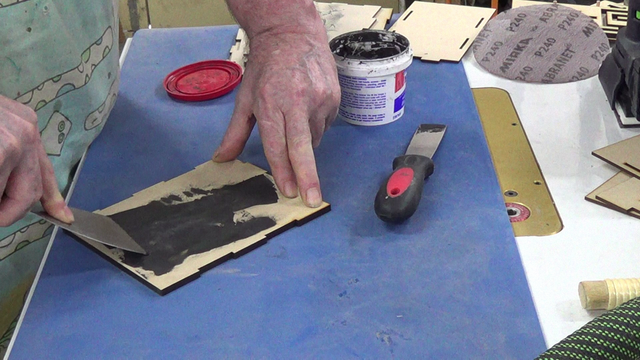
Sanded level the first wood filler layer,
And applied another layer to fill the voids missed with the first layer,
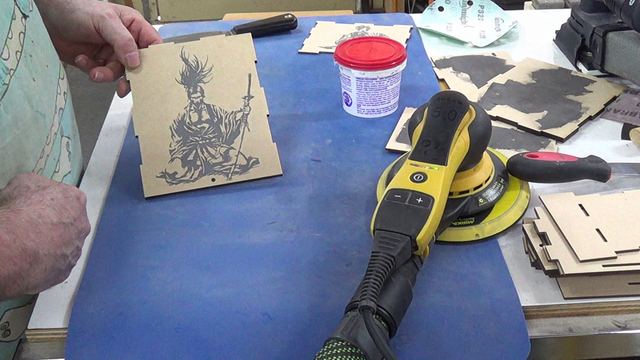
The final sanding was aggressive enough to remove all the filler staining outside the engravings perimeter and some of the timber remaining within the perimeter,
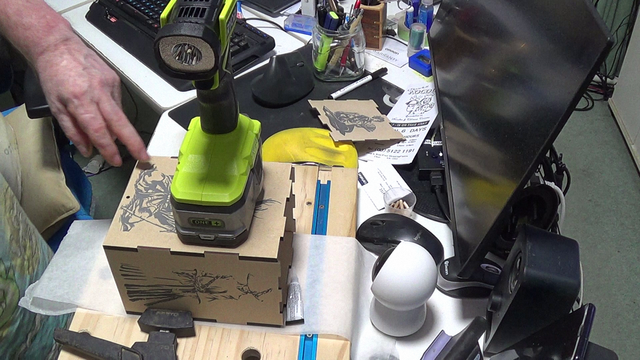
Worked my way from 180G to 240G and then got the parts ready for glue up.
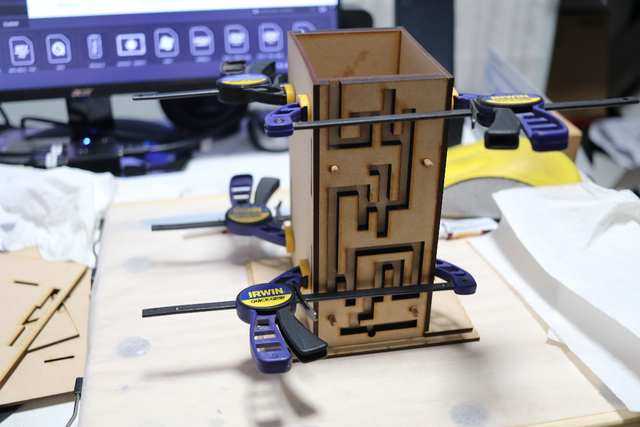
Moved upstairs for the coolness of my office and used my Mini Office Workbench to glue up the parts,
After the glue up, did a test fit
before trimming the maze runner dowel on the box top for size and final fit,
The first box was then moved over to my slow speed bench grinder and using 8” buffing pads, applied the Beall Buffing system which consisted of a coating of Tripoly, White Diamond and Carnauba waxes in that order.
Before the buffing, the second box was given a coat of Organoil Hard Burnishing Oil (which is predominantly tung oil),
the wood filler really popped with each stroke of the paintbrush loaded with the oil,
Unfortunately I wasn’t going to document the process, however, ego got the better of me and I finished up making another one that I recorded.
Not being shy, I kept crapping on about the process and finally finished up with a video that I had to split up into 3 parts to try to make them viewable,
Well done LBD, a cool maze box, the graphics are great, along with the maze. I'll have to place this one in a file for later. I think the grandkids would love it, I'll use real wood though.
Eric - the "Loft" commented 37 minutes ago new Well done LBD, a cool maze box, the graphics are great, along with the maze. I'll have to place this one in a file for later. I think the grandkids would love it, I'll use real wood though.
Thanks Lofty, I agree that "real wood" is a much better choice.
Unfortunately, most of my puzzles are destined for distant acquaintances/strangers, and making it out of up to 9mm solids could become a tad costly, especially with all the mistakes I seem to insist on making.
If your first cut is too short... Take the second cut from the longer end... LBD
Do you get one of the Geishas if you win? How do you do the maze - with a metal ball? I am seriously envious that you can just "print" those images, whereas I have to "paint" them and am severely limited in my abilities to do so. You might have included a photo of You wearing the kimono!
Great build Ducky. Wish I could borrow you and your skills for some of my projects. Your are the Madburg and Wild Brian of this type of box building. Note: Mad and Wild.
I didn’t know Timbermate made ebony fill. It’s the best wood fill I ever used. I think it’s made in Australia. I also didn’t know that your were such a balancing artist. What’s ya smokin there Mate?
I like the laser engraving + timbermate combo! The boxes are well made and cool but somehow, I feel western vibes than Japanese from looking at them....
Anyways, I used to have a plastic one when I was a kid and I broke the maze by a metal pin on the inside of the outer box by scratching and shaving the plastic gradually....
I like it! I've only recently discovered the ebony Timbermate. Great for fine detail. As in filling your engraving, or as I did on my Geisha box for the pine needles on the Mt. Fuji marquetry. On that I finished the marquetry with my usual polyurethane and then used an ultra-fine V gouge to cut into the poly which was then filled and sanded etc. It's a similar technique to Japanese Chinkin, where they 'scratch' a lacquered (or in my case polyurethane), surface and wipe in gold dust. If you apply your 'finish' to timber first and then use the laser, would you get sharper edges on the cut? If you did that, have you found a 'finish' that doesn't 'burn'? Len and I usually just put a coat of shellac on before lasering, to which I then add my filler and then apply my poly. Len usually just wipes ebonising fluid in, but the Timbermate is no looking better on a pre finished surface.......
Kel Snake .... Hmm, mistakes, some of my best lessons, lol
MY problem is I don't seem to learn... A lot of my posts are long as I try to mention process including my mistakes... I remember one of my projects at LJ where nearly 1/2 of the blog was about the same mistake I repeated about 4 (or 5) times... on the same part... same project...
I'm only posting my new project here at Craftisian.
YRTi .... I feel western vibes than Japanese from looking at them....
I should have called it ウエスタンバイブス迷路ボックスパズル
Madburg .... If you apply your 'finish' to timber first and then use the laser, would you get sharper edges on the cut? ...
The edges are "crystal clear" sharp with or without covering media ... I say media instead of finish as that includes masking tape. I depend on depth of engraving (number of passes) to permit sufficient fill and still sand to remove the Timbermate dark stain in the timber. Because of the interest shown in laser/CNC, I am working on a blog on my engrave/fill process.
Madburg .... have you found a 'finish' that doesn't 'burn'? ....
What I refer to as "char" from the engraving, I believe it is actually fumes, soot and molten resin from the burning away of the wood/MDF. Masking the wood with special laser masking tape will prevent that... but then I'm faced with the task of removing small bits of tape that are left from non engraved bits inside the perimeter. Though sanding could remove it.
I always mask acrylic.
Madburg .... just wipes ebonising fluid in, but the Timbermate is no looking better on a pre finished surface.......
I like the Timbermate fill, as at the end of the exercise... I finish up with a flat surface across the timber and infill (sort of... that's what the proposed blog will cover).
A lot of issues can be removed by using inlays instead of filler,
My infill method (as is at the moment) is not too good for endgrain... too grainy and filler stains much deeper.
I haven't been too experimental, as most of my engravings are just for fun and not designed to be works of art like yours and WBW creations.
If your first cut is too short... Take the second cut from the longer end... LBD
Corelz125 commented about 1 hour ago new I like the build LBD but if you didnt spend all your sheckles on Festools and Woodpeckers you could use real timbers
To be honest, I don't own a lobster pot wallet (only one way traffic)... and being a non-taxed pensioner, purchase of Fe$tool and Woodpeckerstax is the only way I can feed our govermin. It's the availability of timber (even pine is hard to get nowadays) that inhibits my diversity from MDF.
Hell, the residents of downtown Churchill are just starting to learn that you can't grow trees in caves.
If your first cut is too short... Take the second cut from the longer end... LBD


 on demand. - Project by LIttleBlackDuck")