A couple of months ago I purchased a laser and have been having some fun playing with it. A friend of mine asked if I would make a box for his father who happens to be a bee keeper. I was excited to see what was possible to accomplish with the laser and jumped right in.
Having to learn a new program I started out the way I usually do…without a plan. I knew bee hive boxes are sometimes stacked, so I decided to make this box 3 individual sections. The top 2 sections are a space that can be used to store something and the bottom section can't be accessed and is supposed to resemble an old time saloon.
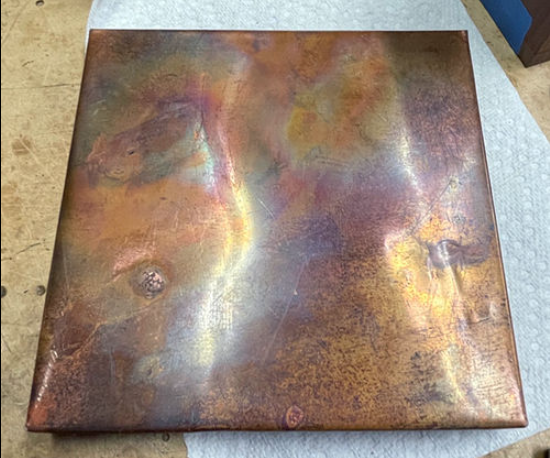
I had some copper from years ago and used that to form the top and the awning. I hit the copper with a torch to create some colors and formed and soldered the corners together. The copper is probably 16 gauge, so it's very heavy, but that is what I had on hand.
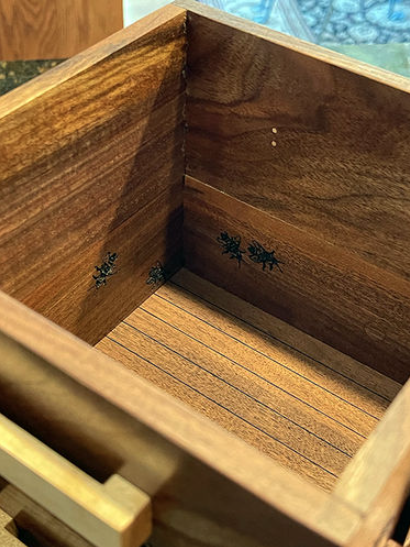
Not sure how I was going to finish the piece because of all the nooks and crannies, I pre-finished as much as possible before assembly. Even though I scraped the shellac off the areas I was going to glue, I was afraid it might come apart over time. To prevent this I used toothpicks to also dowel everything together.
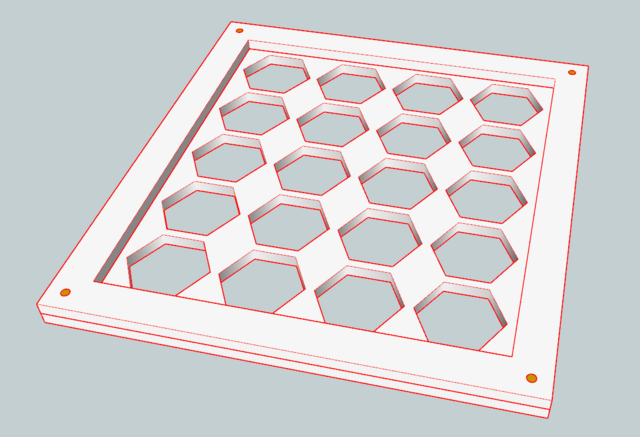
Photoshop was used to alter some of the bees so that they all didn't look the same. I used my laser to create the signs and the burn in the bees. The sides of the bottom section was too thick for my laser to cut through, so I used a router to thin the wood from the inside and then I could cut the honeycomb design all the way through.
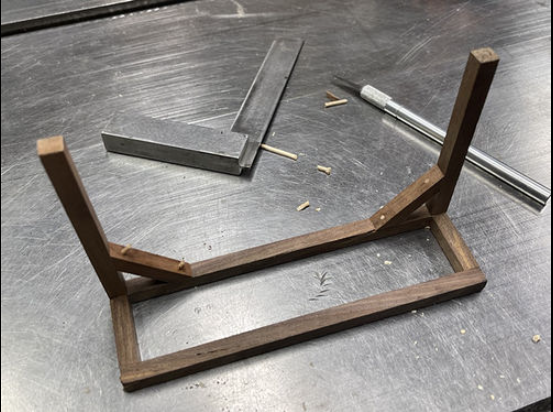
I cut some walnut into 1/4" beams and made the structure for the awning. every part was glued and then pinned with toothpicks to resemble post and beam construction.
The saloon doors had at least 7 or 8 different designs until I found one that I liked. I also made several shutters. My graveyard was getting very large, but I was having a great time anyway. It was all a big learning experience and I enjoyed every minute of it. This was only half of what I had when I was finished.
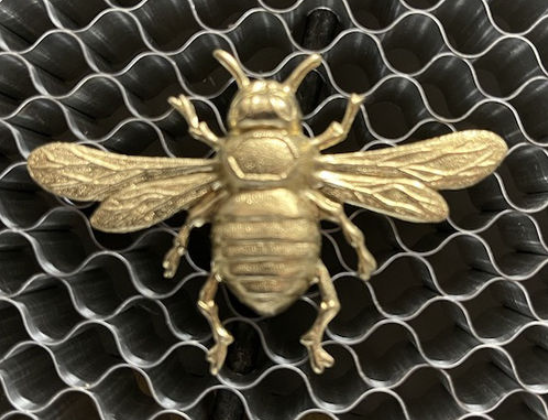
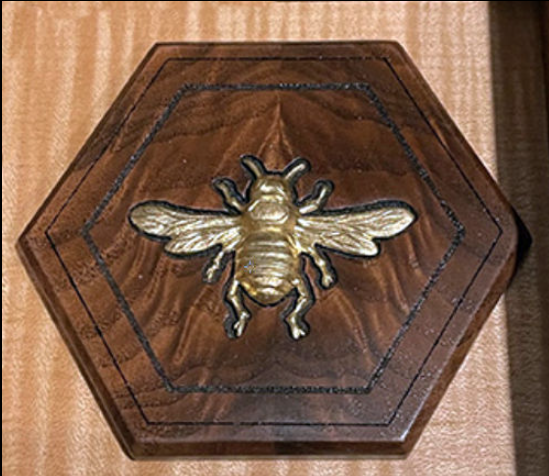
This project all started when my friend showed up with a few stamped gold plated bees of different sizes and asked if I could work them into the project. I took a picture of the largest one and put it in Photoshop along with a quarter to make sure I was going to get the size right.
I drew a silhouette around the bee and burned a void in a hexagon shaped piece of walnut just a bit larger than the bee. I used tiger stripe maple as a background and wrapped it with walnut and maple.
I know this is a bit on the strange side, but I enjoyed making it even though there were times I was extremely frustrated. What do you all think? Pretty crazy huh?
(I feel nearly as bad a D_W with his acorns)... but I think it's a tad better than 👍👍👍 for a great job.
Nice combo of woodyingand lasering.
Two things if I may add:
areas I was going to glue, I was afraid it might come apart over time. To prevent this I used toothpicks to also dowel everything together.
The toothpics are a great idea for strength and alignment. If they are through toothpics (strategically placed) you can laser cut the alignment holes. Suggest using CA glue over shellacked spots... I haven't tried it, however, I often pre buff (heavy wax) and I don't worry about glue lines as the CA seems to have held well... well, well for the last 2 years.
so I used a router to thin the wood from the inside
If the media is a tad too thick for my laser, I layer. The rim around the doors could be an additional layer, and the char can be scraped/sanded off, although it does have a good effect. The toothpicks are ideal for alignment.
BYW... would have looked bigger if you used metric.
If your first cut is too short... Take the second cut from the longer end... LBD
mA bit bloody flash for a bee hive isn't it? Ant man and myself have been considering building the out of my pallet timber Something as flash as that here would encourage some bastard to steal it on us
Very impressive just the same but we would have to sit shotgun on it 24/7!
Thanks for all the nice comments, this was fun because it had a purpose. Mostly everything I make has no intended person in mind, but this was asked for and that made it a lot more interesting for me.


")
")
")
")
")
")