I post most of my puzzles with the same name that I plagiarise from the internet and many of them just don’t make sense, however, with this one I managed to ferret it out and bore yazall with the detail.
This puzzle was invented by Volker Latussek and named after Guillaume Henri Dufour who was involved in the establishment of the International Red Cross in 1864.
I believe it was named such because of the “red cross” pattern
when solved using the carefully contrasting coloured pieces.
Now for a tad more pre-amble before I get down to the nitty-gritties of making it.
It is rated at a 10/10 DOD (Degree Of Difficulty) and the puzzle’s documentation provides two solutions as can be found in the 3DW model,
being :-
As it’s name implies, place the pieces inside the box so the top layer displays a “red cross” (dark wood). The cross will protrude above the top of the box.
Place all pieces withing the box with no parts sticking out.
The SketchUp model includes step by step scenes to solve both options and a layout for cutting the box on a laser… can also be 3D printed.
Pieces are built up out of 12mm x 12mm x 24mm timber, though some may add 0.7mm to the height/width dimensions to negate the need to buy a new ruler/tape. The centre pieces are cut at 12mm x 12mm x 24.5mm to facilitate assembly… more on this below.
The box is designed to be made out of 3mm-6mm (though with this magical dimension, it is a tad more imperial friendly because of the range) thick timber and protruding tenons (between 3mm - 6mm depending on the thickness) will need to be sanded off. However, later into the project, I made several boxes made out of solids using conventional tools and for this later build, no laser was used and MDF didn’t grace the project in any way (short of the sled on my Micro-Marksaw).
I found some great spalted logs… correction found the logs, cut them and then found the spalting, much like the picture of Guillaume (one must report facts correctly),
of which the longer pieces fell victim of my laser,
with enough for a 2nd. box,
The following pictures were plagiarised from another build, however, the process is exactly the same… though swear words may differ (c'mon, who;'s build goes without glitches?).
The box pieces were glued up using my two hands as jigs,
with lots of acetone nearby for the CA squeeze out… on the fingers... and tongue if you bite your nails. The 123 blocks couldn’t be used to “flush” the sides, because of the protruding tenons/fingers.
Then it was over to my inverted belt sander to sand flush the protruding tenons/fingers (following pictures solicited from other builds, but the process is still the same),
ROS'ing,
and buffing,
After raising a sweat with my boxing session, it was time for the pieces. Having made enough puzzles in the past, I realised that minor modifications needed to be made for fitting of pieces together and my cubed method (building up pieces out of cubes) was sus,
as some pieces may have difficulty “slipping in”.
Consequently (and to save time cubing and bevelling), I opted for straight and “single piece” cuts,
In this adopted design, each piece measured 12mm x 12mm x 24mm, however, to facilitate the “slip in” action, the middle piece (light colured in above picture) was 12mm x 12mm x 24.5mm… that extra 0.5mm was the secret,
Mass produced some 12mm x 12mm sticks on the tablesaw,
and then set up the Micro-Mark to cut 24mm lengths (and 24.5mm)
It was then time to glue up the pieces… working from this SketchUp screen dump,
(where M represents maple/pine and Wwalnut/merbeau and the 25 is 24.5mm long)
and the 123 blocks for glue up assistance,
resulting in a full set for each puzzle box,
It was around this time when I got the sooks and felt sympathy for those without a laser… oops, seems like yazall now have lasers, so I meant cuttable lasers.
I then designed and laser printed of some cutting templates… oops that cutting assumption has chimed in again… so with these dimensions,
one can either print on A4 and scissors, or use some setup blocks (or ruler and calculator/dictionary for metric to imperial translation). You can then cut a box as I’ve tried to demonstrate in this video,
and glue up for simple, easy to align, butt joins using CA with the 123 blocks which proved invaluable (similar to this other puzzle box),
Now the secret of this puzzle is to assemble outside the box and then carefully place it inside. It's not an easy puzzle (DOH, DOD of 10), so a quick peek at the solution gives one a start, if not necessarily the solution.
The pieces are buffed and they are slippery little suckers… so a greater part of the solving difficulty is to hold the pieces together. That’s why I needed a rubber band around the pieces (outside the box) for the photo shoot,
flip side,
FAIW, the SketchUp solutions include a method for packing all the pieces in the box flat with the top for shipping as “unsolved” to recipients rather than as loose pieces outside the box…
If interested in any of mine (LBD), measurements can be made available on request for anyone not familiar with SketchUp… though a working knowledge of SketchUp’s navigation (as opposed to its design/use features) and access to 3DW could be of benefit.
All the solutions to my puzzles can be found at this link... Kids love ‘em and most of us are still kids.
Don’t be crafty Craftisians,... SHARE your craft!
If your first cut is too short... Take the second cut from the longer end... LBD
Thanks 987... I may never coax anyone into my puzzles (why does all derivatives of the letters P O T T Z emanate into the -ve), but at least yazall will know where the red cross originated for the next trivia session.
If your first cut is too short... Take the second cut from the longer end... LBD
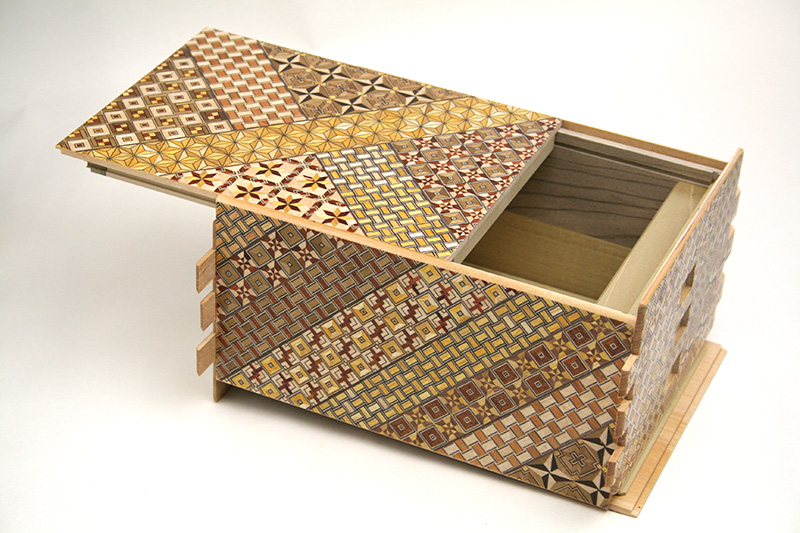
Just back from a woodworking tour around Japan. You may be suprised but I thought of you on a visit to Hakone to see their version of parquetry - Yosegi-zaiku . This is their 72 move puzzel box. The way they do the parquetry is mind boggling, then theres the puzzel box. But guess you will be familiar with them, though if not then check this link out https://www.hakonemaruyama.com/
Cutting those small puzzle pieces on a regular table saw brings a few drops of sweat to the brow. The micro mark is definitely the right tool for that job. That build isn't as simple as it seems. There's been one or two I built where I forgot how to solve or put back together
Steve Rasmussen Yeah, I can't imagine solving that without the solution.
My first step in any puzzle is to import into SketchUp and digitise the solution. If I can't do that, it doesn't hit the shop floor, but the bottom of the bin.
Just back from a woodworking tour around Japan. You may be suprised but I thought of you on a visit to Hakone to see their version of parquetry - Yosegi-zaiku . This is their 72 move puzzel box. The way they do the parquetry is mind boggling, then theres the puzzel box. But guess you will be familiar with them, though if not then check this link out https://www.hakonemaruyama.com/
Thanks for the thought Maddie...
Their pattern is what kept me away from them, but then when I found a way to "cheat" and laser engrave and backfill a pattern, I got enthused. This one is based on this (without the parquetry), while this one is my own design based on a maze. I love the Japanese concept, but lack the ability.
I believe their 72 moves consists of many repetative moves... eg. 3 sideways sliders in the same direction on top of each other is considered 3 moves, otherwise, the mind boggles at the number of moves required.
Corelz125 commented about 4 hours ago new Cutting those small puzzle pieces on a regular table saw brings a few drops of sweat to the brow. The micro mark is definitely the right tool for that job.
Actually it was Pottzy's review of the Micro-Mark that made me aware of it... that's why I love those in your face reviews where you don't have to search for what you don't know about.
Corelz125 ..... There's been one or two I built where I forgot how to solve or put back together
If it's any I plagiarised from you, I have the solution.
If your first cut is too short... Take the second cut from the longer end... LBD


.skp%20-%20SketchUp%20Pro%202018-009220.png)
.skp%20-%20SketchUp%20Pro%202018-009219.png)


.png)
.png)