Bentlyj
in almost 12 years
More from Bentlyj
Walnut Wall Unit (added new slideshow)
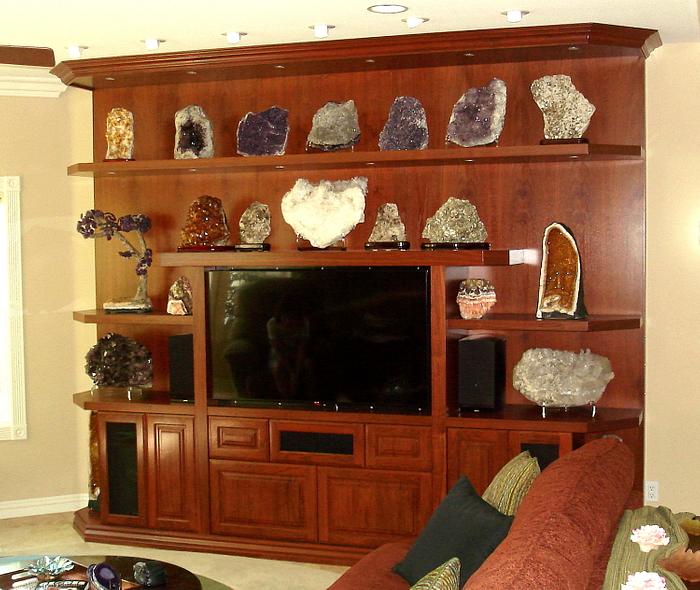
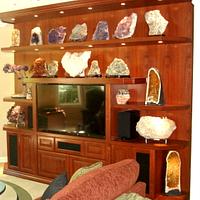
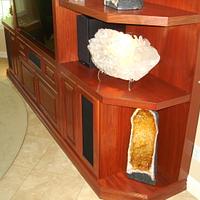
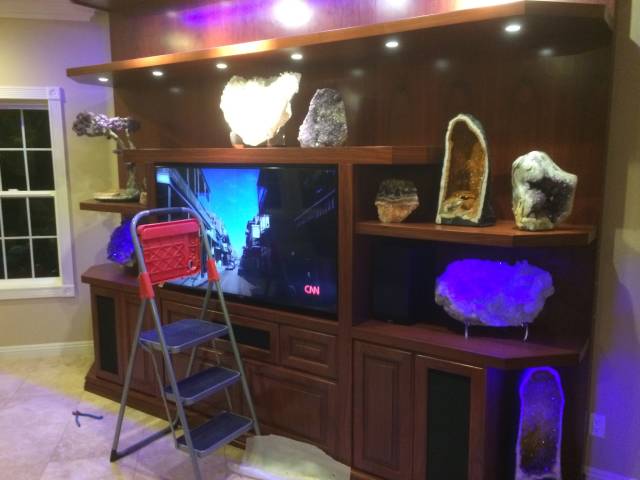
I made this for a customer who’s main concern was to display his Geodes.
It’s all Walnut plywood with hardwood on all the edges. The finish is stained with a pre-cat lacquer finish. The color is fantastic in person. I was really pleased with this color on top of the walnut, it almost made it look like it was rosewood.
I put in Low voltage lighting. The last pic shows the 3 motion sensors for turning on/off and dimming the lighting with just a flash of the hand. I also installed GRB LED strip lighting inset into the top and side shelves that use a remote to change the color output of the strips. (Mainly for mood lighting)
The Floating top shelf is supported by 3/4" black pipe screwed into floor flanges and mounted through the back with the bar going into the hollow of the shelf. The little side shelves are also supported this way.
Thanks for looking and any comments or critique are welcome.
Bonus Pic: Here I am playing with the RGB strip lighting during the install.
Figuring out how to do something you have never done is what makes a good challenge.
20 Comments
This is a beautiful unit.
My dad has one he made very similar. Yours looks better with the raised panel.
I think this is the right place to display the geodes. Those guys are really expensive.
I thought those dots on the right were switches, I guess I was not far off.
Great work
Abbas, Castro Valley, CA
Bently,
You mentioned you used Pre-cat lacquer and from the description tinted (maybe).
My question is can pre-cat lacquer be tinted like latex to match a color?
I have seen several projects were they mentioned pre-cat lacquer and I am dying to try it. I also read that it need to be sprayed and cannot be brushed.
Abbas, Castro Valley, CA
Bently,
Outstanding! We’re not certain what we like best . . . the cabinet or the geode collection . . . or the step ladder! LOL
The cabinet really showcases the collection and the lighting puts it over the top!
L/W
“Those who would give up essential Liberty, to purchase a little temporary Safety, deserve neither Liberty nor Safety.” Benjamin Franklin
That is awesome and so well done! I love the lighting, and the floating shelves, and that finish looks perfect. Wow!
Great looking project! I really like it and thank you for openly sharing the “plywood” aspect of this project. IMO, often that aspect seems like folks try to hide/deny it, yet to me we should celebrate it and incorporate it more often in our WW than we do. Thanks for sharing.
HorizontalMike
Thanks Everybody,
lanwater, you can tint the pre-cat, it has all the same characteristics of regular lacquer.
I’m not sure if they make a brushing grade pre-cat, I always spray. I’m sure if they did and you tinted it you would have a hard time getting an even color. I didn’t explain myself very well, I stained the unit first (believe it or not) using Minwax Gunstock stain then lacquered over it.
Thanks L/W, My first time using this type of lighting. Very impressed at the ease. I used the LOOX brand LED’s from Hafele, everything is plug and play. LED’s have a 8’ lead with a plug on the end, just plug into the transformer which has room for 6 plugs. Then just select the style switch that comes with an 8’ lead that also just plugs into the transformer and done.
Thanks David, I was worried about the strength of the floating shelf, those geodes are heavy.
The black pipe solution worked great, got the idea from my bar clamps.
Thanks Mike, I’m not embarrassed to use plywood, now if it was an mdf core I might have hid that fact. lol I try to use a plywood core whenever possible. I also demand a domestic plywood over any import plywood. It’s worth the extra cost and is an added benefit to OUR economy as well.
Import products will double your work and lower the quality, Buy American!
Figuring out how to do something you have never done is what makes a good challenge.
Quite a feat of engineering to make shelves like that that won’t sag, bend or start leaning down. Great job.
Wow that’s a great build.
woodworking classes, custom furniture maker
I have a lot of pictures in the different stages. No means is it blog worthy, but........
Figuring out how to do something you have never done is what makes a good challenge.
I'm not a snob though, I have a lot of boxes I have made from walnut, I love the natural look of walnut too.
Just depends on what it is I guess.
Figuring out how to do something you have never done is what makes a good challenge.
I look at each job differently. Depends on what they want.
I do have enough experience to know if I can achieve the color with MinWax,
or if I have to make my own with mineral spirits, tint and blo,
or just go to the SW and have a color match made.
A lot of times I buy the small cans (whatever brands closer to what I'm after) and mix and match to see if I can get it close. Then go buy the big cans and replicate it.
Stain matching can be an art.
PS, I have thrown a lot of stain ($$) away because of not being right.
Or keep them around for the one job that doesn't really matter, which almost never comes along.
Figuring out how to do something you have never done is what makes a good challenge.
It's just easier for me to put the stain in a cup gun and spray it on, then wipe it down. (sections going from end to end)
Then after everything is stained I turn down the material volume, and turn up the air pressure, then lightly go over it to even out the color wherever I think it needs a squirt.
Figuring out how to do something you have never done is what makes a good challenge.
working with my hands is a joy,it gives me a sense of fulfillment,somthing so many seek and so few find.-SAM MALOOF.
looks great id love to see the slide show.
J/K I can't tonight, xmas party, maybe if I get home early enough and am not all buzzed out on Monster drinks.
Figuring out how to do something you have never done is what makes a good challenge.
I'm sorry that it's not as good as I would have liked.
They're just a bunch of crappy shop pictures thrown together. I don't have the patience or skills to do a proper one but this will at least give an idea of the process.
Thanks for watching.
Figuring out how to do something you have never done is what makes a good challenge.
I like the stain color on the Walnut...first time I've ever said that!
The man in the suit has just bought a new car from the profit he's made on your dreams.
or at least what I picture rosewood to be. It's very pretty in person.
Figuring out how to do something you have never done is what makes a good challenge.


