


Share your craft projects
Make new craft buddies
Ask craft questions
Blog your craft journey

Mike40
1074 posts
and
35 followers
in about 12 years
in about 12 years
More from Mike40


head - Project by Mike40")
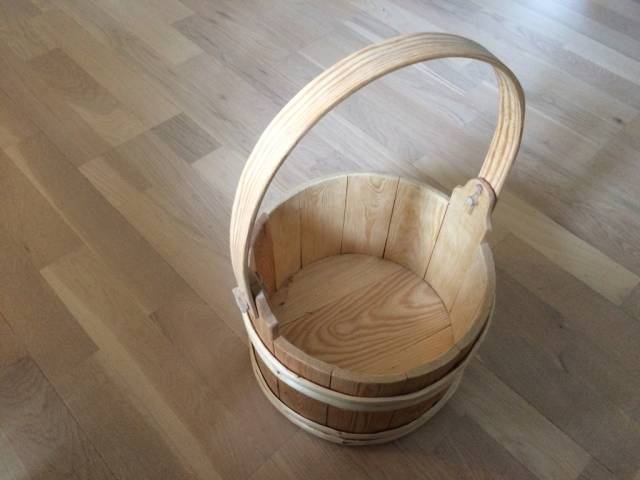
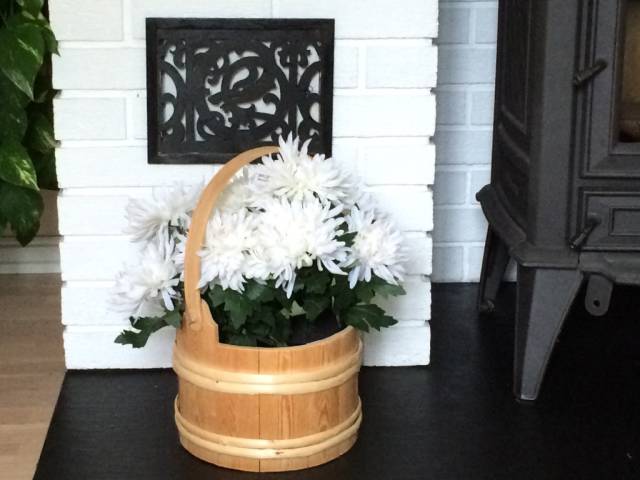
Ancient Pine Stave Bucket

History
I have seen some old buckets like this at museums here in Norway. The design goes back at least 1,000 years based on various archeological finds, but I would bet they were made well before that time and they were in daily use up to the beginning of the 20th century and probably even later in many places. The bucket holds water very well. The wood swells and it becomes very watertight and the bands are very tight. I don’t keep water in mine so during the winter the seams between the staves open a bit and the bands are a bit loose. in summer everything tightens up.
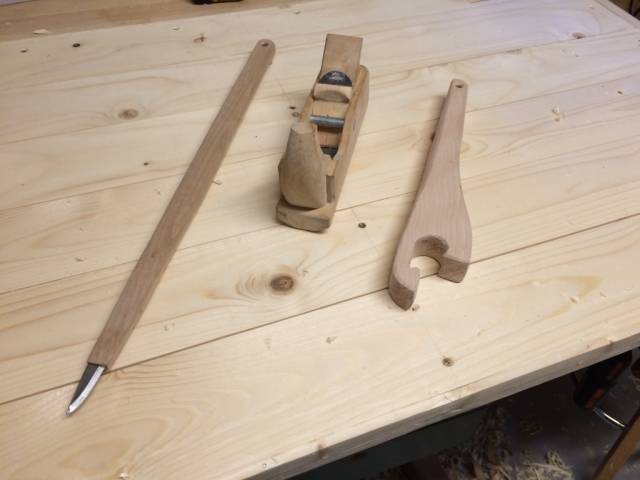
Tools
I had to make 3 different tools to complete this project. see below
- A round bottom hand plane to round the staves inside.
- A shoulder knife to cut the dado outlines on each stave.
- A band lever to lever on the bands.
Bucket Nomenclature
- 8 to 12 staves rounded on the outside and the inside and the edges are angled to conform to the diameter of the bucket. The rounding of the staves is done with a round bottom hand plane and the outside rounding with a regular hand plane or drawknife.
- A dado is cut into the bottom of each stave to hold the bottom pieces. This is done with a knife that has a blade 2-1/2"- 3" long and a long handle that rests on the craftsman’s shoulder to exert maximum leverage while cutting. This knife works amazingly well. The groove is chiseled out between the two knife cut lines.
- The bottom is also made of staves, in this case 3 pieces. see below
- The staves are strengthened with two wood dowels between the edges of each stave.
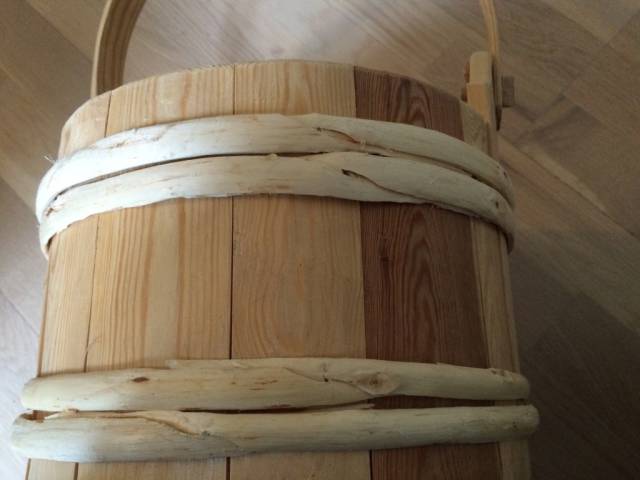
- The staves are held together with bands made usually from thin willow branches that have been cut in two lengthwise and which connect with a special joint. No fasteners are used. The bands are produced from green wood and then soaked in water to make them pliable and the joints carved on the end. They are installed tight as possible with the band lever to pry them on, and the bands shrink as they dry making for a very tight hold. Here is a close-up of the bands at the joining point. see below
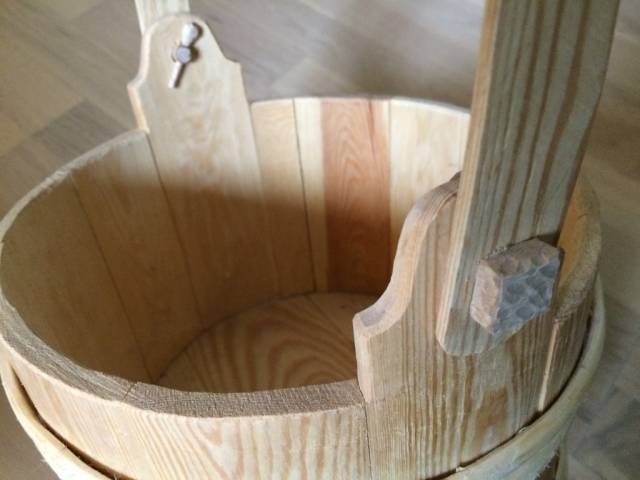
The handle, made of bent dampened pine is held onto the bucket’s ears with wooden pegs. You can see the inside and out side of them in this photo. see below
The bucket now resides by our oven in the living room. see below
More History
- The width of the staves did not have to be of equal width and the angles would also vary when they were not. A plain circle was used as the plan, rounding the staves to conform to the circle and taking the next edge angle based on the one from the prior stave. The last stave would normally just be sized to fit whatever leftover space was remaining. Because of the varying edge angles, the staves had to be numbered to keep them in order. In the 1,000 year old bucket found in our district the staves were numbered with vertical line marks on the inside of each stave. ‘llll’ for example representing the fourth stave.
Machine made buckets
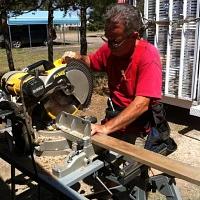
If you like machines more than hand tools, most of of the work on this bucket can be done with machines. The width and number of staves can be accurately calculated based on the diameter of the bucket and then the mitered edges can all be the same angle. The mitering is easy to do on the jointer before cutting the staves to length. Rounding the inside of the staves can be done with an angle jig on the tablesaw, also before cutting the staves to length. The outside can be rounded on a lathe with the staves if you glue the staves together. This eliminates the need for dowels. The bands still have to be hand done. The dados that hold the bottom edges can be done with a small circular saw mounted on a Dremel tool, but you still have to hand chisel out the waste.
I have to say though that the imperfections of a handmade bucket and the loose staves add a lot more charm than the machine made version.
A future blog
I might do a tutorial blog on both the handmade and/or the machine made versions in the future if there is any interest.
Mike, an American living in Norway
14 Comments

That is gorgeous!
Thanks for sharing your projects!
I look forward to every one!
Steve Tow

Love it ,very cool Mike.
woodworking classes, custom furniture maker
Thanks Steve and Jim. This was an interesting project. I have seen a Swedish film, from 1922 I think, showing a guy making a very similar bucket. The work methods were almost identical to my own, but he was a whole faster!
Mike, an American living in Norway

Very cool Mike.
Madts.
Tor and Odin are the greatest of gods.
Mike,
That is AWESOME!! Very cool for sure!!
Great job Mike !! Thanks for the detailed instructions
Jaybird

Great info Mike.
It’s a fun project.
Abbas, Castro Valley, CA

very impressive , nice work
Wheaties
Thanks everyone. This wasn’t meant as a tutorial, but I I figured that as woodworkers you would probably be more interested in the construction details and the work methods than the final product as it’s nice to know how our ancestors worked.
Mike, an American living in Norway

Very nice Mike.
CHRIS, Charlottetown PEI Canada. Anytime you can repurpose, reuse, or recycle, everyone wins!

Beautiful, thank you Mike.
Jack
I love it Mike and it still is on my BIG BUCKET LIST but I have the wood drying so next winter it should happen .
Klaus
Thanks Thorreain, Jack and Klaus.
Klaus Get ready to have a lot of handwork fun connecting with the past.
Mike, an American living in Norway

beautiful work
More from Mike40