


Share your craft projects
Make new craft buddies
Ask craft questions
Blog your craft journey

MontyJ
226 posts
and
11 followers
in over 12 years
in over 12 years
More from MontyJ


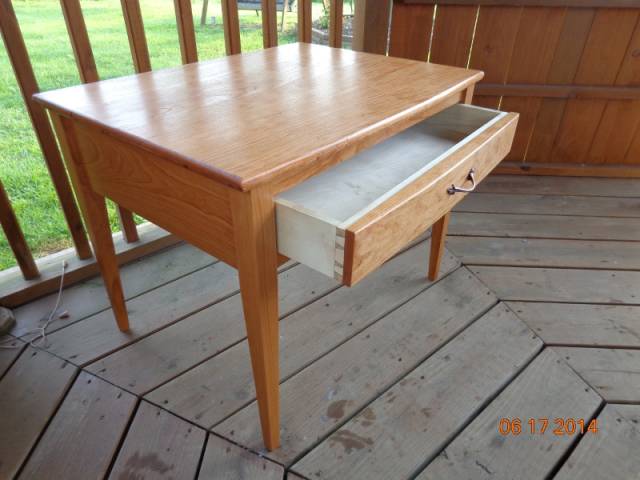
Cherry table


A simple cherry table for the wife to set her sewing box on. It includes a drawer large enough to hold her cutting mats. The curves were cut with a hand plane and came out better than I thought they would. The dovetails are hand cut and are far from perfect, but are holding nicely. The finish is colonial maple for 70 seconds followed by three coats of satin wipe on poly.
I’m off to work now, but will have a few questions later.
Where are the band-aids?---Pro Libertate!
14 Comments

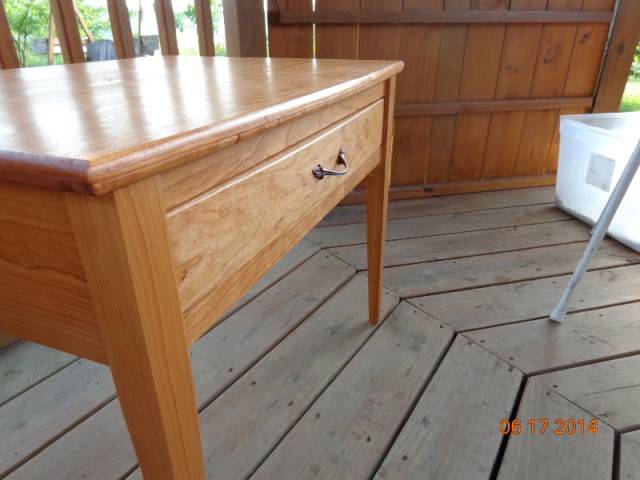
Monty, that really turned out nice. Love the curved drawer front and dovetails!

A very nice table I must say. Love the finish.
Tor and Odin are the greatest of gods.

Love the finish and the curved drawer front. Very well done!
Thanks folks, but I have to be honest with myself here. I am happy with the structural work. Sure there are a few mistakes, but nothing I can’t live with for now. Some questions I have:
1. The wife totally balked at breadboard ends. How will that affect the life of the top?
2. The router really ticked me off. It seemed to hang in certain spots around the top and burned the wood. Why does it do that? And how do you get rid of the burn marks? Sanding to remove the burns alters the shape of the edge.
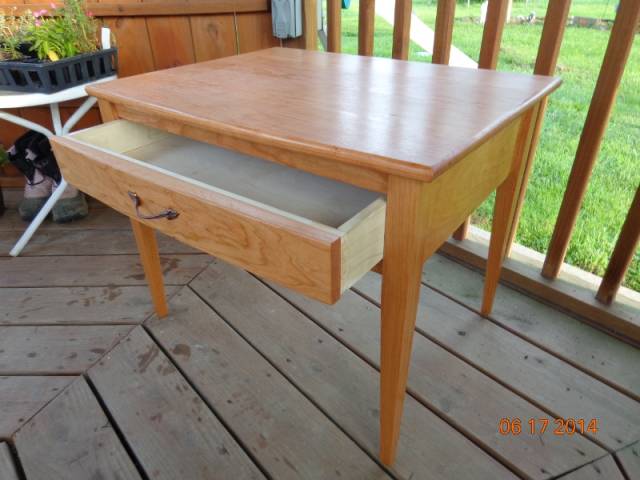
3. WHY is the finish blotchy looking on the top? It looks like CRAP. The aprons came out beautiful, but that top looks like my grand daughter finger painted the dang thing.
4. Before I stained it, I checked to make sure I had sanded away any glue residue. It sure looked good to me…right up until I applied the stain. There are a couple of places on the legs, just below the lower front apron, that sure look like glue marks to me. How can I tell if the glue is really gone? In the future I have resolved to keep a damp rag and bucket of water handy to immediately clean away any squeeze out, but what if I miss some? I sure couldn’t see it there.
Of course the wife thinks it’s the most beautiful thing she’s ever seen, but she’s biased. This is only my second project, but I feel like I let myself down.
Where are the band-aids?---Pro Libertate!

first it came out great.
I wipe with mineral spirit to spot the glue residue and sand.
beware I am bad at finishing, really bad.
Blotching is due to uneven penetration of the stain or finish.
I was told to either thin the finish to 10% or so, apply that, let it dry then apply your stain/finish or use sanding sealer as the base.
Abbas, Castro Valley, CA
Thanks for the tip about the mineral spirits. That, along with wiping away the squeeze out, should solve the glue problem. The more I look at the top, the more I think it’s the wipe on poly that’s blotchy. If you look at the picture of the table top, you can see it. I’m wondering if I didn’t keep enough on the rag. I have some scraps in the shop so I think I’ll experiment and practice some. If I can figure out exactly what went wrong, I’ll sand down the top and try again.
Overall, I’m tickled pink with how the table came out structurally. There were a lot of firsts for me such as mortise and tenon joinery, gluing up the panel for the table top, using a hand plane to curve the drawer front and table top, wooden drawer runners, guides and kickers, and tapering the legs. I tried hand cut dovetails previously during the sewing box project and failed miserably, but this time they are functional enough for a drawer.
Where are the band-aids?---Pro Libertate!

Very nice! I love it!
HorizontalMike
I sanded down my octagonal table about 5 times, then I got fed up and kept the last try on.
Could it be you wipe on poly is getting thicker so you have more drag?
The table came out really well. You do pay attention to details.
Abbas, Castro Valley, CA
When routing it seems important to make shallow passes and move fast enough to avoid burning. The last pass should be very shallow and fast thus removing its own burn marks. Different types of wood seem to burn differently, so doing test pieces might help get the right speed.
If routing by hand, it’s usual to go counter-clockwise around the outer edge. If the surface is curved, the router can bite into grain and cause deformed edges. You might have to route in one direction on one part of the curve and in the other direction on the other side of the curve. It’s tricky.
A spokeshave can easily and safely and quietly and smoothly round over edges. And it’s easier to determine direction of the grain.
Hope this helps.

Good job! This is a very nice piece.
Cherry is notoriously fussy. The stain will almost always come out blotchy, the best cure is sand it to at least 220, then a 50/50 mix of dewaxed shellac and denatured alcohol. This will seal the pores in the wood and make the stain a little lighter but the color will be even. As far as burn marks, Richforever has some great tips, but it sounds like your bit is dull. Take it to get sharpened or buy a new one. Don’t skimp on the bits! Buy the best ones you can find.
Thanks folks. The bit was new, a Bosch. After further investigation and thought, I think the problem may have been using the round-over bit on both sides. I think it caused the bearing to hang. As far as the finish goes, it will have to stay the way it is. The wife absolutely refuses to let me have it back.
Rich, I really want a spokeshave. Using the plane to curve the drawer and table top was very fun and relaxing. I want a lot more planes! If I could find enough planes to replace my router I would be in heaven.
Where are the band-aids?---Pro Libertate!

Try putting a few layers of masking tape on the surface where the Bering touches for the first pass. It’ll burn, then remove the tape and go quicker with the finishing pass. That will remove the burn out but still keep the proper dimension. Try it on some scrap, in particular the end grain and see how you like it for future projects.
CHRIS, Charlottetown PEI Canada. Anytime you can repurpose, reuse, or recycle, everyone wins!
I’ll keep the masking tape idea in mind for next time. I just finished another table yesterday and was going to round the edge over, but time was against me. Yesterday was probably the last day it will be warm enough to finish in the shop. I don’t know if I’ll start another project to tinker on during any “warm” winter days or not. I might just spend the winter designing a few projects in sketch-up and see how that goes. It might be nice to have plans instead of just flying by the seat of my pants like I usually do.
Where are the band-aids?---Pro Libertate!

You say “simple table” but the clean lines and wonderful cherry are what makes it so wonderful.
woodworking classes, custom furniture maker
More from MontyJ