


Share your craft projects
Make new craft buddies
Ask craft questions
Blog your craft journey

RobsCastle
1289 posts
and
24 followers
in over 10 years
in over 10 years
More from RobsCastle


Les Hastings Curved Doors Tutorial 1st result.


OK all built sanded and sealed.
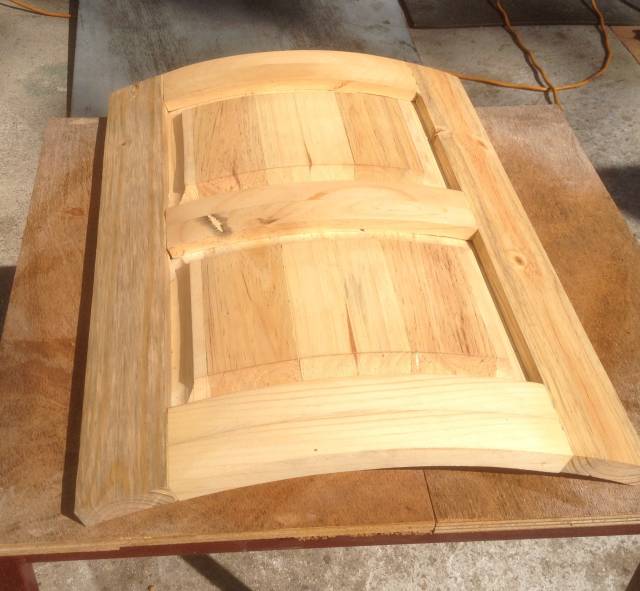
Materials:
All recycled pallet wood, or other “bits” I had lying about. With 1 exception the bendy plywood I used for the back.
Construction Method:
Followed Les’s tutorials with a few minor deviations, otherwise principally as he guided the tutorial posts
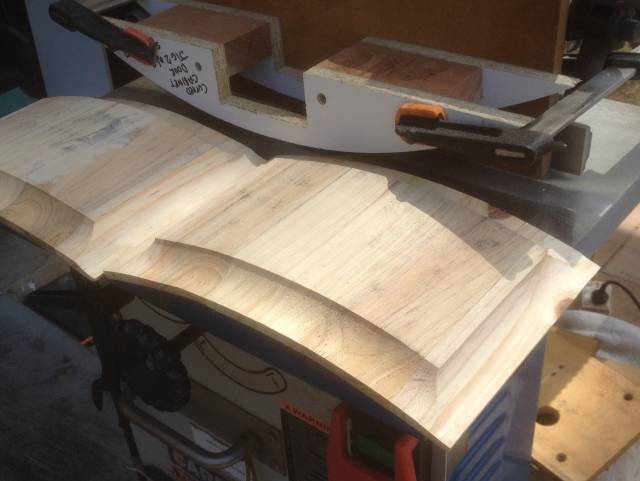
Jigs:
I ended up with quite a few extra jigs mainly to ensure the frame stayed aligned at glueup
I even turned one of the radius jigs upside down to assist routing the panels
Tools required/used:
Layout plan
Bandsaw
Table saw
router/shaper
Clamps
Custom made Jigs.
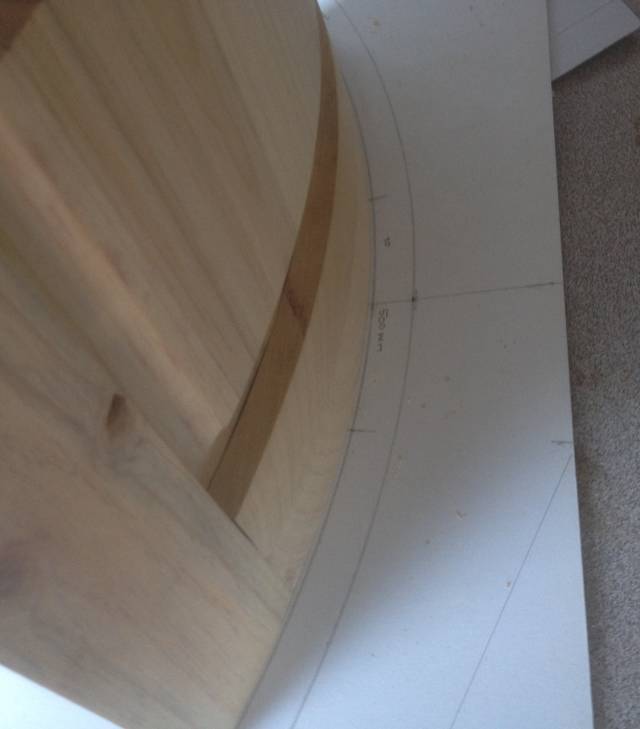
so did it match the plan?…..
Not really a few mm out on the radius.
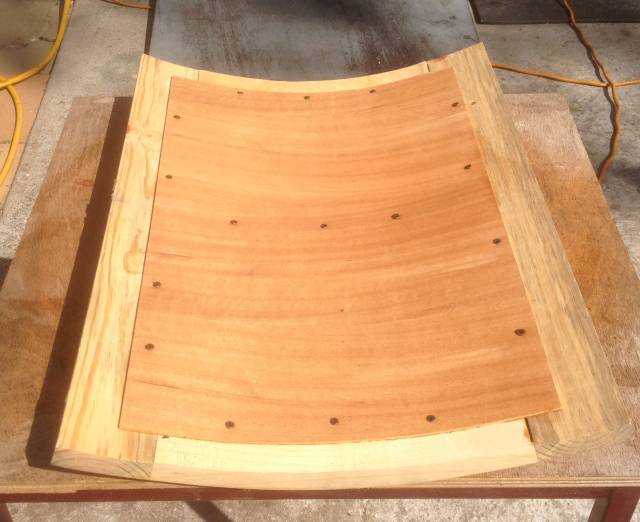
The back.
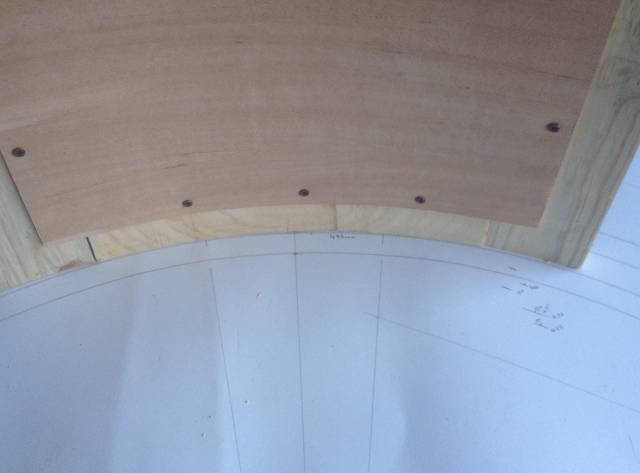
Deviations from the plan:
The panels are fitted by rabbets in the back and a ply cover holding everything in. The stiles were cut on a bandsaw profile routed and then glued together.
Time:
The killer. I took me the best part of 4 days to get to this stage, admitly a second one would be a lot quicker but not enough to make a living out of making curved doors in my mind, unless the sale cost covered the work. I am yet to find out the answer.
Would I do it again?
If for myself: yes if for selling and making a profit: no.
Acknowledgements: Les Hastings for the Tutorial Posts.
enjoy.
Regards Rob
10 Comments

Rob,
I think you did splendidly!! I would also consider four days to be quite speedy considering all the jigs, etc. It would probably take me at least four months!
Thanks for sharing.
L/W
“Those who would give up essential Liberty, to purchase a little temporary Safety, deserve neither Liberty nor Safety.” Benjamin Franklin

Another example of quality workmanship , excellent job .
Wheaties

Looks super Rob nice work
woodworking classes, custom furniture maker
Rob, you did a nice job for your first try at radius doors. I think you would find that the more you do the easier and faster it becomes. I can easily make two doors with a lip mold that holds the panels in from the front side in a weeks time. However that still makes them on the pricey side. Your everyday client would have to really want them. I’m lucky in that for my clients price is not usually not an issue. I’ve made them for a lot of kitchens and furniture pieces as well. I continue to looks for ways to make them faster and easier all the time.
Thanks for giving it a try and for your post.
I'd rather be covered in sawdust

Super good work.
-- Soli Deo gloria! ( To God alone be the Glory)

Thanks for sharing your journey and new knowledge!
Thomas J. Tieffenbacher/aka docSavage45

id say thats pretty impressive. looks like a lot of work just in making the jigs to do it.
working with my hands is a joy,it gives me a sense of fulfillment,somthing so many seek and so few find.-SAM MALOOF.

Nice job there Rob. Next time just take a piece of one of the many empty casks from LBDs yard
Wow its now 2023 and the project and process is attracting a little attention by members here.
Its something I just made as a learning aspect of wood work and never built a Curved cabinet.
The door I made has been disposed off in the give aways when I have had a clean out.
However the jigs from Les's tutorial and some fabricated parts still exist with me today
The Les Hastings tutorial for producing it is actually within Lumberjocks.
I did contact les and he is now enjoying retirement but took the time to tell me where the tutorials lie.
Here is the link to the Les Hastings tutorial
regards
Robert
Regards Rob
Great work my Aussie friend. Don’t be discouraged by a condescending person who said. “Thanks for giving it a try.”
You not only gave it a try you nailed it!
I don’t think I’ll ever want to build a curved door since my Bailey wick is Art's & Crafts and G & G
I sure do appreciate your link to Les H’s plans.
You not only gave it a try you nailed it!
I don’t think I’ll ever want to build a curved door since my Bailey wick is Art's & Crafts and G & G
I sure do appreciate your link to Les H’s plans.
James McIntyre
More from RobsCastle