


Share your craft projects
Make new craft buddies
Ask craft questions
Blog your craft journey

Mike40
1078 posts
and
35 followers
in over 11 years
in over 11 years
Horn Speakers #3: Cutting the Wedges to fit the pattern
This is
part 3
in a
4 part
series:
Horn Speakers
-
Time for the rubber to hit the road
-
Cutting the Wedges to fit the pattern
-
Marking and More Cutting
- Time for the rubber to hit the road
- Cutting the Wedges to fit the pattern
- Marking and More Cutting
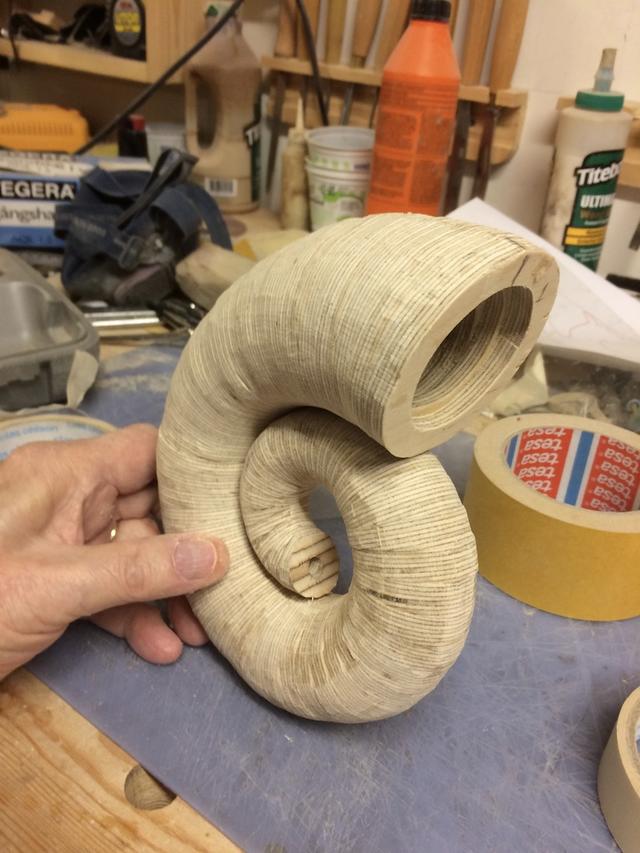
Here is a teaser so you can get an idea of the size of the horns. Keep in mind that there will be trumpet like ends attached to the horns. I will be making these ends with plywood rings similar to segmented turnings and turn them on my lathe.
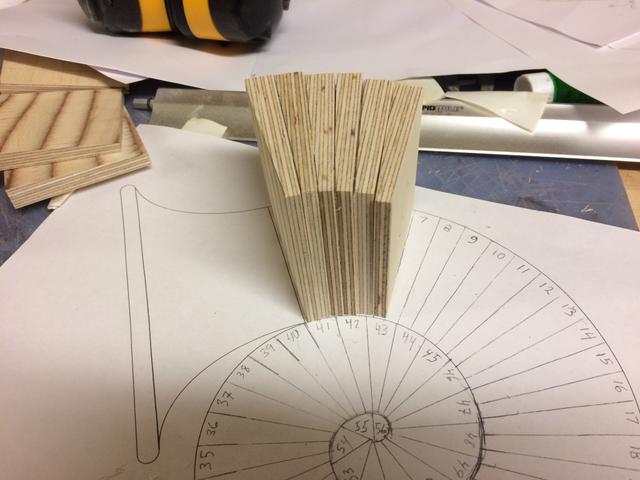
Once the individual segments were cut, they needed to be cut into wedges so that they would form the curl in the horns. The outside thickness (or top) of the segment squares would remain the same. The inside edge, (or bottom) of each square would vary from about 3mm or 3/32" to 5mm or slightly less than 1/4".
Perhaps the biggest challenge of the whole project was finding a way to cut these wedges dead accurate leaving a very flat surface on the cut side that would glue-up without any gaps. The dimensions were taken directly from the pattern for each segment as shown below.
After several failures I finally came up with a procedure that worked. This required the following:
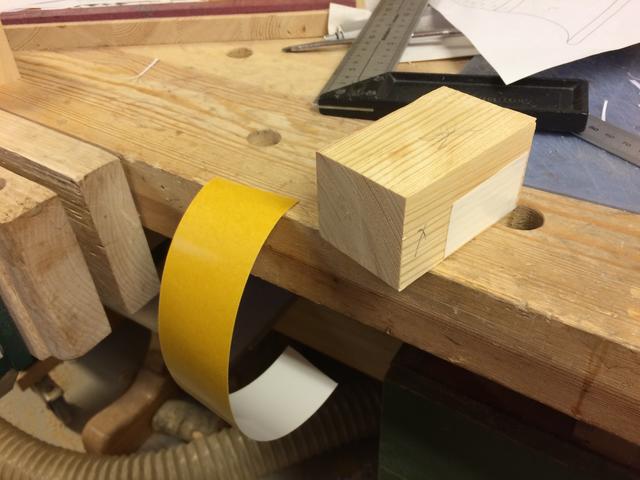
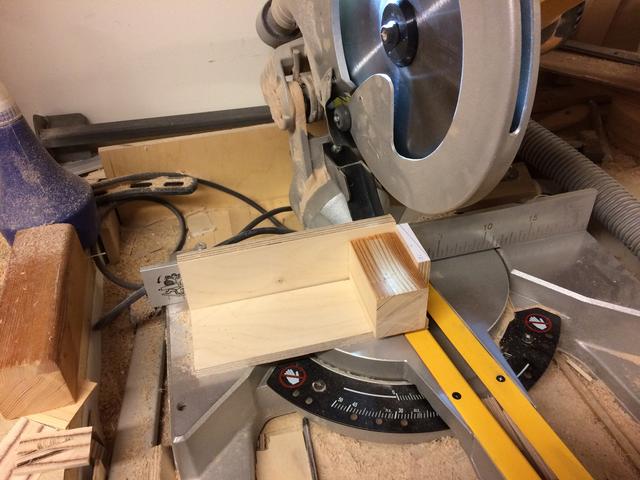
- A clearly marked cut line. This was accomplished by gluing white paper to the top of each square before marking. 1st photo below
- A hefty woodblock to manually hold the workpieces firmly against the miter saw fence. Each workpiece was stuck to the woodblock with double sided tape. I was able to cut two wedges with one piece of tape before replacing with fresh tape 2nd and 3rd photo below
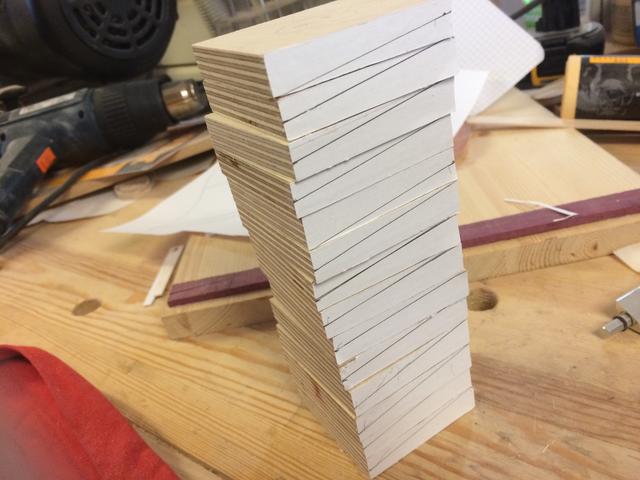
After cutting all the wedges they looked like this photo below

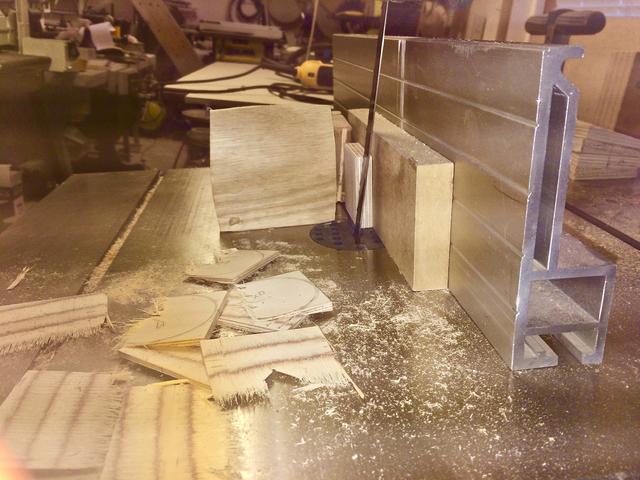
I ran into a lot of problems cutting these wedges before coming up with procedure outlined above. I tried several methods of cutting them which failed. I first tried to do it with my bandsaw because I couldn’t come up with a safe way to hold the on-edge workpieces in the miter saw. The cuts were not perfectly flat or particularly accurate and the changing angles required continual adjustment to the table angle, which is not the easiest to do with my bandsaw. Here is a picture of that failed set-up below
The other problem was making a clearly marked cut-line which was eventually solved with the papered edges.
My next blog in this series will cover additional necessary markings, cutting to round on the scroll saw and glue-up.
Thank you for following along. Please let me know if have any questions or need to clear up any of my wordy explanations. You may have better ways to do some of the operations outlined above and if you do please share them.
Mike, an American living in Norway
7 Comments

Great work Mike you are an amazing craftsman and work out so very challenging technical issues and techniques. I’m looking forward to the next installment of your blog.
Merry Christmas My friend
woodworking classes, custom furniture maker
Thanks Jim and Merry Christmas to you and your family too. The next installment is tomorrow.
Mike, an American living in Norway
This is a great project! Simply, a great project….
I’ve been intrigued by B&W’s Nautilus speakers… being a bit of a Fibonacci sequence/Golden ratio fan. I wouldn’t have known how to start this, let alone execute the damn thing…
I look forward to updates.
MJCD

Mike,
Nice to see how you came up with a safe way to cut those angles. I was certainly pondering the loss of fingers!
L/W
“Those who would give up essential Liberty, to purchase a little temporary Safety, deserve neither Liberty nor Safety.” Benjamin Franklin
*L/W exactly my thoughts and the reason why tried a bandsaw solution before coming up with a way to use the miter saw. I say this in spite of the fact that the only two times I have injured myself in the shop during the last 22 years were both done on the bandsaw (many years ago).
Mike, an American living in Norway

This is a really cool project. Looks like its going to keep you busy for a WHILE… Although you’re making a lot of progress.
Losing fingers since 1969
Thanks Brian I still have a ways to go, but mostly sanding (uh).
Mike, an American living in Norway