


Share your craft projects
Make new craft buddies
Ask craft questions
Blog your craft journey

Mike40
1074 posts
and
35 followers
in about 12 years
in about 12 years
LEARNING MARQUETRY SKILLS #1: Chevalet marquetry 101
This is
part 1
in a
1 part
series:
LEARNING MARQUETRY SKILLS
-
Chevalet marquetry 101
- Chevalet marquetry 101
WARNING, LONG AND POTENTIALLY VERY BORING BLOG!
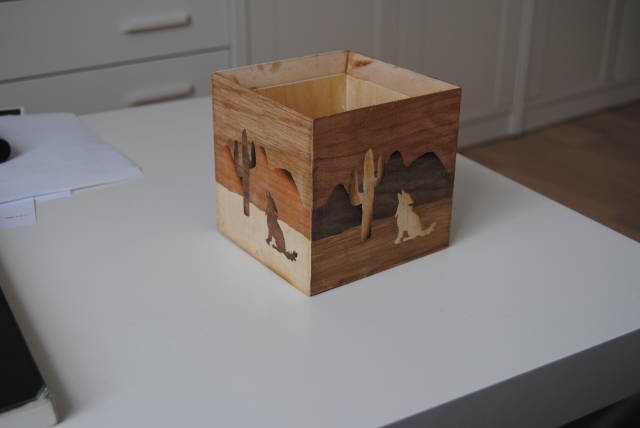
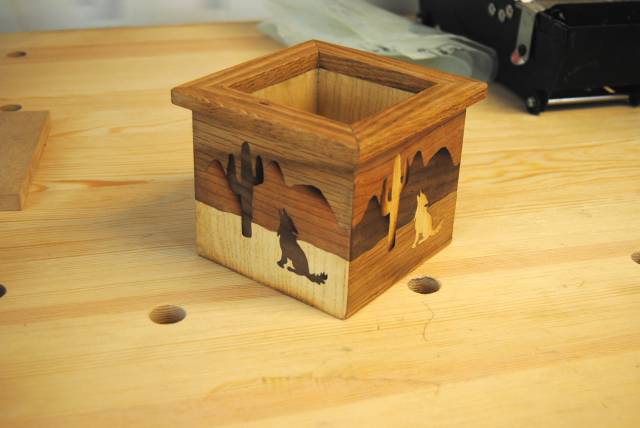
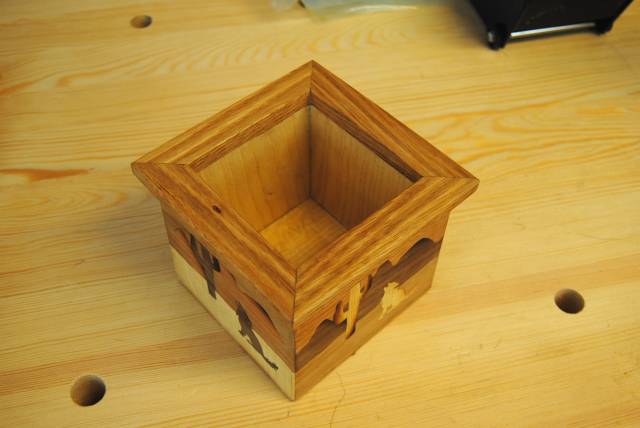
Shortly after finishing my Chevalet Paul aka Shipwright asked me if I would be interested in doing a little project where I could learn a few basic marquetry skills and use my Chevy to do the cutting with. I think he knew that I was a little worried about working with thin veneers and he thought this would help me get started. The only serious marquetry I have done prior to this was my chinese dragon cut from solid wood about 5mm thick which you can see Here. I was kind of proud of it, but it was a road to nowhere because using solid wood is very expensive and you can’t get the hundreds of different species available as veneers which are necessary to create more complex marquetry works. Here is the completed project and some other pictures taken underway. You can see that I unwittingly mitred the tops of the box sides. I guess I got carried away. Anyway that explains why the finish box has a much reduced height to the sky. Another error was that the grain of the 4 motif veneer was supposed to run in the same direction, but I got one wrong anyway. I’m not too worried about it.
My purpose for blogging this is not to brag about my work shown here, but rather to catch the interest of those who are sitting on the fence trying to decide if they want to give marquetry work a whirl. I am hoping this will take away some of the fear of the unknown and maybe encourage them to go for it. I am trying to convey my own doubts and subsequent learning experiences. This is not a how to blog. I have just done the best I could with whatever skills I possess at this time. I think you will see here that you don’t need to be and expert or have all the answers to get an acceptable result.
Chevalet Marquetry 101 (can also be done using a scroll saw)
The project Paul gave me seemed real simple, actually more simple than what I was thinking about to start with. But after thinking it over i realised that there were a lot of elements involved that I had never tried before and knew nothing about. Here is the work that was involved.
- Preparation of veneers (4 in this case)
- Sharpening a veneer saw
- Cutting veneers to rough size (oversize)
- Making up a marquetry packet for cutting (could also be done on a scroll saw)
- Cutting on the Chevy
- Sand shading
- Hammer veneering using hot hide glue
*Gluing the marquetry motif
Here is my personal experience with the different stages of this beginner project listed above.
Preparation of veneers (4 in this case)
In this case I cut them to size first, but details later. After cutting I used hot hide glue to glue white paper on the back of each of the 4 motif veneers for the outside a the project box. This is done to reinforce the veneer so it wouldn’t shatter while sawing. The other 4 veneers were left plain.
Sharpening a veneer saw
Before cutting the veneer to the rough size I first had to sharpen and tune up my new veneer saw. I learned to do this from a great video. I followed the instructions and got a great result. Here it is.
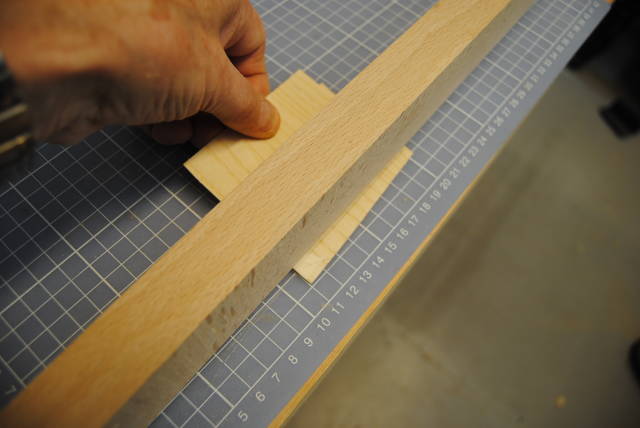
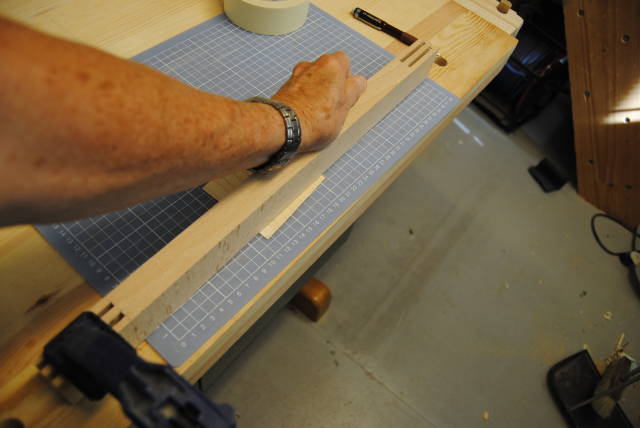
Cutting veneers
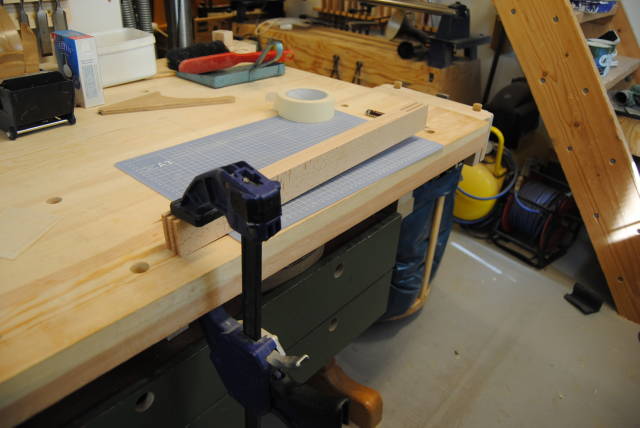
I used a self healing cutting matt and a hardwood fence to guide the cuts with my veneer saw. As you can see I clamped one end of the fence to my bench and holding the veneer in my left hand to position it under the fence at the cut line. I then put downward pressure on the other end of the fence temporarily until I could hold it down with my left and and saw with my right hand. This was very easy and accurate. I did have a problem on the first cross grain cut with blow out at the end of the cut. I solved that problem by putting a small piece of masking tape around the edge where the cut exits. You can see the tape if you squint.
Patrick Edwards says he doesn’t like veneer saws with round and offset handles which are awkward to cut with and which also have exposed row of teeth on the top edge of the blade which can cut your other hand resting on the fence if you aren’t careful. I totally agree with him, but I can’t justify the $100 cost for the one he likes just now, so I will just have to use the one I have. It works fine, but yes, it is a little clumsy.
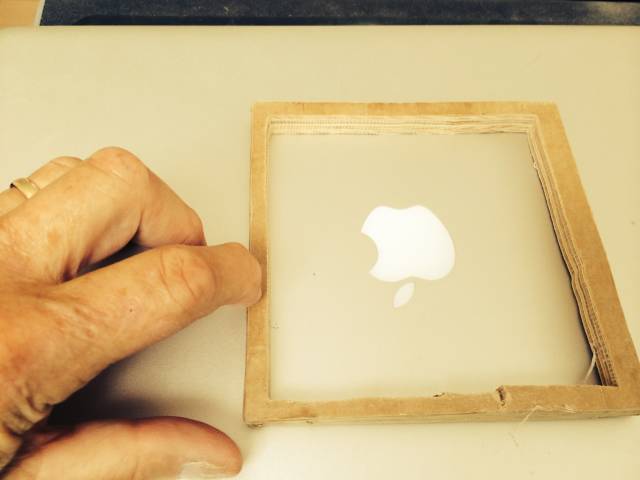
Making up a marquetry packet for cutting (could also be done on a scroll saw)
I followed Paul’s instructions here. You don’t have to reverse the top veneer for this project. after putting the packet together as shown sandwich the 4 motif veneers between a top and bottom sheet of 1/8" plywood before taping all around the edges. This made for a well compacted and stable packet to be cut on the chevy. Here is pic of packet after I cut the marquetry out.
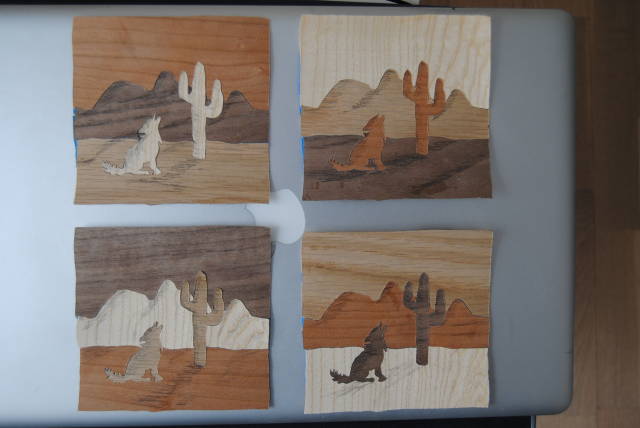
Cutting on the Chevy Paul has posted some demo videos showing this that you can look up. Here is what my marquetry looked like after assembling just after cutting it out.
Sand shading
This didn’t go so well for me. I did learn to only use perhaps a 1" thick layer of sand instead of the 3 or 4 inches I actually used. The result was shading is place I didn’t want and not shading where I wanted. I did find out beforehand that the paper on the back of the veneer doesn’t cause any problem and the shading is the same as for the un-papered side afterward. When removed from the hot sand the pieces curled up like potato chips. To counter the effect I immediately remoisturized them by stroking a little water on them with my finger and then placed them between a couple of clamped Melamine platers to reflatten them. That part went well.
Hammer veneering using hot hide glue
The insides and bottom of the box were hammer veneered onto the oversized mdf substrate with hot hide glue prior to cutting the box to final dimensions. Instead of a regular veneer hammer I use the paint scraper shown below. I removed the blade and filed the business end round and smooth. Everything went extremely well. Not a surprise since these were very small pieces. The knob on my makeshift veneer hammer (suggested by Paul) made it easy to apply good pressure while squeezing out the excess glue
Gluing the marquetry motif to the box sides
I assemble all 4 marquetry picture and then I taped over the paper reinforced side with veneer tape to hold the cut pieces together for gluing to the box sides. The papered/taped side is the face side while the other side gets glued to the substrate. I then spread hot hide glue on the bare box sides and centred the marquetry motifs on the box sides.
The 4 box sides were then placed in my shop made veneer press shown below. I first placed a sheet plastic onto the lower caul then the box sides with the marquetry motifs up, then a piece of baking paper to prevent glue squeeze out from getting onto the upper caul and lastly three layers of felt padding to even out the pressure. I left it overnight and it came out perfect.
This was a great learning experience for me and I now have a pencil pot for the shop and a reminder of the fun I had making it. Many thanks to Paul aka Shipwright for suggesting this to me and also supplying me with the line drawing of the motif and the advice contained in his photos.
Mike, an American living in Norway
7 Comments

That dragon was my most favorite!
It came out really good. I like you press.
One of these days I will take the plunge.
Abbas, Castro Valley, CA

It looks great Mike and the pleasure was all mine.
This is the sixth (or maybe seventh) time this little motif has been cut. I use it to teach a quick class to about anyone who wants to learn.
Don’t worry too much about the sand shading not working out the first time. I find it about the most illusive of the marquetry related skills.
It’s a fine little pencil box and it brings a big smile to my face to think that my little coyote has found a home in Norway.
The sky’s the limit now Mike.
The early bird gets the worm but its the second mouse that gets the cheese.
Thanks Paul for your help getting me going. Now I have to figure out what I want to make and put marquetry on and also to decide what marquetry designs to try next. I can’t wait for Fall so I can get started, but first I have to attend my son’s wedding in Sweden next week and then some more garden chores.
Mike, an American living in Norway
You know, when I first saw some of Paul’s work I imagined him painstakingly cutting all of those little pieces with an exacto knife and a magnifying glass. (Something I am unable to do) Now, after seeing his videos of the chevalet, and also what you have done, I’m re-thinking this adventure. Perhaps my shaky hands aren’t a death sentence to my marquetry dreams after all.
Where are the band-aids?---Pro Libertate!
Hi Mike
It is nice to see you putting the CHEVY into action and giving us a good insight into your tool set and approach to this discipline of woodworking .
I always enjoy this type of blog as it helps to find alternatives to tools available and ways of approaching the way to accomplish the task .
One day I will try this and get Pauls help but right now I will be like the motif and howl at the moon .
Klaus

Love the blog, Mike! Thanks for sharing it here.
Marquetry Awards in Fall? :)
Martin Sojka, Maker of Craftisian
I’ll be happy just to get a marquetry done Martin, any awards work might be above my head, but I wouldn’t mind trying if I get the time. I don’t have a day job, but I am awfully slow these days.
Mike, an American living in Norway