


Share your craft projects
Make new craft buddies
Ask craft questions
Blog your craft journey

shipwright
2073 posts
and
113 followers
in over 12 years
in over 12 years
Shipyard Memories #16: Boring Bars and Custom Castings
This is
part 16
in a
22 part
series:
Shipyard Memories
One of the interesting tools that find a regular use in building boats is the boring bar. After the hull is finished and the time comes to install the engine and associated equipment one of the first jobs is to install the stern tube, the passage through which the shaft will penetrate the hull. It must be perfectly aligned with the output shaft of the engine but often must be drilled at an oblique angle to the skin of the hull. This challenge is overcome with a boring bar. It is simply a piece of bar of sufficient diameter to maintain stiffness over the required length but still be narrow enough to be significantly smaller than the required hole. A hole is drilled transversely through the bar near it's center and an adjustable fly cutter is installed and locked in place by a grub screw. One end of the bar is then turned down to fit in a drill chuck.
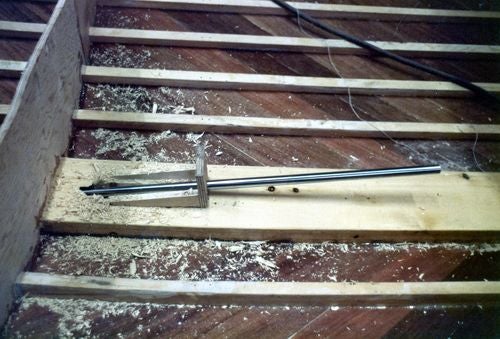
The boring bar being used here is 1" dia. stainless steel about eight feet long. After hacking a rough hole big enough to pass the bar through, bearings are set up inside and out as close to the eventual shaft line as the rough hole will allow. A few passes with the fly cutter will allow the bearings to be moved closer and soon they can be set up exactly on the shaft line with a string stretched from the center of the engine output to the center of the propeller position. These bearings are usually just holes in blocks of wood but they serve just fine.
Once the bearings are in final position inside and out the bar is re-inserted and the cutter is advanced slowly in fine cuts until the desired diameter is reached. The photo below shows the the bar and the inside bearing position in Olfara. You can even see the string that was used to set up the bearings.
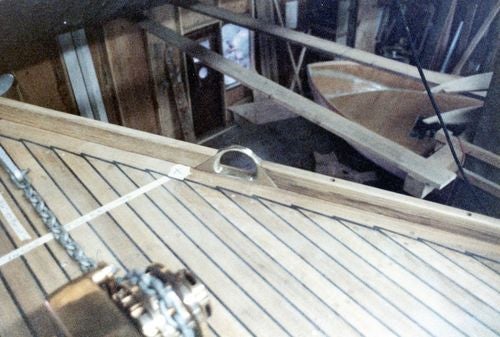
This is the outside position. It's a very simple setup but would be difficult to do any other way.

Once the hole is cut the shaft tube(stern tube) is glued in place with epoxy and the shaft and it's water sealing gland are fitted. In this case the tube was ABS pipe and had no bearing in it. The outer bearing was in a cast bronze strut and the sealing gland was on the bronze casting you can see here. This shaft is aligned to the thrust bearing of a constant velocity drive that isolates the boat from engine vibrations and the shaft from minor misalignment from engine vibration. It’s a very sweet system.

Another way this can be done is with a bronze tube with the stern bearing installed in it's outer end and the gland mounted directly on the inner end. This photo is of the inside shaft tube in Friendship.

When building custom yachts , you can't always find all the hardware you'd like to use. I used to make patterns and send them to a foundry in Vancouver and get castings done in aluminium bronze. This is a toe rail chock that I designed for Olfara. It's advantages are that it is closed so that your line won't slip out of it if you're rafted next to a higher vessel or dock, but the hole is big enough to pass your hand through with a line. Sailors will understand the advantage. There are mortises in the ends to accept the toe rail tenon ends and fit the toe rail flush and fair.
This one is a double headstay + anchor roller casting for Olfara. Two headstays can be an advantage at sea, particularly for running with twin headsails, but even just for redundancy.

This one is a backstay tensioning lever. For the non-sailors an over center type tightener sort of like the chain tighteners truckers use except for sailing. I managed to get my company name on this one.

The last one I have a photo of is this custom stanchion base for the lifelines , again on Olfara. It's not easy to find something off the shelf that fits the angles and style of a custom boat and if you make do with the store bought parts and make adjustments to account for them it always shows.

I guess that's it for tonight. Next time I'll show some finished shots and the few sailimg photos I have of these boats.
Thanks for following and keep the questions coming. I'm happy to answer them.
Paul
The early bird gets the worm but its the second mouse that gets the cheese.
1 Comment

Great write up Paul. Thanks for taking Us on this Journey.
Main Street to the Mountains