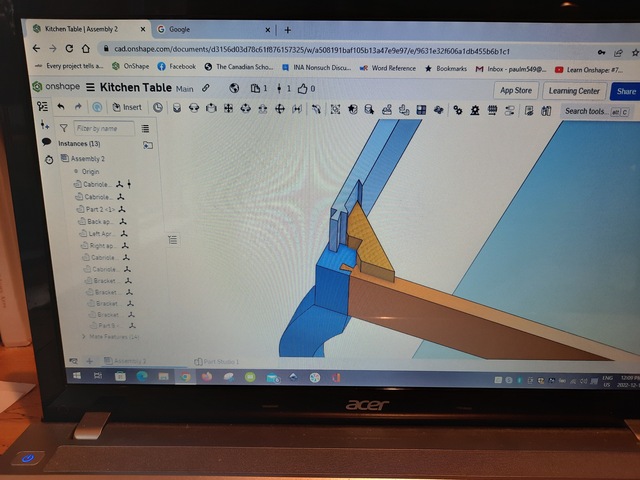
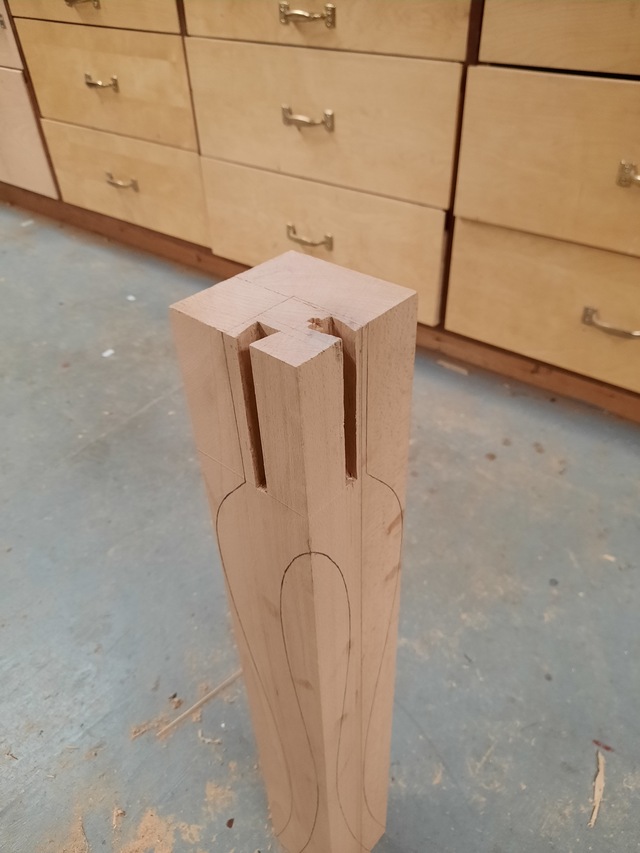
This year’s winter project is a new kitchen table. The beater we have is having trouble living next to the new dog food cabinet beside it. Our whole house is French country themed and the table must fit in so elegant cabriole legs were a must. However I don’t like to draw cabriole legs in 2D and hope they look good. To me they need to be designed from the get-go in 3D and as my 2017 Sketchup was dying a thousand deaths I decided to try a new CAD program. After a couple of less than satisfying tries some fellow Craftisians pointed me to OnShape and the rest is history. The learning curve was not bad and the general process seemed to suit me (right brain) much better than Sketchup ever did. I wanted to play with some cool joinery so I decided on the apron/leg joint shown in this OnShape pic.
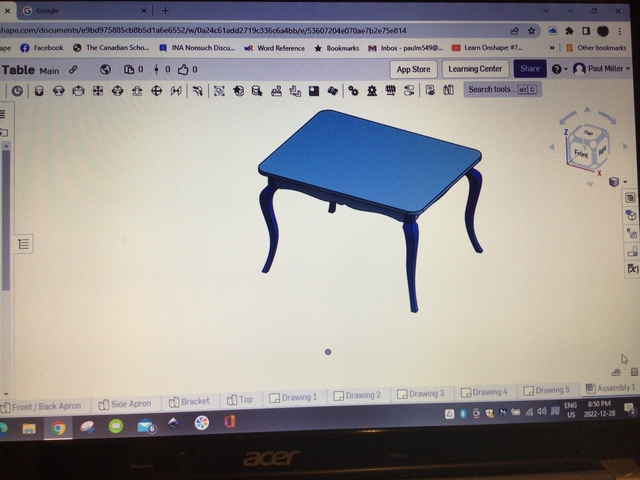
A little tweaking on the leg and apron design led to this final design.
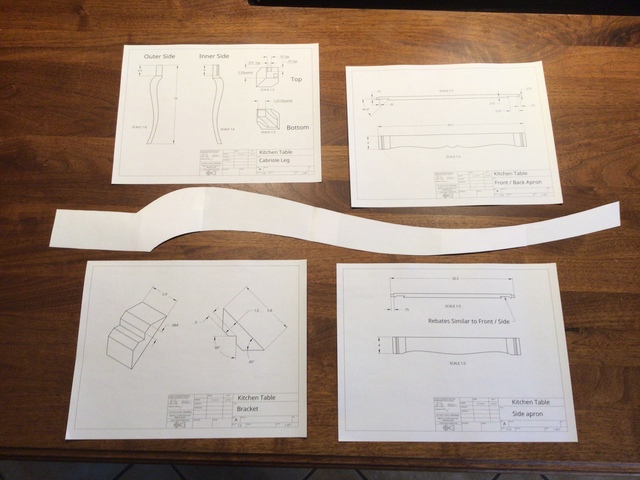
One of the great things about OnShape is that it makes working drawings and patterns a snap.
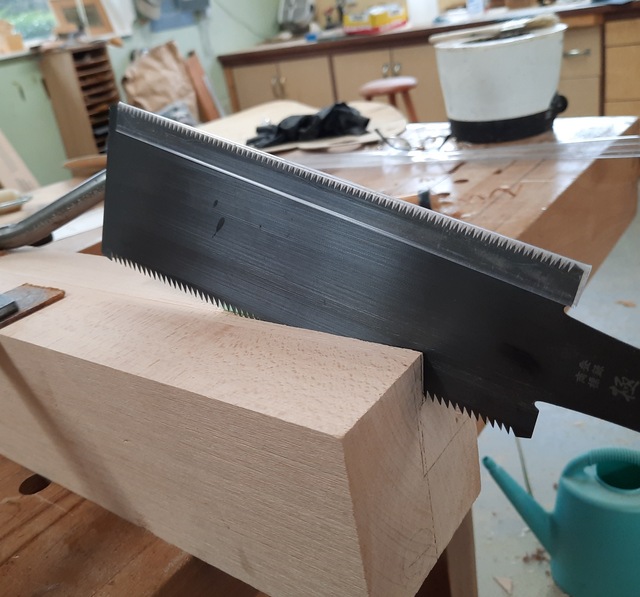
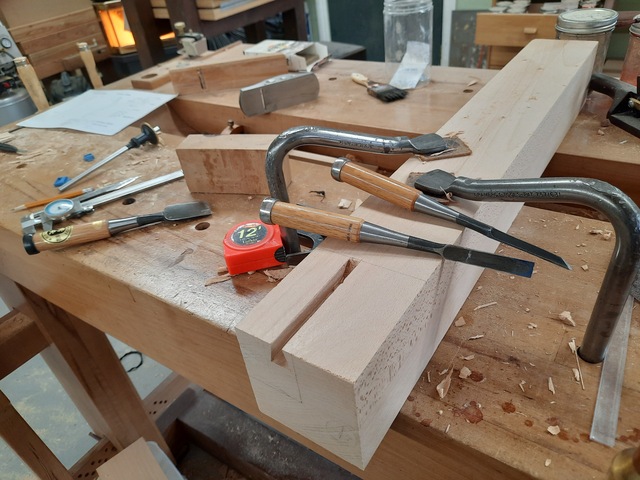
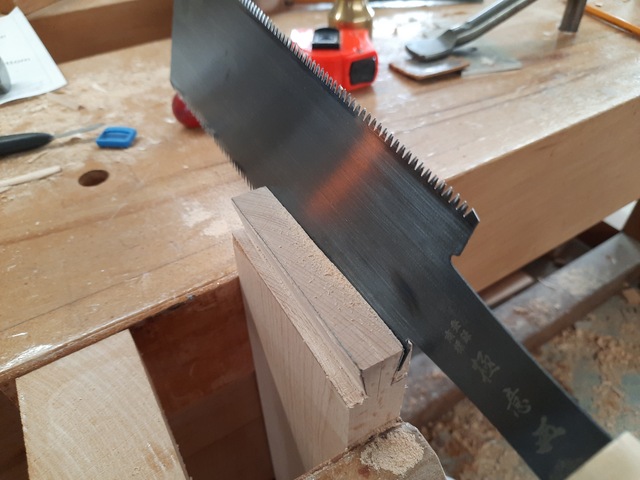
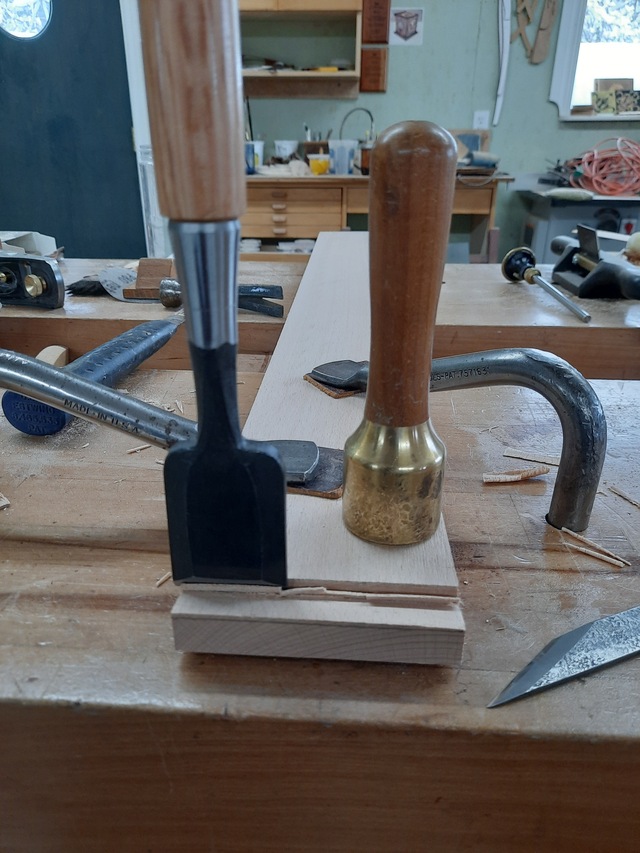
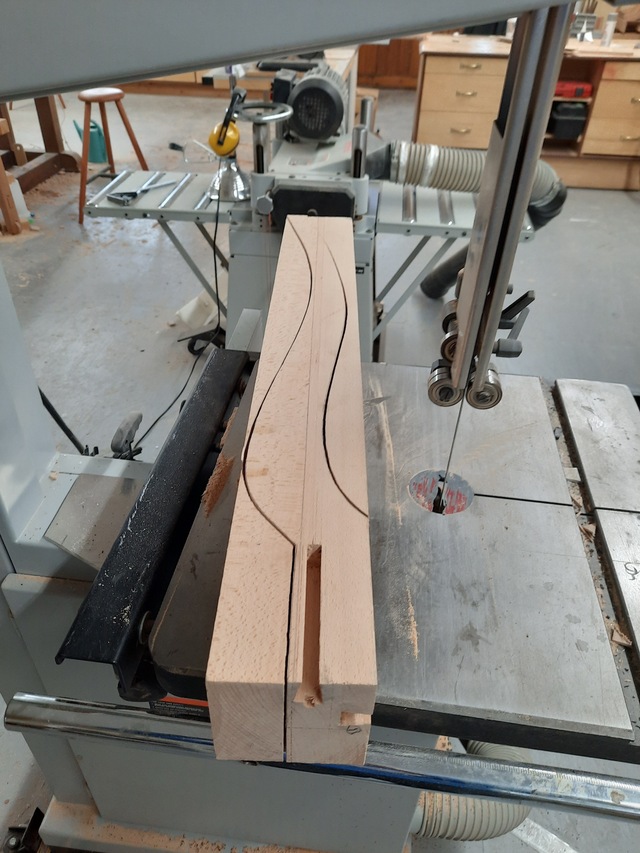
While hand cutting the joinery was a challenge and a satisfying pastime, to be honest I did less than half by hand before getting the process in gear with the mortiser and table saw. I did do enough to prove that I could and satisfy my need for meeting the challenge however so here are some shots of the “slower way”.
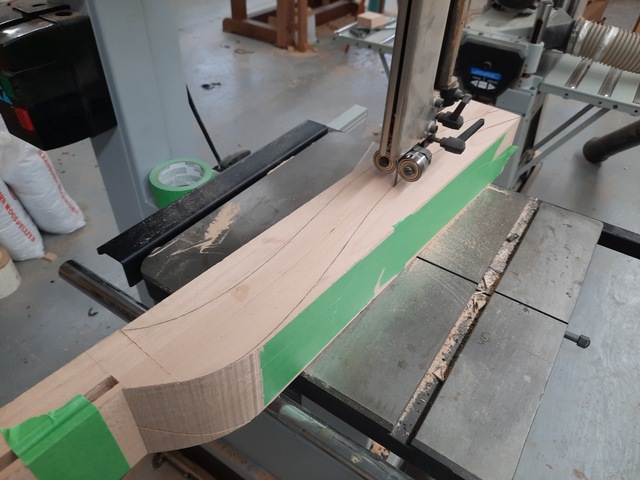
Then it was on to cutting the legs.
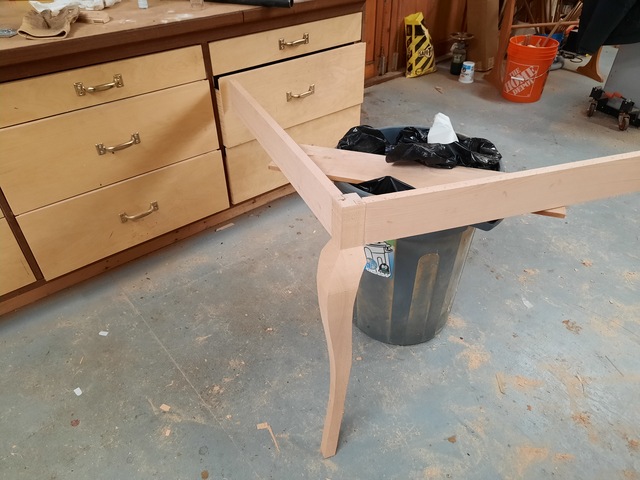
…and running a trial fit
…. before final glue up
The structural wood is Beech but it will all be veneered with walnut to match our general decor. The glue is liquid hide (Old Brown Glue).
That’s how far I’ve come so far. I’ll post again when the veneering gets done.
Thanks for looking
Paul
The early bird gets the worm but its the second mouse that gets the cheese.
Dang. You work fast. Seems like you just started learning OnShape a couple of weeks ago.
I don't think I have ever seen a corner brace attached that way. I will have to remember that approach, if I ever get the guts to attempt something like that.
--Nathan, TX. Hire the lazy man. He may not do as much work but that's because he will find a better way.
I’ve been going down the Japanese joinery rabbit hole lately. In all fairness a simple mortise and tenon would be just as good here. This is the one I used here.
The early bird gets the worm but its the second mouse that gets the cheese.
OnShape is much easier to learn than F360, IMO but if you already know SU and are not having problems with it, it is probably not worth switching just for the sake of switching. OnShape has some great tutorials/lesson that made it very quick to learn. At the end of each lesson, you can download a hands on exercise that drives that lessons topics home. very well done. I started using it mostly because SU is terrible for 3D printing and not great for CNC either. For the work that you do Bentlyj and your familiarity with it, it may not save you any time. One nice thing about OnShape is that it is free as long you do not mind your designs being stored in the cloud and public.
--Nathan, TX. Hire the lazy man. He may not do as much work but that's because he will find a better way.
My main reason for learning it was to be able to tweak my Cabriole leg and see it in 3D. The rest is fun but I never follow drawings when I’m actually building. 😅
The early bird gets the worm but its the second mouse that gets the cheese.
Not that you had any problem putting in the corner blocks, they looked a little tight when you pounded them in, (solid) Just wondering if you had loosened up the clamp on the other side if that would have let them in easier, then tighten up the clamp afterwards.
Actually the clamps were just sitting there loose, waiting to be tightened after all four legs were done. They would not make much difference though. The blocks are tight because the sliding dovetails lock the leg to the aprons. Hide glue is a great lubricant but getting them started (on camera) is tricky.😉
The early bird gets the worm but its the second mouse that gets the cheese.