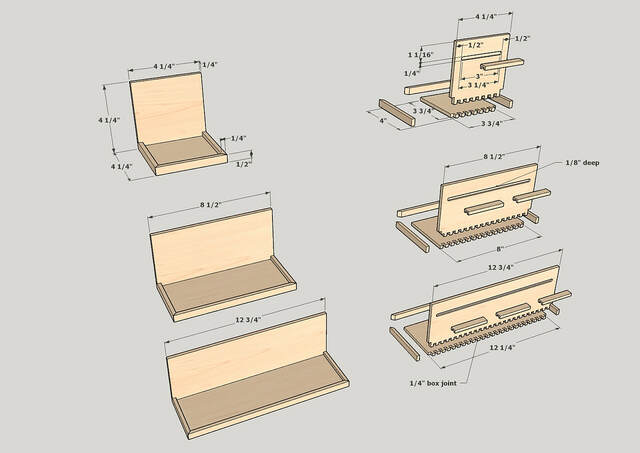
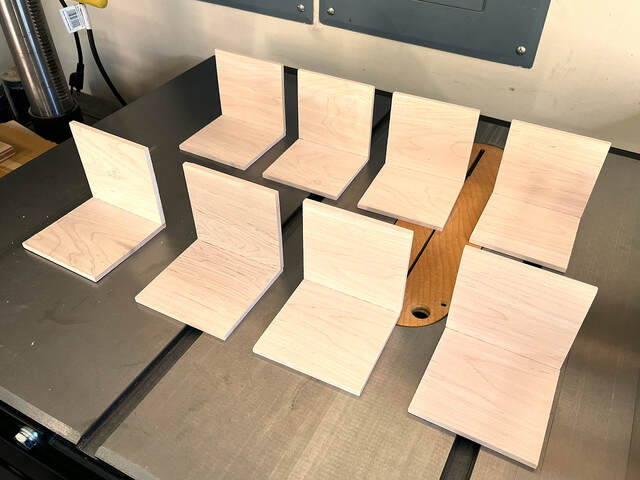
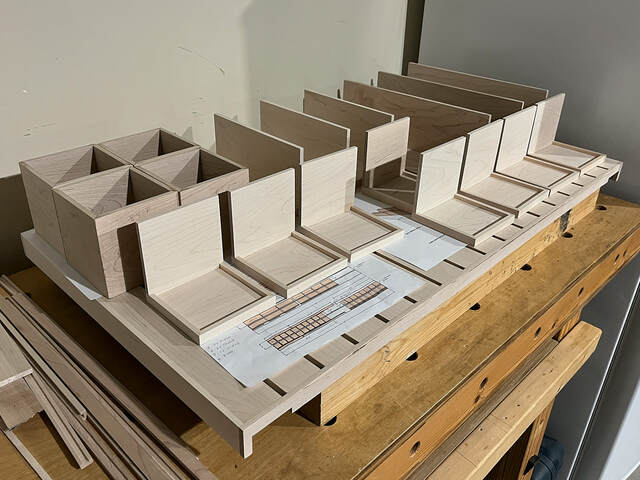
The L-shaped shelves are a bit more complicated than the boxes. Each consists of five parts (not counting the hangers) that must fit precisely. A mitered lip runs about the perimeter.
The L-shape is unbraced (potentially fragile), so I decided to use box joints for strength. I bought a Porter Cable dovetail jig a while back for a different project, and I opted for the deluxe kit that included a mini (1/4") box joint template. This project gave me an opportunity to use it for the first time.
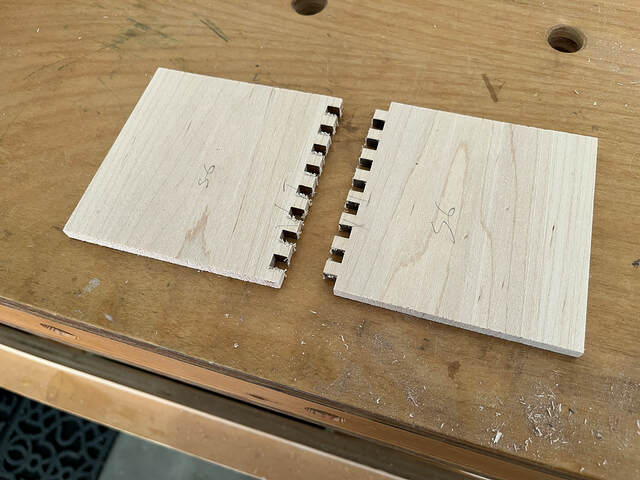
My results with the jig were mixed. The fingers showed some “hairiness” and burning, but the bigger problem was that they were too tight. I don’t know if the problem was my bit (whose diameter is very slightly less than 1/4"--somewhere around 0.247”), a slightly off-center guide bushing, my routing technique, or something else. I also had a hard time clamping the stock to the jig. The jig is designed to work the ends of longer stock (like drawer sides), not short 4 1/4" pieces, so I had to improvise and use scraps as clamping aids.
To clean and loosen the joints, I wrapped some 150-grit sandpaper around a narrow rectangular scrap piece and sanded the interior faces of every finger. Sanding just enough to remove the burning seemed to do the trick. (At this point, I started to regret my decision to make such a large set of shelves. I don’t remember the exact number, but I think there were around 500 fingers across all the shelves. Sanding took a long time.)
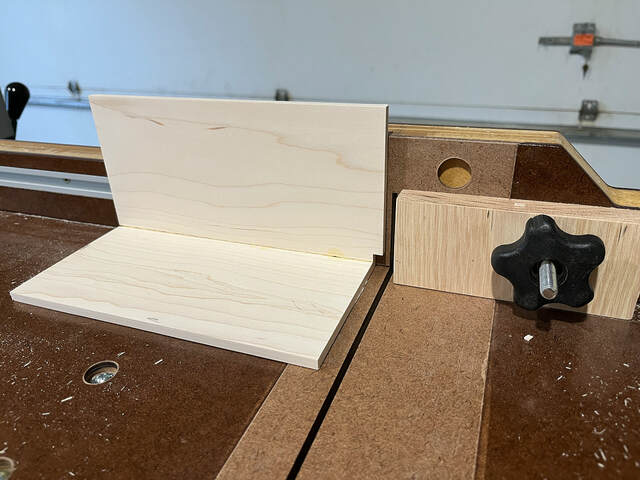
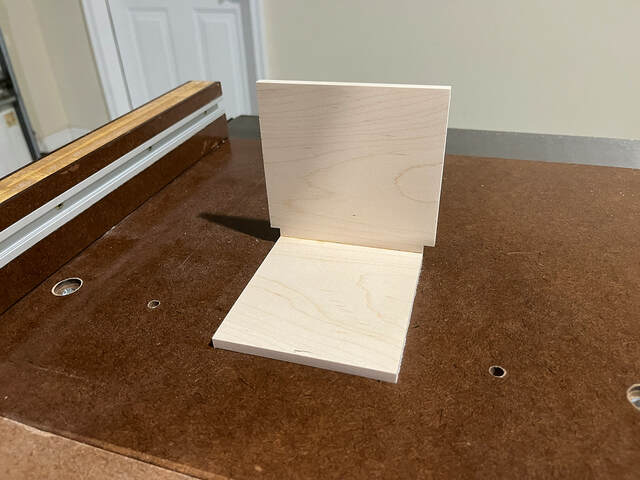
A test fit showed that the single-width shelves fit together well.
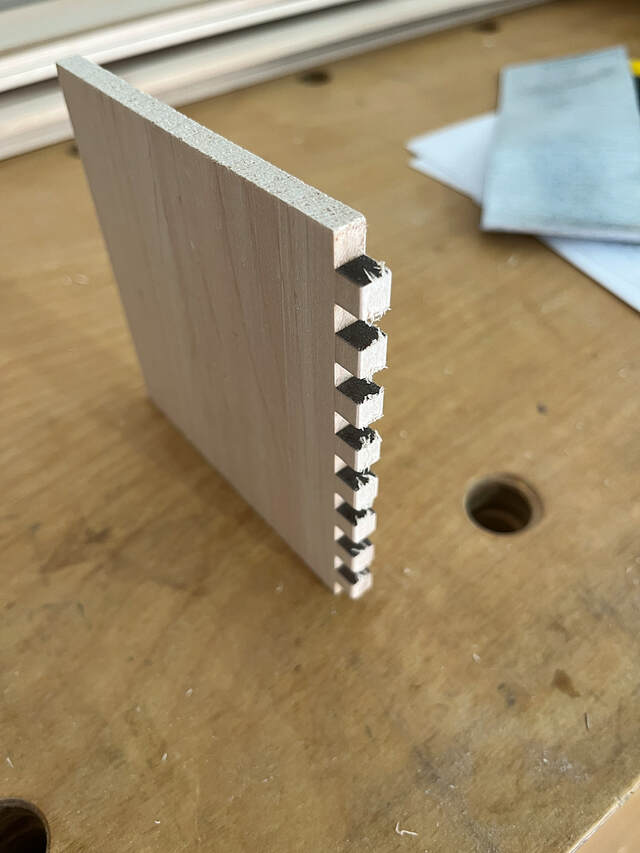
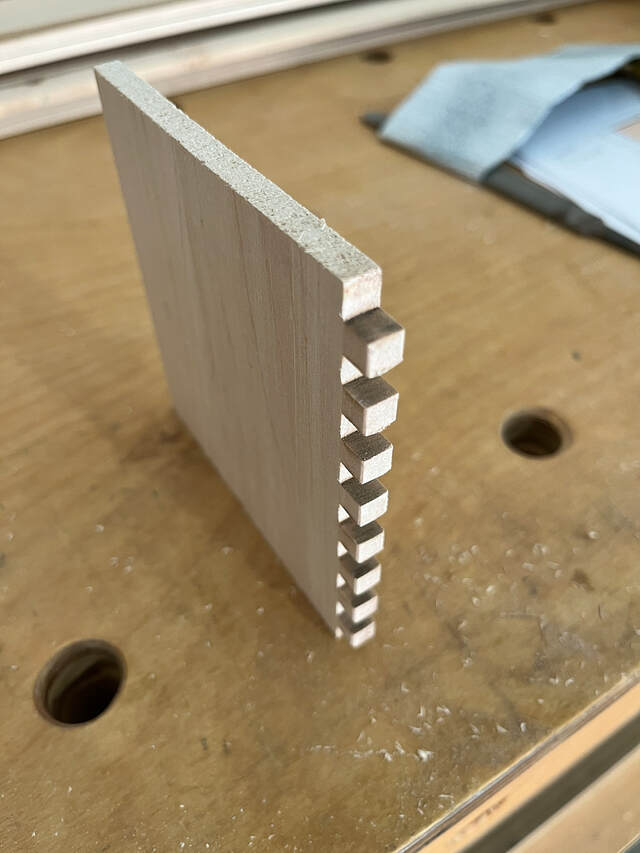
Test fits of the wider shelves were okay, but not as good. Some of the joints showed small gaps that looked like stitching. I had to do more sanding on these longer shelves, resulting in some rounding on the edges of the fingers. In the end, some of these shelves have what I would call “boxish” joints.
If I use box joints again, I’ll practice more with the PC jig, or maybe I’ll build a simple table saw jig with some adjustability so I can fine tune the joints and skip all the sanding.
Prior to gluing the two parts of each shelf together, I sanded all the the interior faces down to 180 grit.
When I glued the narrow shelves together, I carefully brushed glue into the sides of the fingers. One thing I noticed right away was that the joints were basically self-clamping—once I pushed the glued joint together, it was pretty much stuck. If I moved quickly, I could adjust the angle between the two pieces to make sure they were perpendicular.
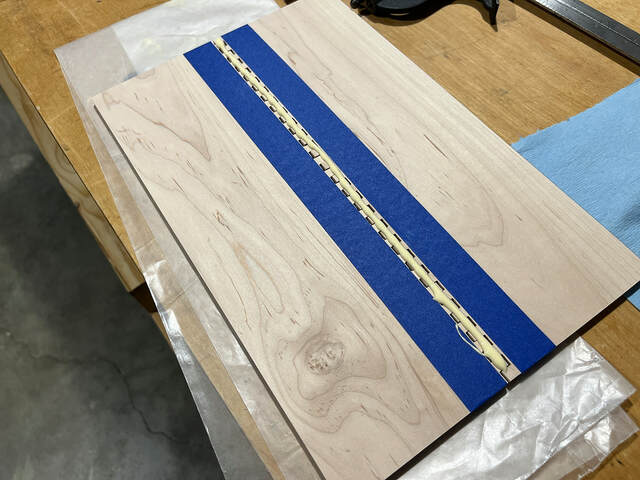
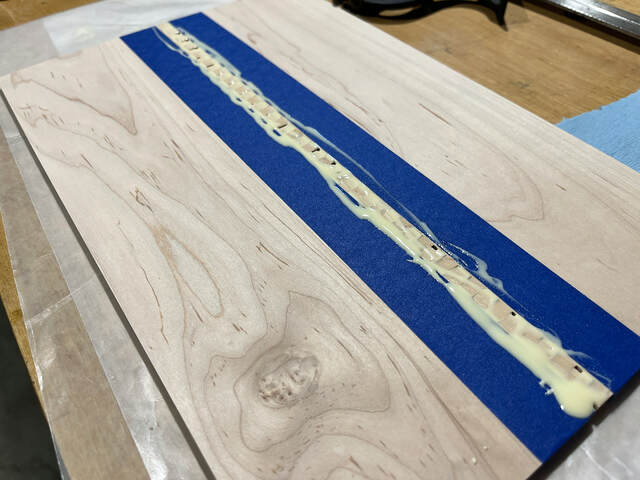
By the time I got to the widest shelves, I realized that brushing glue on each finger was going to take forever, so I tried a shortcut. I masked off the fingers with tape, partially closed the joint with the two pieces flat on my bench, ran a bead of glue over the joint, and spread the glue out with a brush. Then I rotated the two pieces and closed the joint. It seemed to work okay. (I’d love to hear some tips from those of you with more box joint experience.)
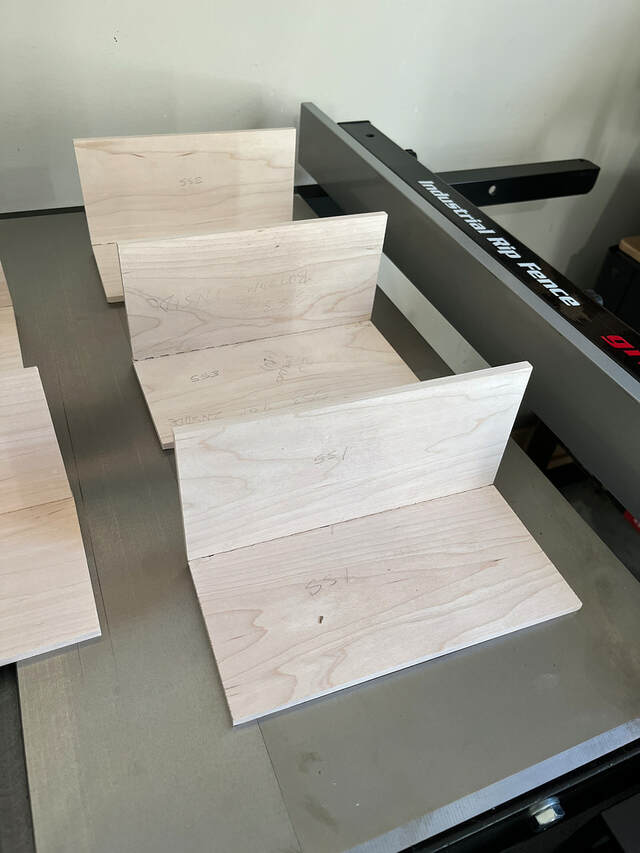
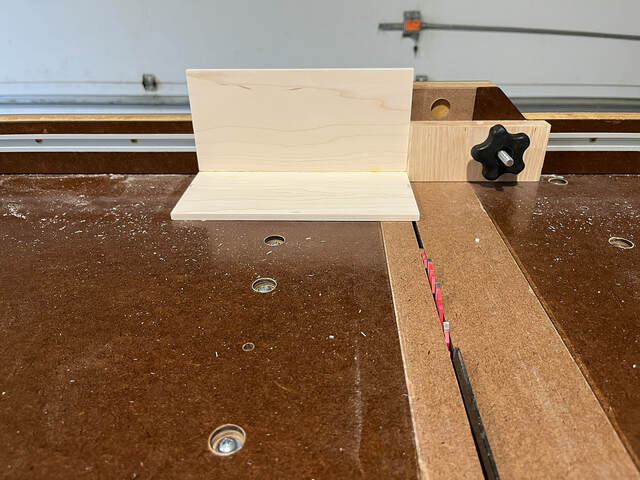
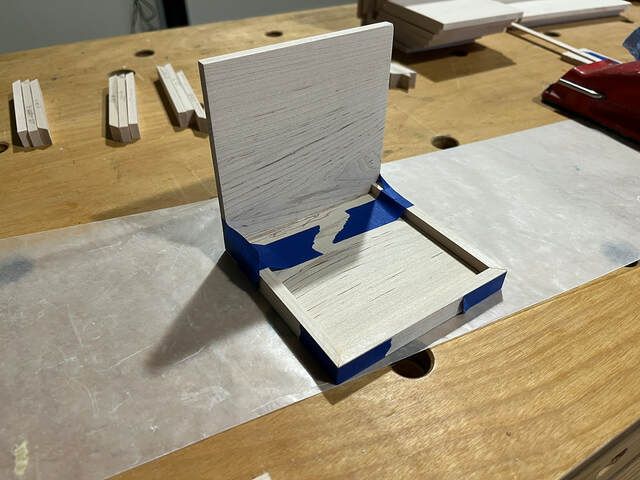
After the glue dried, I cut the notches for the trim pieces that create the lips around the shelf bottoms. I set the blade height to 1/2" and positioned a stop block on my crosscut sled to trim off 1/4" from each side of the bottom and notch out the back. It took two passes for each notch. I trimmed one end from all the shelves.
Then I moved the stop block to the other side of the blade and cut the notches on the other ends of the shelves.
I trimmed the edges and cut the notches after glue-up so I could deal with any side-to-side misalignment between the mating parts due to box-joint routing errors. In most of the shelves, the alignment was good, but a few were slightly off, and I was able to custom cut them to compensate.
The next step was cutting the trim pieces. I didn’t take any photos of that. It was just a bunch of crosscuts with my sled (90 degrees on ends of the short sides, 45 degrees on the rest of the ends). I cut the short trim pieces slightly oversized—I’d sand off the excess later, but I cut the long front trim pieces to the correct sizes.
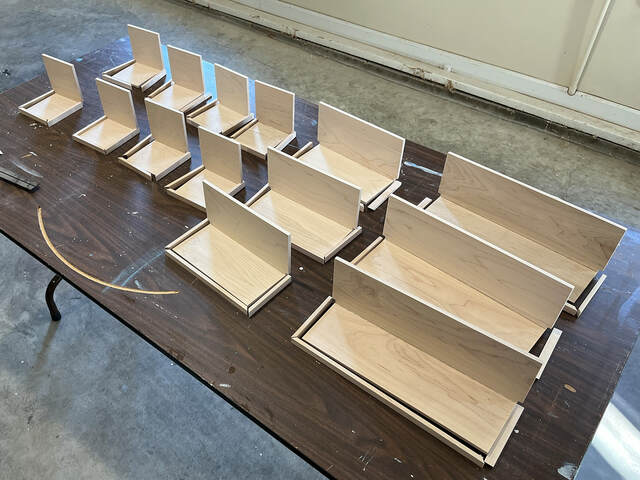
Here are all the shelves ready for glue-up.
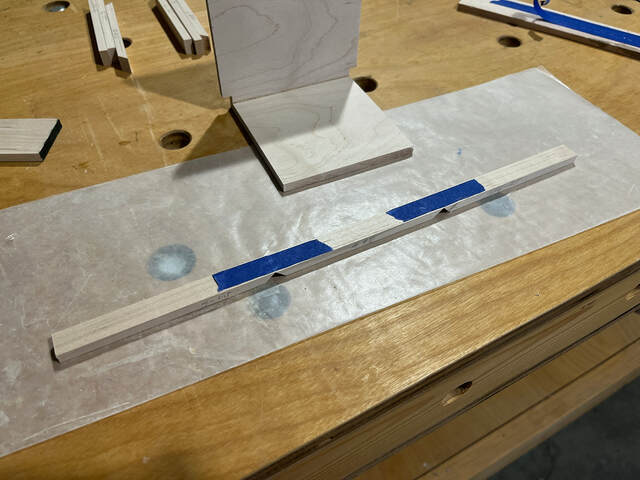
I used painter’s tape to clamp the mitered corners.
I also used it to clamp the end pieces to the main shelves.
The glue-up was uneventful. After the glue dried, I sanded all the exterior faces. At this point, the boxes and shelves were ready for finish. (I took the photo below much later, after I had assembled the back panel.)
Great details here, Ron. I don’t envy you all that sanding - especially burn marks. But kudos for the end result. And that crosscut sled of yours is an awesome asset.
Thanks, Oldtool and Ross. I’m very happy with my sled. Swapping out inserts has worked as I had hoped. With my old sled, I always had to wonder if it was worth the time to swap out the screw-in insert for a small number of cuts. Often, I just ended up using my miter gauge instead. Now, there’s no internal debate. It takes less than a minute to change the insert, so I just do it.
Or an add-on to the laser software that produces simulated hand cuts for a more rustic look…
Back in the days when pen plotters were in common use, I remember a software product called Squiggle that would take an HPGL (Hewlett-Packard Packard Graphics Language) file—a file containing the commands to produce a drawing—and emit a modified version that turned straight lines into wiggly ones. It gave the drawings more of a hand-drawn look that some people liked better than pristine drawings. (Think stylized architectural renderings, for example.)