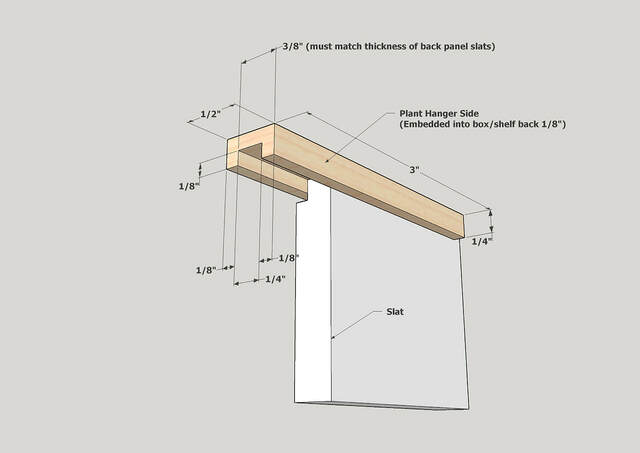
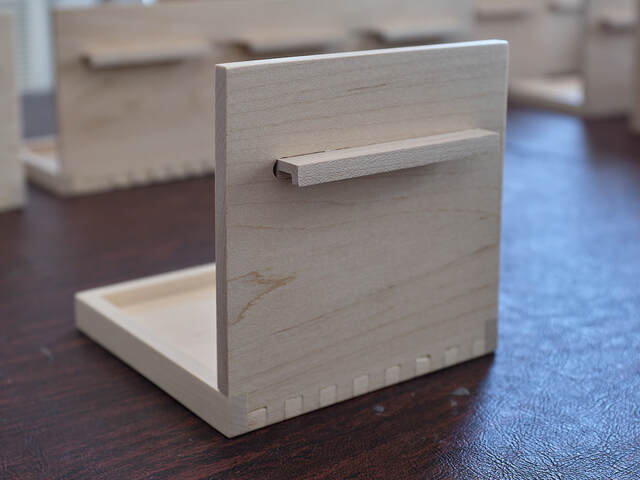
I wanted to use aluminum C-channel for the box/shelf hangers, but I couldn’t find any that was the size I needed, so I decided to make my own.
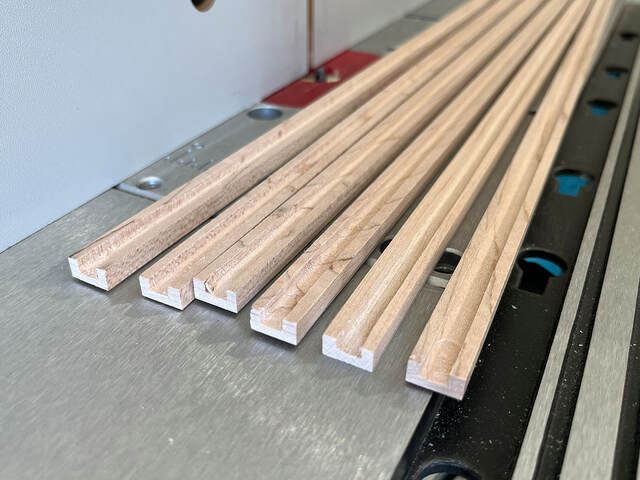
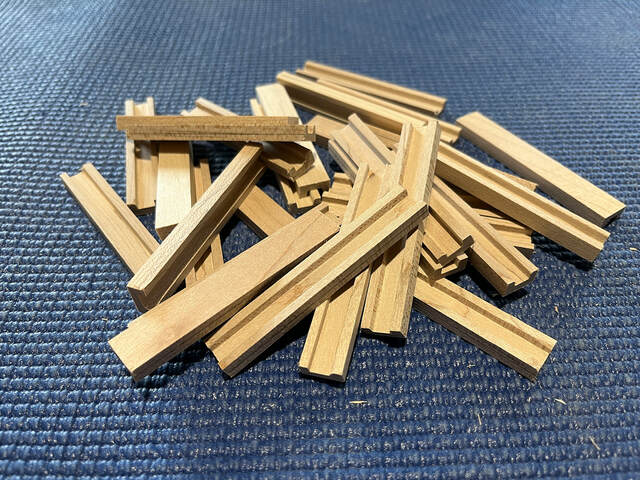
The hangers are made from 1/2" wide, 1/4" thick strips with a 1/4" wide groove in the center. I used my router table to route the grooves, then cut the strips into 3” lengths.
One side of each hanger is embedded into the back side of a shelf or box, creating an L-shaped hook that wraps around notches in the main unit’s back panel slats. Each box and single-width shelf has one hanger. The wider shelves have two or three.
I didn’t mention this in the blog sections about building the boxes and shelves, but I routed the hanger slots in the backs before assembly. I could have done it afterward, but I thought it would be easier to work with flat panels instead of assembled boxes or shelves. I didn’t take any photos, but I used my router table to route a 1/8” deep, 1/4" wide slot in each back, taking care to stop about 1/2” from each end.
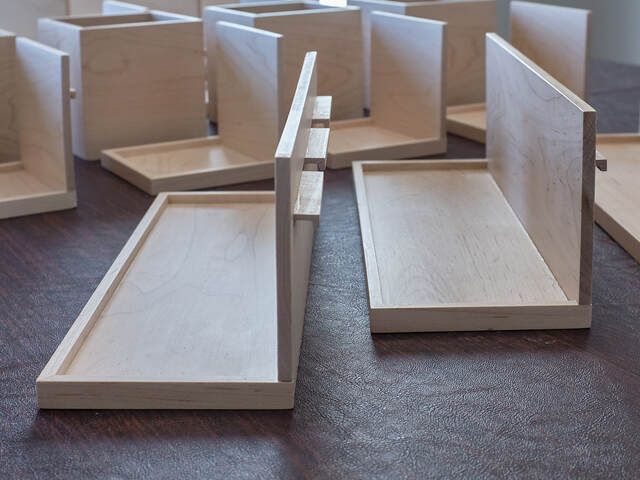
Here, you can see three hangers installed on a triple-width shelf.
I didn’t square off the slots. I left them rounded. The hangers fit between the rounded ends.
An Aside: CAD Model vs. Reality
Working on these hangers brought home something I know, but don’t always remember. Relying on CAD modeling as much as I do has many benefits (less waste, fewer design errors, good documentation), but it’s very easy to confuse the model with reality. In the model, a 1/4" slot in a hanger always fits perfectly over a 1/4" notch. In the real world, that’s not always the case.
After I had completed the project and started configuring the shelf for the project photos, I discovered that many of the hangers were too tight. One of the narrow shelves fit so tightly that the hanger snapped in half as I was trying to force it into position, causing me to lose my grip on the shelf. Before I knew it, the shelf was in two parts on the floor. The back panel had also snapped in half just above the back/bottom joint. The story has a happy ending, though. I was able to glue everything back together, and the breaks were so clean that the repair is virtually invisible. (And I confirmed with empirical testing that the box joint on the shelf was stronger than the wood.)
While I was working on the unit’s rear panel, I spot tested several hangers by sliding them over the slat notches, and they all slid smoothly. Yet, in the end, they were too snug. I spent some time analyzing the problem and came up with several potential explanations:
The finish on the slats increased their thickness enough to matter.
The width hanger slots varied slightly from hanger to hanger.
The depth of part of the hangers embedded into the shelf backs varied from shelf to shelf.
The width of the notches in the slats varied slightly from slat to slat, or even across a single slat.
The backs of the shelves aren’t perfectly flat.
I doubt the finish thickness caused the problem, but any of the other factors could have. More likely, it was a combination of them. I think the biggest culprit is the last one: shelf backs that aren’t perfectly flat. Looking at the finished shelves, I see some that are curved in the vertical plane, and some that are bowed horizontally. (The water-based poly I used did cause some of the curving. I'll describe that more in a later post about the finishing step.)
If you look carefully, you can see those problems in the photos above. In the narrow shelf, the back is very slightly curved vertically. The wide shelf looks good vertically, but the top edge curves forward as it nears the camera. These variations are slight, but they’re still large enough to cause problems.
In the end, I widened all the slots in the finished shelves and boxes by dragging the side of a 1/4” chisel across the inner edge of the slots, using it as a scraper. I also used coarse sandpaper glued to one side of a piece of scrap about the size of a popsicle stick. It was tedious work.
Now all the hangers work acceptably well. For the few shelves with curved backs, it helps to press them against the back panel to flatten the curves while seating the hanger. I could have spared myself all the worry and effort by just routing the hanger slots a hair wider or cutting the slat notches a hair deeper. I’ll try to remember to design in tolerances in future projects.