
Mike40
in over 11 years
A STORAGE SHED FOR MY BBQ GAS GRILL #8: Door Hinges
This is
part 8
in a
10 part
series:
A STORAGE SHED FOR MY BBQ GAS GRILL
I didn’t get much done today as this is our shopping day. I did manage to get the hinges installed on the door frames though.
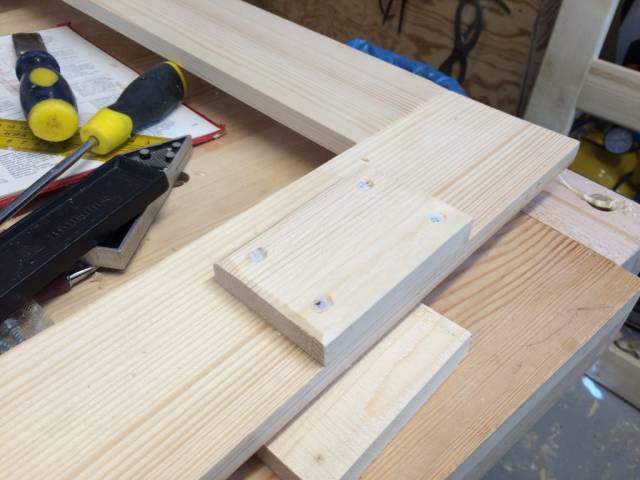
Yesterday after taking the door frames out of the clamps after the glue-up I needed to increase the frame thickness on the back of the frame to allow long enough hinge screws and also to somewhat reinforce the hinge area. This was done with simple wooden blocks glued and screwed to the frame. see below
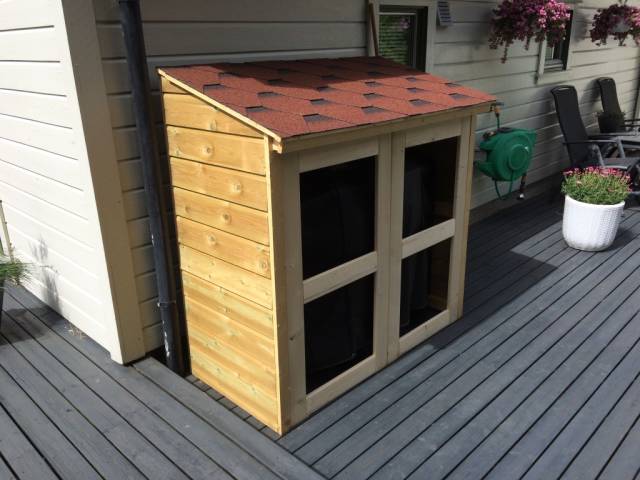
Today wiith the reinforcements dry I could take the doors out to the shed to see if they would fit, and what do know, they did!
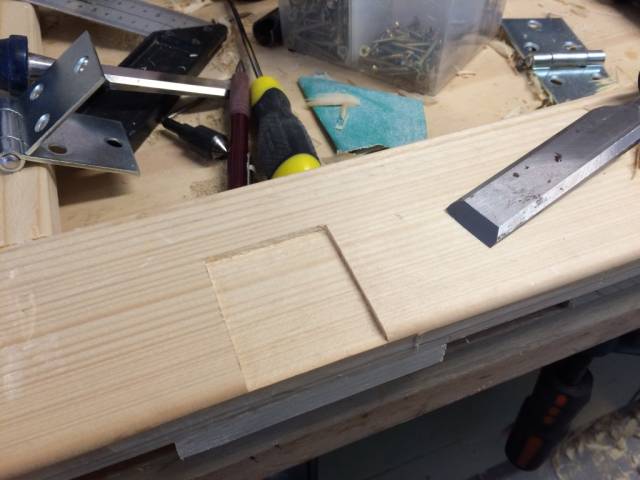
So on to the hinge installation. The first thing I did was to carefully mark out the locations with a pencil line from the actual hinges, then I used a knife cut just inside those lines to outline the area to be chiseled out. Here is the mortise after chiseling and the hinge screwed in place. See below
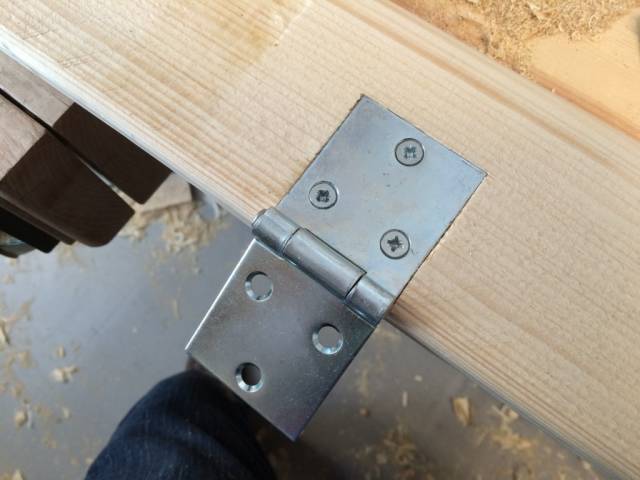
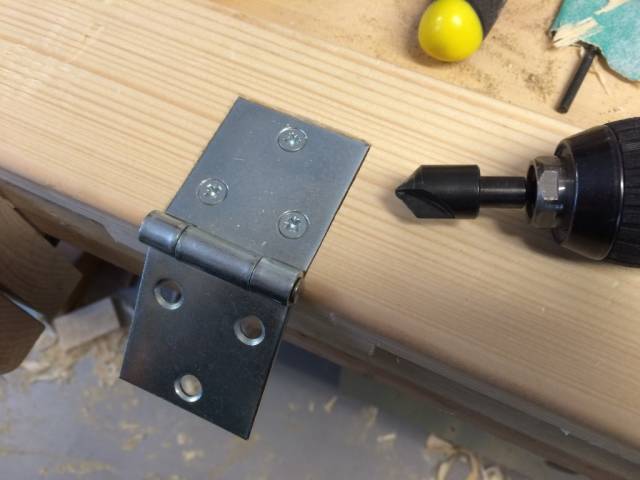
Most of you have probably installed more hinges than I will ever see, but here’s a little trick for those who might have struggled with hinge installations. The most difficult part is usually getting the holes centered. If you don’t, the hinge will not stay where it is supposed to or the screw will not seat properly into counter sink in the hinge blade. I use a countersink on my drill. You need one wide enough to self-center itself in the hinge blade hole. Just give it a spin and you have a nice little centered depression to guide your drill bit. see below
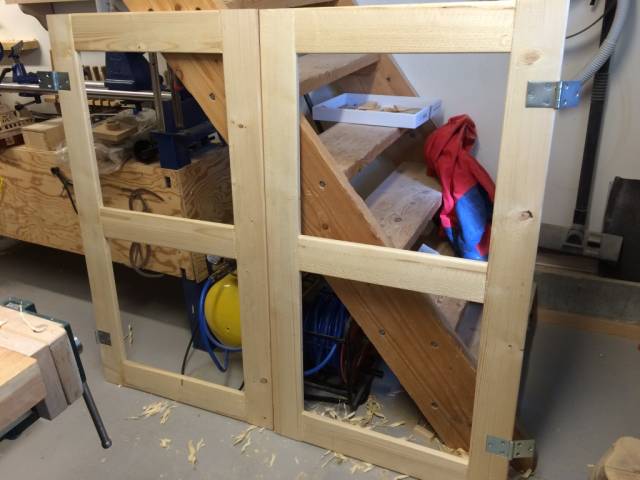
Here are the doors with all four hinges installed. Now I just have to do the mortises on the shed, yet another opportunity to botch the job!
I’m looking forward to getting a lot done tomorrow if the weather permits, so I hope I will be almost finished with the shed by day’s end and almost certainly finished by Saturday.
Thanks for following with!
Mike, an American living in Norway
5 Comments
There are a great many people on this earth living in much less posh accommodations than your BBQ will be enjoying Mike. It certainly must be the envy of all BBQ’s everywhere. Most folks (like me) would just surface mount the hinges I suspect but I also suspect that more than a little fun is being had here making it perfect. :-)
The early bird gets the worm but its the second mouse that gets the cheese.
Mike,
You certainly do nice work. I hope you’re already contemplating your next project!
L/W
“Those who would give up essential Liberty, to purchase a little temporary Safety, deserve neither Liberty nor Safety.” Benjamin Franklin
That’s a neat trick for centering hinges.
I usually use Vix bits and still have problem centering thing.
Abbas, Castro Valley, CA
Thanks for kind remarks everyone.
Whiteacrebespoke I agree, butt hinges would look better, but the frame wood is fir and they are slightly Less than 3/4" thick, so I was worried about strength and the ability of the soft wood to hold the screws. I also like the relatively large size of the hinges and 3 screws to carry the weight as they will have panelling on the back and be much heavier as a result. I considered using decorative wrought iron hinges, but wrought iron doesn’t do too well in our wet climate. Even these galvanized hinges will probably have to be painted to keep them from rusting.
Paul You are right of course, It is the work that I enjoy the most and it’s also a way to practice and improve my skills. I do think that surface mounted hinges would also be more apt to let water seep into the back of the hinges and perhaps accelerate rusting. I know, I’m paranoid about water. That’s can happen when you move from a dry to a wet environment, Like from California to Norway for example. Of course as a master boat builder and experienced sailor you are probably not the least bit afraid of water.
L/W As you can see my projects are pretty simple ones. I would really like to be carving and doing marquetry work, but I like my relatively new work bench so much that I am also enjoying doing some joinery work and planing now that I have so many clamping options and lots of bench space. I don’t usually get much woodworking done in the summer. This shed project was a bonus for me.
Abbas Another little trick is to use a brad bit the same diameter as the screw hole and just give it a light tap with a hammer.
Mike, an American living in Norway
Thanks Mike!
Abbas, Castro Valley, CA


