


Share your craft projects
Make new craft buddies
Ask craft questions
Blog your craft journey

Mike40
1074 posts
and
35 followers
in about 12 years
in about 12 years
MAKING A WOODEN GEARED CLOCK #3: The Main Dial/Gear - day 3
This is
part 3
in a
9 part
series:
MAKING A WOODEN GEARED CLOCK
-
DAY 2 - THE FRAME
-
The Main Dial/Gear - day 3
-
Day Finishing Up The Clock Dial - Day 4
...
- DAY 2 - THE FRAME
- The Main Dial/Gear - day 3
- Day Finishing Up The Clock Dial - Day 4
...
How The Time Is Read On This Clock
This clock is a little different from most. It only has one hand which is the hour hand. This hand is stationary and stays at the 12 o’clock position while the clock dial turns. The clock dial is actually a gear with the hour numbers on it. The distance between the holes around the dial denote 15 minutes each.
Having To Prioritize Due To Material Problems
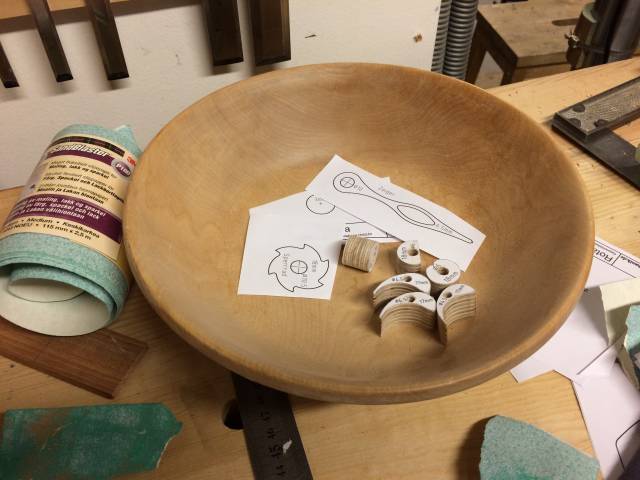
Some of the other wheels call for 6.5mm thickness which was not available. I bought 6mm instead and it will be necessary to compensate for the difference with washers in the final clock assembly. I hope it works.
3rd days Work
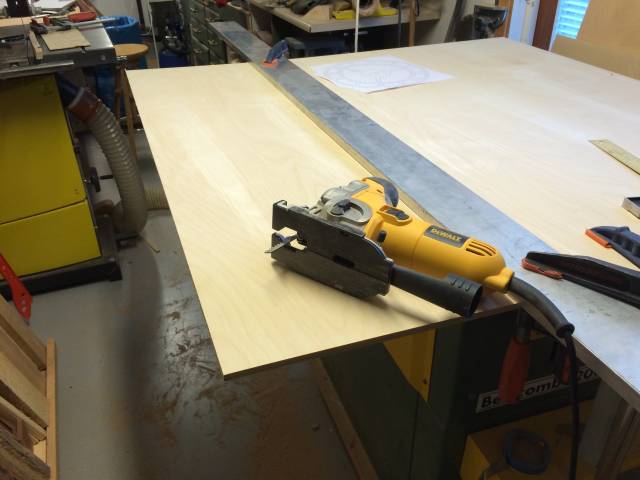
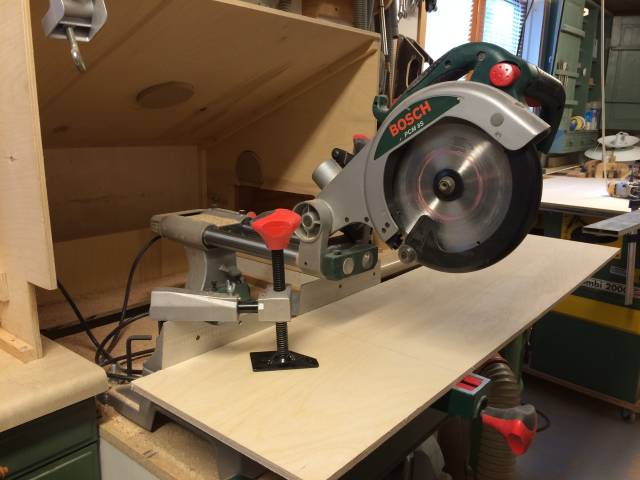
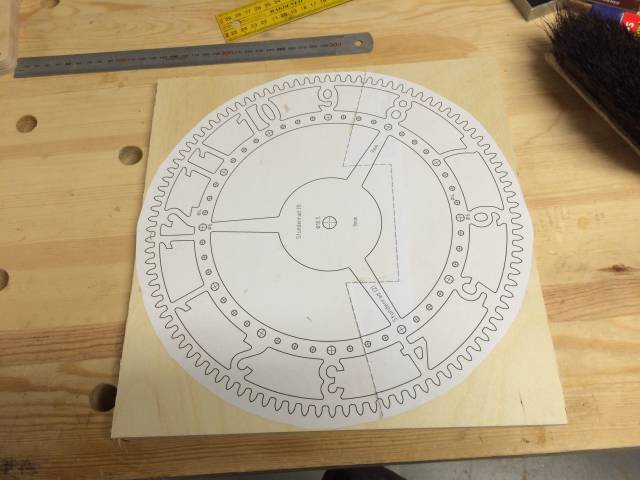
I started by cutting my 9mm platter. I got everything set up and then to my amazement my saber saw wouldn’t work! I solved that problem by plugging it in. Next I cut the workpiece I needed on my miter saw and then got my pattern ready.
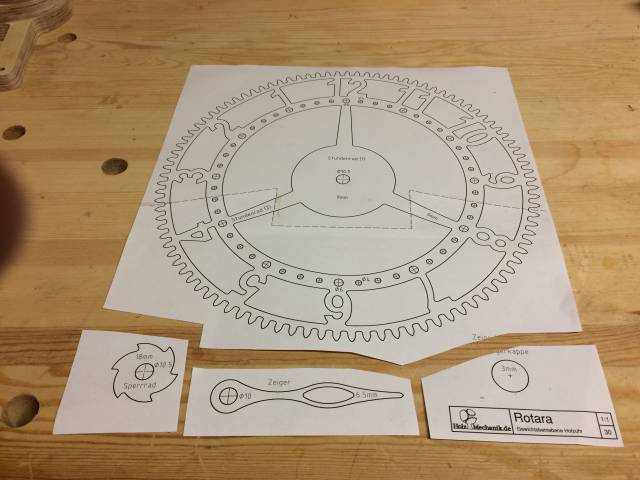
It is a large wheel and I had to glue two A4s together to get the complete pattern. There were some smaller parts patterns included on it which were set aside for later use. see below
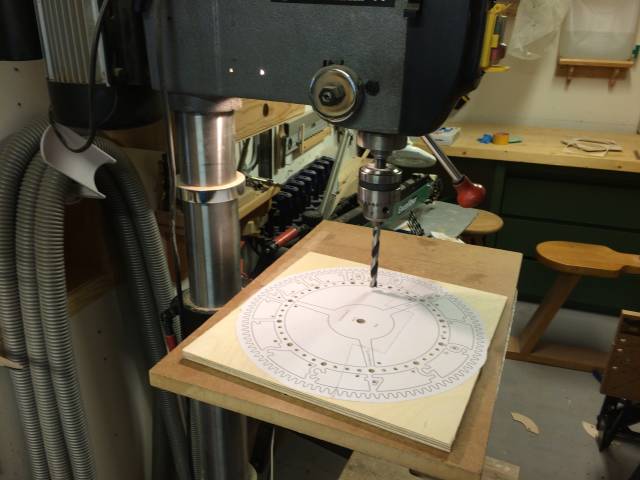
Boring, Boring, And More Boring
I wanted to get all the holes drilled before I started with the scroll sawing. It took awhile since there were 70 holes to drill, including entry holes for inside cuts. see below
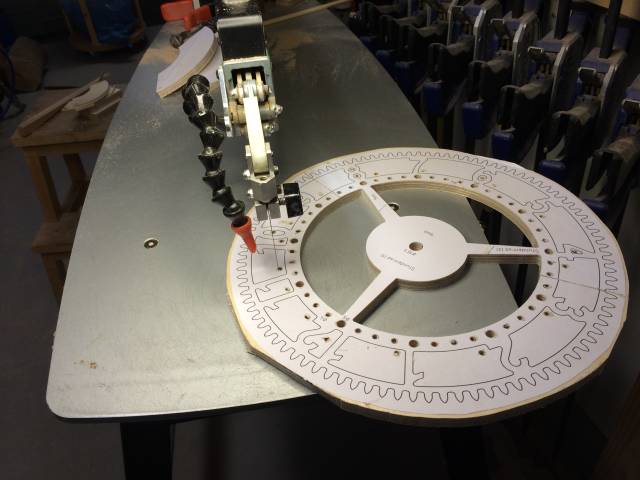
Scroll Sawing And More Scroll Sawing
The first I did was to cut out the center pieces between the spokes. This was so I could hold and move the workpiece around easier while cutting the hour numbers and the gear teeth. see below
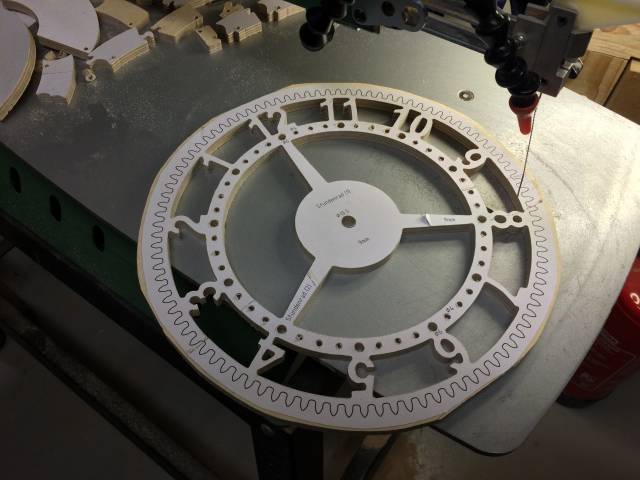
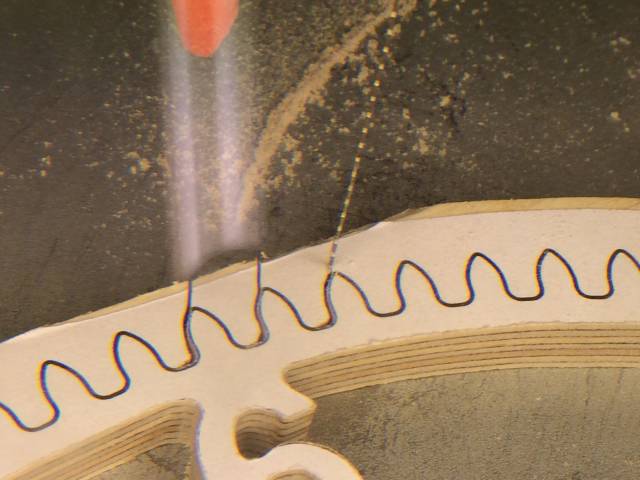
Gear teeth Cutting Technique
The area between each wheel teeth was removed first with a straight cut in from the top of each tooth making the same cut all the way around the wheel, then a 2nd cut in from the other side, again from the top of each tooth and all round the wheel. This avoided the need to move the big wheel around a lot to perform a ‘U’ shaped and made everything easier. just a hair of the pattern lines along the tooth edges were left to be filed away later to to perfect the shape of the teeth. see below
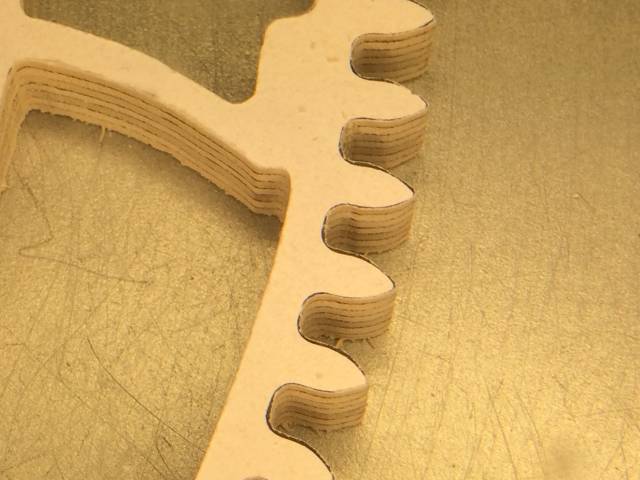
The Almost Completed Gear
I was pretty tired after all the drilling and scroll sawing so I decided to do the filing work on the teeth tomorrow. see below
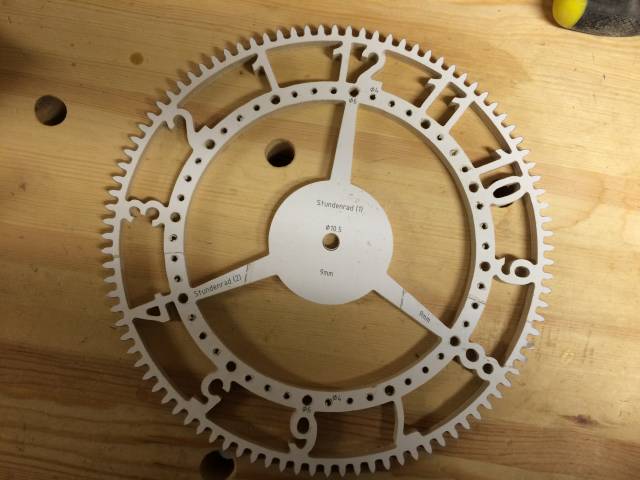
I’m pretty satisfied with the work. One of the advantages of working with the magnifying light is that any small errors seen through the magnifier are totally insignificant when viewed with the naked eye. I did put a little hack in the 2 in the twelfth hour cutout. I’m confident that this can be fixed so well that it will not be noticeable. I have a LOT of experience fixing woodworking mistakes!
Thanks for reading.
Mike, an American living in Norway
4 Comments

Man the pieces are looking good . What kind of saw blade are you using ? Can you make a straight cut with it > Do you have to use a different technique than a regular blade ?
Wheaties
Adam Your Dad had the right idea. I think extra washers will do the trick, but your idea is good too.
Bruce I have been using a Nicqua #5 reverse tooth blade. These come from Germany. They are great blades.
Mike, an American living in Norway

This is a complicated design Mike…
It’s looking good.
Abbas, Castro Valley, CA
Abbas No more complicated than scroll sawing other patterns, but my magnifier lamp can take credit for whatever degree of accuracy I’m able to attain.
Mike, an American living in Norway