


Share your craft projects
Make new craft buddies
Ask craft questions
Blog your craft journey

Moment
362 posts
and
12 followers
in over 12 years
in over 12 years
More from Moment


Un Meuble


this is a cabinet I built and designed in solid oak , secondary woods are
redheart and paduak , it is 66 inches tall ,34 inches wide and 21and 1/2 inches
deep.
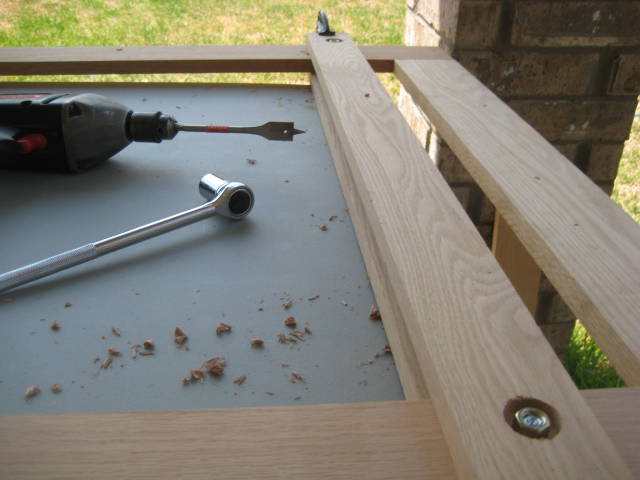
I began by making the front frame using (3) 3/8 inch dowels per joint ,
next I attached the two rails on each end of the frame using (4) 5/16
bolts.
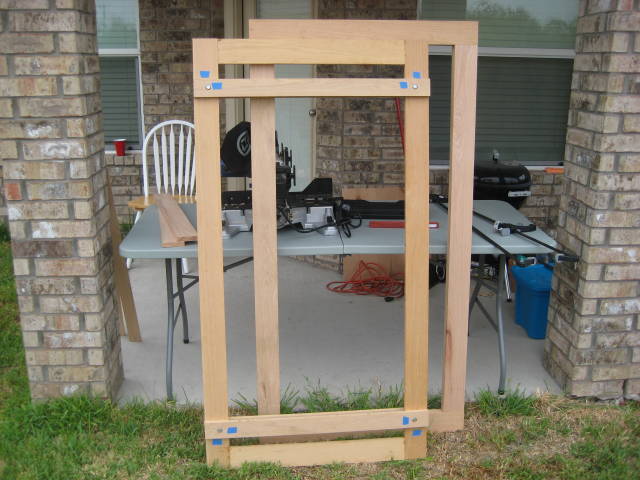
At this point I have made two frames. I will make a third identical frame , it
will be glued and doweled to the back frame , with the joints staggered at
90 degrees to create a lap joint , brings it’s thickness to one and one half
inches .
The rail locations have been marked with painter’s tape , because they
will be removed and put back on quite a few times for cutting down,
sanding , attachments etc.
The grey folding table is 28 inches wide and not level by any means .
my cabinet is 34 inches wide ……quite problematic…..but I didn’t want
to start out building a large assembly table . I would rather put that
money into the cabinet materials , and besides …it would bore me .
I had a couple of 20 × 30 " plywood squares on hand that were dead square,
I could place them on each end when needed and shim things out when
needed with a screwdriver or pencil or combination square blade……
whatever was handy . Sometimes it would take 10 – 15 mins. of creative
clamping or impromptu jig making to do a routing procedure that would take
two mins. : ) I knew using that table was going to be a slow roll…..worked out
o.k…..I wasn’t in a rush . Someone with a shop could have knocked this
out in two or three days…..took me about 2 1/2 weeks.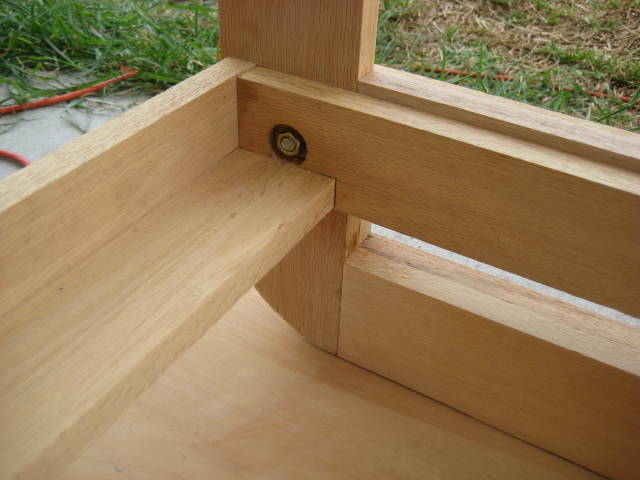
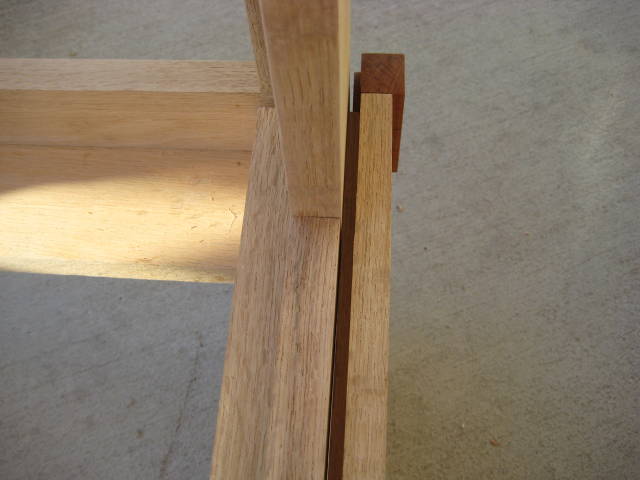
This is the view showing the back rail . Above to the right is the shoulder that has been glued to the back rail and it rises 1/4 inch to keep the doors from
" falling " inward into the cabinet . To the left is the L shaped rail ( (2) 1×3′s doweled
together) that connects the frames together with ( 5) 3/8 inch dowels per joint .
Very stout….zero racking . At this stage it’s time ( yet again ) to remove the kerf rails
for final sanding of the whole cabinet .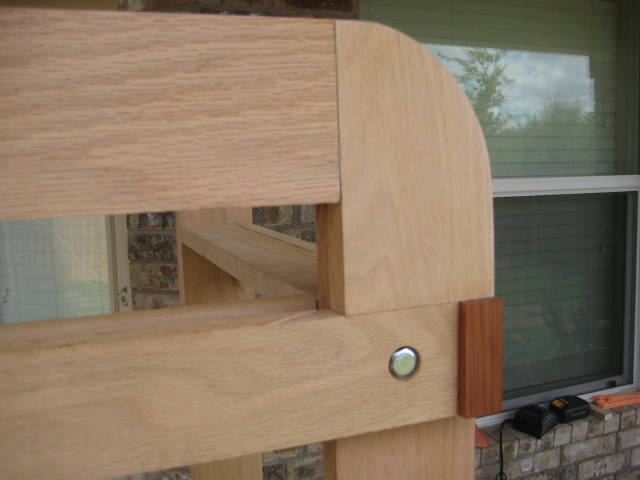
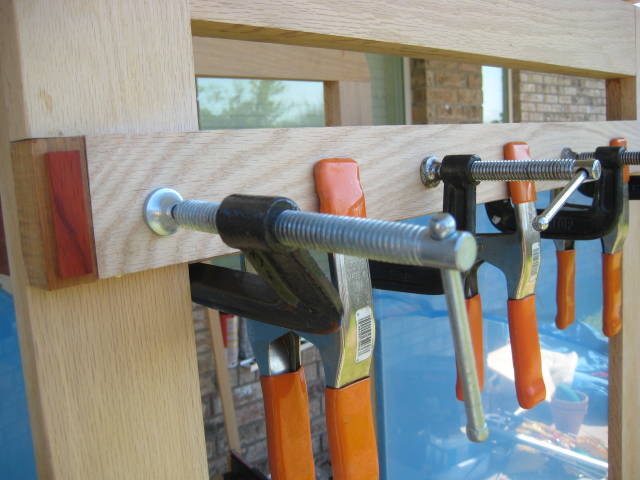
View of the top from the front
This view shows the routed kerf to the right , the shoulder in the middle
provides the other part of the kerf. The redheart end caps have been held proud1/4
inch for the overlay to cover the bolt heads.
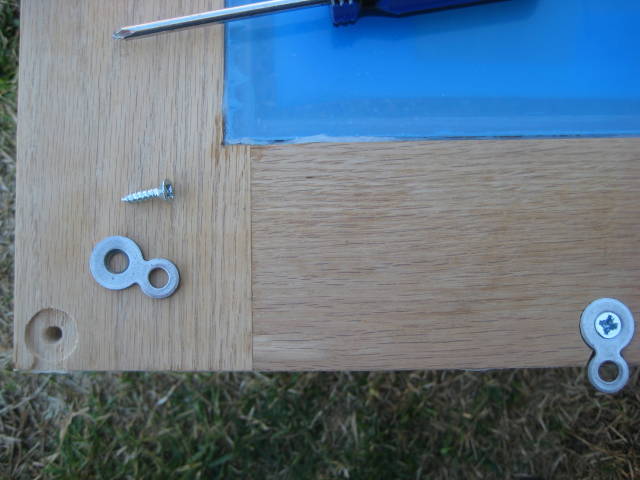
This view shows the pins for the kerf being attached to the backsides of the
doors. The figure 8’s were flushed to mounting holes with a paddle bit,
the bottom of the mounting holes were chiseled . The blue is the plastic
covering over the acrylic panels which have already been installed in
the doors using silicone. These pins do not ride on the bottom of the
kerf, they simply keep the doors from "falling " outward .
20 Comments
Last day……all that’s need is to attach the 1/4 inch strips to cover the bolt heads, attach the pediment , and put some UHMG tape on the bottom of the door. Slides open pretty sweet . That’s about it…
thanks for viewing .

Un très beau meuble Moment.
Lots of good build info. Your photography is really good.
I can say that I have not seen any like it.
It would take me months no a couple of weeks.
Well done!
Abbas, Castro Valley, CA
Merci mon Ami !

Looks great. I don’t understand the purpose of the bolts. Why not just glue? Just curious.
Losing fingers since 1969

Wonderful work on this unique cabinet. I love the sliding doors, so much better with all that glass. Obviously a creative mind at work here.
Mike, an American living in Norway

Great post and a great cabinet. I love the sliding doors. Thanks for showing us.
-- Alec (Friends call me Wolf, no idea why)
Brian , thank you for the compliment . Je préfère ne pas répondre aux questions sur mes œuvres lors d’un forum public. Je vous invite à me demander ce que vous souhaitez dans la correspondance privée.
Thank you Mike , and
Thank you Wolf….for your gracious comments .

A very nice piece Moment. That is one you can be proud of. I would.
Tor and Odin are the greatest of gods.
Thanks Madts , nice of you to say . Not so much proud as
relieved . Like a boxer after close fight , awaiting a decision . : )

Moment,
I have never before liked sliding doors, but yours changed my mind! They look terrific. It’s a fantastic display piece. Nice work!
L/W
“Those who would give up essential Liberty, to purchase a little temporary Safety, deserve neither Liberty nor Safety.” Benjamin Franklin
Thank you so much , lightweightladylefty !
Your 33 drawer cabinet was really great .
So much work in that piece .It really
made an impression on me !
Well, you do pay attention to nuance . I would expect
no less from a free thinker of your caliber . Merci Bentlyj !
What cabinet?
I look for shadows and mirror reflection but nothing… Oh well. I guess it’s what you don’t see that’s the best.
Abbas, Castro Valley, CA
AH, you have touched upon a great truth…….
" The Moon shows in every Pool ,
In every Pool ….the one Moon " ~ Zen proverb
I guess what I mean , as it relates to this site , is that
Woodworking is the Moon .Each of us , regardless of
our different beliefs and backgrounds , share that Moon,
and the desire to create shines in each of our “pools” ,
and is reflected by sharing those creations with one another . A good thing .
Beautiful cabinet!
Thank You , Sheri !

Very good design and simple build.
woodworking classes, custom furniture maker
Thank you Jim , it was fun to build .
More from Moment