


Share your craft projects
Make new craft buddies
Ask craft questions
Blog your craft journey
31 Replies

I am not an expert but I think 1/64 is pretty good.
I am thinking when you apply the glue the fingers are going to swell a tiny from each side.
Abbas, Castro Valley, CA

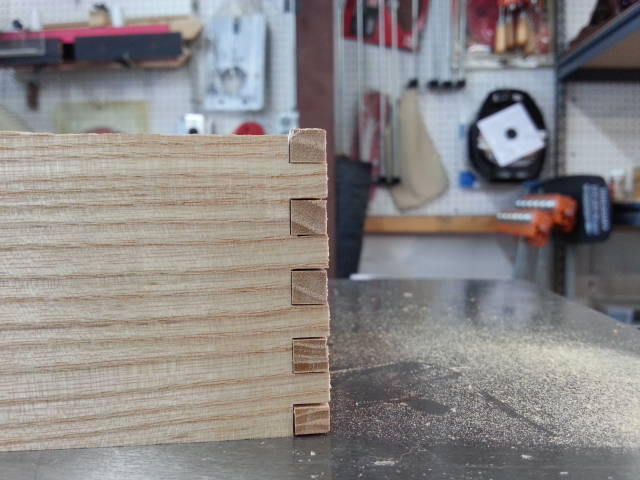
Forgot images of test joints in white ash

HorizontalMike
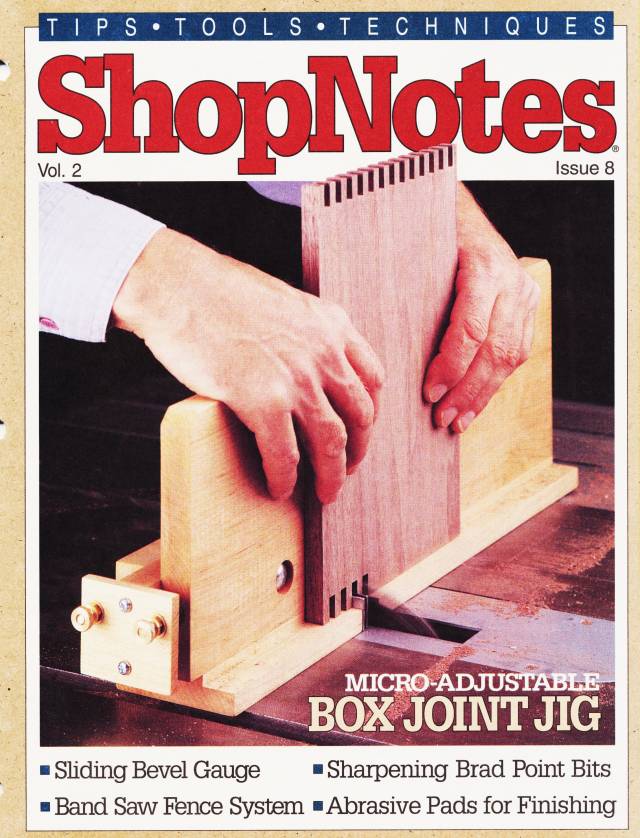
Digging into my Gifted WW Library, I just found plans for a “micro-adjustable” box joint jig in ShopNotes Vol.2 No.8 March 1993.
This will be a small project in its own sake, but will be well used in the future. NOW I will be able to eliminate any/all gaps!… 8-)
HorizontalMike
That’s a bit more than I thought:)
Abbas, Castro Valley, CA
I built a similar jig for my router table. I have a different jig for 1/4" and 3/8" wide fingers. I did incorporate the fine adjustment for the finger width. I find that I like a snug fit for my joints. Also, I found the setting will be slightly different for different kinds of wood.
Good Luck and let us know how it works out.

That’s OK Mike, I’ve taken up where you left off, I’ve not been in my shop for a month, just taking a break. Nice box.
Randy - If I'm not on the computer than I'm out making sawdust.
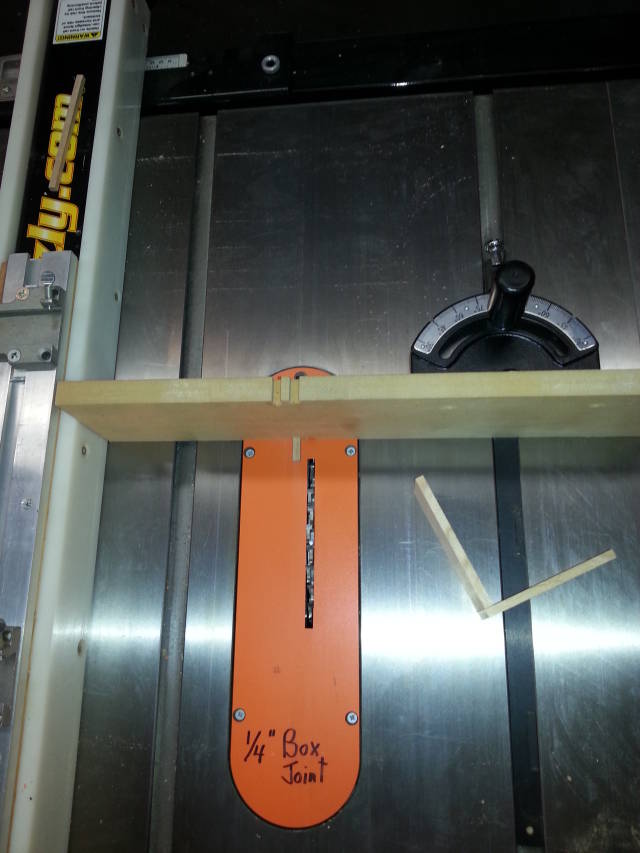
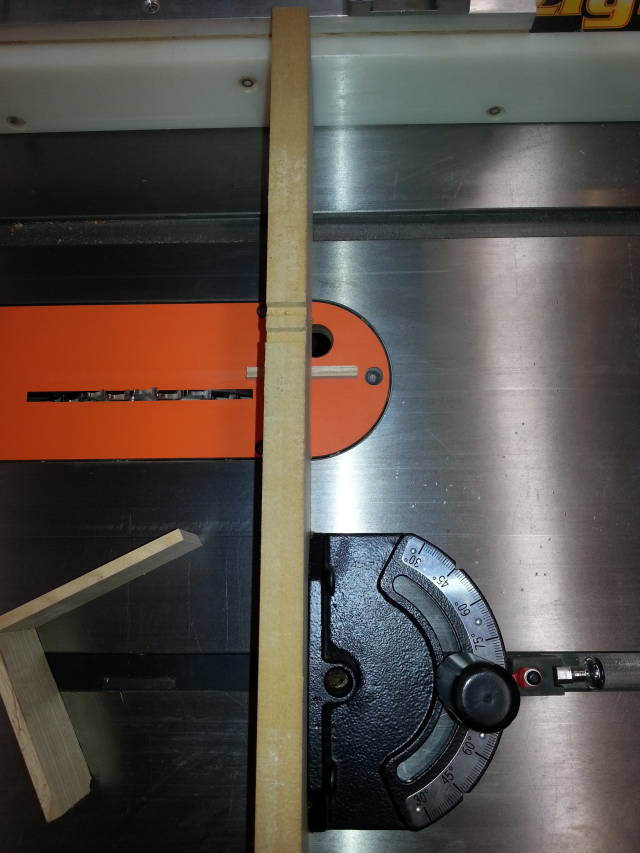
The jig I first made was a very simple, cross your fingers and hope you got it right kind of jig. NO adjust-ability. I’ll use for my first box, a Hoppes gun cleaning kit, that I want to change from its OEM cheap plastic to wooden.
My next project will be the above “micro-adjustable” jig, once I get to WC and/or HD and pick up the needed bolts, inserts, and knobs.
Here is the simple jig. You can see where I had to attempt it twice (by the cuts). Not very substantial and will not last long IMO, but will work for now:
HorizontalMike

Mine is virtually the same as yours. It took a lot of trial and error to get right. Just keep plugging away. My “micro adjust” is my mallet. ;-)
Losing fingers since 1969

(nice to see you back again… hope all is well!)
Toxins Out, Nature In - body/mind/spirit
Thanks MsDebbie!
And BTW, I did finish up on my planer table project/blog. It was the first blog posted here on WWWeb 2 years ago (bottom of blog page 77). Yeah, I’m feelin’ a bit guilty… ;-)
"":https://woodworkingweb.com/entries/1-planer-table-cabinet
HorizontalMike
That looks perfect, Mike. You just need a bit of water on the corners, to bring it up to about twenty-one percent, and you’re good to go.
;)
As it is, it’s looking pretty close. I went the Incra route and it’s impressive.
Kelly,
THAT is what I am now thinking (Incra). I started pricing all the brass nuts, brass bolts, knobs, stock, etc. and I came up to about $75 of brass parts, JUST to build the DIY version above. And that DIY would be without a front clamping vise to hold the work piece.
I can get the Incra for $154.00 on Amazon w/FREE shipping. Basically for the difference of ~$75 I can have a much better jig. In the long run I am thinking that that will pay for itself many times over in convenience and durability. And since I have already purchased the 1/4"— 3/8" Freud Box-Joint Dado Blade, it makes sense to stay with a TS solution and besides the Incra can do both router and TS.
Thanks for the suggestion!
HorizontalMike
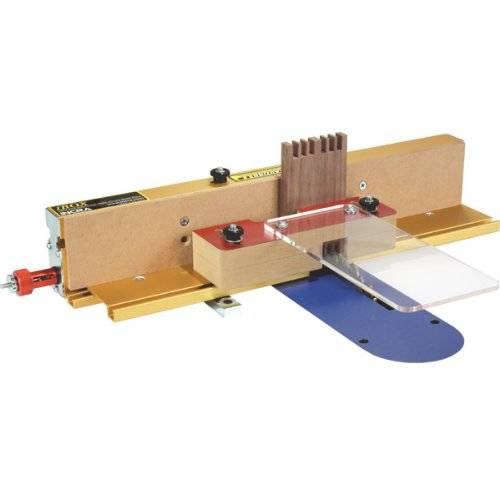
I have looked at the Ibox incra jig many times. It’s on my list.
Abbas, Castro Valley, CA

Hey Mike,
If you still want to build this jig, then this link may help you out…….
Edit… It is where I purchased mine a few yrs ago for $15.95
Measure "at least" twice and cut once
You’ve probably already ran a search of the reviews on the Incra, but, if you didn’t do. Generally, they come out as well as on any tool I’ve seen.
Because of the jig’s versatility, the initial learning curve takes a bit of effort. After that, simple refreshers fall in the “duh” category.
I keep the directions somewhat close, since I get away from the box for months at a time and need training after each coffee break.
The most problem I’ve read about seem to be with not following initial set up directions, which can throw things off, of course. However, unlike most our home made jigs, the Incra just has to be adjusted. Everything after that is a cake walk.
It’s so easy to use, I made my wife some small planter boxes from cedar scrap (okay, they were really test boxes and I told her I made them for her). I expected them to last a year, because they had no drainage, but they’re still hanging together, after a couple seasons of being doused with a hose.
After looking at the Incra very closely, I really like a couple of features that the DIY didn’t have, such as:
- a wide fixed material rest
- a front material clamp/vise to prevent inadvertent slipping while in use
- adjustable miter slot rail for TS and Router setups
- nearly all metal construction that pretty much eliminates swelling/constriction due to humidity issues over time.
- AND last but not least… I got the Incra ordered yesterday!
FWIW, I want to spend more time building projects and less time building shop jigs & cabinets. For example, my DIY router based Horizontal Mortiser works fine once it is adjusted properly, however, it is the act of “adjusting” that is more trial and error than it is precise. I am sure that that experience plays into my decision to go commercial this time.
8-)
HorizontalMike

You should look at Matthias’ website. Great stuff.
https://woodgears.ca/box_joint/jig_improved.html
-Madts.
Tor and Odin are the greatest of gods.
Madts,
Yeah, that guy is rather over the top… wow!
I guess my over all point going forward is that I want my projects to be “final” products, and not another shop jig/machine. I understand that for some of us, just tweaking the shop with gadgets is, in and of itself, a hobby of its own. I did that for a bit, but now just want to get on with it. Built all the big pieces that my home can hold and am now wanting to shift to smaller projects like boxes and other similar sized things.
HorizontalMike

Hi Mike
I’ve been able to make both of the shop made jigs work fine ,but it takes a lot of fine tuning.but an Inca makes fine tuning much easier.
woodworking classes, custom furniture maker
a1jim,
Yeah, that’s what I figure. That ease of adjust-ability will help keep me less stressed in the long run, and that is a significant issue with me and the VA as of late… ;-)
Too bad that I ordered it right at Holiday season, as it will take ANOTHER week or so to arrive…
HorizontalMike
Well, I am tired of waiting for the Incra Jig to show up so I followed Brian’s advice to use a mallet so I got out a dead-blow BFH and knocked the jig on the miter back and forth 6-8 times.
This is the best I could get, after breaking fingers and loose-as-a-goose trial & error on scrap. Was running low on 1/4" scrap, so you can see the first 2-3 joints on the right, where I stopped and checked/adjusted fit on the fly. The rest of the joints from that point moving left, are at least “evenly spaced” and just slightly snug.
I assume… this is as good as can be expected?… without breaking fingers off that is…
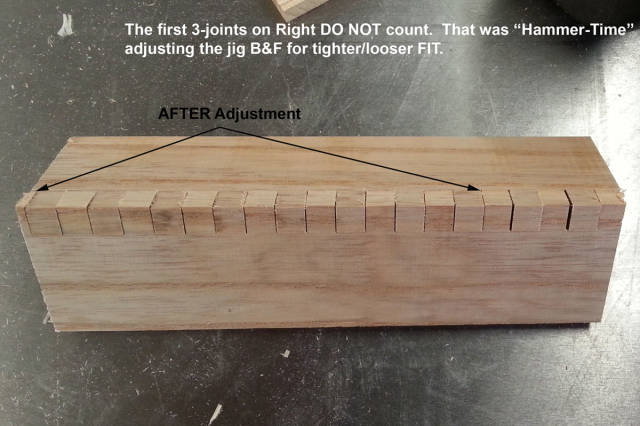
FWIW, my miter/fence connection has double-backed tape between them, plus the screws. That seems to be helping my “adjustments” stay in place, or at least that is the hope… ;-)
HorizontalMike
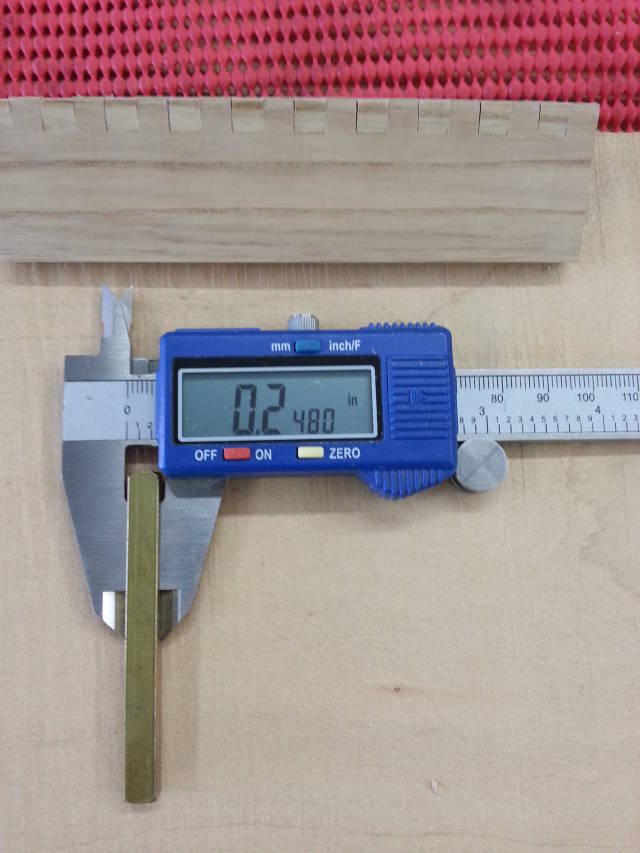
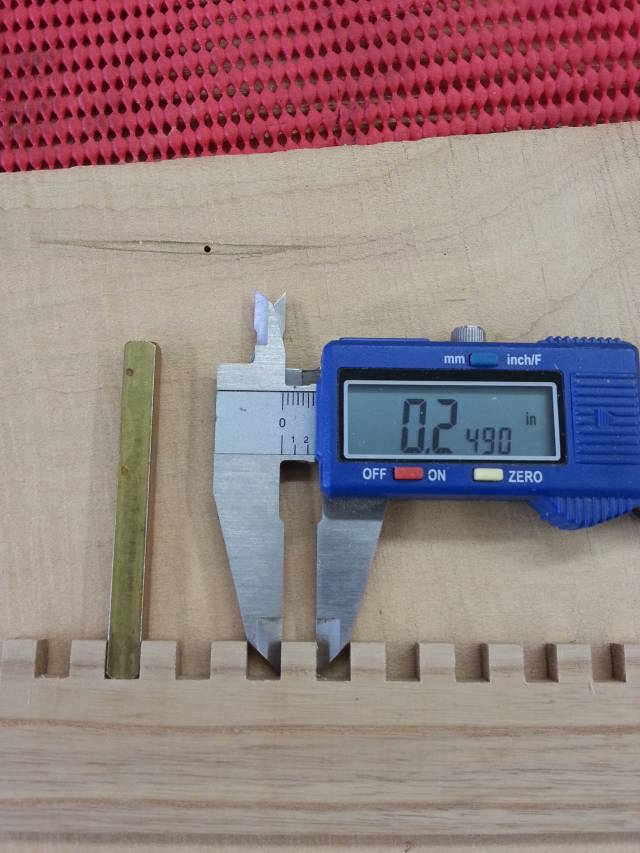
Well, I keep messin’ with it and getting closer. Funny thing is is that I found my 1/4" Whiteside setup bar to be only 0.2480", a couple of thousandths shy of 1/4". Luckily my DIY 1/4" stock/stick also measures same, so I guess it all works out the same once you/me figures out to adjust ;-)
Anyway, this box-joint is finally looking better and more evenly spaced:
ALL THINGS SAID… I am still happy that I ordered the Incra Box-Joint Jig. 8-) Adjusting with a BFH is just morally wrong IMO!… ;-)
HorizontalMike
Just always remember: don’t force it! Get a bigger hammer! :-)
Losing fingers since 1969
I’m no expert on box joints, but it seems to me that “snug” is preferable to “tight” so you can get some glue into the joint. The couple of times I did box joints, I was happy if they were evenly spaced and just tight enough that they don’t fall apart when dry fit.
Losing fingers since 1969
Yeah, this last joint is finally able to “stay” when dry fit. I am also finding that if I lightly sand the flat surfaces of the board (not the cuts themselves) then it fits easier since I’ve eliminated any burrs, even through I am using a zero cut insert.
HorizontalMike
Tear out was a big problem for me. Next time I do this I will tape some kind of backing to the piece I’m cutting.
Losing fingers since 1969
Now that is an idea! I will probably do that in the future as well. For now, since both the box-joint dado blade and the ZCI are brand new, my tear out has been very minimal.
Hey! Just thought about it and I have a “ship load” of 0.20" plywood scraps that will be perfect for that duty! My Jig’s cut is actually now slightly over-sized due to all of my back & forth “adjusting” blows with the BFH, so that makes the fix easy!
Thanks again for the tip(s).
HorizontalMike

I have that micro-adjust jig, built it several years ago. It is a great jig, worth the effort to build and does a beautiful job.
I know I'm late to this discussion. I also have the Ibox. Once set up it works great.
Petey

Yes, an older thread, but that doesn't make the content irrelevant. Box joints are still popular, and for a first time, questions probably do come up.
I box rules the day, BUT if the cost is a concern you can literally make a set size jig in an hour, 2 at the most. Matter of fact, unless I plan a lot of cuts, my Ibox stays on it's shelf, and I just build a new set sized jig, simply due to set up time. I suppose if I did use the Ibox more often I would speed that up, but.....
The key there is make sure your "pin" is exactly the same as the blades width, the "pins" height should ultimately be just taller than it is wide, too tall ,and you will just end up with a toothy joint, or have to cut/sand/plane them flush. Next you have to set that distance "the gap" exactly the same as the width of the blade, and the "pin" if you accomplish that, not really hard to do, you may need to shift it a pinch because you are gnats ass tight. and adding glue can make it almost too tight.
Other variables with ANY jig is stock works best if it is actually 4 square. IOW wonky uneven, unparallel faces will give wonky results. You can use 2 different thicknesses of sides, versus faces, but you have to allow for that in depth of cut. Any changes from same thicknesses also bring with a must to stay awake and look several times before cutting.
I went the same route as you Mike and wound up with the Ibox which works great 1 test cut and it cut perfect box joints. Once setup for your the only adjustment needed is for the size of fingers.