


Share your craft projects
Make new craft buddies
Ask craft questions
Blog your craft journey

lanwater
2132 posts
and
35 followers
in about 12 years
in about 12 years
Marocan Pattern Build #1: Intro and Stock preparation
This is
part 1
in a
2 part
series:
Marocan Pattern Build
-
Intro and Stock preparation
-
Glue Up
- Intro and Stock preparation
- Glue Up
I saw a picture of a pattern on google that I though would be fun to make.
It looks like a rugby/American football ball in a square centered on the diagonal.
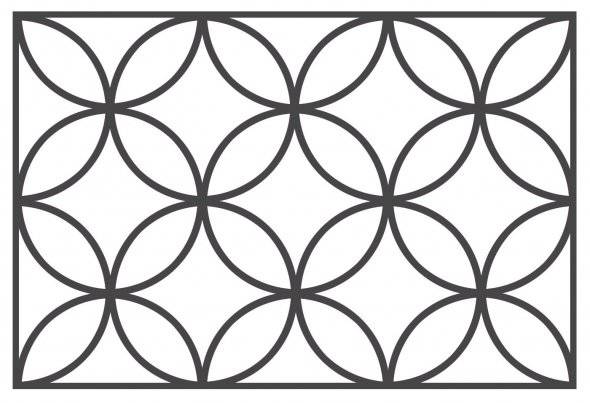
I figured that I will need to start with a Square or rectangular lumber and slice it at 45 degree.
Well since I still have some douglas fir, I decided to use that since it’s an experiment.
My last piece is pretty stressed but I still could get my stock out of it.
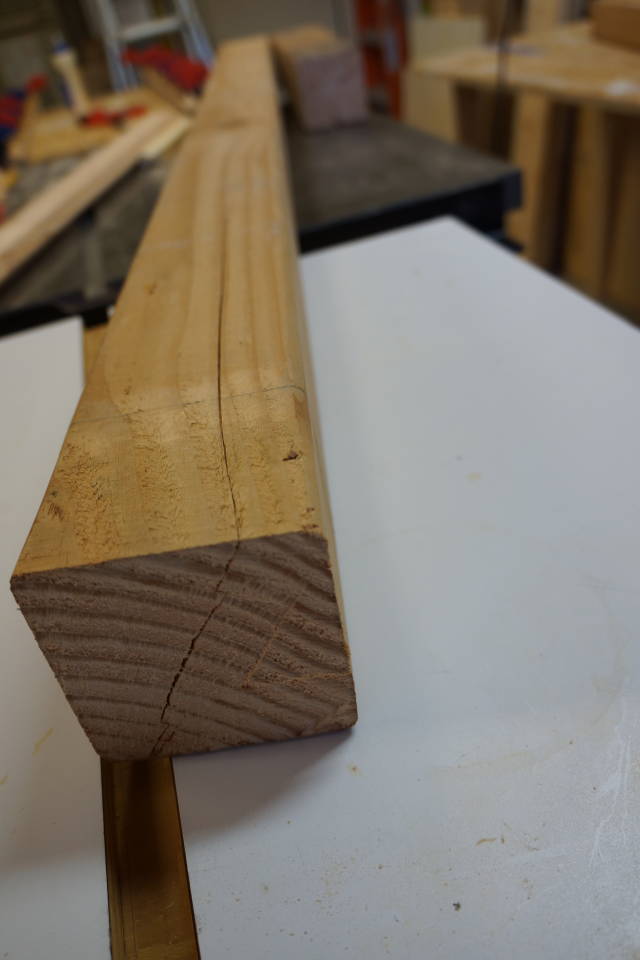
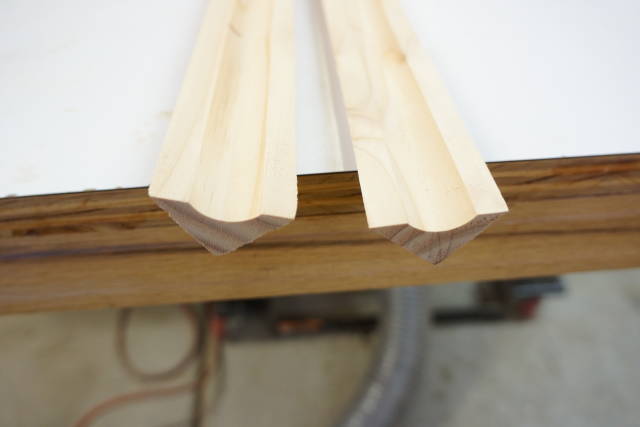
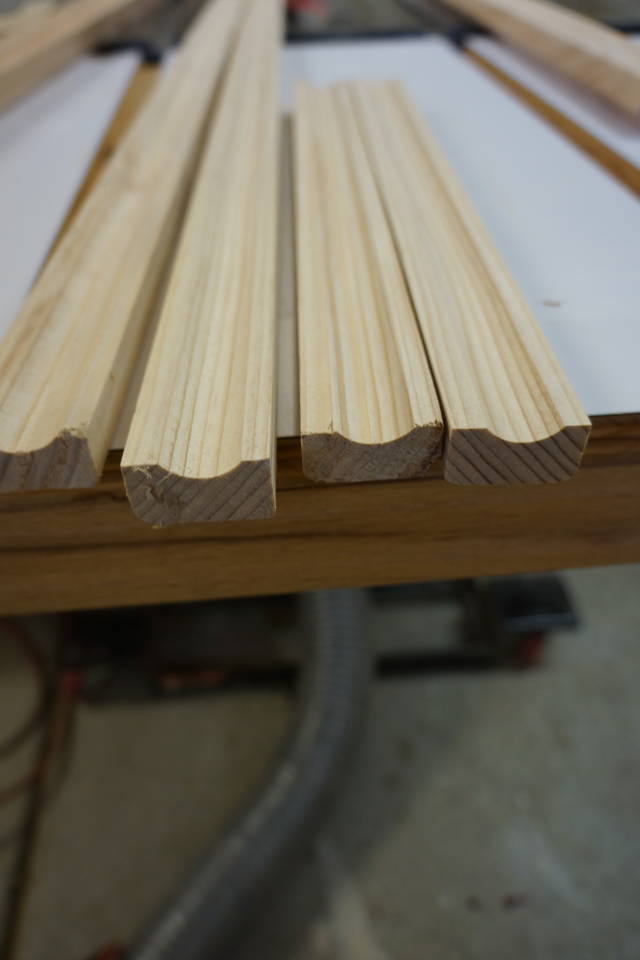
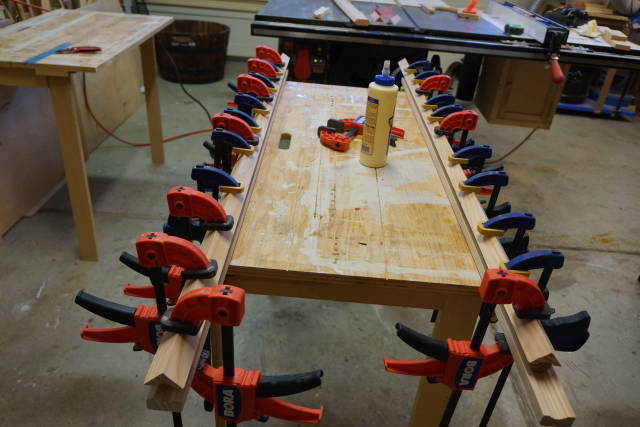
I managed to get 2 rectangular pieces and sliced the corners
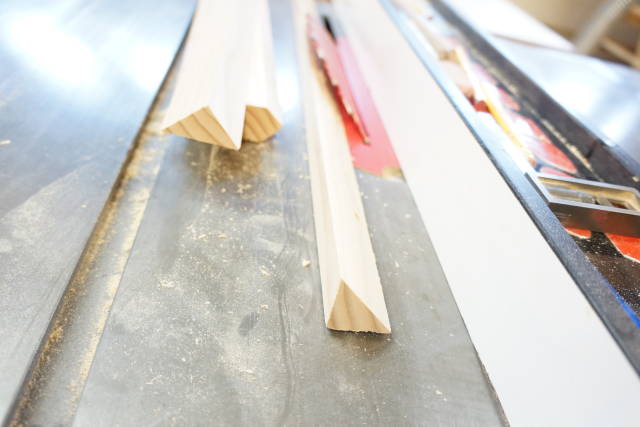
I need 4 of these. I also need 2 dowels
From experimenting with dowel size and resulting “ball” shape I settled on 1" dowels.
I also decided to buy the dowels as opposed to making them. The logic was since 1" would require 5/4 stock.
The math between buying and making the walnut,$10/bf, and cherry dowel $8bf, was very close.
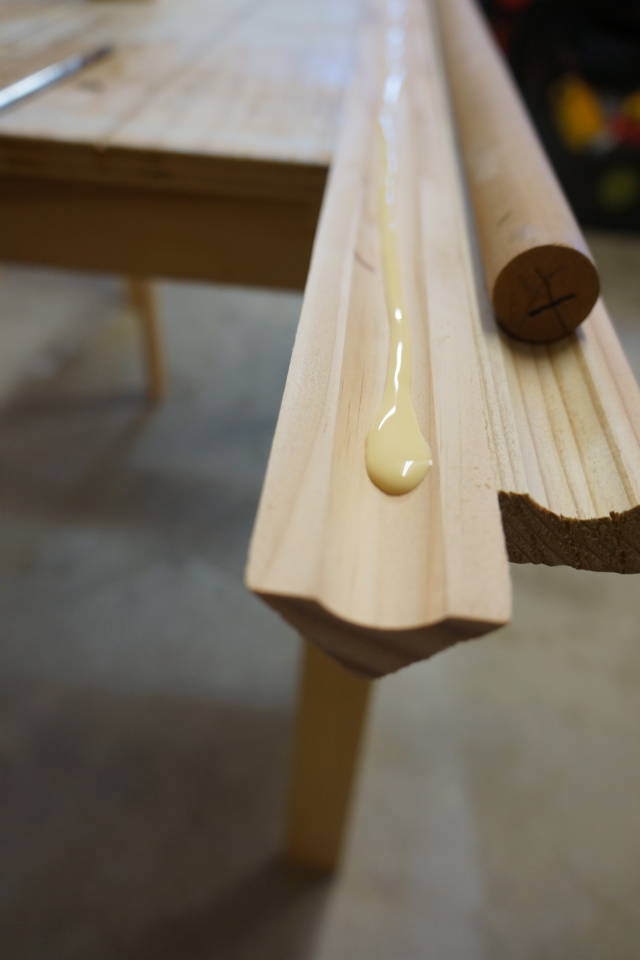
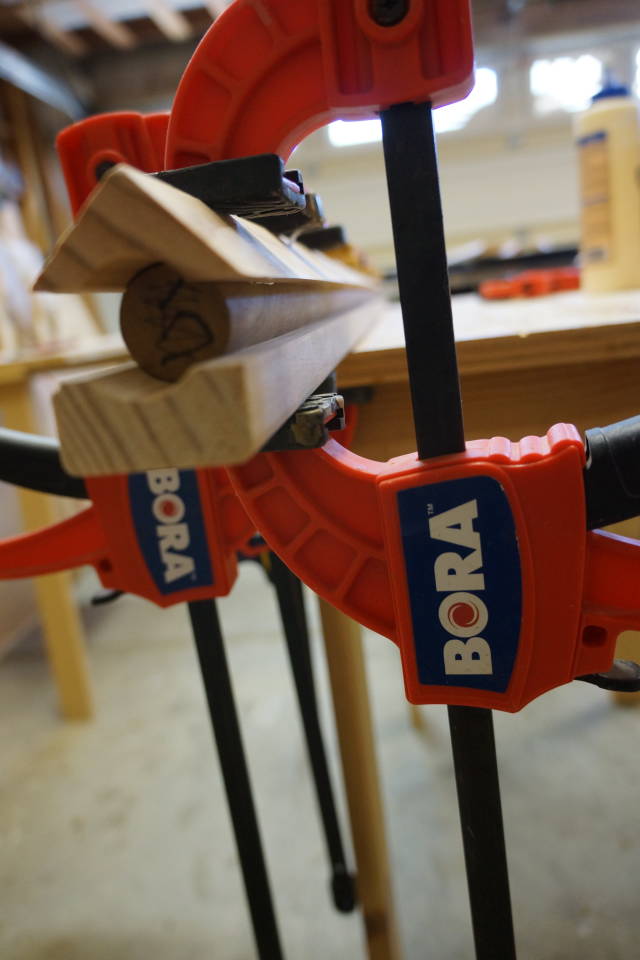
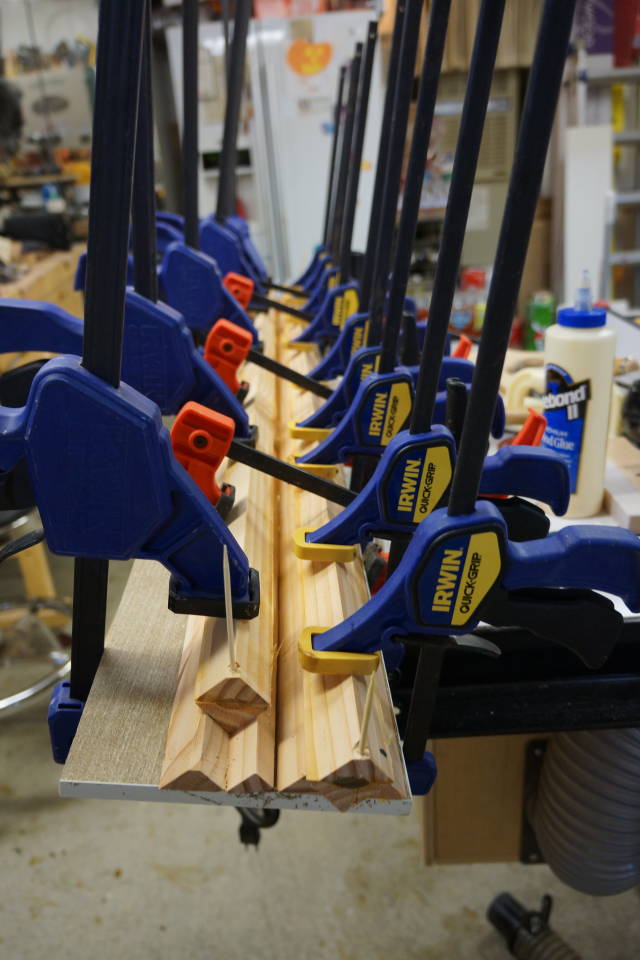
I used a 1/2 inch radius core box router bit and routed the triangular pieces. I also routed some scrap to help stabilize the dowel during glue up.
I decided to use yellow glue on this one. Why? I just had 1/3 of a glue bottle that is way past the year mark.
Once the glue dried it was time to trim the dowel flush. The band saw is perfect for that.
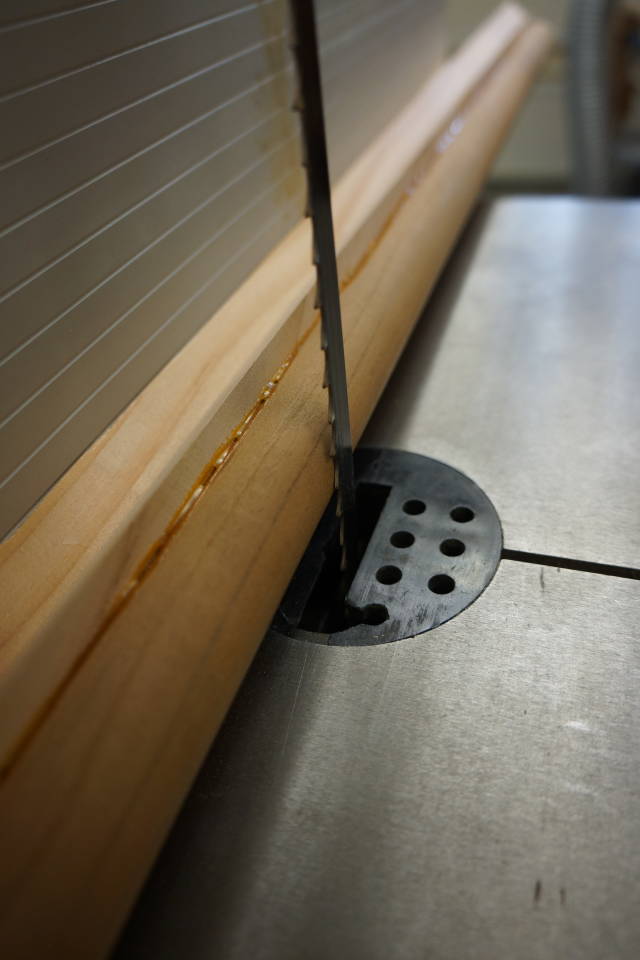
To Make life easy I put some carpet tape on the bandsaw fence and attached a sacrificial 45 degree fence so that the resulting cut would be at 90 degree.
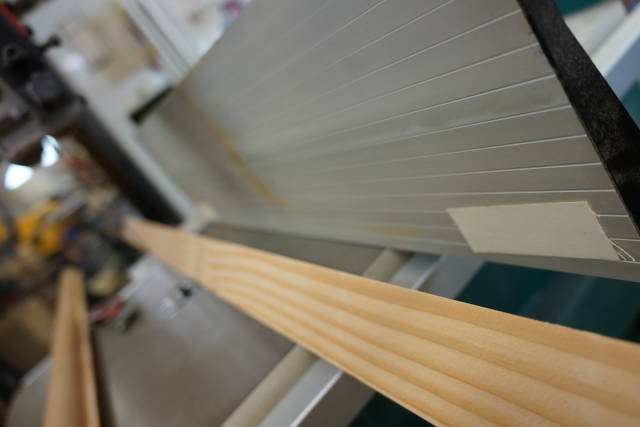


Through the drum sander to make it flat.

Re-glue the resulting halves together
Once dry, through the drum sander to get may square with the “ball” inside.
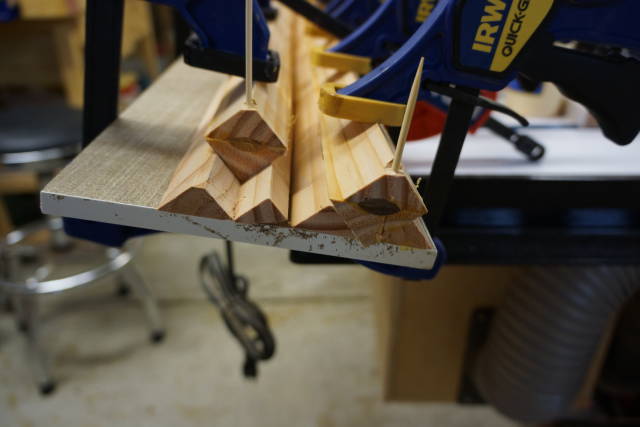
The toothpicks are to make sure the halves don’t move too much during glue up.
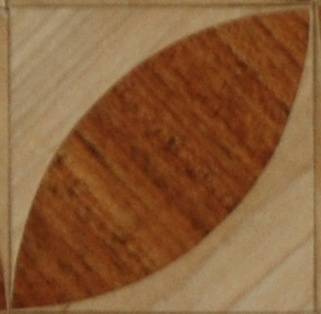
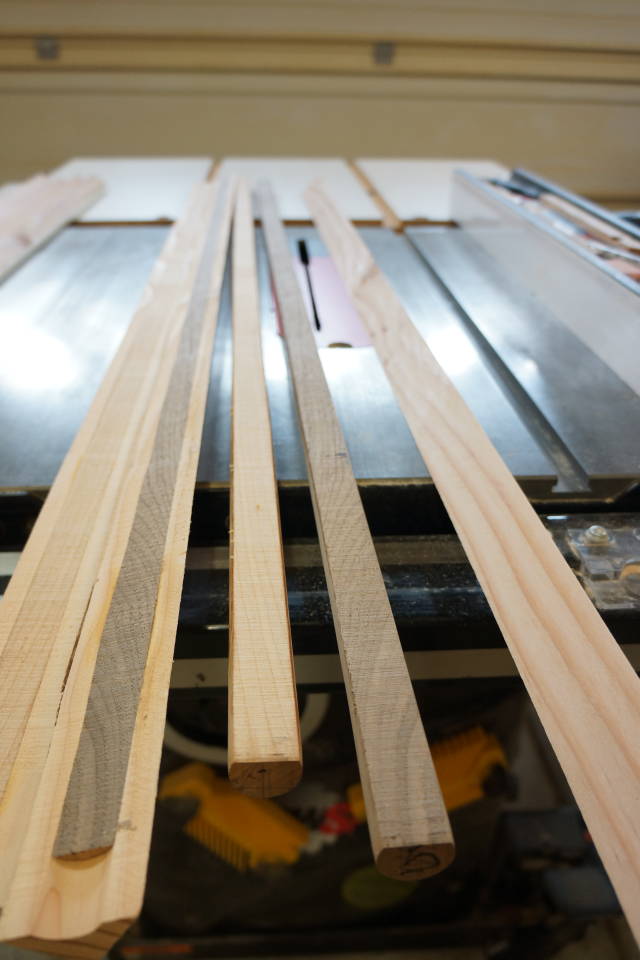
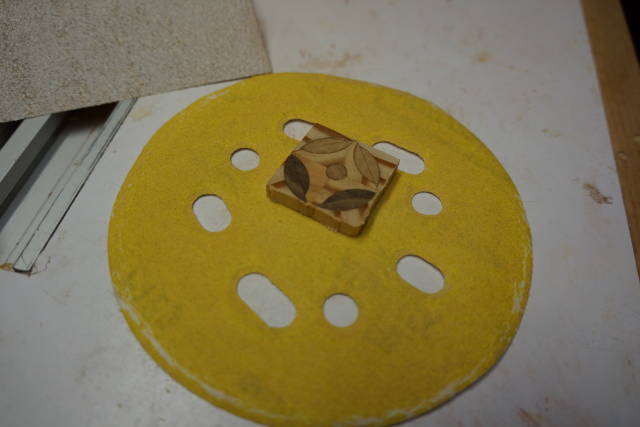
I trimmed the resulting square log to the edge of the “ball” to get this:
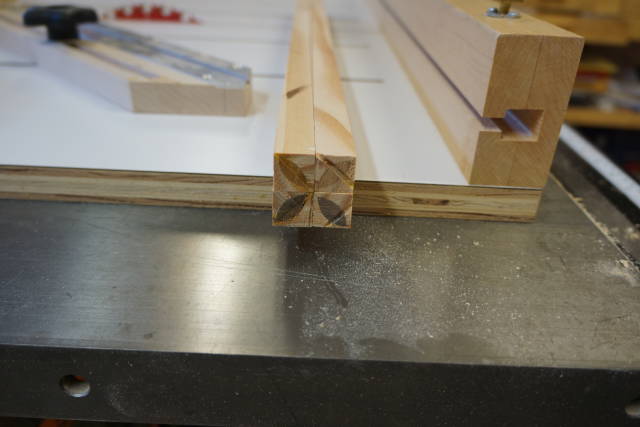
Added a 1/4 inch cherry dowel in the center (this is still not glued together yet) with the help of 1/8 inch radius core box bit.
I bought a box that had over 100 router bits in it when I started woodworking. The price was great. Most of it I never used in years.
Well in that case it came handy :)

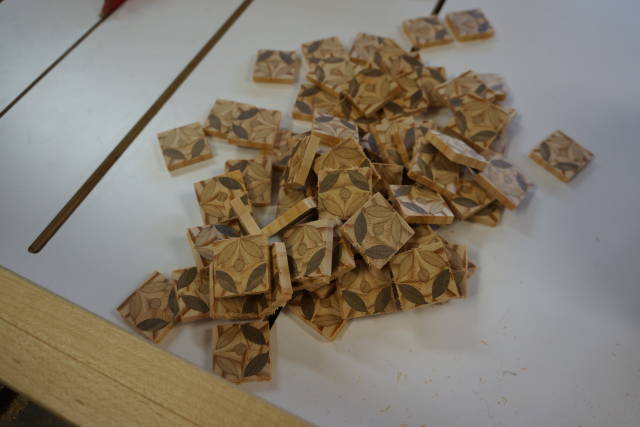
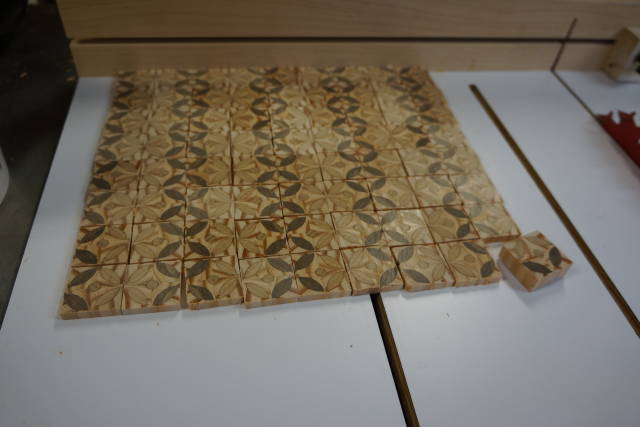
Glue it all and slice it
The result
A couple of note for the sake of completeness. Few mistakes /accidents during this project:
1- You probably notice the resulting pieces are about 3/16" thick.
I really wanted 5/16 but an error in calculating the length of the rods called for a re-adjustment of the pieces thickness.
2- the ball halves are not symmetrical:)
When I made my sled for the drum sander you see in this picture
I decided to use a 1/2 old closet door from Ikea I had in the apartment years ago.
So I sanded that piece of the door through the drum sander taking 1/8 of a turn every time in order to remove the plastic coating on it so I could glue my tracks on it. since 1/4 of a turn yield a 1/64" on my sander that 1/8 of a turn is almost nothing.
I thought everything was going fine until I notice that my stock with the haves was coming out slightly concave.
The cause was a ruined belt:
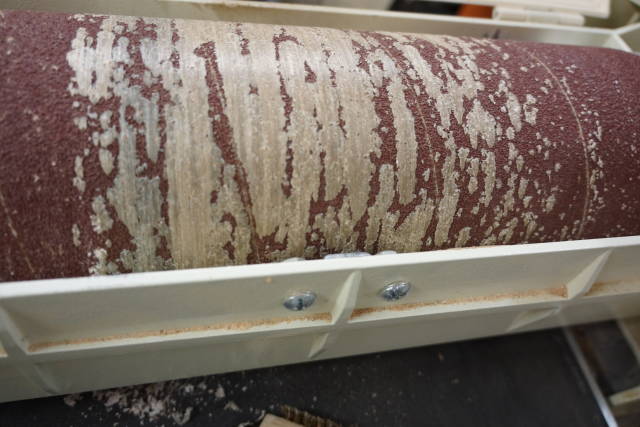
That’s the second time I decided to use Ikea left over and that’s the second time a ruined a drum sander belt.
In fact I took 1/8 because I remember the ruined belt during my picnic table build. Never again for sure.
Lucky I had a belt sander roll on hand.
Abbas, Castro Valley, CA
6 Comments

More than cool Abbas. This is going to be very nice after glue-up. I love the pattern and the smart way you thought out this not so obvious way to get the pattern you wanted. I also appreciate you showing the drum sander problem. I guess any surface finish with resins in it will do this. A great warning not to put anything with paint or poly through through my new DS.
Mike, an American living in Norway

Great thought process and planning.
Does a little smoke come out of your ears when you think that hard ….. or is that just me ?
The early bird gets the worm but its the second mouse that gets the cheese.
That is really clever Abbas……..some of those steps look familiar to me!! That is a pretty tricky pattern to create and you nailed it…..great!
Jeff
Thanks Mike. That drum sander mishaps really got me frustrated.
Thanks Paul. I usually collect pater /project and sleep on them a little. Everytime I look at any of them I try to visualize how it could be done. My wife always ask “why are you staring at that paper?”
Thanks Jeff. I watched you work and read some of your blog several times when you posted them. You tinkered a lot with dowel and showed me a lot of techniques. The one that impressed me most is the yin yang. Talk about thinking.
Abbas, Castro Valley, CA

Very nice design. The thought process!!!!!!
Tor and Odin are the greatest of gods.
Thanks Madts!
Abbas, Castro Valley, CA