


Share your craft projects
Make new craft buddies
Ask craft questions
Blog your craft journey

shipwright
2135 posts
and
113 followers
in almost 12 years
in almost 12 years
DIY thickness sander for lathe or ShopSmith #1: How little can I get away with building?
This is
part 1
in a
6 part
series:
DIY thickness sander for lathe or ShopSmith
-
How little can I get away with building?
-
Structurally complete, down to details
...
- How little can I get away with building?
- Structurally complete, down to details
...
This blog was originally written in November 2011
I’ve just returned to my winter home / shop in Arizona. At home I have all the tools and lots of space but here I have 1/2 a garage and a much smaller budget. That’s no reason not to have all the toys, you just have to be a bit more creative.
What I need to go with the chevalet I built here last winter, to pursue marquetry, is a veneer press and a thickness sander. The press can wait until next week but the sander gets built now.
Criteria:
1) Gotta be cheap
2) Gotta be precision
3) Gotta be small
How hard can that be?
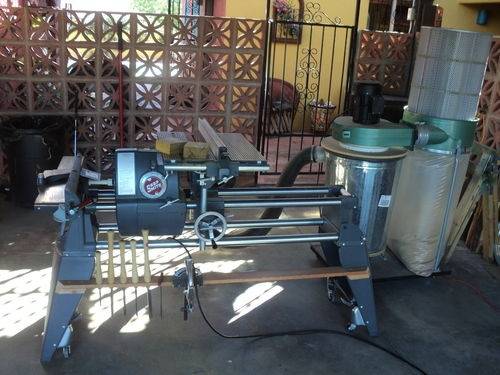
I need to build as little as I can get away with and use as much of the ShopSmith’s versatile platform as possible. So………… the basic plan is to use the SS’s structure as a framework, its lathe capacity as the drum drive bearings and all, and the way tubes as a base for a simple adjustable table.
This morning I took a run into Tucson and bought about all I need at HD. It’s not much.
I decided to make the drum today and fire it up to test the concept so here’s how it went.
Here’s my SS, a 1990 Mark V 510, in tablesaw mode with the jointer coupled on the left. You can run with both of these set up together. I’ve just cleaned one side of a piece of 2" Osage Orange on the jointer and cut a couple of 4" square blocks.
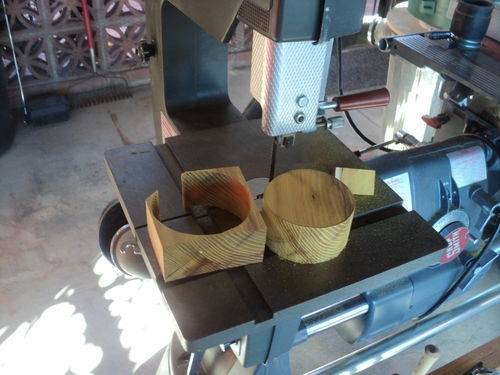
Jointer off, bandsaw on and I’ve cut rough circles out of the blocks.
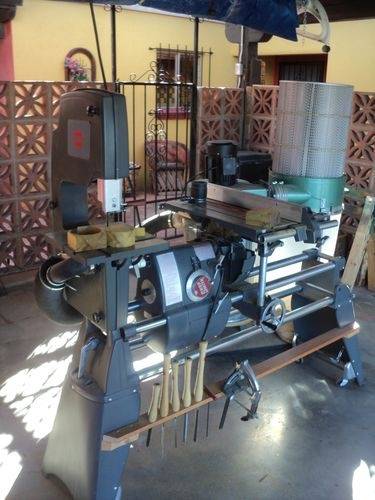
The SS bandsaw is a very good machine. It may be a little small but it is a precision tool.
A quick flip to vertical position to prepare the very hard wood for the lathe.

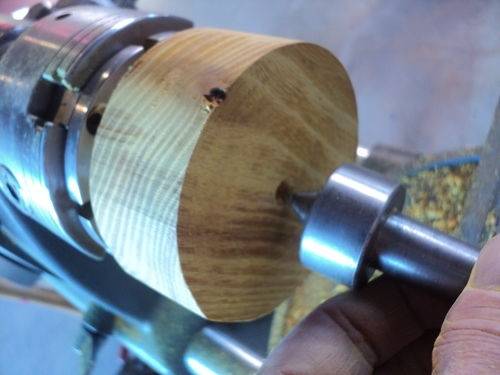
Locked in between centers with a spur and a live center. I’ve cut a 2" spigot for my chuck.

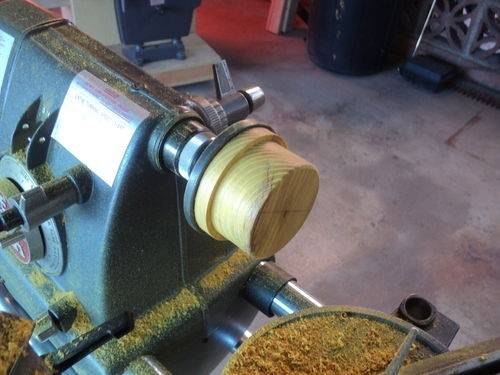
Now in the chuck, I have turned a recess to fit the live center perfectly.
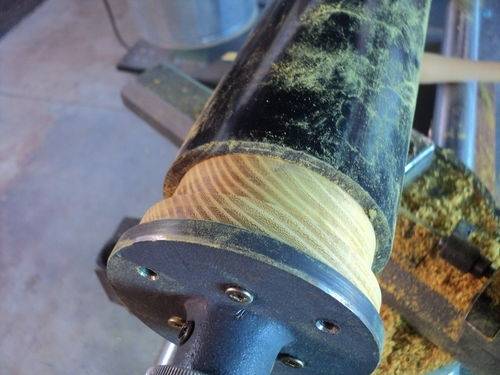
There is room now to use the upgrade lathe rest system. Here I’m set up to finish cut the right end plug to the ID of my ABS roller.
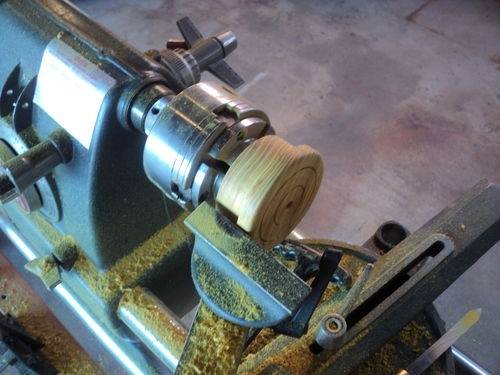
The plug is all finished. I just couldn’t resist a trim groove.
The fit is tight enough to bind but not tight enough (driven fit) to deform the ABS.
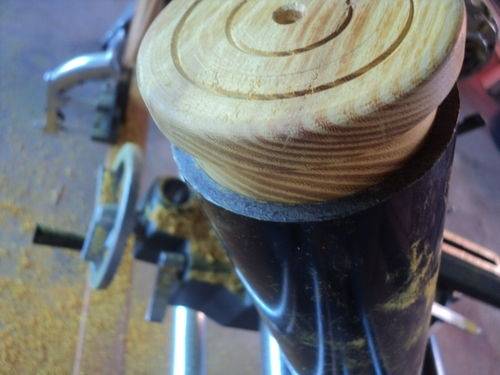
This is the finished look of the right end of the roller.
The drive end (left) is mounted on a dedicated face-plate and turned to the same friction fit.

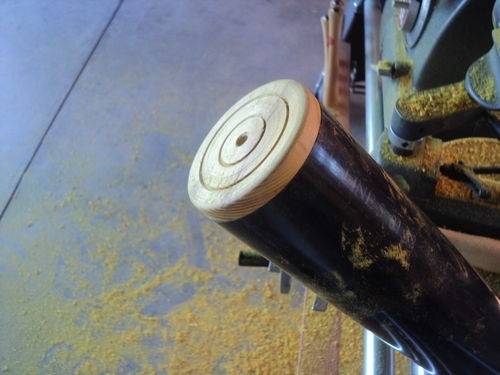
A look at the fit at the drive end.
Spinning her up. I can run the drum up to lots of speed with virtually no vibration. I’ll true it up a bit with sandpaper on a flat board when the table is built.
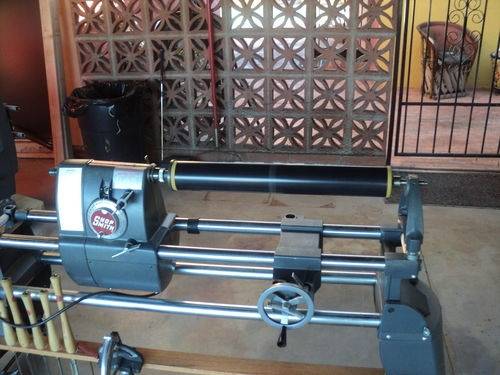
This all tookabout two hours including all the pictures and what I have is a variable speed drum, ready for the velcro kit, mounted perfectly parallel and above a pair of way tubes that will support the table.
Thanks for dropping in.
As always, questions, comments, and critiques are welcome.
Paul
The early bird gets the worm but its the second mouse that gets the cheese.
2 Comments
Looks great! I’ve only used a commercial drum sander… do they work ok without the conveyor belt feed system?
Angellos
It’s a lot easier than you might think. There is a little learning curve around etting a smooth, even feed to avoid ripples but once you get that down it becomes just as easy as the power feed. I have a power feed machine at home and this works just as well.
The early bird gets the worm but its the second mouse that gets the cheese.