


Share your craft projects
Make new craft buddies
Ask craft questions
Blog your craft journey

Jeff Vandenberg
1351 posts
and
51 followers
in over 11 years
in over 11 years
Workbench / Outfeed Table #1 #5: Workbench/ Outfeed continued
This is
part 5
in a
11 part
series:
Workbench / Outfeed Table #1
Well it’s Valentines day and I only got to work a few hours today. So I ripped my frenchcleats today. Im using the back of the workbench for storing. Everthing from my framing nailer to extension cords. Also a lot of F style clamps. Now my wife comes into the shop wondering what I was doing and asked what a frenchcleat was. So I took a whiped up a box and hung it to allow her to see the concept. Then she understood. Hopefully Sunday I can get back in the shop And finish the back side. Im getting there however, I am starting to think of my top. I want to make a butcher block top and im going to use hickory because its more dense that maple and hickory is what im using for my trim, doors and drawer fronts. How would you guys do your top as in putting it together? Im going to glue it up in sections of 7" then truing each 7" beam. Then gluing two 7" sections together and bringing down to within 1/8" of finished thickness. Mainly because my thickness planner is only 15" wide. Then glue up all the 14" to one large top. Well give me your ideas guys.

Jeff Vandenberg aka "Woodsconsin"
8 Comments

Excellent progress.
CHRIS, Charlottetown PEI Canada. Anytime you can repurpose, reuse, or recycle, everyone wins!

You should definitely read thorreain’a bench making blog. That was a very well thought out construction that I plan to use as the basis for my top when I get around to it.
Losing fingers since 1969
Going to head over right now and read it. Thanks
Jeff Vandenberg aka "Woodsconsin"
You can PM me anytime for details, but it was the first time gluing up such a large piece for the top. It turned out ok I think. As for your bench I love the French cleats. I have been using them for 30 years when hanging heavy items on walls like headboards for beds, but never thought of them as a storage solution. Great inspiration!
CHRIS, Charlottetown PEI Canada. Anytime you can repurpose, reuse, or recycle, everyone wins!
Thorreain, the nice thing about your bench build was the thought and careful planning. I’ll be attempting to put that much thought into mine. :-)
One thing I’ve been thinking about pertaining to my future build is the glue up. I plan to make all the pieces with dog holes etc and then glue them up in sections small enough to fit through my planer (12"+/-). Then assemble those sections together. Hopefully it will reduce the amount of flattening after assembly. I also plan to use biscuits to help align the boards, and later the sections when they go together.
Losing fingers since 1969
One thing I learned about gluing up large panels is to used 2"PVC pipe. I learned this from MTM Wood. He is from Russia and he has a custom cutting board company. All his glue ups are dead flat on the side that rest on the PVC. Now I have personally used this method and it works. It allows you to get clamps underneath the glue up and it can sit on PVC without sticking to it or leaving any black spots. The wood surface stays true as long as you have have squared up properly. Otherwise it the highest point of the wood will only touch. Whats nice is the glue clean up is fast and easy. Also your surface is ready for a 1 jointer pass. Just a FYI if you haven’t heard of this.
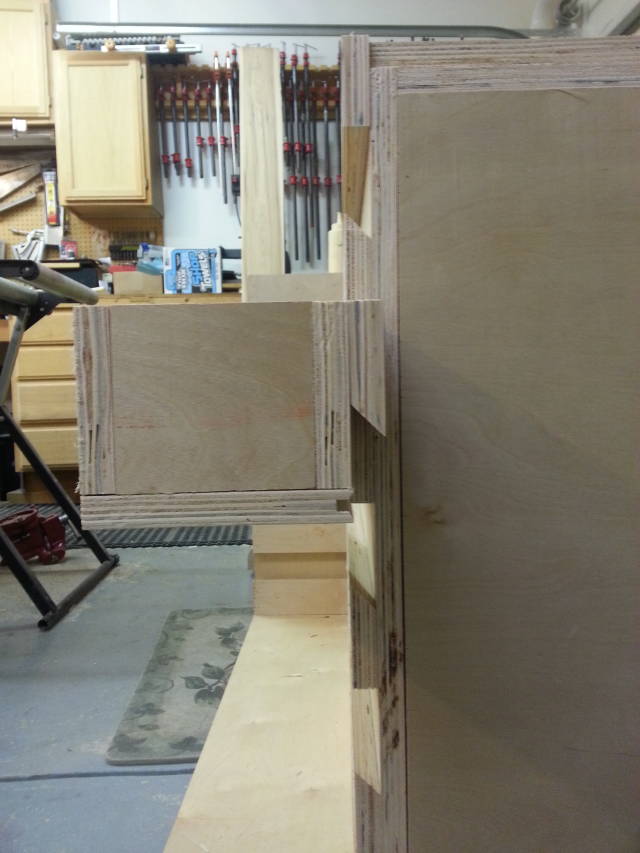
Next insted of bisquet why not spline it all the way down? Just a though. I did some research on companies that make tops. I saw a few that used toung and grove. I really like that but to accurately cut the toung I believe a shaper is needed. Well I don’t have that. I don’t want to have the face to face to have any surface to surface loss of contact by using the table saw for this method. Thats why I stated splines. You could alternate the splines every other board would be near the top then the other would be near the bottom. Use contrasting wood to have it highlighted on the end grain. 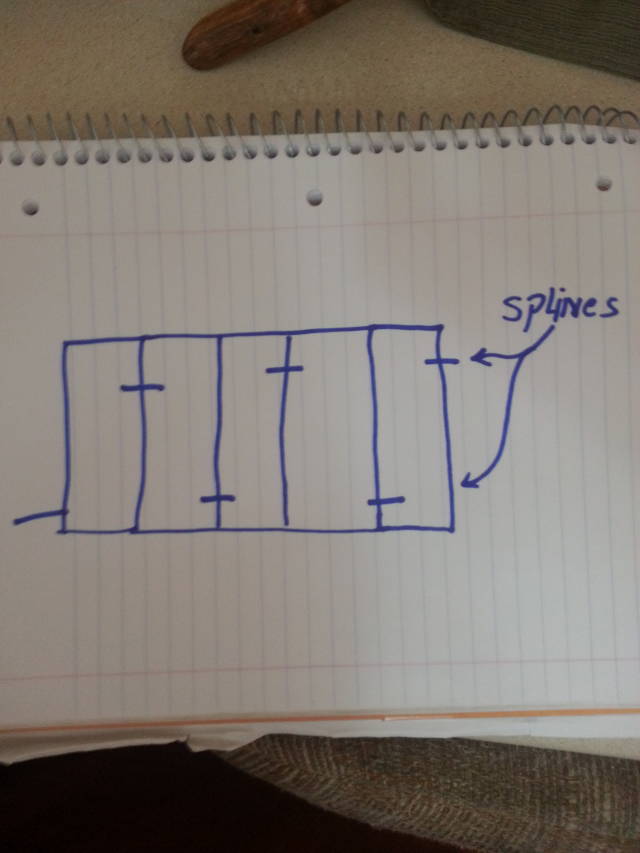
Jeff Vandenberg aka "Woodsconsin"
I have used tempered Masonite on splines that pass all the way down the length of boards many times. It’s as thick as a regular pass with a non thinned kerf table saw blade then allows just enough glue. My passes are 3/4" deep then I use a 1-1/2" wide piece of Masonite. The strength is amazing, more important is the top aligns perfectly. As Jeff has noted, it’s a good idea to stagger the joints. I have even used this way of board lamination on guitars, with great results. I did however use instrument glue so as not to affect the sound quality. Then when dry and shaping it still allowed me to tune the wood to the desired note.
CHRIS, Charlottetown PEI Canada. Anytime you can repurpose, reuse, or recycle, everyone wins!
Nice! hey do you have any pictures of your guitar work. i think that its so cool to build items like that Thorreain.
Jeff Vandenberg aka "Woodsconsin"