


Share your craft projects
Make new craft buddies
Ask craft questions
Blog your craft journey
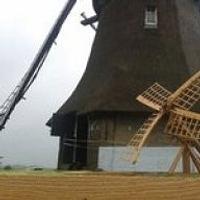

The last thing i will have to make are the sails for the windmill.
[image.png]
These are one the drawing with a lot of details, but I'm not able to...

Giving the head a fist layer of green paint, some small details will be white.
[20230915_180208.jpg][20240518_121518.jpg]
And a first coat for the ...

It's time to make the wings!
[image.png]
[image.png]
Lets start with a nice piece of straigth oak. I'll be using a old bed railing. It dry and will...

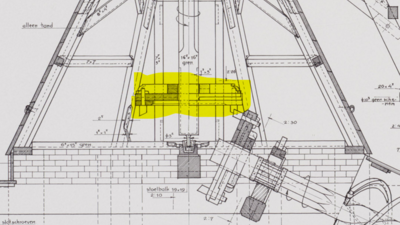
The next parts to be made are a beam for the breaking system of the mill, some rafters and the cladding.
On the drawing that would be these parts:
...

Some part of the mill are strengthened by metal.
And because there is nowhere to bay them, i will be making it myself[IMG_20221217_103828.jpg]
Forg...
To turn the windmill there is a little winder at the tail of the mill.
In this short blog entry i will be making this.
[image.png]
To bevel the fro...
[image.png]
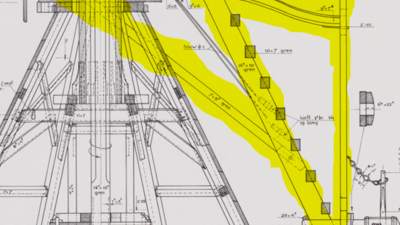
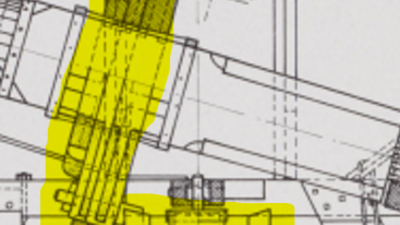
To turn the head of the mill into the wind the windmill has a "tail"
It is strengthen this construction there are braces to transfer th...
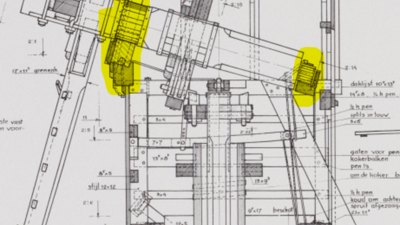
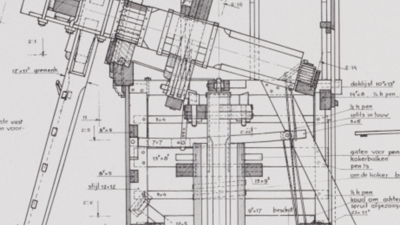
For the head of the mill i will make the beams that support th mail axel.
[image.png]
The surface on the "windpeluw" is on a angle to allow the til...
Lets start with the "head" of the mill
[image.png]
[IMG_20220513_133503.jpg]
These are called the "voegberry"
The joints are mortise and tenon.
[IM...
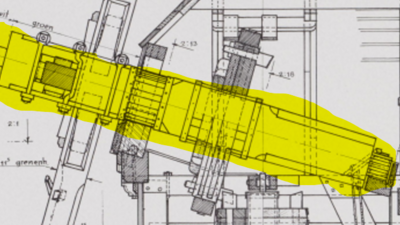
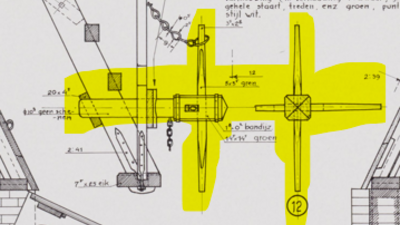
Next up the axel
[image.png]
It is made of oak and is one piece. I will modify this to make it easier to disassemble the wings for transport.
[IMG_...
The next parts i'm going to make are the other two wheels and the break of the mill.
[image.png]
On page two there are some detailed drawings of th...
Let’s make one of the wheels!
It’s the wheel at the bottom of the spindle.
[image.png]
[image.png]
I made the rims on my CNC
[image.png]
[imag...