


Share your craft projects
Make new craft buddies
Ask craft questions
Blog your craft journey
Blog Series
Fun With CNC
Part 1: Background and Kickoff - Why are we here exactly?
A Little about me
Being sort of a retired nerd, I spent my career doing mostly finance related I/T, I have always gravitated towards technical stuf...

Part 2: CAD to CNC Machine Workflow
EDIT: I change the name to reflect the actual purpose of the post
Let's Make Some Boxes
So we all make boxes, right. There are all kinds. Fancy...
Laser Tile Etching With Titanium Dioxide
Part 1: Trying a few tests for the process
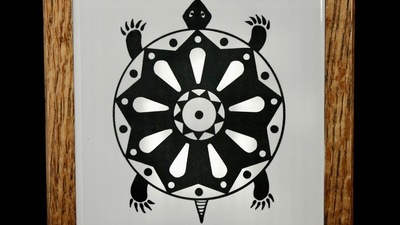
I made some trivets with simple images on the cheap home center plain white tiles in another project.
[IMG_8376.jpeg]
Simply put, this black on th...
Part 2: Prepping for Photographs
Well, yes! You can use the Ti02 on tile and transfer a photograph over.
I personally haven't seriously tried to do this but I have seen pictures o...

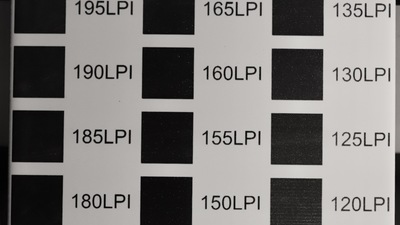
Part 3: Some grey-scale line art
So it has been a while!
For a while now I've been using a free, on-line software called ImageR for getting settings near perfect for etching onto ...
Bugout_Boy’s Speargun Project
Part 1: Speargun 101, Design & Function
In order to explain my own speargun project, it makes sense to provide some context on speargun designs first.
[Image]
Spearguns, used for huntin...
Bugout_Boy’s Lathe Projects
Part 1: Lathe, Love, Or Loathe? A crazy entry to woodturning.
I’m brand new to wood lathes and woodturning. The journey that led me to getting one was about as strange as possible. I’m going to use this openin...
Hans Wegner's "Bukkestolen"

Part 19: Fixing my Mistake
After a day to contemplate the error of my ways, I set to removing the finish from the top of the arms in order to sand the scratches. I spent som...

Part 20: Weaving a Backrest
A fresh 10lb spool arrived at the end of last week, and I got started making good use of it. I wrap the spool in stretch wrap and pull the loose...

Part 21: Completing a Chair
Before I started weaving the backrest, I made a final check on the cords-per-inch with the actual cord I would be using. It turns out my original...
Folding Work Table and Storage Bracket

Part 6: Finishing and Final Assembly
Because the tables will reside in an unheated garage, I decided to finish all surfaces with three coats of water-based poly (General Finishes High ...

Part 7: Storage Bracket
[01.09 Folding Work Table Mounting Bracket.jpg]
A section of the wall on the front side of the garage was just the right size for the tables. I ...

Things go wrong

Part 1: Pen blanks gone wrong
A while ago I poured some epoxy over cholla canes to make some pen blanks. But the epoxy went exothermic and made enough of a mess that I thought a...
Free Retrofit Puzzle Box Plans

Part 1: Liquor Box Puzzle Plans
[Windy 1.png][Windy 2.png][Windy 3.png][Windy 4.png][Windy 5.png][Windy 6.png][Windy 7.png]
Urban Ore

Part 33: Tool Engineers Handbook
For $2, acquired a new book. What a book it is. Measures over 3” thick printed on vellum. I estimate over 1,000 pages. Printed in 1959.
[IMG_8840....

Part 34: Record 77 Spare Iron
For $1, picked up this new-in-package plane blade. Lord only knows how old it is. When was the last time Marples was in business. Also, looks to be...

Part 35: Stanley 04-421 “Silken” Hole Cutter
A rare find. Some collectors passed it around and it came to me. I knew it was a hole cutter, but I didn’t know about this variant. Usually the piv...
New Supercell DC for My Shop

Part 1: Designing a mobile cart.
Background:
A couple of years ago, I found a basic Delta 1 HP dust collector that someone was throwing away. It was in good condition and had t...

Part 2: Making a Cart
As I mentioned in part 1, I based my cart design around a a Sketchup model I found on their 3D Marketplace. Once the Supercell arrived and before...

Part 3: Shop Vac Hose Reel Auto Rewind Mechanism
It has been a while. Maybe a little off topic for a Supercell titled blog but sort of the next step in improving dust collection in my shop. The ...