


Share your craft projects
Make new craft buddies
Ask craft questions
Blog your craft journey

shipwright
2073 posts
and
113 followers
in over 12 years
in over 12 years
How to Build a Chevalet From Scratch #3: Some Chevalet Modifications A New Friend
This is
part 3
in a
6 part
series:
How to Build a Chevalet From Scratch
-
Blade Clamps, Sliding Mechanism and Adjusters
-
Some Chevalet Modifications A New Friend
-
Another Little Modification
...
- Blade Clamps, Sliding Mechanism and Adjusters
- Some Chevalet Modifications A New Friend
- Another Little Modification
...
There are two stories here that can't be separated from each other so I'll tell them together. One is about the first modifications to the Chevalet after using it for several hours. The other is about making the acquaintance of the premier marquetry and chevalet master on this side of the ocean.
As our story begins; I was having a bit of an ethical struggle with myself about offering my (however humble) Sketch Up chevalet plans publicly for free when there is someone out there selling them. Just because I'm retired and don't need to make money from this is no reason that I should be allowed to undermine someone's business. (IMHO)
So I decided to email Patrick Edwards and ask him if he would have objections. He replied almost immediately and told me that I could make them as public as I wished with his blessing. His goal is to make North Americans more aware of the chevalet and it's unique abilities and he sees my project as a way for DIYers to get into the art at a more affordable cost. He also commented on the photo link I sent him and gave me tips on how to improve my design. What an impressive man.
I have since spoken to him on the phone when he again had time for me and offered more advice. I will definitely be scheduling a week at his school next winter when I'm back down here (AZ). All he asked was that I mention his American School of French Marquetry as a place where those who choose to build from my plans might learn how to get the most out of their chevalets. Did I mention I was impressed?
On to the modifications. From the beginning I had planned to add a seat on the bench, both because the bench is a little narrow and because I wanted to make the chevalet as adjustable as possible. I built the bench at the lowest that I thought might work and planned on adding the seat to come to the height I thought would be right for me. The option is still there to shim the seat even more.
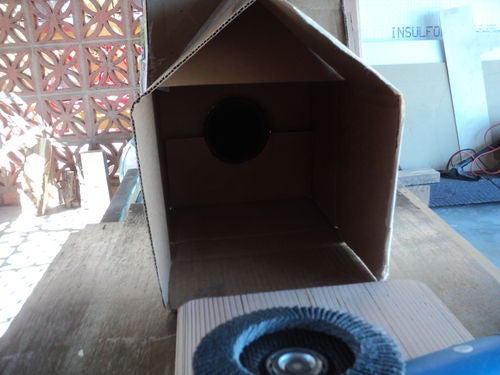
This is not a cheap dog house. It's my Q&D dust collector for the seat shaping.
Here's the seat shaped and with it's first coat of BLO. When I resawed the piece to glue up the blank for this I found a spike knot that was crying to be the defining shape of the back of the seat. .. Well I like it anyway.

This is the chevalet with the new seat in place. It raises the sitting position by 1 3/4" so the main arm is also raised 1 3/4" by moving shims and the new clamp jaws that Patrick suggested are also the same amount higher.

On Patrick's recommendation I made the new clamp jaws thinner, with a much smaller birds mouth and sanded away part of the moving jaw so that only the area immediately around the notch is is contact with the veneer package.

If you look closely at this one you should see that the jaws only touch near the notch.

The Sketch Up plans are now finished. I will post them as a forum topic under Tools and Accessories. If you want to build one, please contact me and I will be happy to help you size it to suit your body. Not many will want to set theirs up at my exact final dimensions. I'm 6'4" tall. I also have lots of photos and will share them as well.
As always, comments critiques and questions are encouraged.
Paul
The early bird gets the worm but its the second mouse that gets the cheese.