


Share your craft projects
Make new craft buddies
Ask craft questions
Blog your craft journey

shipwright
2073 posts
and
113 followers
in over 12 years
in over 12 years
Shipyard Memories #14: Cold Molded Planking
This is
part 14
in a
22 part
series:
Shipyard Memories
...
-
Two Cape Scott 36's: Cold Molded Construction
-
Cold Molded Planking
-
Rolling Hulls Over and Pouring Lead Keels
...
...
- Two Cape Scott 36's: Cold Molded Construction
- Cold Molded Planking
- Rolling Hulls Over and Pouring Lead Keels
...
I have to apologize for my lack of a lot of photos of this stage. I guess it just seemed to boring to take a lot of photos at the time. Anyway there are enough to give you the general idea.
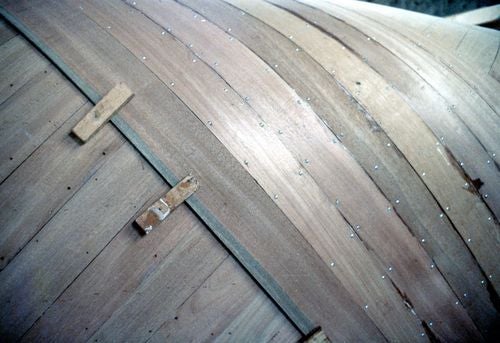
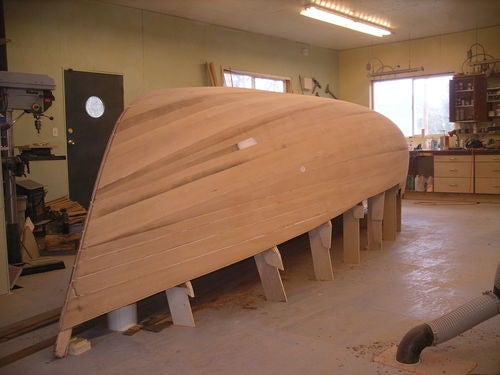
The first layer in this style of cold molding is applied on a diagonal as shown below. The exact angle is found by making several trial bends in different parts of the hull. The one that allows the easiest bends in the greatest number of places is the one to choose, if that makes any sense. This layer is epoxy glued to the stringers and bulkhead edges but care is taken not to glue the edges of adjoining planks together. This is because at only 1/4" thickness they will bend slightly differently and will not align exactly with each other. If this hull looks different to you,that's because it is. This is Stevador, with it's higher sides aft. I didn't have any early photos of planking Olfara.

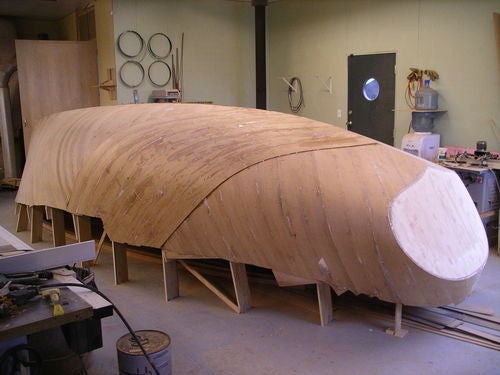
This is actually the third layer but for a moment, think of it as the second. The second layer is epoxied to the first and edge glued to it's neighbors and as the layers are drawn together with sheet metal screws, any high and low plank edges in the first layer are brought into line. As the planks are snugged up together, excess glue fills the joints between the planks in the first layer and everything levels out nicely. The sheet metal screws are removed and re-used and as you can see in this photo the holes left behind are filled in the third layer. In the first and second layers this is not necessary as glue will be forced into them when the next layer is squeezed down on top of them. The piece nearest us in the photo is being temporarily held in place by loosely fitting cleats so that it's far edge can be scribed to perfectly match the plank behind it, already glued down. That scribe line will be cut on the band saw and will then fit snugly against the previous plank. The other side will remain straight and the next piece will be fitted to it and so on down the hull.
This picture was probably taken at the same time as the last one but from further back. It shows a good view of the hull with two layers finished and the third started. These are the easy parts. It gets a little trickier around that stern.

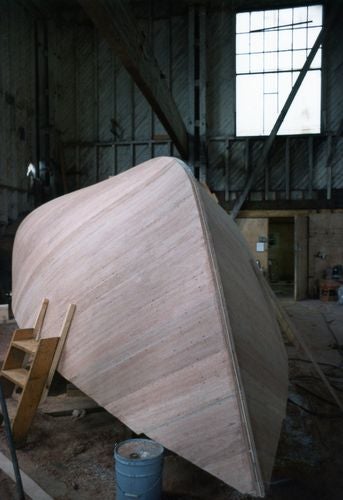
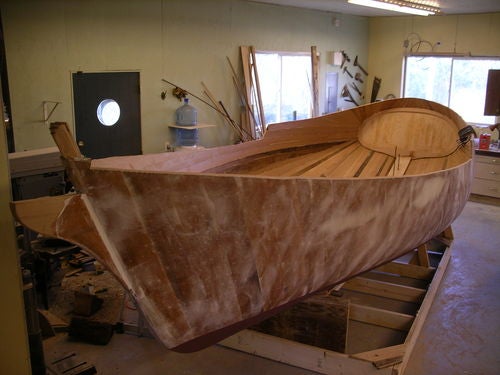
The view from the bow after planking is complete. The stem and keel areas have been planed down ready to accept further laminations to finish off the shape.
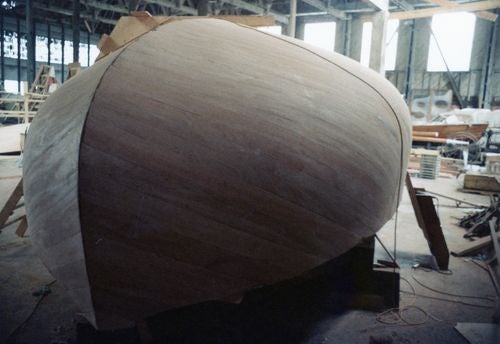
This is the same thing except from the stern. Here the centerline has not yet been planed off. In the stern where the shape is extreme, the difference in planking is the amount that gets trimmed off from the scribing. Some of these pieces will be quite wide in the middle and quite narrow on the ends. They may also need to be narrower pieces to start with than in the forward and central areas.
!
I'm going to toss in a few photos here from planking my own boat Friendship just to show another method of cold molding. This one is my own modification of the "strip plank " method where a layer of thicker strips is first laid up over temporary molds and is then covered by thinner diagonals. My modification was to shape my planks in the first layer more like carvel planks instead of using many many, more narrower strips as is usual in this method. I used a bead and cove edge to keep them aligned and escape the very labor intensive edge fastening used in strip planking.
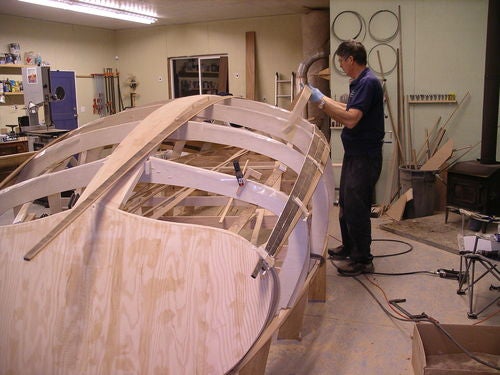
Here she is with the first longitudinal layer complete.
The first layer here was 5/16" followed by two opposing diagonal layers of 1/8" each. Now that's a tough stern to plank! It doesn't look too tough here but think about the first layer.
This method produces a hull that is completely clean on the inside and can be sanded smooth. This is really a good thing on a small boat like Friendship. The battens would have robbed her of a lot of very precious space.
There, I'm sure we've all had enough for tonight. Next time we'll roll them over and pour some lead keels.
Thanks for dropping in.
Comments and questions welcome.
Paul
The early bird gets the worm but its the second mouse that gets the cheese.
5 Comments

Doesn’t look much at all like Gibbs’ basement. ;-)
Thanks for the education, Paul!
Thanks for the education, Paul!
May you have the day you deserve!

Why is it that you did the first layer 5/16" and then the next 2 at only 1/8"?
I'm sure there's a good reason for it, but why not 3 layers equal thickness?
I'm sure there's a good reason for it, but why not 3 layers equal thickness?
The man in the suit has just bought a new car from the profit he's made on your dreams.
Why is it that you did the first layer 5/16" and then the next 2 at only 1/8"?I'm sure there's a good reason for it, but why not 3 layers equal thickness?
Good question.
The thicker first layer forms a fair curve with fewer frames.
The early bird gets the worm but its the second mouse that gets the cheese.
Damn...the light came on as soon as you said that. Same basic principal as bending curved rail then.
For laminated curved railing, all the layers are the same thickness, but the thickness is maxed out(radius and pitch dependent) and that's one of the reasons.
Less clamps, less brackets, fairer curve.
For laminated curved railing, all the layers are the same thickness, but the thickness is maxed out(radius and pitch dependent) and that's one of the reasons.
Less clamps, less brackets, fairer curve.
The man in the suit has just bought a new car from the profit he's made on your dreams.
Yup. 😉
The early bird gets the worm but its the second mouse that gets the cheese.