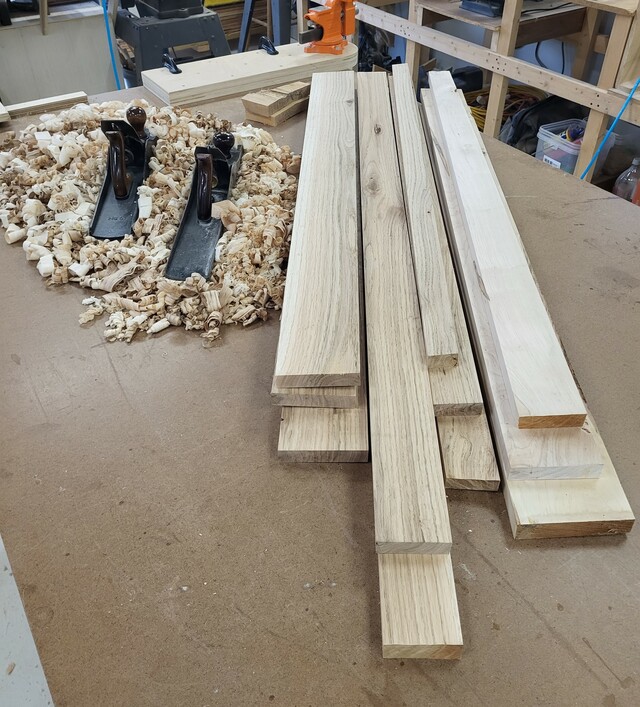
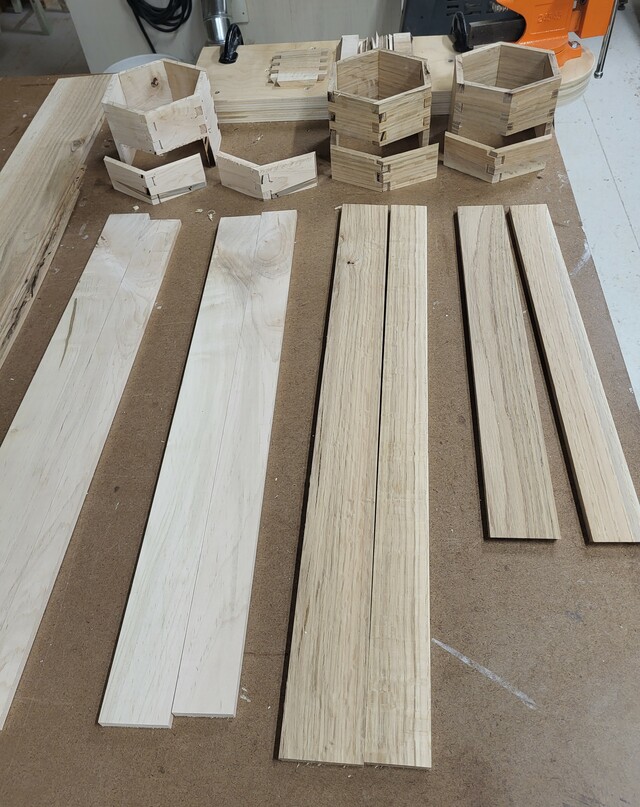
I wanted to make some hexagon boxes again, this time using thinner stock. Started out with some rough cut 4/4 Pecan and Maple about 8" wide and 8' long, ended up cutting them in half and ripped them along the pith line, they had a bit of a cupping effect. Ran them through the planner just to enough to get a smooth surface on both sides, ended up with 7/8" then squared the edges using a #6 for the high spots and a #7 for the final passes.
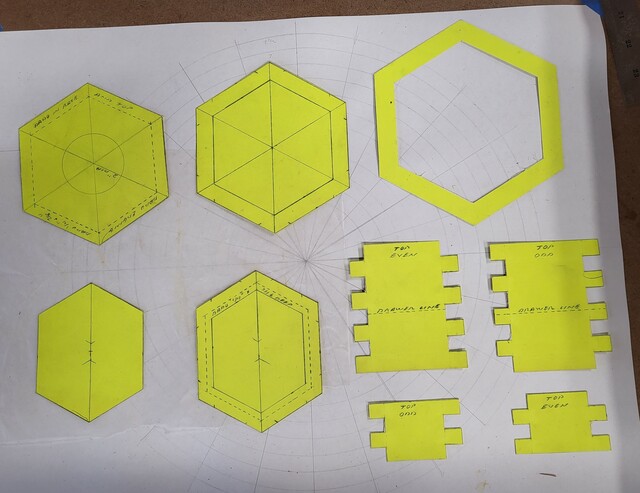
These are the patterns that I had stash away from one I built years ago.
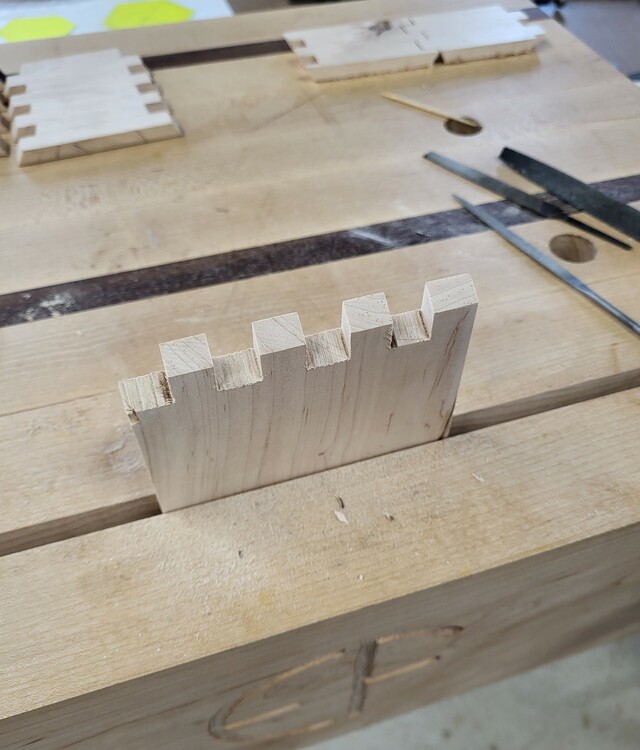
Over to the band saw to resaw in half, and back to the planner, ended up with just under 3/8". Now do the layout for the case sides, tried to keep the grain wrapping around the case. Once the pieces were cut to length and at the required 30* (I did build a small parts sled to assist in cutting the angles) it was time to lay out the 1/2" finger joints. (Tried to use a dado stack, the small pieces raised off the sled, ended up going back to a regular blade). Defined the edges then nibbled between. Cut the drawer face, then nibbled the small joints out. (No photos). Over to the Moxon, cleaned up the bottoms of the joints with a file (3-4 passes) and fine-tuned for a good fit. Guess I need to put a Lambs Ear on the front chop, (maybe someday).
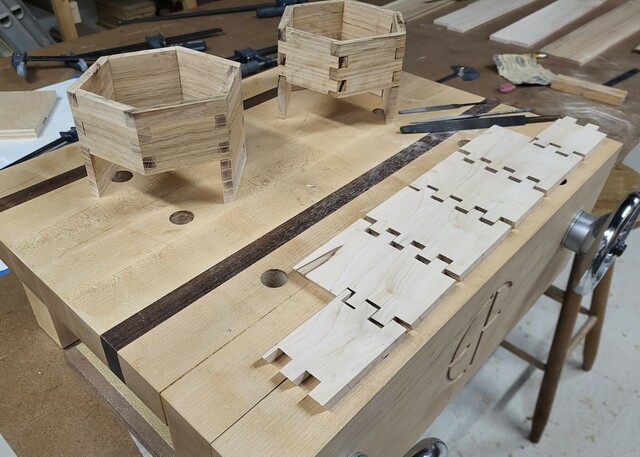
Had a few misses in the joint which had to be filled with a small strip. As I finished the fitting for each box, I did sand the interior face over at the belt sander first, then glued up the case. Tad bit of a challenge, had to be fast with the glue, then getting them (square if you want to call it that). Used the patterns to assist proper line up. On to the next case.
After the glue dried, used the large disk sander to remove the proud fingers, then a belt sander to finish each face. I do have a few gaps in the joints yet, collecting sanding dust and will fill after the drawer boxes are assembled. Keeping the boards in line with each box, for the matching grain and thickness since there is a slight variation.
Next up was to size the drawers to fit, each box had a tad bit of different dimension. Using the lower half of the case face, cut the 4 remaining sides. Grain sort of matched, at least kept the orientation of the bottom. After cut to length, back to cutting the finger joints. Small pieces, so I had to watch which ones to nibble out first. Probably should have used the sled that was set up for 1/4" box joints, next time. The sandpaper does help with keeping a grip on those little pieces. Also to knock off any tear out.
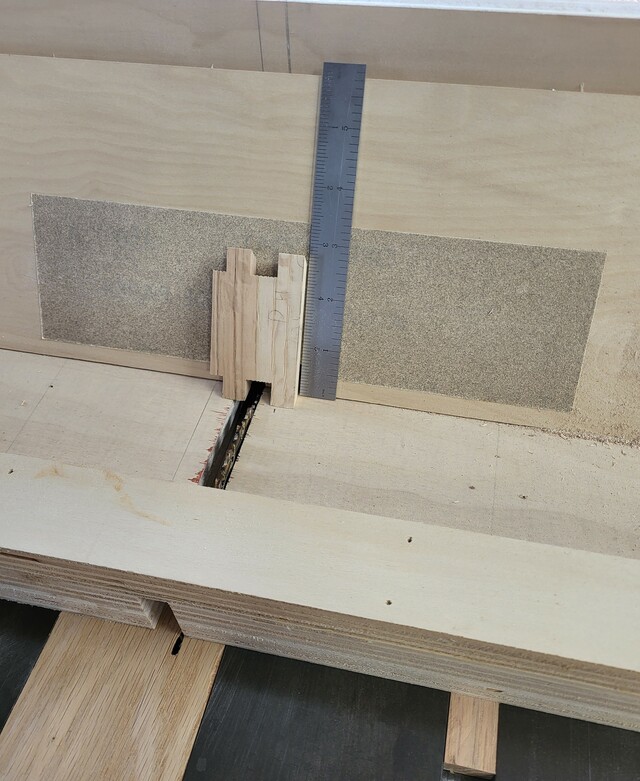
Back to the bench to fine tune the drawer sides. Also had to ensure the bottoms were flush for the next step. Once all of those were fit together. Off to the table saw to cut a shallow grove for a drawer bottom. Found a piece of 1/8" Baltic Birch. I thought about the router but didn't have a bit to match the thickness.
Once that was completed, I fit the sides together (again square) and laid out required cuts for the panels. Ensuring that I marked one end for reference during the glue up later.
A little grove, and reference numbers.
That is where I left off, but off to a good start. These boxes are designed for some Coffee Grinders that I have had squirreled away for a while. I do this set in the Hexagon, then do another set square. If I can figure out a good design that would work for the application, maybe try to turn a couple of them.
Thanks for reading and comments are always welcome and appreciated. Until next time.
Kenny, you can borrow all you want, that is why I post. Bently, thanks. Steve, thanks. I like to make things a bit out of the ordinary. Paul, thanks. Yes need to keep the mind active. Splinter, thanks. Smalls do have the challenges, have to sit a spell and figure out the best way, and keep all of my fingers. Moke, thanks. Ryan, thanks. I made one of these years ago. there will be a few changes in the design. Ron, thanks. Designs are a key at times, and the drawer fits in just right. Mike, thanks. Something a little different.
Rick, thanks. I cut finger joints on the table saw, I like to see where I am cutting, and a good sled helps out. I have two sleds, one for 1/4' and one for 1/2" and each one uses 2 runners. I also keep the bottoms waxed for an easy slide.
OldTool, thanks. I think they would survive being dropped, just have a couple of dings only. I have dropped projects with butt joints or miters, and a few have broken apart.
Very cool joinery on a hex box! Also interesting, I picked up a cast iron crank wheel coffee grinder from amazon, with the expressed desire to build a new base for it so I can add mechanics to keeping the drawer locked, and maybe the crank wheel from turning as well until solved. Maybe there is a collaboration in the works? : )