


Share your craft projects
Make new craft buddies
Ask craft questions
Blog your craft journey

Mike40
1074 posts
and
35 followers
in about 12 years
in about 12 years
CHRISTMAS GIFT BASKETS #1: Materials Preparation
This is
part 1
in a
8 part
series:
CHRISTMAS GIFT BASKETS
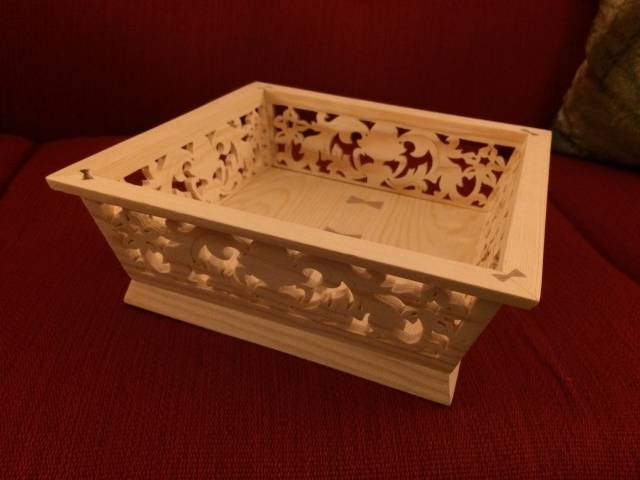
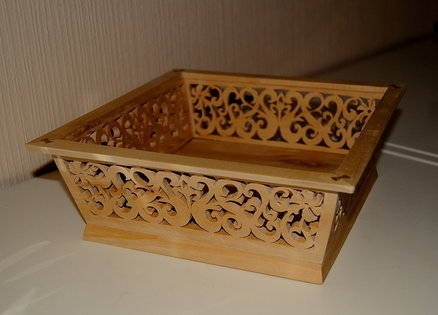
I have made a few of these baskets through the years and they have been very popular with friends and family members. In fact some who got one basket have asked me for a duplicate so they can have extra capacity when they are entertaining. They are very strong, but lightweight and easy to pass around at the table. They are not likely to break if you drop them on the floor unless the scrollwork hits a sharp edge.
I have to make two duplicates for Christmas this year, one for my DIL and the other for her mom. They are easy to make, very durable and they can be used year around. My wife and I are still using the original one I made 10 years ago on an everyday basis. I have made some of hardwood and some in pine which I will be using for this project. The reason I’ve used pine is because I can buy the materials already planed and dimensioned without any knots.
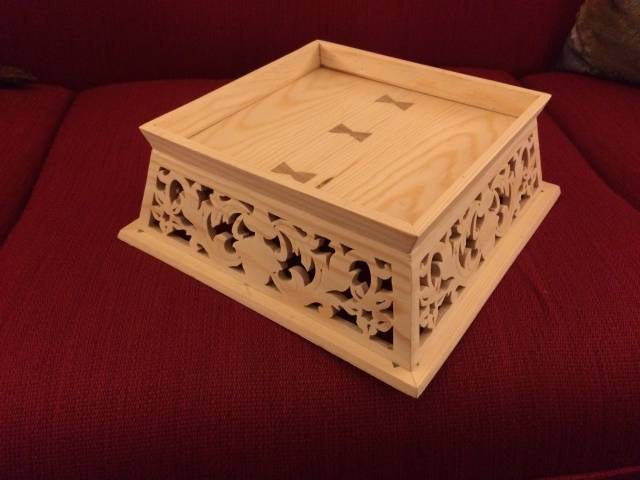
I will be making 5 of them altogether so I have some extras on hand and using dimensioned lumber saves me some time and effort. Here’s some photos of what I am building. As you can see there are bow ties which reinforce the corner miters on the top rim. This will in turn reinforce the side miters. I also used bow ties on the two jointed bottom pieces since they are very thin. Seen below:
A scroll saw is used to cut the design on the sides of the basket, but otherwise this is more like a box project, so you will need some general woodworking skills if you decide to make one. I will include the scroll pattern and the dimensions so you can replicate my design, but please feel free to change it in any way you want.
My main goal here is to introduce you to a great gift idea that lends itself to time saving production methods and it is an item that should be easy to sell at a very reasonable price point too if you are into that.
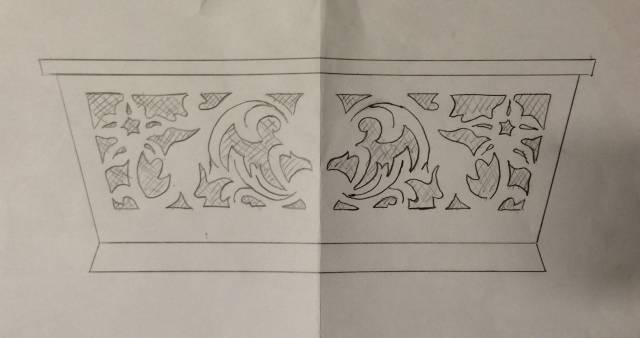
Pattern
Here is the pattern. I will try to include a picture that can be printed out in the correct size later if someone will tell me how to do that. Otherwise you will have to figure this out yourself. I will also include the dimensions and angles as I produce them. This pattern is not to detailed as I would use for hardwood and that is because the pine is a bit weaker and therefore less fragile fretwork is more appropriate in this case. The simpler design is also a lot easier and faster to cut which is always good at Christmas time. Below
Materials Preparation
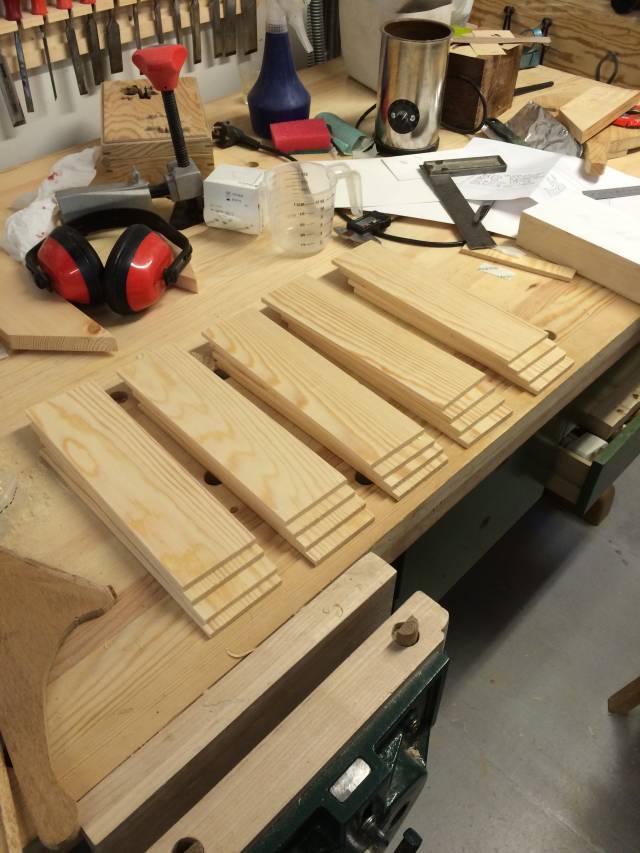
As mentioned before I bought some nice quality pine. The dimensions were 2.1cm thick and 14cm wide. With this size was able to resaw the material for the sides in half and then plane them to a thickness of about 0.6mm. Seen below
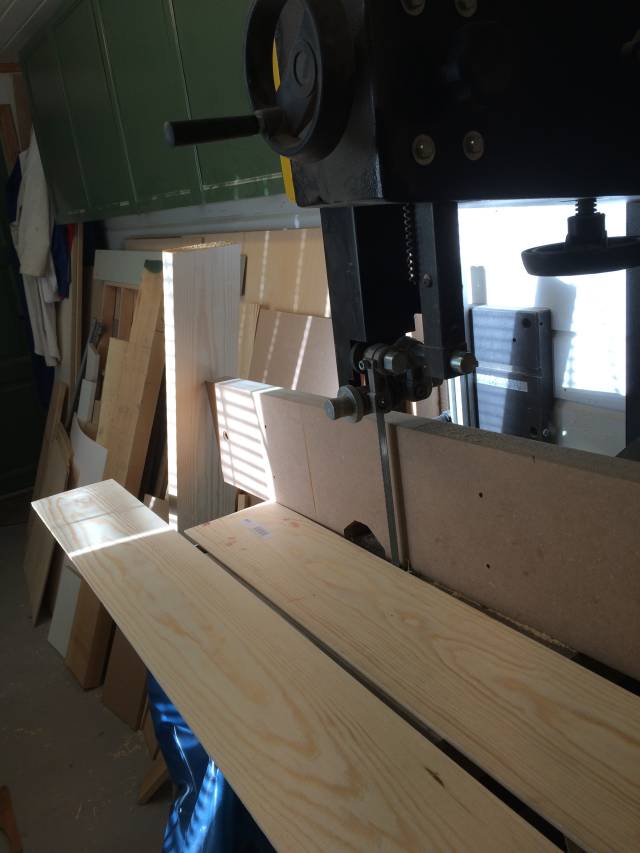
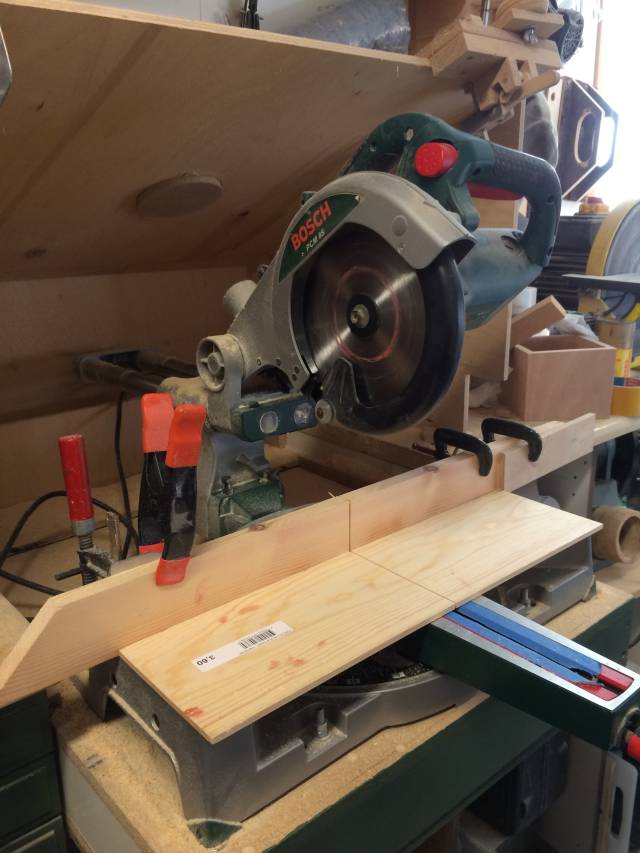
After planing I cut the the sides to length on my miter saw using an auxiliary fence with a stop for accuracy. Seen below:
The cut pieces were just wide enough that I could get two sides from each one by ripping them in half. So I wound up with 5 stacks of 4 sides each. Seen below:
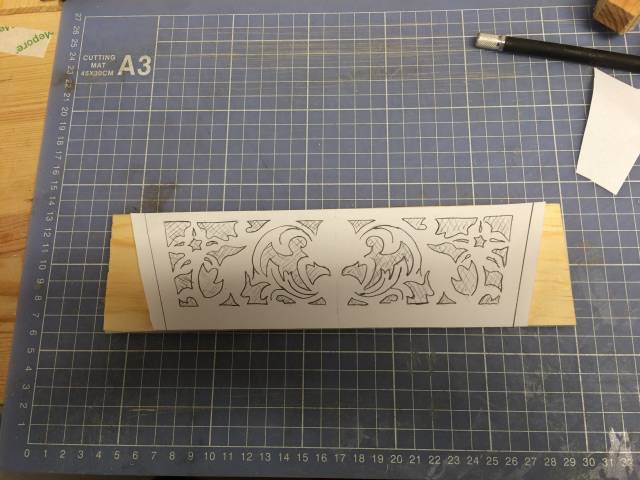
Here is the pattern to be glued on the top piece for stack cutting. I have cut the sides slightly oversized so that the stacks of 4 sides each can be easily pinned to hold them together for cutting.
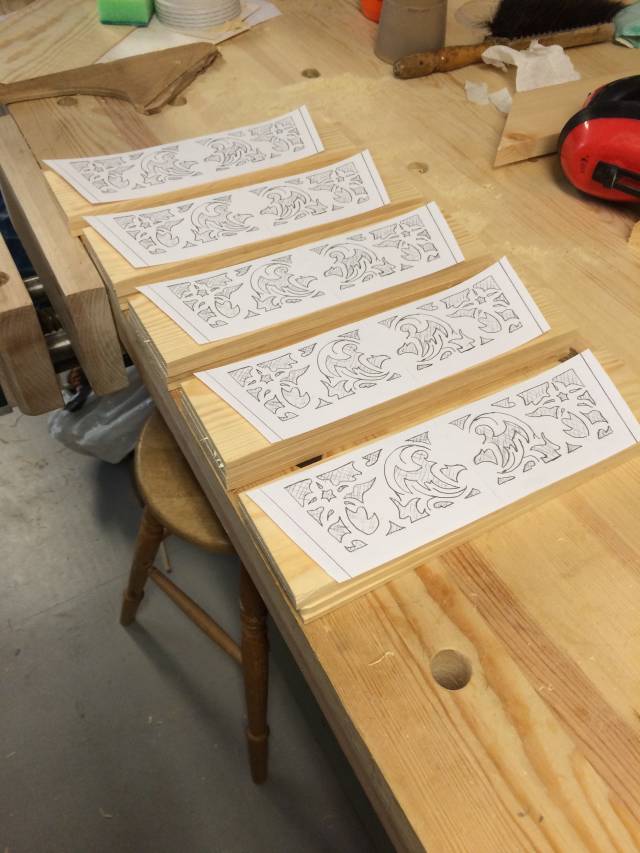
This was as far as I got today. Tracing the pattern, printing out the copies and all the wood prep. took 2 hours. Thank you for reading and I hope some of you will give this project a whirl.
Mike, an American living in Norway
5 Comments

Mike,
This looks like a nice project idea. Thanks for your willingness to share all the details.
L/W
“Those who would give up essential Liberty, to purchase a little temporary Safety, deserve neither Liberty nor Safety.” Benjamin Franklin
Great project. Really nice scrollwork. Thanks for sharing your process.
Anna

That is a fine basket Mike. I love it.
Is the mat you show on the picture before last in centimeters?
I am trying to get the dimensions out of the picture. I might attempt it during the Christmas break.
Abbas, Castro Valley, CA
Thanks for the positive comments. I’m always glad to share anything I make.
Abbas
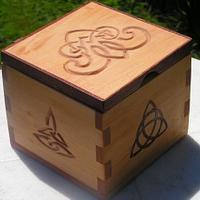
I will have a measured drawing available shortly which can be printed to exact size right from the blog. Also worth knowing that the size and angles can be changed to suit your own needs. If you wish to do it in hardwood I also have another more detail pattern available to make the one shown below.
Mike, an American living in Norway
Thanks Mike!
Abbas, Castro Valley, CA