


Share your craft projects
Make new craft buddies
Ask craft questions
Blog your craft journey

Mike40
1074 posts
and
35 followers
in about 12 years
in about 12 years
CHRISTMAS GIFT BASKETS #8: Completing the project
This is
part 8
in a
8 part
series:
CHRISTMAS GIFT BASKETS
At the end of the last blog the sides and bottom had been glued up and the foot frames and top rim frames had been each glued together in preparation for gluing them onto the basket.
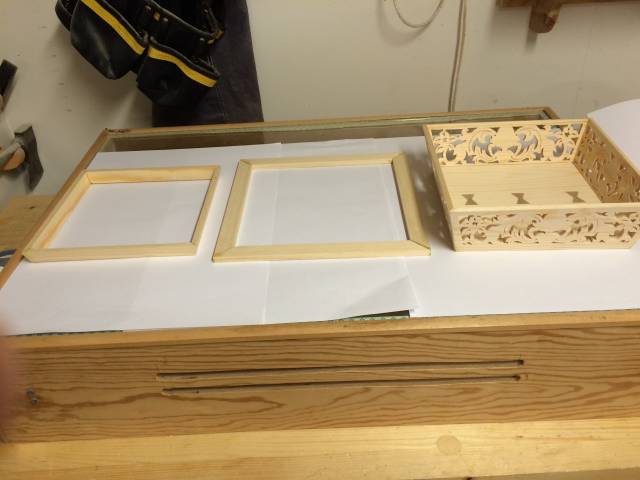
A RECAP OF THE BASKET’S COMPONENTS
There are only four main components that make up the basket. These are; the foot frame, the top rim frame, the basket sides and the bottom piece. So four small projects make up the whole. see below
YOU CAN DRAG AND DROP THE PHOTO BELOW INTO YOUR PHOTO GALLERY AND PRINT IT OUT TO FULL SIZE
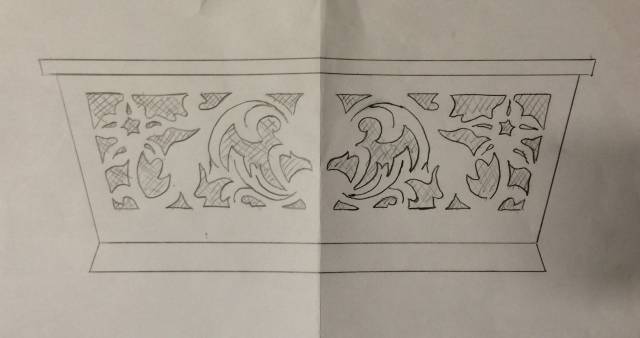
Finished dimensions for the components
- Foot Frame, four pcs,: 8mm thick X 15mm wide X 240mm long
The foot frame pieces have 15 deg. parallel top and bottom edges with mitered ends. That means that the top and bottom edges will be flat on the top and bottom with the foot sides sloping at an angle of 15 deg. from top to bottom.It is glued directly onto the bottom edge of the basket sides. - Top Rim, four pcs.; 7mm thick X 15mm wide X 248mm long
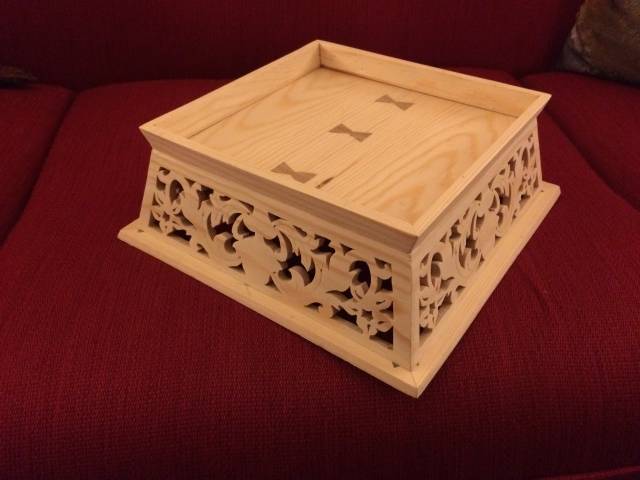
The top rim has 15 deg. parallel inside and outside edges with mitered ends. Bow-ties have been added to it’s corners to reinforce the relatively thin stock and to reinforce the the basket side miters. It is glued directly onto the top edge of the basket sides. - Basket Sides, 4 sides; 7mm thick X 67mm wide X 227mm long
Each basket side has a 6mm groove for the bottom running the full length of the side and beginning 3mm from the bottom edge. - Bottom, 2pcs with a glue joint in the middle reinforced with bow-ties, alternatively a solid plywood panel with or without bow-ties. finished dimensions; square 195mm.
WORK PROGRES
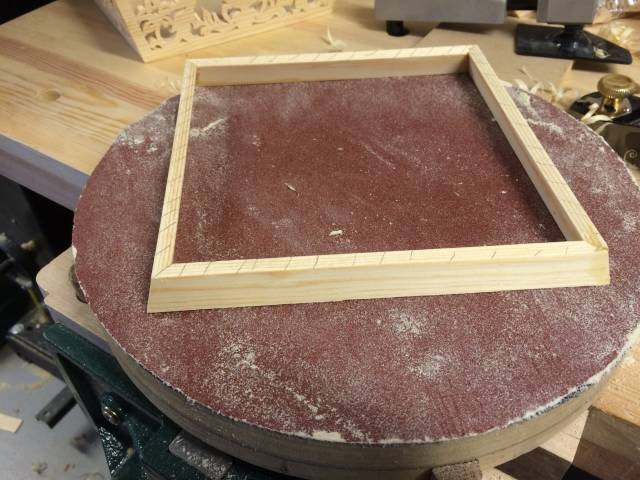
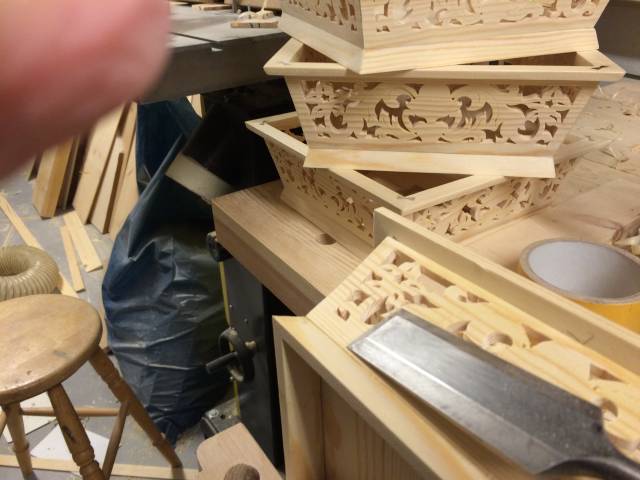
Having already glued up the sides and bottoms and the feet frames I sanded the top and bottom edges flat on my sanding board to prepare them for gluing onto the top rim and the feet. I used my block plane to get it almost flat before sanding. This was done to ensure good glue joints which are essential to the appearance of the finished baskets. see below
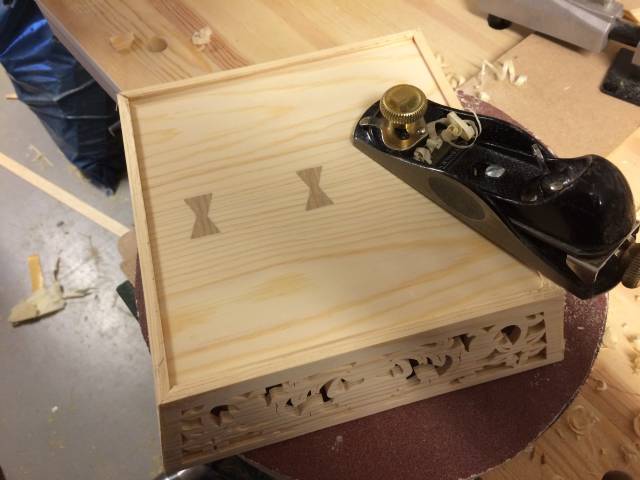
Next I glued the feet frames onto the bottom edges of the baskets. The hole you see in the side is where a piece got broken out. More about that later. see below

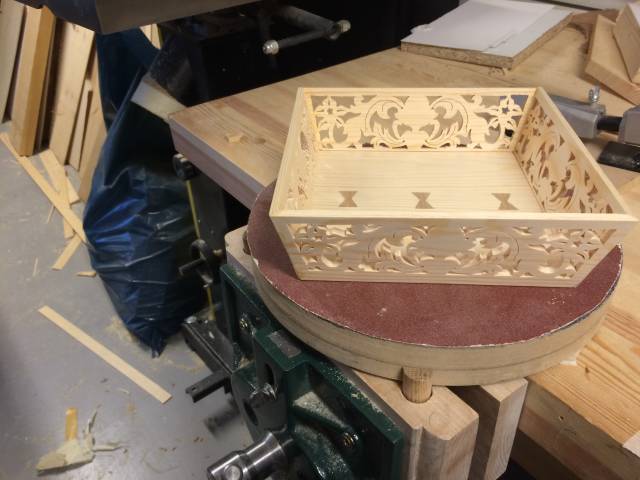
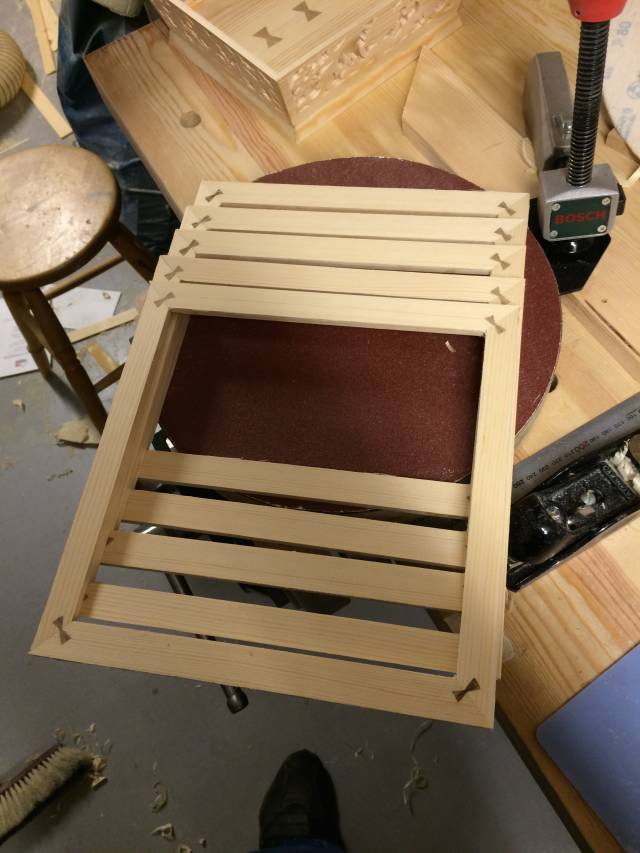
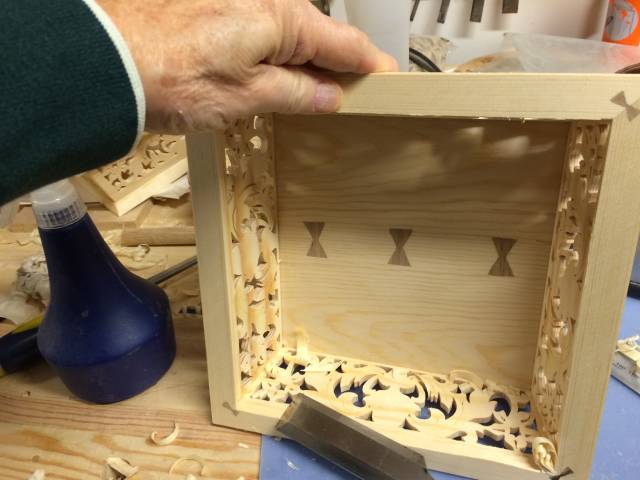
While waiting for the glue to dry on the feet I started cutting out the holes to receive the bow-ties on the top rim. I traced each bow-tie onto the rim numbering each outline with it’s corresponding bow-tie to ensure a tight fit. I cut out the bow-tie holes for one rim at a time and glued them in before proceeding to the next rim in order to avoid dealing with too many small pieces at once. After letting the glue dry, the top rims were sanded flat. This time I used my drum sander because the rims are too thin to get a good grip for to sand them on the sanding board, although I could have used double sided tape to tape some scrap handles on them if I wanted to use the sanding board. see below
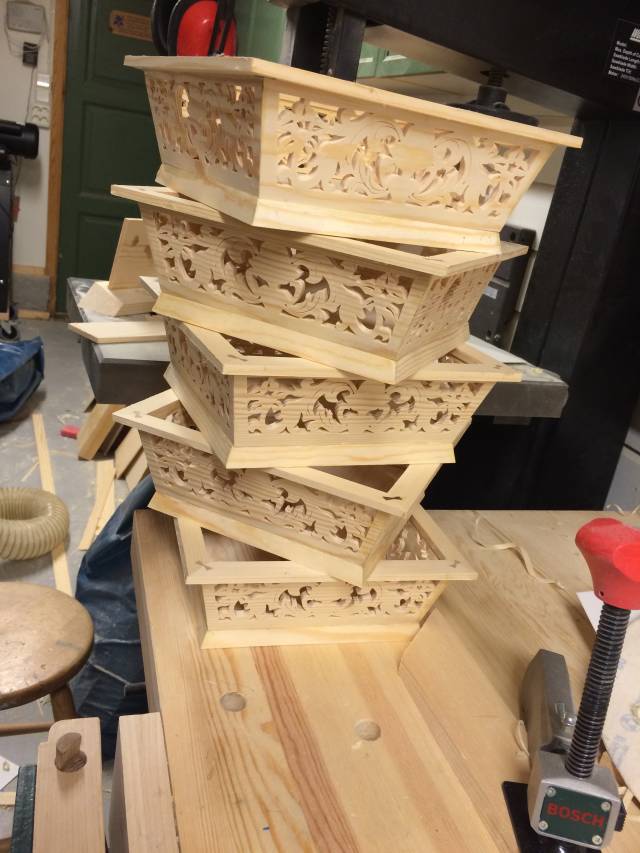
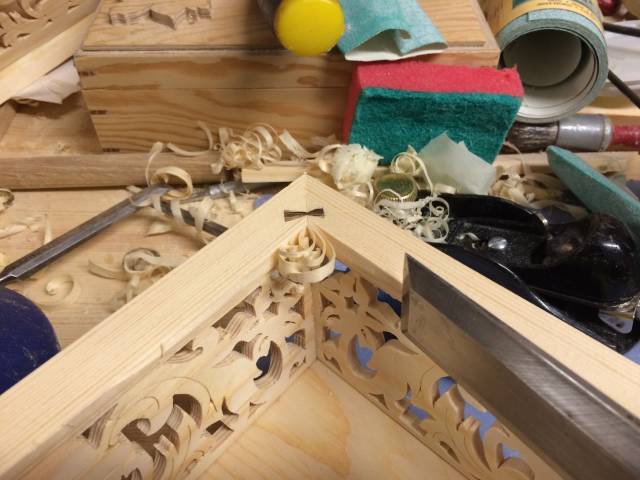
The top rims were glued on the following day and that completed the construction phase for all 5 baskets. The best way to do this is to place the frame on the bench, put glue on the top edges of the basket sides while holding the basket upsides down to prevent glue from running onto the fretwork, the place the basket still upside down onto the top rim. Line up the corners of the basket with the miter joints on the top rim as shown in the 2nd photo below. this will center it good enough. I left the top rim sides oversize in width and length so could trim it to an exact fit later. see below
FINISHING UP
Problem
I had a problem on some of the baskets. Piece fell out where I had sawed veins on the leaves. I didn’t have this problem with 3 pine baskets I made before. Last time I cut these veins with a #3 blade and the entry holes were made with 1.5mm drill bit. On these baskets a #5 blade and a 3mm drill bit were used. this was because even my small bit holder can’t hold a 1.5 mm bit and all I had was the 3mm. I used a smaller drill press last time (gave it to my son in Sweden), and I was having problems getting the blade holder in my scroll saw to hold a # blade (I still have to fix that). Anyway, the larger blade and bit cause a weakness and the broke off under handling.
The fix was pretty easy. The pieces were located back where they belonged and I just thinned out my hot hide glue and put it into the vein saw kerfs. I did this on all the veining on the face and inside of all the sides to make sure this would not happen again. The are now bomb proof.
The veining is optional. My wife says she doesn’t like it, but I do. however, I did a rather poor job of cutting them (dull blade-duh). It doesn’t look too bad to me, but I’m trying to be positive.
- Last things done prior to applying a finish*
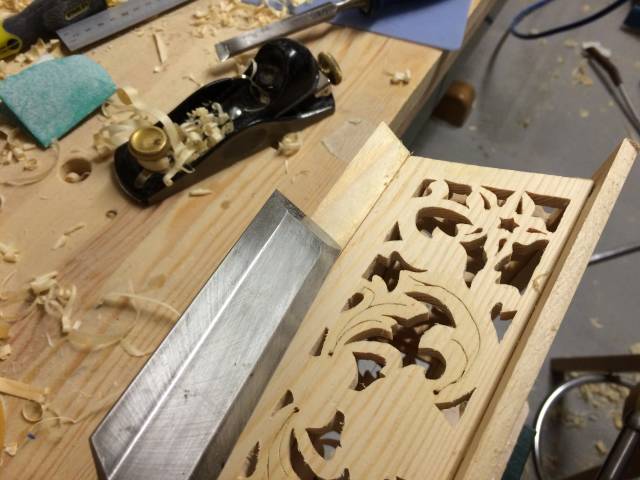
The next work was to trim the outside and inside edges of the top rim to 15 deg. On the inside of the rim I just trimmed the edge to the same angle as the sides and flush with the inside of the sides. This more or less automatically produced the correct angle. I started at one inside end with a sharp chisel and worked backward from that so that I was working downhill with the grain to prevent splitting until running out of workspace, then working the same way from the other end. I knew I was finished when the glue line disappeared. I was very careful to not let the corner of my chisel cut into the side as I worked. I used the angle side as a guide the whole time. see below
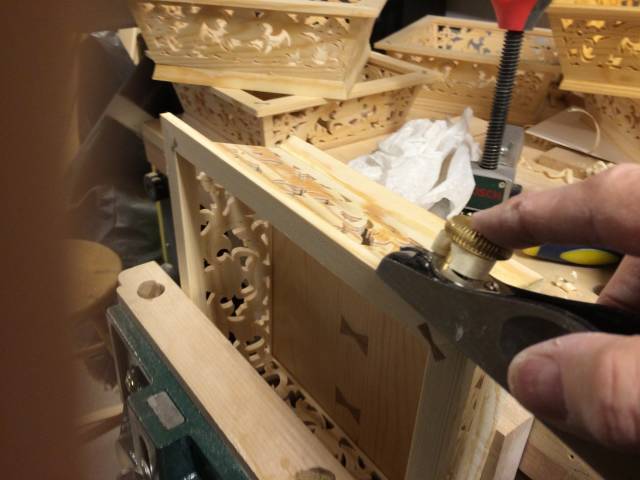
After the inside edge was done I used my block plane to plane a 15 deg. angle on the outside of the top rim. I eyeballed the angle, but I did measure the width to make sure that the rims were consistent in width all the way around. see below
Next up was to check all my miters around the outside to see whether they were good enough or if they needed any tuning. The were all good, but some needed a little sanding to perfect them. After that was done I checked to see that the glue joint where the feet meet the bottom to make sure that there was no ugly overhang from the side pieces or the feet pieces. There were a few spots with some minor overhang that I eliminated by smoothing with my chisel as shown. see below
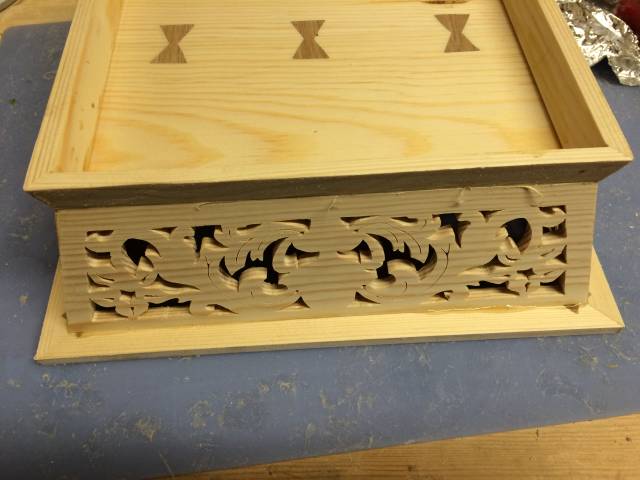
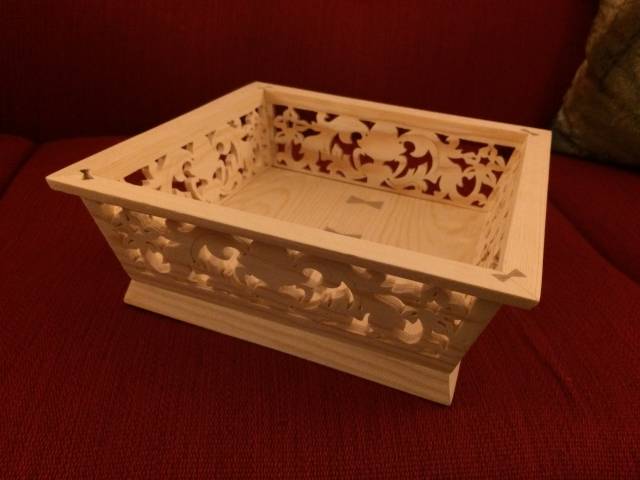
The last thing I did was to sand all the surfaces smooth and ready for finishing and here is one of the baskets after sanding. They all came out like this one.
So that is it. The only thing remaining is to figure out how to get the pattern to you in actual size. I have made a PDF with the pattern so it can be printed out in actual size and sent via email, so if you want the pattern please send your email address to me on a PM and I’ll send it. If there is another way that you want to do this and you know how, let me know.
Please feel free to make any changes you wish to the design and/or the dimensions. If you do make one of these whether this one or another version I would be grateful for any feedback to see how it went for you. I am also happy to answer and questions or lend any support I can to enable to finish this project.
I hope you were able to understand my description of the work. Thanks for following with.
Mike, an American living in Norway
8 Comments

Beautiful baskets. I really like the angles, they match the scroll work to make the whole basket delicate looking yet strong. I have been wanting to do a project entirely in metric dimensions. I currently do not have a scroll saw but maybe in the future. Excellent work.
CHRIS, Charlottetown PEI Canada. Anytime you can repurpose, reuse, or recycle, everyone wins!

Beautiful baskets and some excellent woodworking !

Excellent Mike. I really like it.
The blog is most detailed and will be extremely helpful.
Thanks!
Abbas, Castro Valley, CA

Mike this is just awesome. I will have to make some, I mean a lot because my wife saw it. And she has a big family. What wood did you use?
Tor and Odin are the greatest of gods.
Thanks everyone I appreciate your positive comments.
Madts I used pine (furu) because I was able to buy it finish planed and dimensioned (glatkant in Norsk) to save some time in getting the materials prepared, which helped a lot since I made 5 of them, but any kind of hardwood would be fine too and even stronger, though I don’t think strength is really an issue with this design. Please ask if any questions come up as you make them.
Mike, an American living in Norway

Mike,
Those are certainly gifts of love! I hope your recipients understand how much skill, patience, love and energy went into making these. (Perhaps you should make a copy of your blog series and include it with each gift.) ;-)
Thanks for sharing with all of us.
L/W
“Those who would give up essential Liberty, to purchase a little temporary Safety, deserve neither Liberty nor Safety.” Benjamin Franklin

Very nice Mike . I still see the hands of a craftsman when I look at these photos.
A very good one too.
The early bird gets the worm but its the second mouse that gets the cheese.
Thank you for those great compliments LWL and Paul. I loved doing the work except that I did get a bit bored doing the scroll work 5 times using a little over 2 hours for each one. I would like to consider myself a real craftsman, but I am continually humbled by the work I see on LJ and elsewhere. However, It’s satisfying to me that I have come a long way since I took up woodworking, so I’ve found it best to measure my success against my own learning curve and not the skill of others.
Besides continuing with marquetry I do hope to develop other products where the scroll saw plays an important role, but where general woodworking is still the dominant factor. There are so many possibilities. These baskets are the only project I have made quite a few of, and that is mainly because they are perfect gift items and so useful, and I have to admit that I am a little proud of the design too.
Mike, an American living in Norway