


Share your craft projects
Make new craft buddies
Ask craft questions
Blog your craft journey

shipwright
2073 posts
and
113 followers
in over 12 years
in over 12 years
The V8 Wedge Powered Workbench #4: Fitting the Sides and Ends
This is
part 4
in a
8 part
series:
The V8 Wedge Powered Workbench
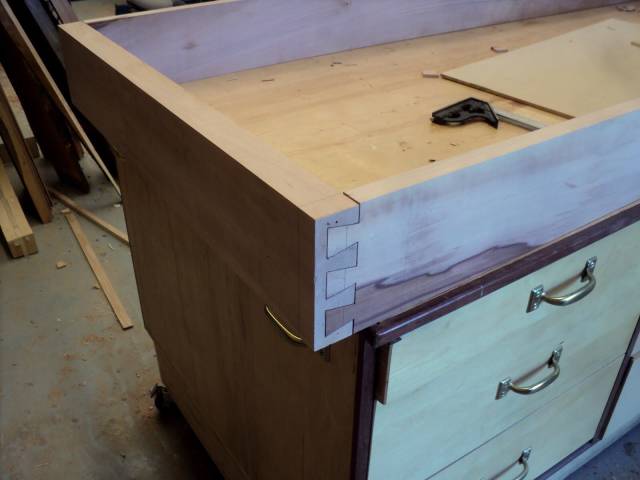
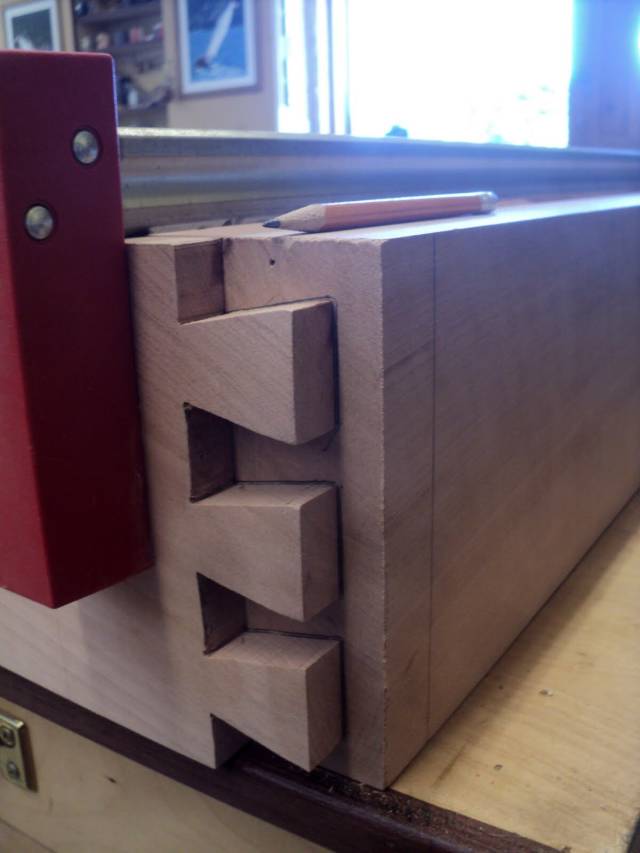
I know that I have said that there is no “fancy joinery” in this bench and there certainly doesn’t have to be. There is however, in my own bench, a simple dovetail joint in the top frame corners. It is purely decorative and a box joint or even a butt joint would in fact do the job. If the wagon vices were not epoxied in, then the dovetails would have a real function but I personally would rather rely on the epoxy… it’s a boat builder thing.
This is the joint I’m referring to and it’s really quite easy.
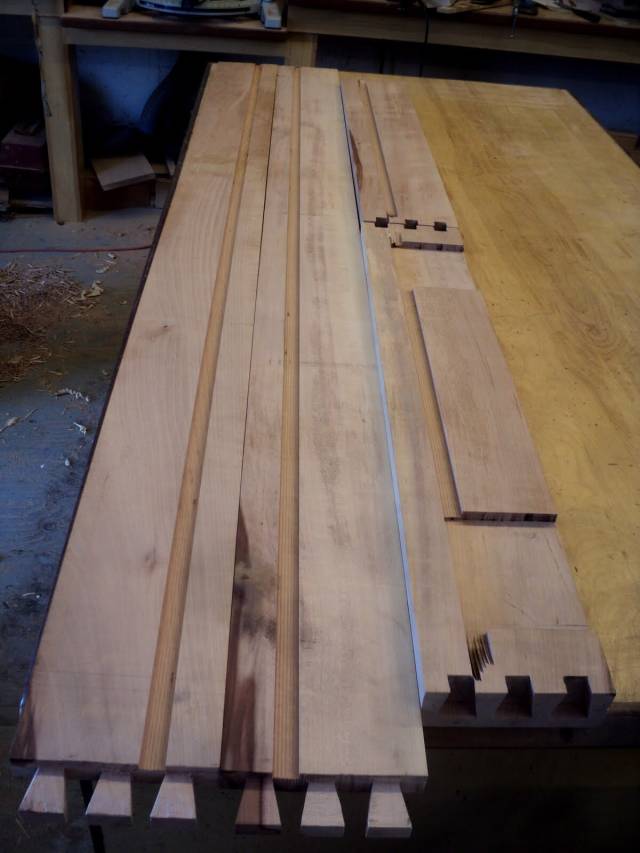
I made up a little 1/4" MDF pattern and cut the rough recesses out with a router. I’m really not a dovetail guy but I’m sure this must be a somewhat standard way of doing it.
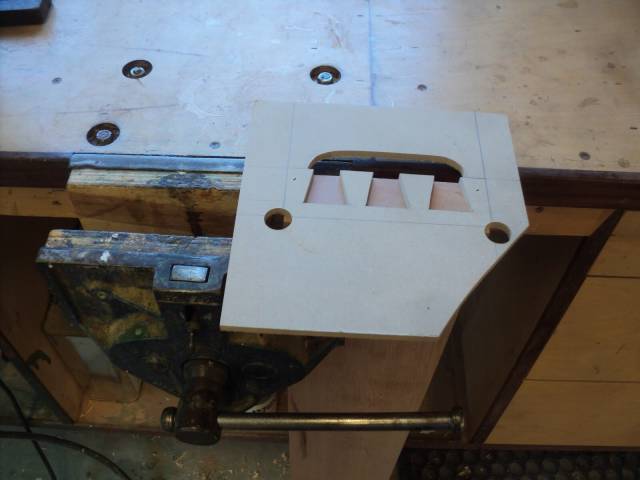
The pattern lines up with the corners of the end members via some sight holes and is tacked in place with a pin tacker.
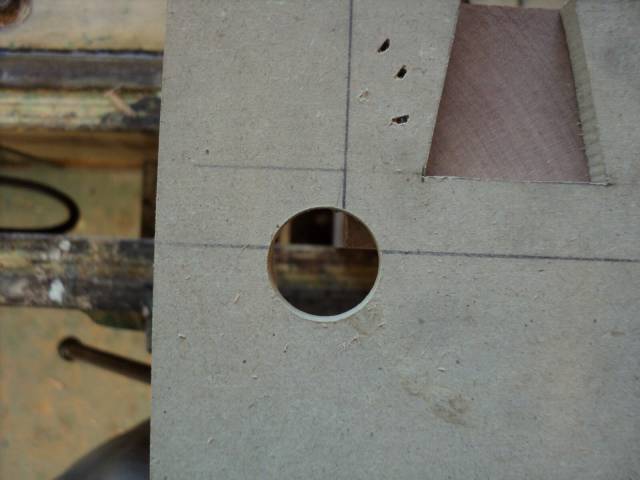
I routed the recesses out about 5/8" deep and left them unfinished for the time being.
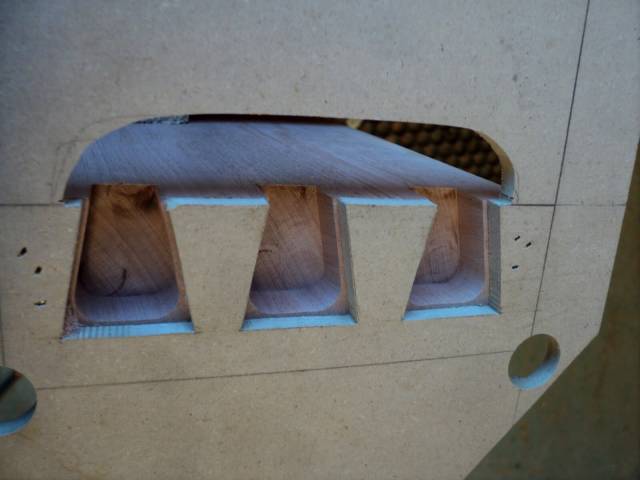
Then after cutting the tails on the bandsaw, I fitted each corner and marked the recess from the tails.
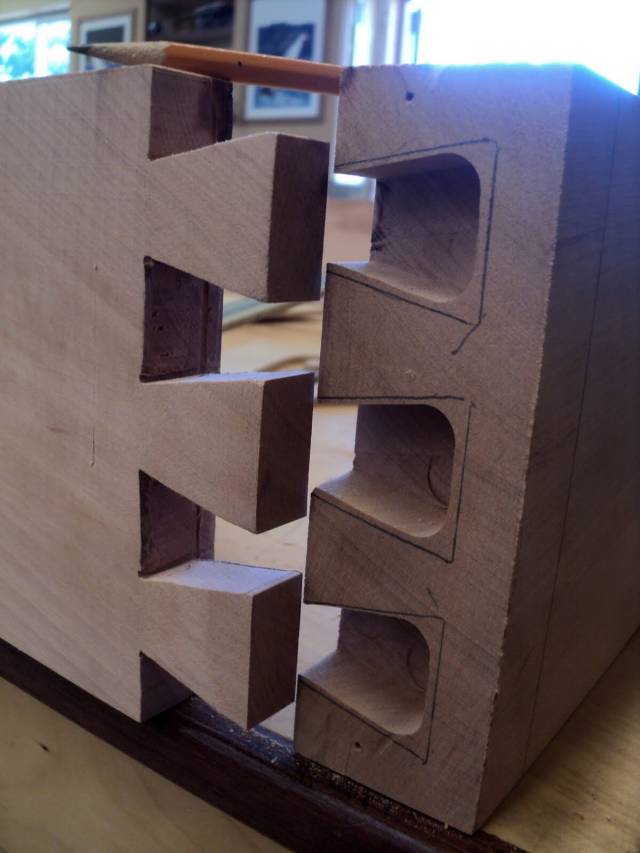
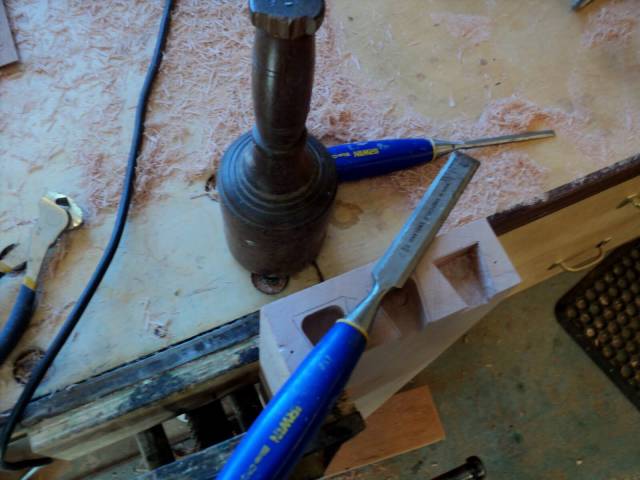
From there it was an easy job to finish them up with a chisel.
The next job was to set the vices into the end rail to lock their sides against spreading under wedge pressure.
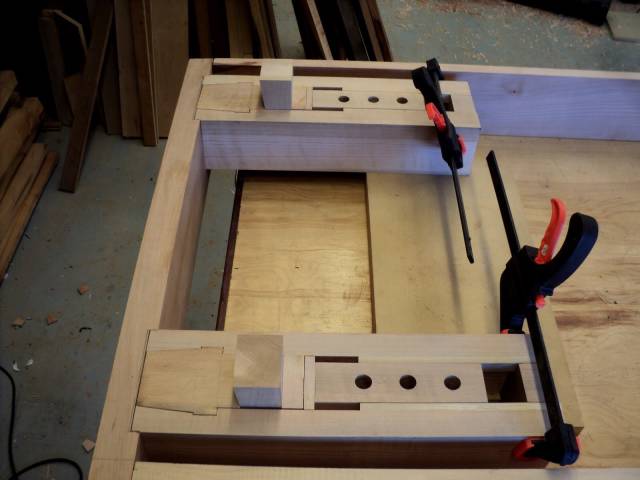
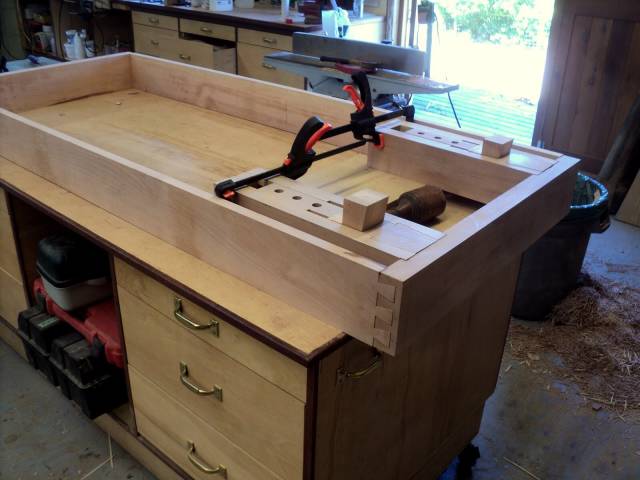
Finally the side and end rails were rebated to accept the larger bottom layer of the plywood top layup.
This was actually done prior to the plywood layup in the last segment of this blog and that is the order I would recommend but I thought it would be easier to describe if I explained the plywood assembly first.
After reaching this point and dry fitting the assembled top inside the rails I left this part of the job and moved on to the leg construction.
That’s the next segment.
Thanks for looking in.
Comments, questions and critiques always welcome.
Paul
The early bird gets the worm but its the second mouse that gets the cheese.
3 Comments

Good work
woodworking classes, custom furniture maker

Really nice work
Wheaties

Love that template.
Mike, an American living in Norway