


Share your craft projects
Make new craft buddies
Ask craft questions
Blog your craft journey

shipwright
2073 posts
and
113 followers
in over 12 years
in over 12 years
The V8 Wedge Powered Workbench #7: Installing the Leg Vice and Finishing Up
This is
part 7
in a
8 part
series:
The V8 Wedge Powered Workbench
...
-
Mounting the Wagons and Cosmetic Top
-
Installing the Leg Vice and Finishing Up
-
Leg Vice Upgrade
...
- Mounting the Wagons and Cosmetic Top
- Installing the Leg Vice and Finishing Up
- Leg Vice Upgrade
The leg vice is so simple as to be self explanatory and its installation likewise, to the point that you can install it and uninstall it in less than a minute. This is nice on those occasions when you don’t want a vice in the way of your work table.
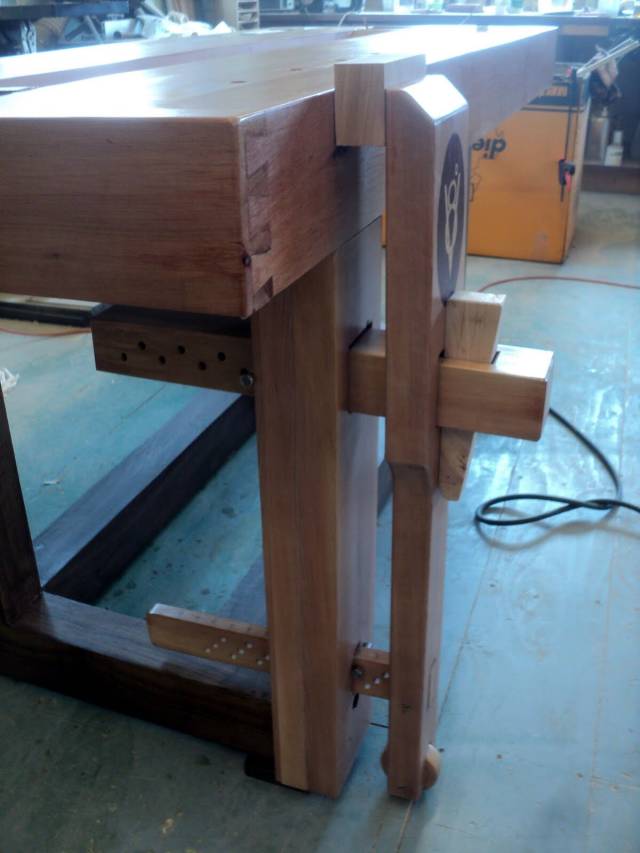
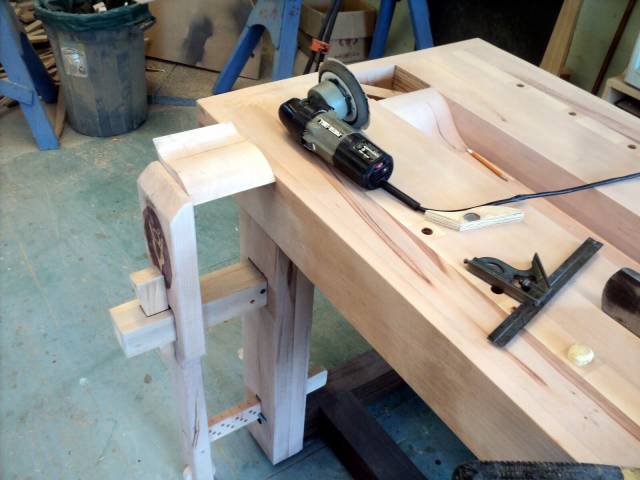
For the above reasons I will keep the descriptions short and just show you some detail photos. This one is the fully operational vice.
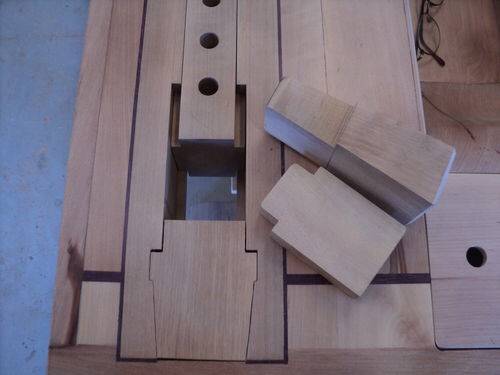
This one shows the assembly removed from the bench. You can see the mortise for the wedge has been formed by ripping the wedge log in three and reassembling it after removing the wedge hole. This is held only by hot hide glue, no mechanical fasteners.
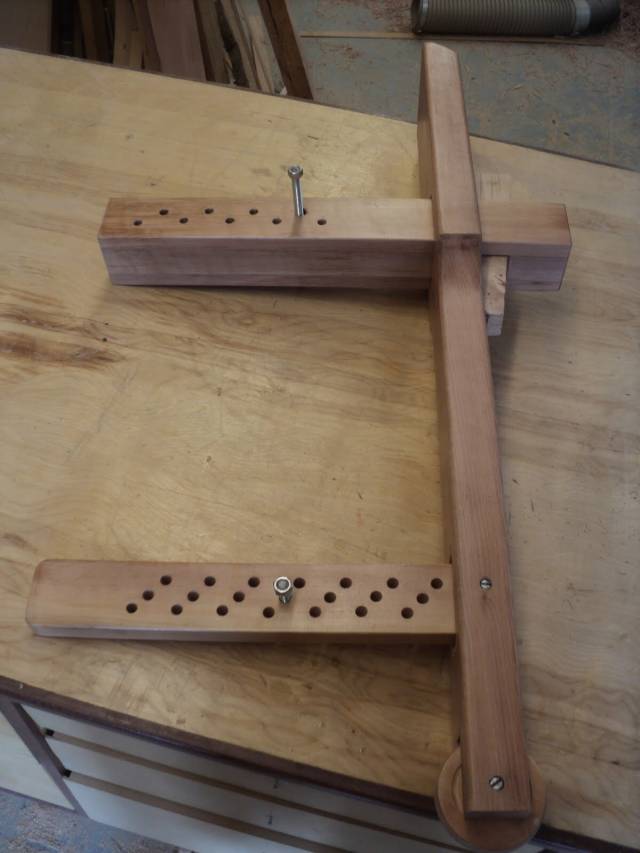
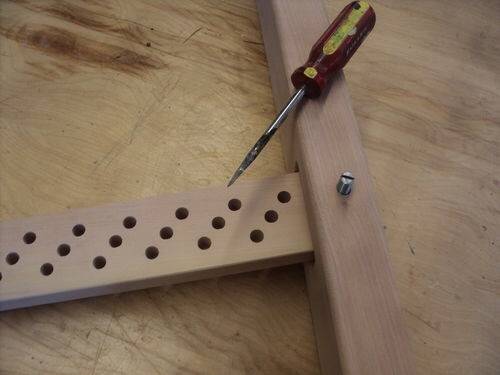
The lower brace and the wheel are both on pins made of 3/8" threaded rod with a slot cut on one end for a screwdriver. The hole on top is 3/8" and the one underneath is a little smaller. The rod will self thread. The lower holes are at 1/2" intervals in three staggered rows. The holes in the wedge log are at 1" intervals in two rows. All are 3/8" diameter.
The deadman is self explanatory. It has a box joint at the corner and a dog hole in the top. it stores nicely on a stretcher underneath. There is a 3/4" spacer for the vice to make up for the thickness of the deadman being on the outside of the bench top.
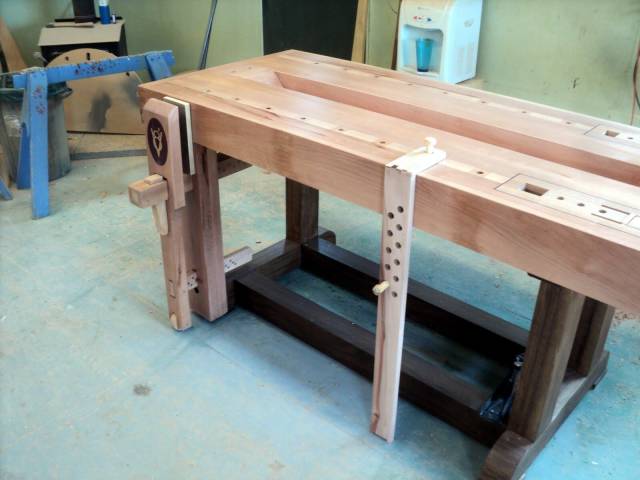
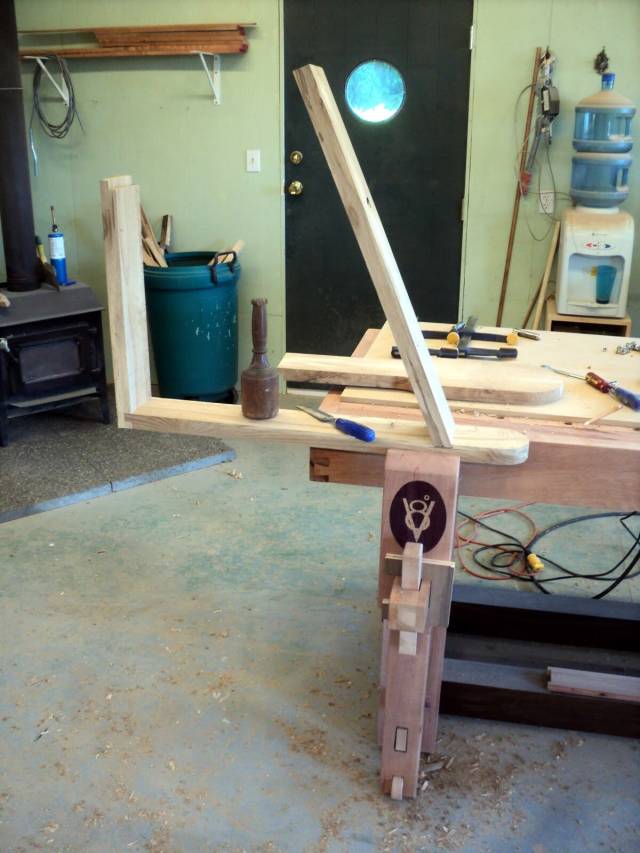
All that’s left is to trim up the ends of the trough and finish the visible plywood behind the vice. Here one end of the trough is already glued in place and the other is being shaped in the leg vice. You can see that the remaining visible plywood on the back of the leg vice has been covered with 1/4" arbutus. The trough length was determined by the length of material I had available to line it, hence the plywood showing inside the end compartments. The trough ends are curved for easy blowing or wiping out.
The end compartments are finished off with a router rebate and a 1/4" arbutus top. They will serve to hold the shims and dogs, hence.. dog houses.
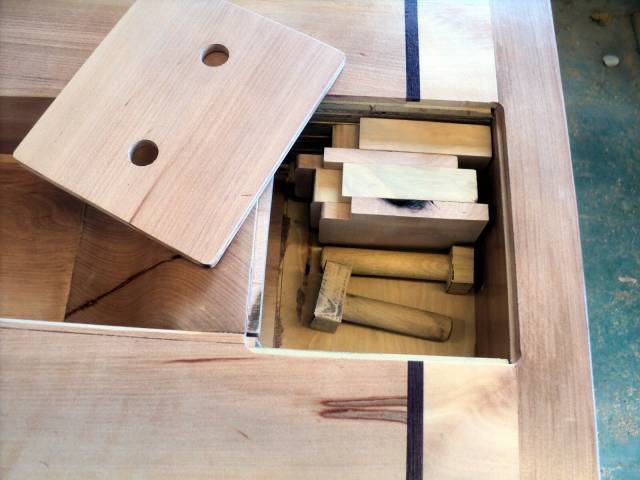
About the little inlay around the vices….. It too is a result of my available material being a tad too short. I could go back to the mill and buy more arbutus or …. make lemonade….. and since I was doing it anyway, I took the opportunity to make some already quite acceptable fits around the vises look just a little better.
So that’s it ! All done.
Full dimensioned Sketchup here: https://3dwarehouse.sketchup.com/model.html?id=eac92d1e533271b452d9fc61873164a1 Thanks to my friend Rance for the excellent SU model.
I think that now anyone can easily build this bench with the blog and the SU in conjunction. It should be a piece of cake.
Just a few photos of the bench and vice in actual use on a real project. I’ve been using it for a week now and I still like it. There are times when operating the leg vice that I could use another hand but there are ways around the obstacles and I don’t think I would have fared better with a screw vise.

As always, questions, comments and critiques are welcome and if you decide to build one of these or even just use the vices, please keep me posted and I’ll help any way I can.
Thanks for lookin in.
Paul
The early bird gets the worm but its the second mouse that gets the cheese.
3 Comments

Nice job , a great addition to any work bench .
Wheaties

Your leg vice is Simple and effective Paul, no better description of a functional vice exists. Please note the proper English even though the police might differ.
Mike, an American living in Norway
Thanks Mike. Proper English is kind of a vice of mine.
:-)
The early bird gets the worm but its the second mouse that gets the cheese.