


Share your craft projects
Make new craft buddies
Ask craft questions
Blog your craft journey

HorizontalMike
257 posts
and
20 followers
in over 12 years
in over 12 years
More from HorizontalMike


Milk Painted 6-Board Chest


We have had benches at our two dining room windows for a number of years. We do so because the two windows are on the corner of the house and lets us look out at a number of bird feeders while remaining in the AC during the heat of the summer and for general viewing outside to combat claustrophobia during poor weather. That being said, I wanted to build a better bench that would serve this purpose.
A 6-Board Chest came to mind, as it could readily serve as additional seating PLUS give us some additional storage space. There are several sources and several philosophies on how to make a “proper” 6-board chest.
Here are a few links for those interested:
http://www.wkfinetools.com/contrib/wMyers/art/6BoardChest/6BoardChest-01.asp
http://www.popularwoodworking.com/articleindex/6-board-chest
http://www.finewoodworking.com/item/13139/free-plan-six-board-chest
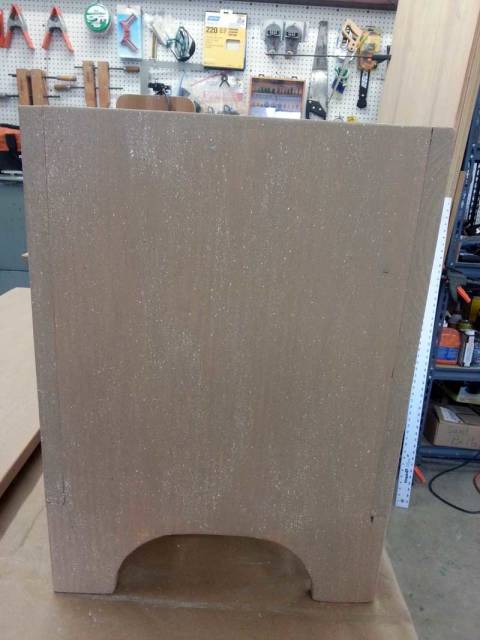
Lacking any ready source for very wide boards (14-20in wide), I decided early on to do a glue-up in order to get the desired width. In order to “hide” this fact from the WW puritans I also decided that I needed to paint the outside of the chest. Keeping with the early country theme that such a chest can represent, I chose to use DIY Milk Paint for the majority of the coverage. More on Milk paint here.
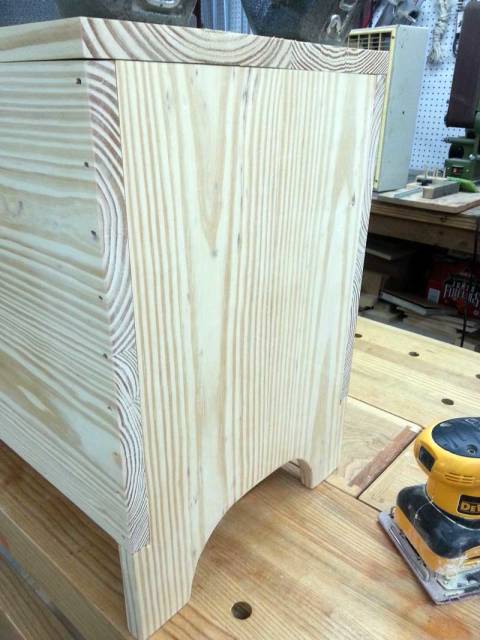
The heavily textured milk paint “wash” (see through) on the end of the chest is evident. Many milk curds showing. Following the link above can answer why this is happening.
I chose chose the cheapest route for materials and bought traditional big box store construction lumber, AKA #2 Southern Yellow Pine. I hand picked the best 2×8 8ft boards I could find at my local HD. With the assistance of an employee, we went thru an entire pallet until we came up with the 5 best boards. Then it was off to the shop.
I first ripped off about 3/8in of each 2×8 and then planed the boards smooth. I let them sit a day and then planed most of them down to 3/4in and butt-glued them in pairs after jointing a 90-degree on each board. Glue-ups came out to 14 1/4in so I chose to use the TS to standardize all to identical 14in width. The boards came out warping from the get go, so I knew that I needed to get this thing nailed and glued up ASAP in order to minimize problems.
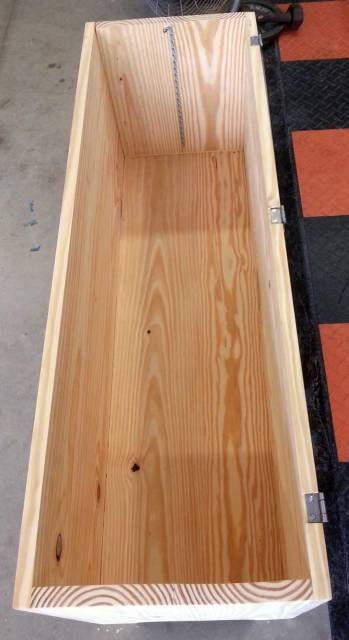
I had originally chosen to leave the end pieces (leg ends) at 1in width in order to have a beefier chest, however my crown-up/crown-down glue up came out looking like an “S”, so I was forced to plane it down to 3/4in to take most but not all of the “S” out of the board. I immediately dado’d and cut the slots for the sides and got the chest assembled. Where the grains of the sides and bottom matched I used glue and square cut nails. Attaching the sides to the end pieces were cross-grain so they got square cut nails only, to allow for shrink/swell. I also doubled the number of nails on the end joints.
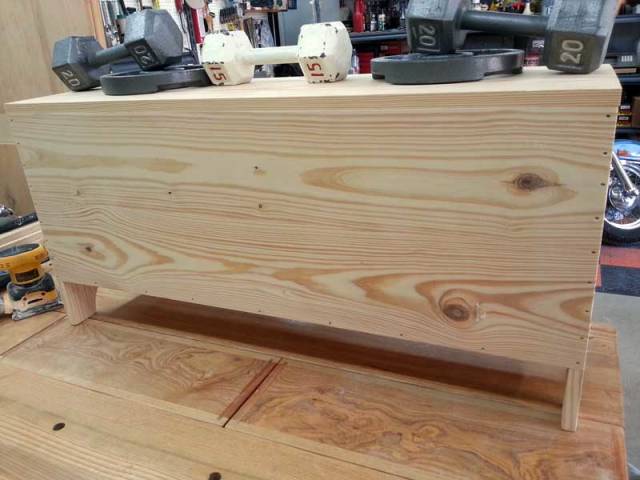
The lid glue up came out pretty good, and flat. I was at the end of the day in the shop and just placed the lid in place so I could see what the chest was going to look like, and went inside for the night. Came back the next morning and the lid had a significant warp in it. Even with 79lb of weights on it the warp was still quite evident (below)
The warping took me for a loop and was much discussed on the Working with Construction SYP thread. By placing the lid on the chest I was trapping the natural wood moisture “inside” the chest (construction lumber only dried to 19%MC) and the outside was drying faster than the inside, hence the warping. I flipped the board over and within a couple of hours it flattened back out (below)
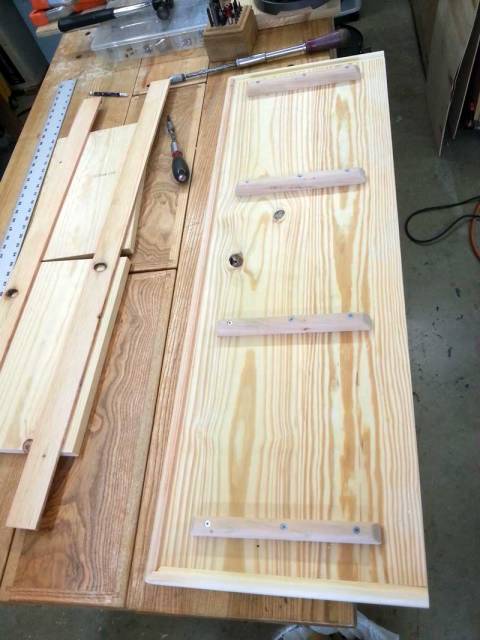
Knowing that this warping could come back, I decided that I needed some strong ribs on the underside of the lid to keep things straight. I chose to make these ribs out of some scrap Soft Maple, and made them 1in thick. I also “stepped” the screw holes so that the shrink/swell cycle would not be affected. While not exactly traditional, they are hidden from view, plus they add to the strength of the top since it will be frequently used for seating.
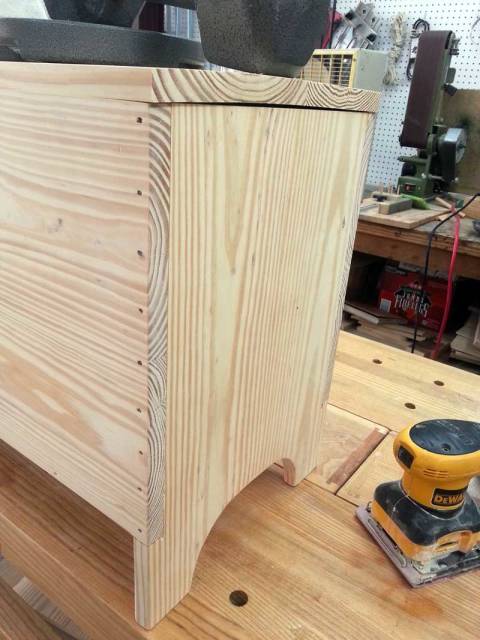
Breadboard molding was nailed only, in place with the only exception being the front molding piece that was also glued since grain direction matched.
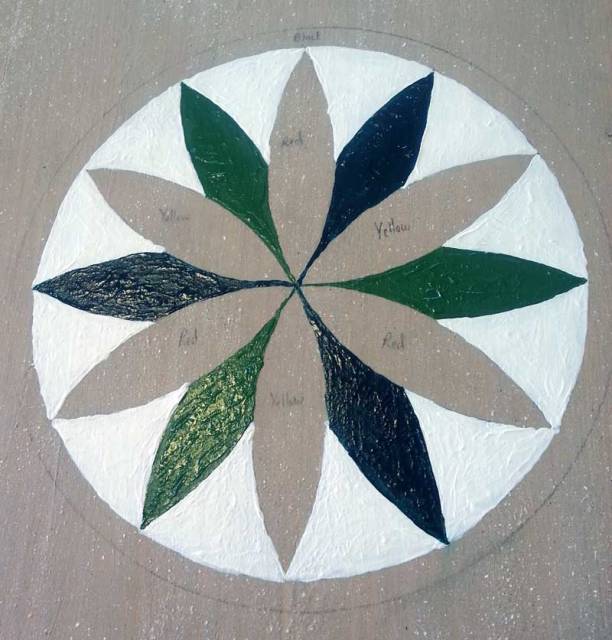
The chest and the lid were painted with milk paint and the artwork was done with acrylic pigments from Hobby Lobby. These acrylic pigments can also be used to color your milk paint and work very well. As you can see from the closeups, the paint appears very textured. Most of that shrinks and flattens as the paint continues to dry. Once completely dry it looks much better than the images show.
Painting the Penn Dutch Hex Sign for “good luck for all 12-months”
(below — painting in progress)
Sept 2013
HorizontalMike
8 Comments

Pretty bench Mike. Nicely done with less than optimum material.
There’s definitely an attraction to these simple timeless pieces.
Well done.
The early bird gets the worm but its the second mouse that gets the cheese.

Mike: That is one pretty bench. I very much appreciate the paint job. That looks just great. I also need some pointers from you about shellac. At that I suck big time. Oh yes, working with box store bought pine is very hard to make fine joinery.
Tor and Odin are the greatest of gods.

Very nice!
Now I know the “6 board chest”, I never run into that before.
Is your work bench made of ASH? what finish is on it?
Abbas, Castro Valley, CA
looking at your workbench again. Is it pine?
Abbas, Castro Valley, CA

I love it
and the blog is filled with tips/strategies! Nice.
JAGO - just a grandma’s opinion

Love the hex.
Losing fingers since 1969

Very nice. Well build and stunning art work well done!
CHRIS, Charlottetown PEI Canada. Anytime you can repurpose, reuse, or recycle, everyone wins!

Very cool .a really good build
woodworking classes, custom furniture maker
More from HorizontalMike