


Share your craft projects
Make new craft buddies
Ask craft questions
Blog your craft journey

Mike40
1074 posts
and
35 followers
in over 11 years
in over 11 years
CHRISTMAS GIFT BASKETS #4: Progress
This is
part 4
in a
8 part
series:
CHRISTMAS GIFT BASKETS
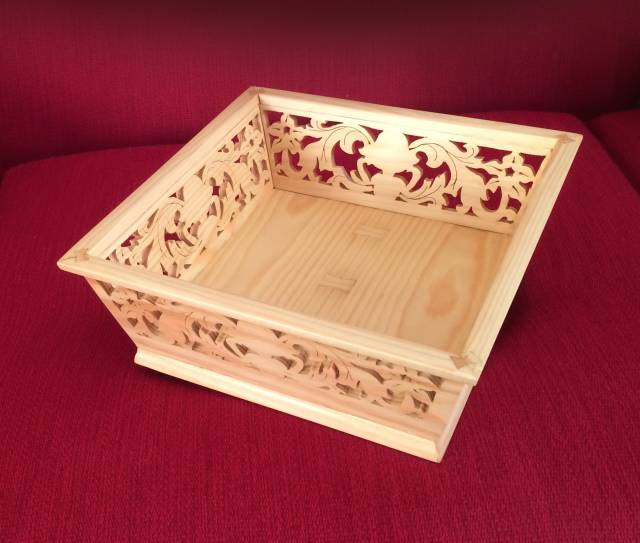
Today I finished the scrolling and got the sides ready for the bottom panels. There are a some important points that are outlined below.
GETTING A GOOD CUT
Once again I am offering some advice on the cutting. Many of you will be light years ahead of me with your scrolling skills, but others, like myself, who use their scroll saws less frequently can get rusty. This advice is directed mainly to them.
- Cutting technique (again)
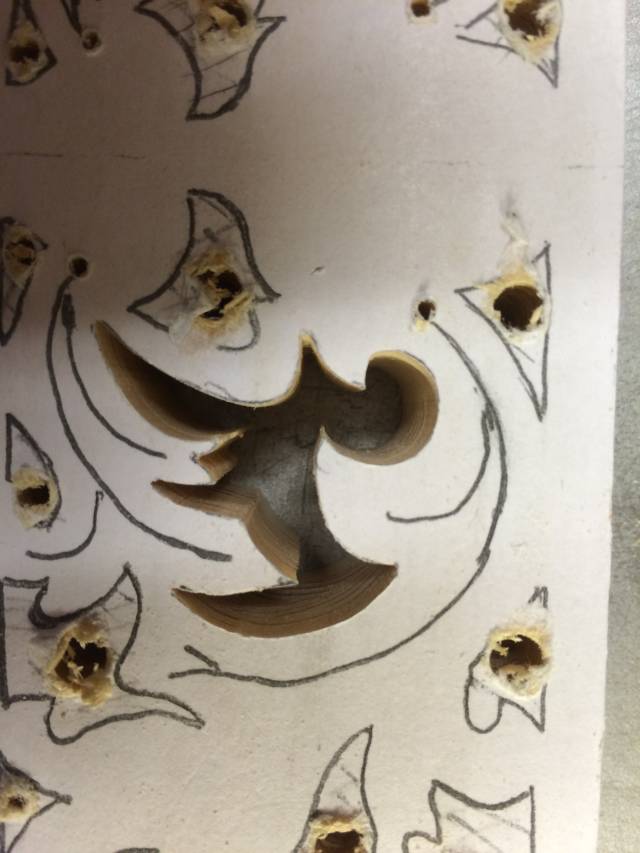
I have revised my cutting technique a little since scrolling the first packets and it seems a bit faster and a less bothersome way to do it. As you can see from the first photo I have made a continuous cut around, but the sharp points have been left until the main piece has been removed. The points are then easy to cut out afterward accurately without having to make almost impossible turns and risk messing up the project. The 2nd photo shows the completed cut. See below
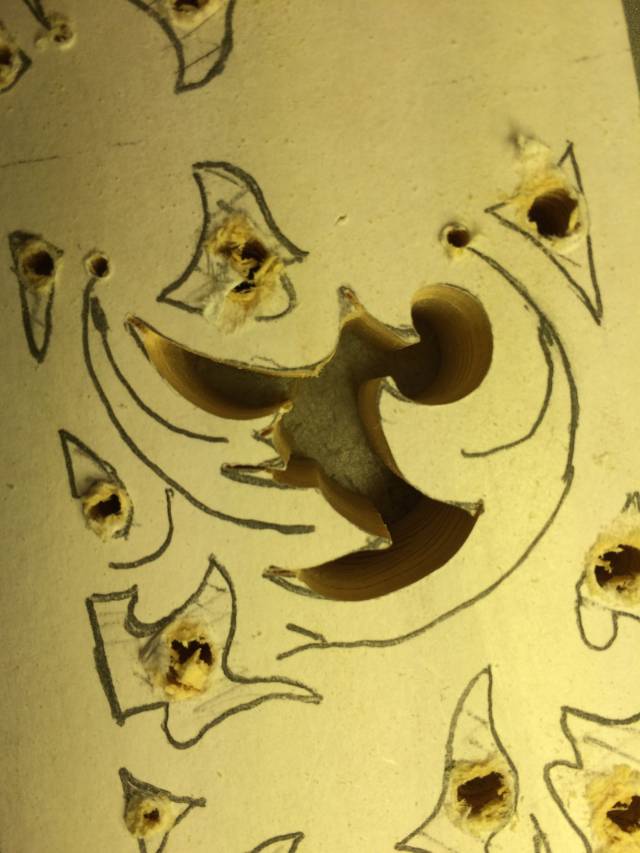
- * why have I used a relatively thick blade?*
I used a #5 for all the cutting which I mentioned before. My reasoning is that it will last a lot longer and since it is fret sawing the width of the blade is not so important except that it doesn’t make quite a sharp a point, that is, the points that are cut like a ‘V’. Another good reason for a heavier blade is that it is much better to trim an already cut edge such as when a curve was cut with a flat spot and it needs to rounded out. However, it does make it difficult to turn those tight corners and that is why I have chosen to do the cutting the way I’ve shown above.
- How to insure that the mirror image cuts are near identical
I first cut out a part on say the left side, then I cut out the corresponding part on the right side. I then compare the two to see if they are alike. If I have made a small cutting mistake on the one then I cut the other one to match it. This leaves my symmetrical design symmetrical and small changes will not be noticeable by the casual observer.
If you want to see how you did after the packets are dismantled, you can flip one side and put one on top of the other to see how well they match.
SCROLL CUTTING COMPLETED
Here is the result after cutting all 5 packets. I thought I used 1-1/2 hrs. for the first one, but I’m sure now that it must have been more like 2-1/4 hrs., which is what I used on each of the others. I’m glad they’re finished. I was getting pretty bored towards the end.
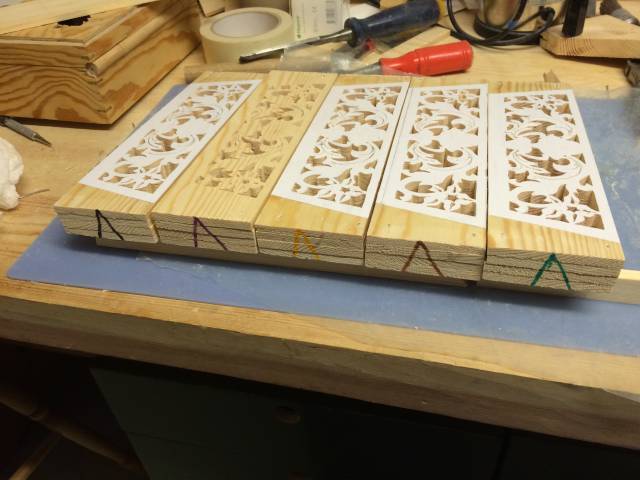
I ran into problems while cutting the veining. I had intended to use a #3 blade for that work, but it kept coming loose on my lower blade clamp and I didn’t have the patience to find out what was causing the problem so I went back to my #5 blade. I have to admit that I did a pretty bad cutting job on the veining. My blade wasn’t tracking well and so I was having a hard time following the pattern lines. I figured out too late that the problem was caused by a dull blade, so I have nobody to blame but myself. It didn’t ruin the project, but it did downgrade the quality a bit. Anyway, here are the 5 completed side packets. See below
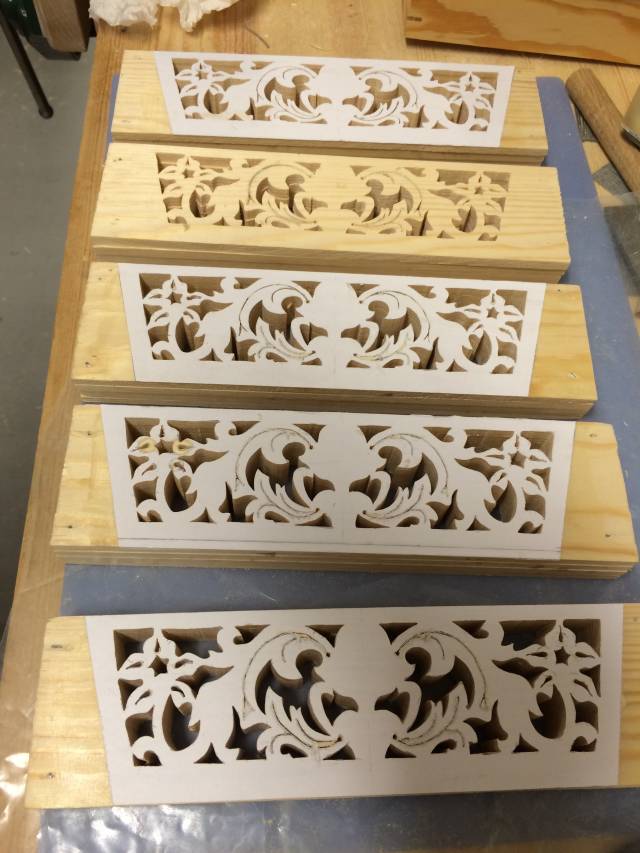
The first thing I did before dismantling the packets was to mark them with color coded ink using felt tip pens. This marking showed me the orientation (side up/side down) and also identifies which packet each side belongs to. This is to ensure that no differently cut sides will be mingled with the wrong set, remembering that though the patterns are cut almost identical there are some small deviations. So now we know that all four sides on each basket will be a perfect match and that the grooves for the bottom panels will be cut on the correct side. See below
CUTTING THE GROOVES FOR THE BOTTOM PANELS
The bottom groove was marked up on an extra side blank of the same width and thickness, I located the groove about 4mm above the bottom edge to be cut 6mm wide with the depth set at slightly more than 3mm. I made a test cut on my table saw to test the accuracy of my depth setting. I also used the scrap piece to set the fence for the first cut of 3 needed to get the full width.
I had the sides stacked in order close at hand on my table saw and I began cutting the grooves being very focused on making sure that I was cutting the groove along the bottom of the side piece and also on the correct side. A mistake on even one of these would require a couple more hours to recut a replacement! I restocked each side piece back in order as the were finished, running all 5 packets through on each cut and then adjusting the fence for the next cut and repeating. See below
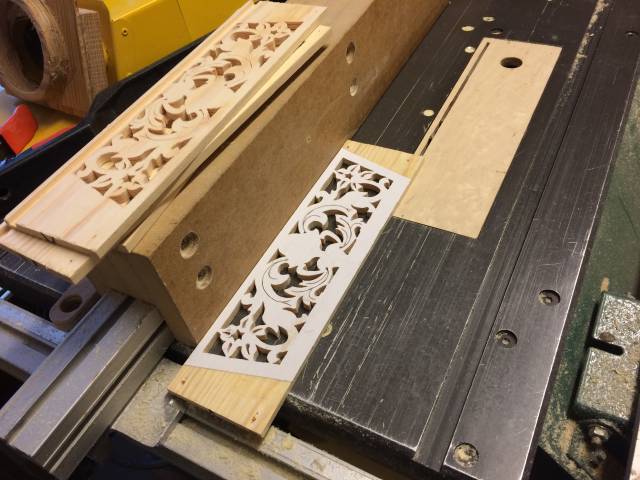
I made a mistake cutting the groove. A mistake that I reminded myself had to be avoided. Lucky for me it won’t ruin the project, but I still find it quite annoying. Can you spot it? That might be difficult with the photos provided, but don’t be afraid to give it a guess.
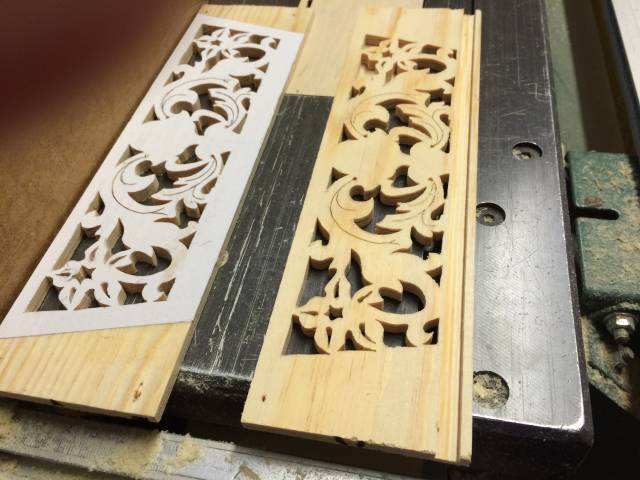
I have used 16 hours altogether now. The scrolling took about 11 hrs. That means I have a little over 3 hrs. invested in each basket so far. That seems pretty efficient for me.
TOMORROWS WORK
I plan to cut and and glue in the bow ties (butterflies) in the bottom and cut the compound miters on the side pieces and assemble and glue them up with the bottom panels in place. If I have time after that I will get the top rims and feet miter and glued up too. Thanks for viewing!
Mike, an American living in Norway
2 Comments

Thanks for details Mike. They will come handy.
Did you cut the groove on the wrong side on last picture? Both pieces seem to have the same orientation so the groove should be on the other side… No?
Abbas, Castro Valley, CA
No Abbas. The groves were cut on the correct side, but both sides are actually identical. The reason I wanted them oriented in the same order in which they were cut is because even though the pattern is symmetrical, there would still be some very small variations between the two sides. This is probably overkill on my part, but it’s just how I think.
Mike, an American living in Norway