


Share your craft projects
Make new craft buddies
Ask craft questions
Blog your craft journey

Mike40
1074 posts
and
35 followers
in about 12 years
in about 12 years
CHRISTMAS GIFT BASKETS #3: Chase to the cut
This is
part 3
in a
8 part
series:
CHRISTMAS GIFT BASKETS
-
Preparation of Materials (continued)
-
Chase to the cut
-
Progress
...
- Preparation of Materials (continued)
- Chase to the cut
- Progress
...
Back to work on the project today after our thursday shopping excursion and getting a check up at the doctor (us old folks do a lot of that).
After completing all the blanks for the basket components on Wednesday, I used today to get the side blanks ready for cutting and to gluing up the bottom pieces.
Steps in preparing the sides for stack cutting
- The stacks of side blanks, 4 to each stack were carefully aligned and temporarily clamped with masking tape prior to pinning them together. This is important to avoid problems later on.
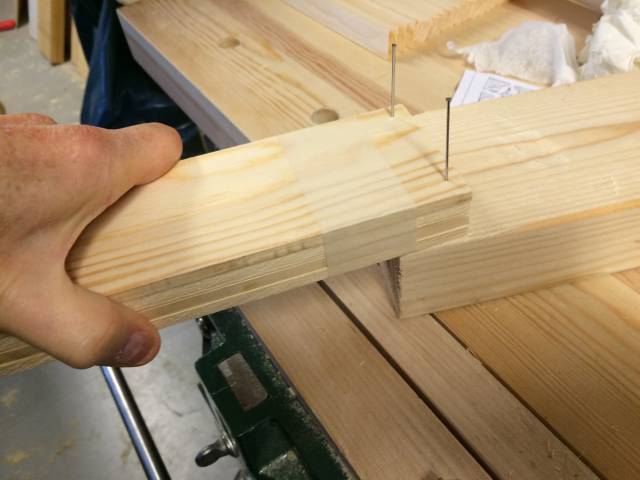
- The blanks were then pinned together. They had been cut oversize to accommodate the nails. I used very thin 18 gauge pin nailer nails as they are not as likely to split the wood at the ends like heavier gauge nails might. I had to hammer them in because my pin nailer gun sprang a leak. I banged them in with a piece of wood underneath to prevent break out on the other side. The nails were driven in from what was to become the bottom of the stack to insure smooth going on the scroll saw table. The protruding pins were then clipped shorter and clinched on the other top side. See below
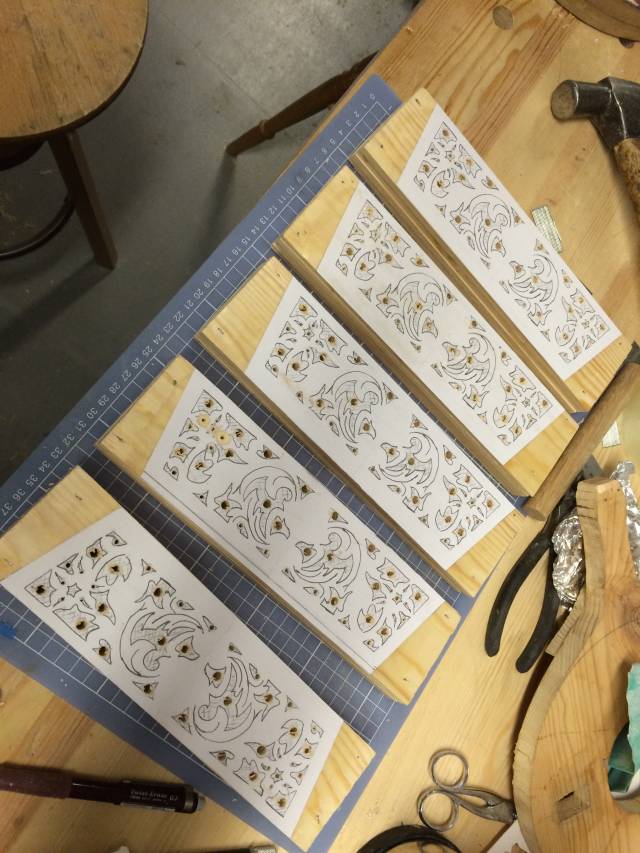
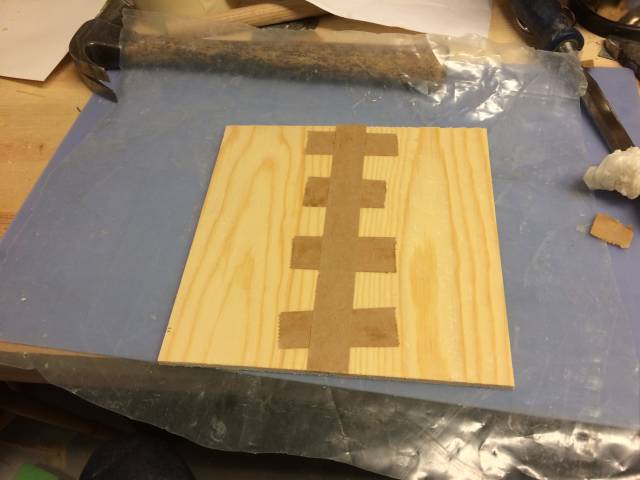
- I made sure the stacks were all nicely aligned and then I glued the patterns on with hot hide glue. See below

- Next up was the drilling of the entry holes for the scroll saw. I like to use the biggest holes I can. In this case I was able to get the job done with 3 sizes. I have a good reason for the large holes which I will tell you more about below. See below
Cutting technique and philosophy
I used to put a lot of emphasis on becoming so skilled with my scroll saw that I would be able to easily cut around all the sharp corner and points in a pattern and at breakneck speed. Sad to say, that never happened. For me it is much better to take my time. With the large holes I can saw down one side to a point, back out to the drill hole and saw down to meet the point from the opposite side to get a perfect sharp point. I don’t mind cutting out 3 parts of one opening just to get it right. I like to use a stiff blade whenever possible, but especially when stack cutting. In this case I used a #5 blade and that is yet another reason to not attempt turning around those sharp points. I will however use a #2 or #3 blade for the veins.
There are lots of points to cut in this pattern. I don’t believe even the best scroller can saw all the points perfect with those obtuse angled tight turns. don’t worry, nobody seeing your excellent end product is going to ask you how you did the cutting. They will just admire your result. So I suggest you take your time and ‘cheat’ as much as necessary to accurately follow the pattern. So here is our first stack. Let the fun begin! See below
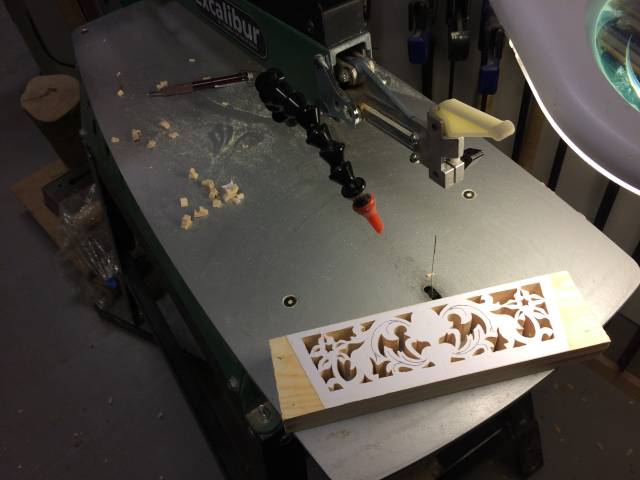
One and a half hours later and the first one is finished. It took longer than the one hour I had estimated, but luckily I don’t have to do this for a living. See below

Separating the stack and removing the nails
Rather than trying to pry the pack apart and risk breaking the nice newly scrolled fret work I drove the nails from the head end (bottom side) further through so the clinched side would protrude. Then I straightened the bent ends and banged the nail out far enough on the head side to pull it out with a plier. Easy peasy and no breakage. See below

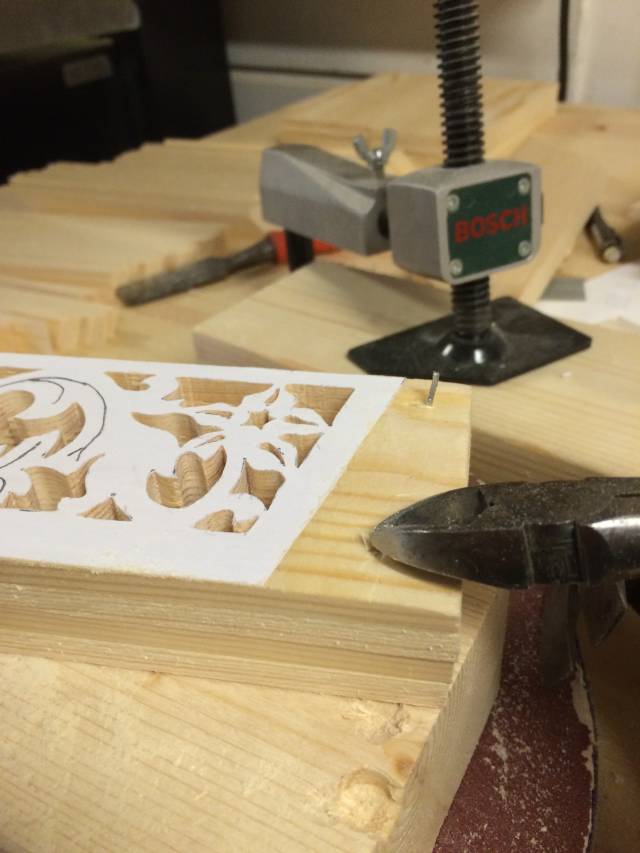
Removing the pattern
Ok, a no brainer, but OMG I forgot to cut the veins!! That means I will have to put the pack back together to cut them. No big deal, just slightly annoying. I sprayed the pattern with water and let it sit a couple of minutes. Most of it pealed off and I used a chisel to get the rest which also came of very easily. This is the first time ever that I haven’t had a pattern loosened at least a little while cutting, so thank you hot hide glue, you are the greatest!
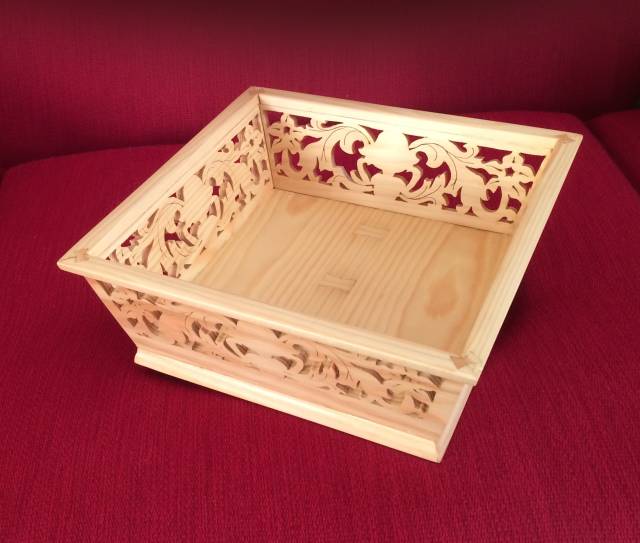
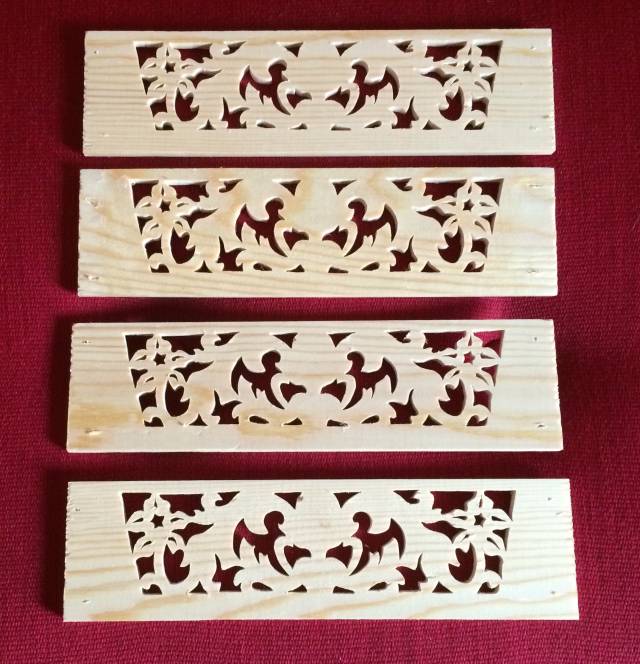
The intermediate results
I’m quite happy with the cutting. I think it looks great, but I still have to give it some touches with sandpaper on the edges to remove the furrys, but no mishaps or bad cutting. One thing worth mentioning here, especially when cutting Acanthus designs. It pays to check that the curves you cut don’t have any flat spots. In other words, smooth continuous curves. Check this out after each cut and make corrections when necessary. Flat spots are very apparent to the human eye and can therefore degrade otherwise fine work.
Gluing up the bottom pieces
I have chosen to make the bottoms out of two pieces to save wood. The width of the pine board I bought was not wide enough to get a full sized bottom. You can use pine plywood for the bottom, but personally I like the 2 piece solution better because I strengthen the glue joint in the middle with some bowties which are also necessary when joining such thin material and also just for the crafted look it imparts. Although I didn’t think to make the bottom pieces book matched while I was cutting the blanks, I did sort through them before gluing to get the best looking grain and color matches possible.
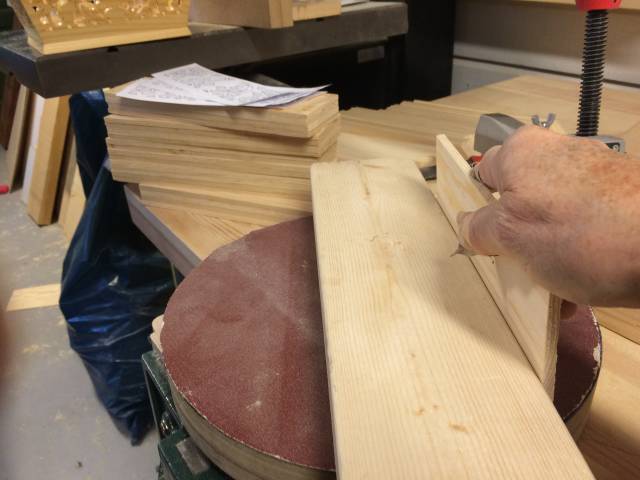
The joint edges though well planed and smooth still were not perfect. I did not want to plane them because they had been cut to finished size and I didn’t want to change the dimensions, so I sand jointed them instead on my sanding board (actually a sanding disk that I use on my lathe sometimes). The set-up is just a loose 2×4 length used as a fence to keep the workpiece 90 deg. to the sanding surface. A few very light passes and perfect glue joints! At least as perfect as it will get with me doing it. Much better than using a disk sander which can remove too much very quickly. See below
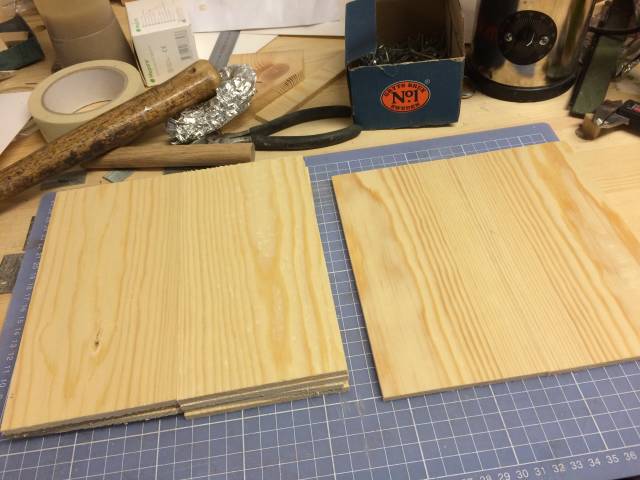
After joining I taped the pieces with veneer tape. I suppose masking tape would work too, but the veneer tape shrinks a little pulling the joint tighter together. I also taped it to ensure that it stayed flat while drying. Very important with such thin panels.
So that was today’s work which took 4 hours altogether. Total project time to date is 9 hours or a little over 1 hour for each basket so far. It will probably be 2 or 3 more days before I post another entry to this blog as I have a lot of scrolling to do before we make the final miter cuts and begin assembly. Thanks for looking in and I hope you found something interesting. Questions are welcome.
Mike, an American living in Norway
10 Comments

I can’t see the pictures Mike.
Is it just me or did you forget the pictures?
Abbas, Castro Valley, CA

Mike,
I’m waiting for the pictures, too.
L/W
“Those who would give up essential Liberty, to purchase a little temporary Safety, deserve neither Liberty nor Safety.” Benjamin Franklin
I was about to check my computer for malicious software…
Thanks L/W
Abbas, Castro Valley, CA

Mike, could you reupload the pictures from your computer please? We don’t support display of pictures from other sites for the security reasons. Thanks.
Martin Sojka, Maker of Craftisian
Ahhh! the mystery is solved.
Abbas, Castro Valley, CA
I will upload the pics.
Mike, an American living in Norway
Thanks Mike! Now it’s alive and bubling :)
That’s quite a cut on the scroll saw…
Is that a butterfly tie on the basket top? Dovetailed?
Abbas, Castro Valley, CA
Thanks for the pictures, Mike. The baskets are looking great.
L/W
“Those who would give up essential Liberty, to purchase a little temporary Safety, deserve neither Liberty nor Safety.” Benjamin Franklin

Looking great. Have you cut the compound mitres yet?
Losing fingers since 1969
Thanks all. No I will be cutting the miters tomorrow. Meanwhile there is a new blog on progress today.
Mike, an American living in Norway