


Share your craft projects
Make new craft buddies
Ask craft questions
Blog your craft journey

Mike40
1074 posts
and
35 followers
in almost 12 years
in almost 12 years
CHRISTMAS GIFT BASKETS #6: The Devil's Bow-ties
This is
part 6
in a
8 part
series:
CHRISTMAS GIFT BASKETS
...
-
Mitering the basket sides
-
The Devil's Bow-ties
-
Sanding and Gluing
...
- Mitering the basket sides
- The Devil's Bow-ties
- Sanding and Gluing

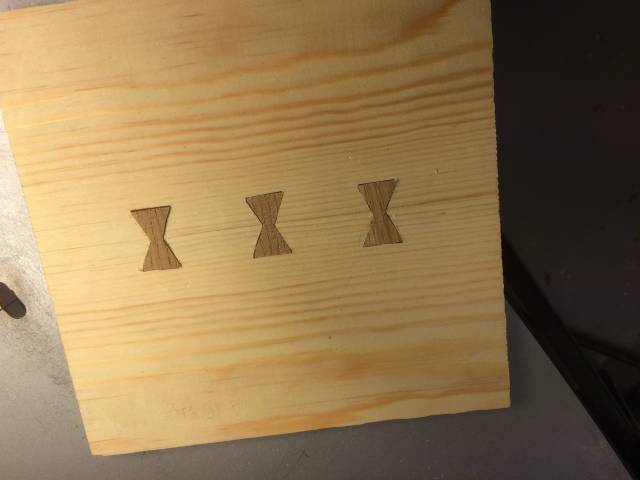
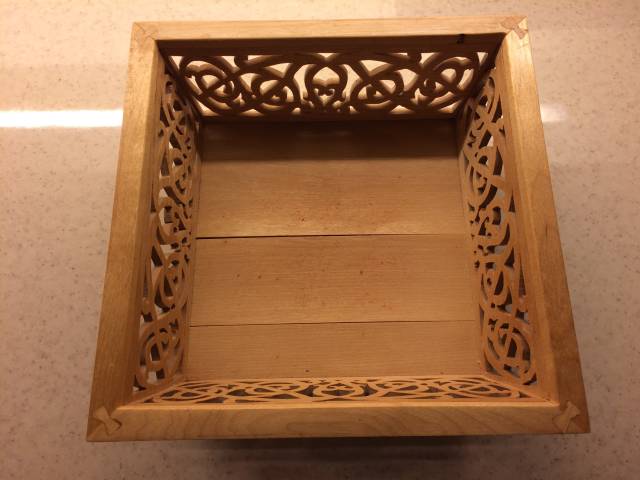
Today I have been working on the basket bottoms. They are made from 2 pieces with a glue joint down the middle. The wood is pretty thin, about 5 mm, so I want to reinforce them with bow ties, or butterflies as some call them. These can be dispensed with if you use a panel for the bottom instead, but I think the bow ties are an attractive feature and people usually comment on them and so I think it is worth the extra time it takes to cut put them in, but only if they are functional as IMHO it would look silly having them there for no reason.
Before beginning on the bow-ties I first trimmed the bottoms to final size with my table saw blade set at 15 deg. sloping inward from top to bottom. I made sure to pick the best sides for the tops which were turned upside down for the cutting process. I will come back with dimensions in my final post. I had already cut one bottom to final size yesterday and so I used that to set up my saw. Just try to remember that you need to trim and equal amount from the side grain sides to keep the glue joint centered. I forgot that and mine might be out a little. Too late to cry about it now!
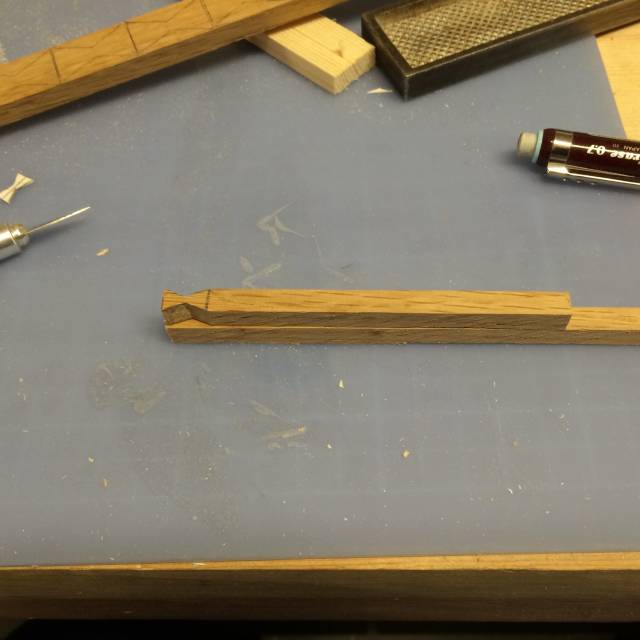
The first job was to make a pattern for the bow-ties with some poster board and cut them out with my craft knife. I also made the bow-ties which will be used to reinforce the corners of the top rim. These last ones are quite small and hard to mark out on the workpiece so instead of using the pattern I cut out the first one on the end of a stick so I could use that as my pattern and be able to hold it easily in place while tracing it. *see below
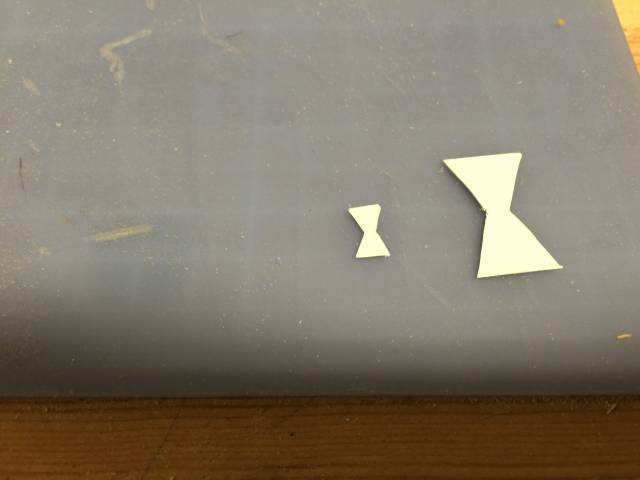
I was able to use the poster board pattern for the much larger bow-ties for the bottom. I did find a great way to get more consistency from one side of the bow-ties to the other. Just use one side of the bow-tie pattern to mark both sides, by just flipping it back and forth. Good idea to mark the edge so it doesn’t go wrong. I learned this way to late, but you might benefit from it.
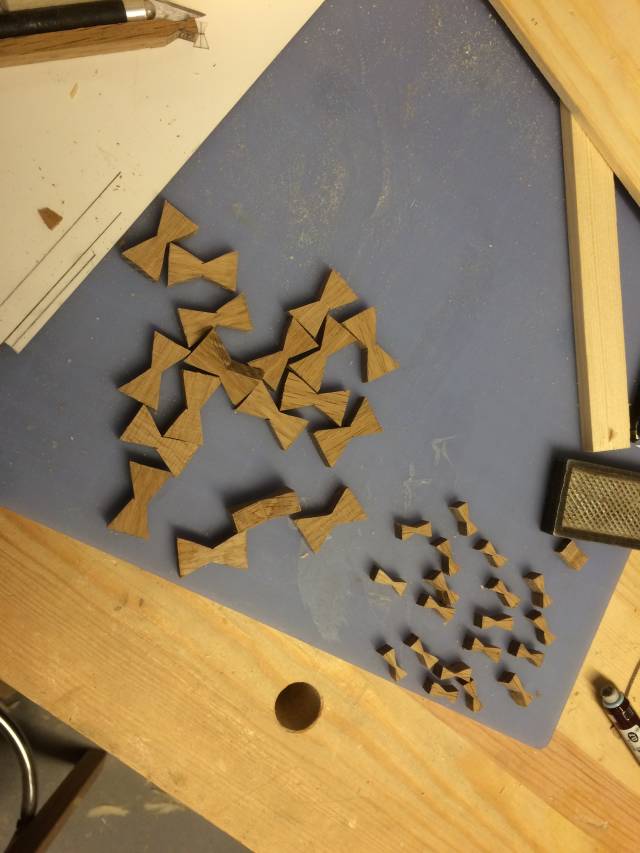
After marking up the bow-ties on long white oak sticks a little thicker that the bottoms I started cutting. I found it was a lot easier to cut all the sides out before separating them from the stick. I also saved a little time by cutting only one of the four cuts from end to end each time. It was tiresome work and those bow-ties are not fun to cut, but I finally got through it. see below

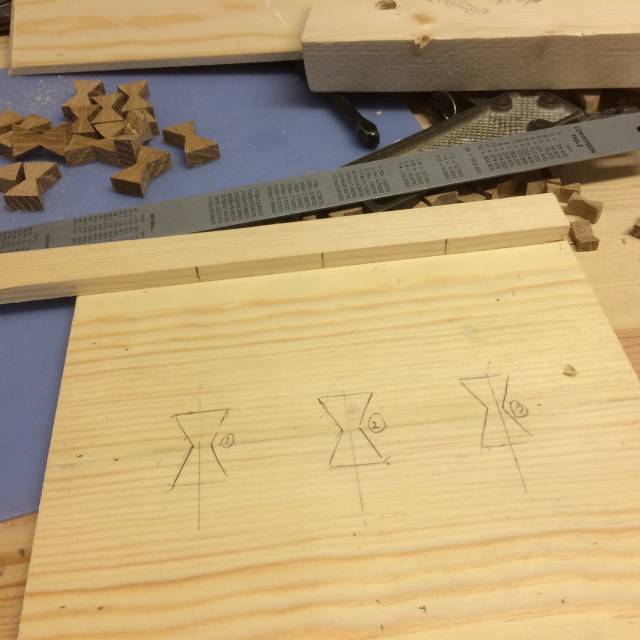
Next up was to cut the holes in the bottoms for the bow-ties. I went for 3 bow-ties with even spacing. Maybe not the wisest choice, but with only one done I can do the others different. The method to do the marking up would be the same in principal though. I made a story stick with the spacing marked out on the edges. Then I marked the lines on each side-grain side of the bottoms and used a ruler to mark lines across the glue joint in the middle. After that the bow-ties were eyeballed to the center of the line, but I did lay a rule along the top of all three to make sure they were in line.
Three different bow-ties were used to mark up the bottom for the cutout. and each one was then numbered along with corresponding tracing to be cut-out. The bow-ties all look alike at a glance, but I can assure you that they are all a little different, so it is important that the bow-tie used for marking is also the one that is used in the corresponding hole. I made sure to mark the hole no. of the area to be cut-out. The fit on the first 3 turned out pretty good, but I will probably change the spacing on the next ones. When cutting the tracing you have to remember to just remove the line and no more. You may have to do some subtile trimming of the hole to get a good fit so it takes a little patience. Another issue is that with the bottom being so thin it is easy for the saw blade to run out of control easily. I dialed down to the slowest speed, which helped a lot and I use the same technique as I did for the scroll work on the sides. That is, avoiding the corners until after the main pieces have been removed. It isn’t easy to get a good fit with these so do take your time and work carefully. I got a good enough fit that the glue should easily close up any small gaps, alternatively larger gaps can be filled with sawdust and glue, but I am trying to avoid that if possible.
I don’t think I will get much more done than these bow-ties for the bottoms today. It is fairly time consuming work. Have a great day and thanks for reading.
Mike, an American living in Norway
7 Comments

If they are not reinforcing the glue joint, they are adding character for sure.
Abbas, Castro Valley, CA
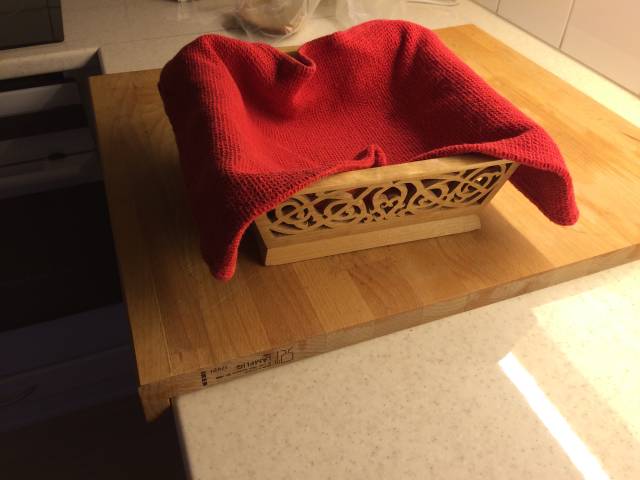
Hi Abbas. In this case the bow-ties are reinforcing the glue joint as the bottoms are made from two pieces. I suppose most non-woodworkers wouldn’t know that, but I would tell them, and they would enjoy getting a little insight. The background to the bow-ties is that my first basket made 10 years ago had a 3 piece bottom because I was running out of birch which it was made from and I just glued the joints with no bow-ties and eventually being so thin they eventually separated, although the bottoms are staying in and are still functional. We still use that basket every day, mainly as a bread basket and we keep a tea towel in it that keeps the toast or whatever warm and prevents crumbs from falling out the bottom or through the sides. If I had used bow-ties on the bottom it wouldn’t have separated, but I didn’t anticipate that problem.
Mike, an American living in Norway
awesome artwork
Thanks Asim.
Mike, an American living in Norway

Looking good. Please stop inspiring me to buy a scroll saw. I have no room for another tool!
Losing fingers since 1969
I have barely used my scroll saw, So far it has collected dust.
I am planning to learn it probably while doing this basket.
Abbas, Castro Valley, CA
*Abbas*That’s the right attitude!
Brian Time to start thinking about a larger shop.
Mike, an American living in Norway