


Share your craft projects
Make new craft buddies
Ask craft questions
Blog your craft journey

shipwright
2073 posts
and
113 followers
in over 12 years
in over 12 years
Marquetry Cutting Styles #3: Classic or Piece by Piece
This is
part 3
in a
5 part
series:
Marquetry Cutting Styles
-
Boulle Style
-
Classic or Piece by Piece
-
Painting in Wood
- Boulle Style
- Classic or Piece by Piece
- Painting in Wood
The Classic Style is the most difficult of the saw cut styles to master. It involves cutting each piece separately, from packets of veneer, each composed of only one color or species. It’s considerable advantage is that it can produce as many identical motifs as the number of layers in your packets. This can reduce the labor and increase the speed of production of pieces with repetitive motifs or enable the production of several identical pieces.
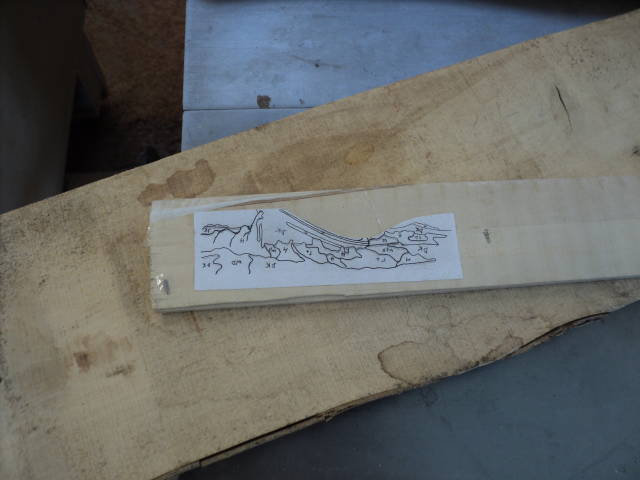
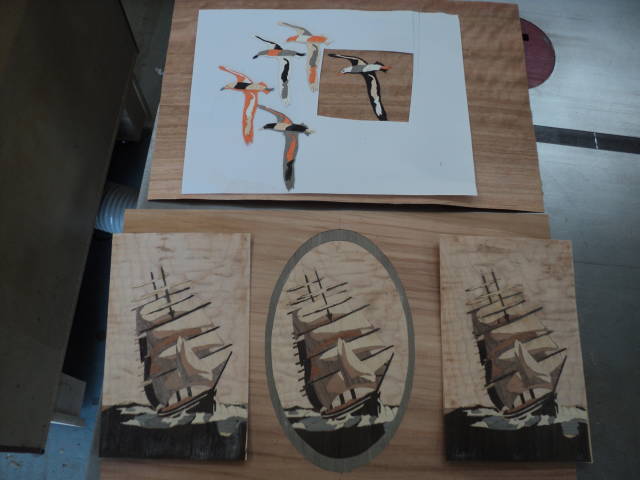
The first step as in other styles is to produce a drawing segmented into the pieces you want to cut. I did this one from a photo. The various segments are numbered to indicate the veneer used for that piece.

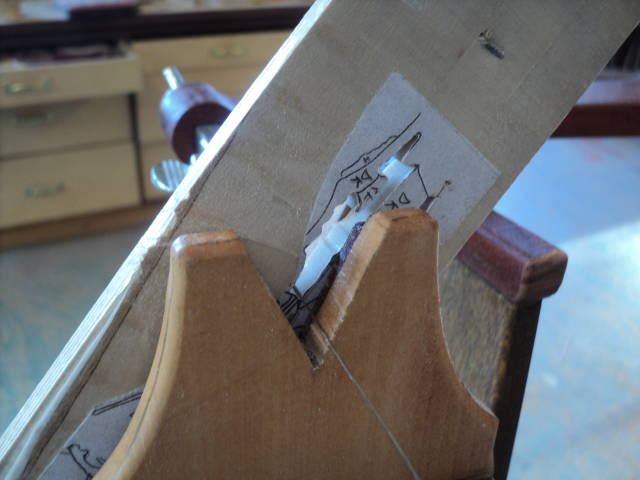
In Classic Style the next step is to assemble packets, in my case here, of six layers of one veneer. This is a packet of shop cut Holly. It has been fastened with marquetry pins and it’s edges have been taped to further compact it. A segment of the drawing which includes several holly parts has been attached to it with spray glue.
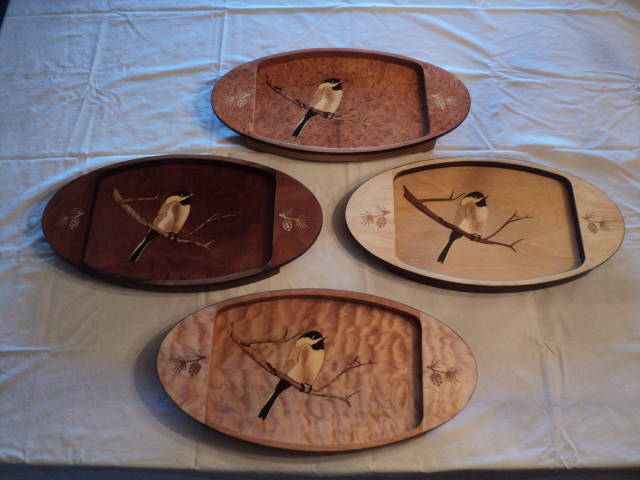
When one of the elements is cut, again with the saw blade at exactly 90 degrees, six identical elements are produced.
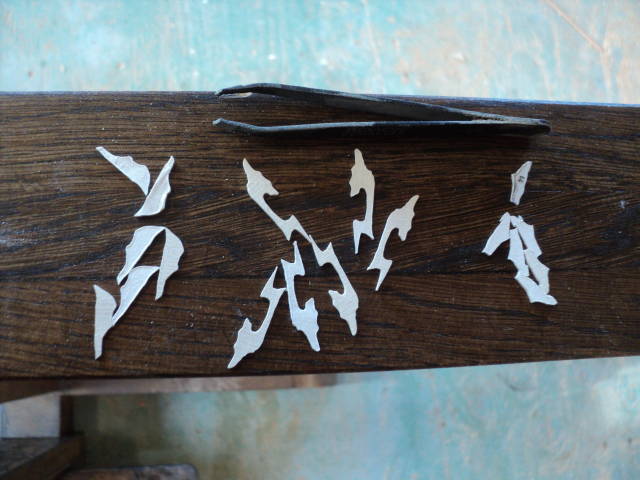
The other packets are cut one by one until all the elements are cut and ready to assemble.
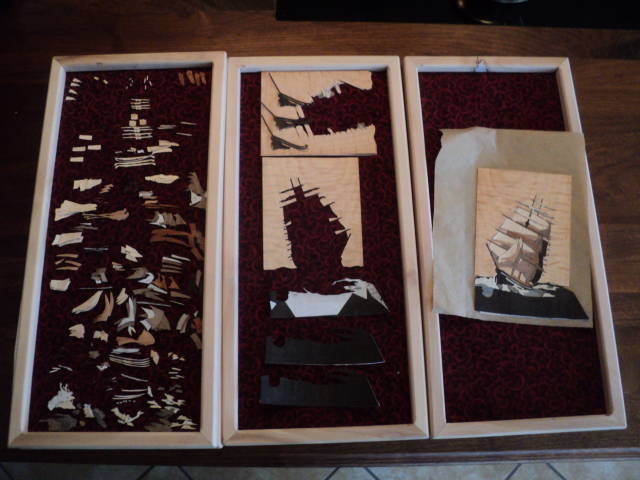
This photo shows the difference between the results of the Boulle cut motif in the last blog entry and this one cut in Classic Style. The pros for Classic Style are obvious. The big con is simply that as each piece is separately cut, the perfect fits guaranteed by the other styles are no longer a given. In theory anyway, in Classic Style, you cut the outside half of the line on the internal part and the inside half of the line when cutting the field. IF you can do this, you get another pro in that unlike the Boulle Style there will be no saw kerf. This was my first try and I can tell you that it is not easy. I have lots of gaps…..but I learned something and I will improve.
This is an old blog. In fact I have improved. This is a more recent Classic style study …… and eureka! … there are no gaps!
Next time “Painting in Wood”.
Thanks for looking in.
Paul
The early bird gets the worm but its the second mouse that gets the cheese.
4 Comments

This is inspiringl work Paul and it gives me something to shoot for. I like the classic cutting method best because I think it is so easy to make duplicates and also to utilize those small pieces. I saw from Elaine’s blog that she makes a packet and keeps cutting from it for different marquetry works as they come up. That seems very efficient to me and in many ways less fuss than preparing painting in wood packets like I am doing now. I will be trying this out in the not too distant future after I become more experienced with my chevalet.
Mike, an American living in Norway
Soon you too will have a big drawer full of partly used packets. What you have to do is decide what your number is (how many copies you want to make) and stick with it. Mine is four.
The early bird gets the worm but its the second mouse that gets the cheese.
I have just read your three blogs on marguetry methods. I have a box of veneers donated to me and marquetry has been on my list of things to get into so your blogs have been very helpful. I think I will start with something simple using the bevel method cutting with my scroll saw. I love trying new things!
Anna
This video is a great tutorial on DB method by one of the great marquetry artists, Silas Kopf.
The early bird gets the worm but its the second mouse that gets the cheese.