


Share your craft projects
Make new craft buddies
Ask craft questions
Blog your craft journey

Mike40
1074 posts
and
35 followers
in about 12 years
in about 12 years
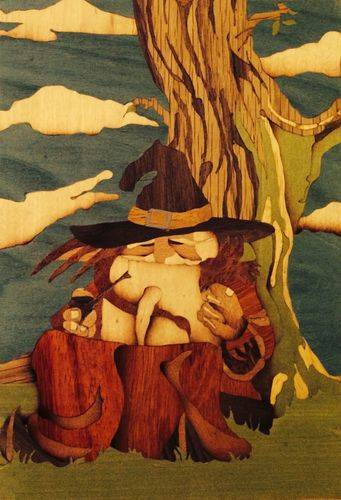
FANTASY MARQUETRY #13: Fresh out of the press
This is
part 13
in a
13 part
series:
FANTASY MARQUETRY
The veneer press worked perfectly for me using the hot hide glue. I brushed glue on the picture back and the substrate and rubbed it in with circular motions to make sure there would be no dry spots. Here is the sequence of the pressing procedure. This was photographed as I took it out of the press, but I am showing the sequence backwards to give you an idea of how I prepared the glue up for pressing.
Photo below: a plastic layer to protect the bottom press caul from glue squeeze-out.
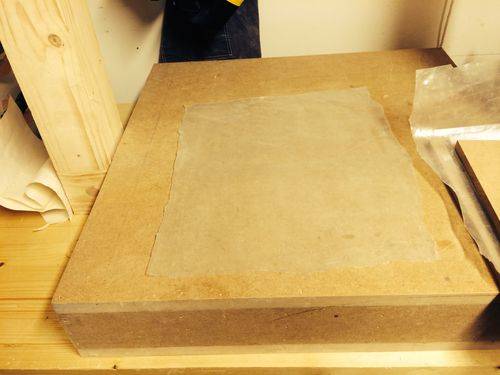
Photo below: The MDF substrate which the picture will be glued to
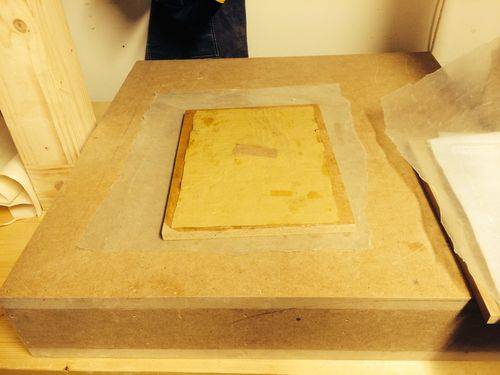
Photo below: A plastic layer to cover the top of the substrate with the picture glued in place, also to prevent glue squeeze-out from getting on the upper caul.
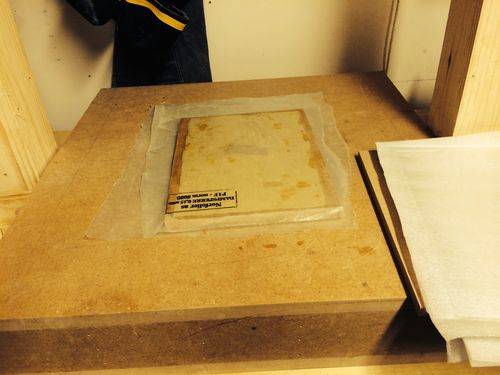
Photo below: 4 layers of thin polyurethane foam matting to even out the pressure.
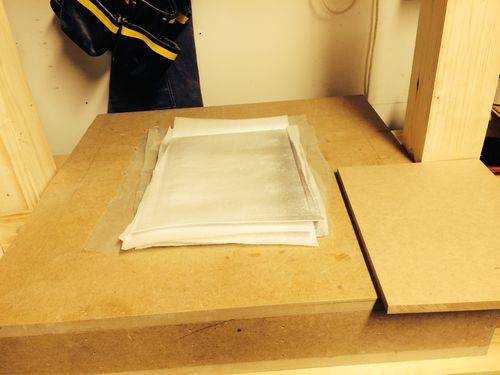
Photo below: MDF caul the same size as the substrate
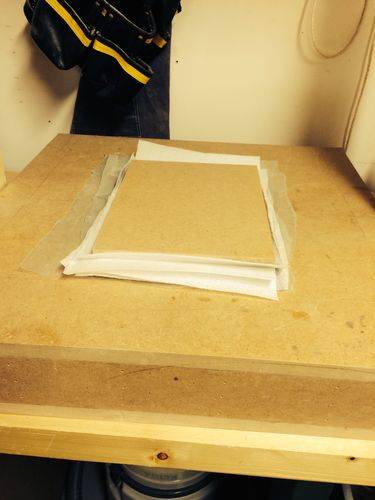
Photo below: Package in the press with the big press caul and the jack in place.
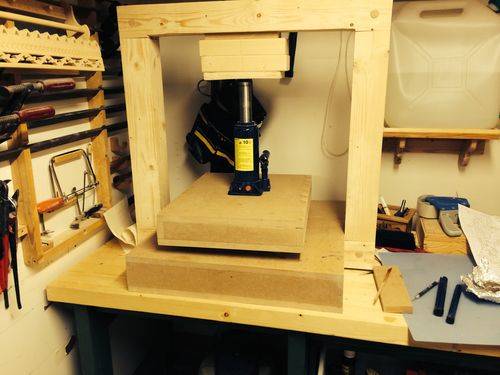
Photo below: Package out of the press and I have started removing the paper from the face side. Quite a thrilling moment! This is done by moistening the paper and scraping it off. I found that a chisel worked best, but I was very careful to not nick or cut the veneers. I took my time and remoistened as I removed the different layers.
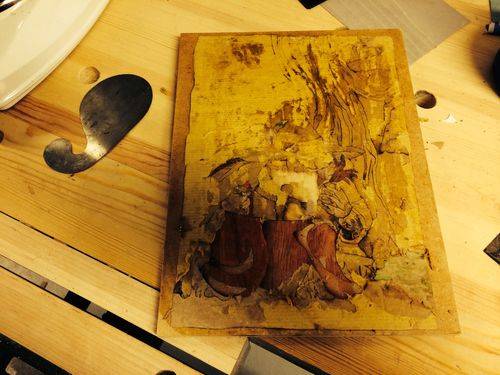
Photo below: The emerging picture began to give me hope of at least limited success.
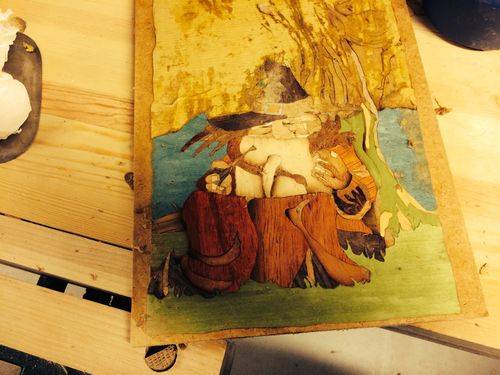
Photo below: After filling most of the holes and improving a couple of things Like the pipe, etc. I still have a couple of spots to fill with veneer and some very small spots to fill with mastic.
My own conclusions:
Technically it came out better than I expected, especially considering the problems I made for myself with the pattern and paper backings. The next one should go a lot smoother and be a lot better.
The artistic part is hard for me to judge, especially since the original picture, done by my son Mark, is the real artwork behind this project and my input has been to just simplify to the picture to make it suitable for a marquetry project. I did enjoy choosing the veneers. My selection was somewhat limited so I had to compromise quite a bit, especially with the dragon. The compromises could have been eliminated or at least reduced by adding more contrasting details, but I didn’t feel well enough qualified to go to that level yet.
All-in-all this was a positive experience and increased my skill levels with the chevalet and the craft knife. I also got more experience with the waywardness of veneers and sand shading. I did get pretty frustrated on occasion and I even considering tossing it a few times, but now I’m glad I didn’t.
I will be finishing up the picture on Monday and then I have to make a nice frame for it. I have some ideas for that already and I will show you the final product when I post the finished project.
Thank you all for joining me on this journey into the unknown and all your kind words and interest along the way.
Mike, an American living in Norway
8 Comments

Very well done Mike. Good job on following through on the job. The first one is always hard.
Tor and Odin are the greatest of gods.

It came out great! Really nice job with the color too.
Losing fingers since 1969
Just like I expected ,I knew you would come thru and you did not disappoint me .
Will watch for the framed up finished version .
Klaus

Well done Mike!
It was great following your work. You detailed pictures made it easy to understand.
Thanks for posting your work.
Abbas, Castro Valley, CA
Thanks all. I enjoyed the trip and my traveling companions.
Mike, an American living in Norway

maybe you made mistakes but I’d be hard pressed to see them and you seem to have learned from them. I think it’s great and I can’t wait to see your next one. Really enjoyed following along on your project, thanks.
-- Alec (Friends call me Wolf, no idea why)

Nice Mike, it wouldn’t be any fun if the first one was perfect.
The important thing is you are started and have a baseline from which you will be able to gauge your growth and improvement.
I think it, or maybe your next work, should go on the front of the chevy as just such a reference. I have done that on both of mine and get a kick out of looking at them from time to time as a reminder of where I started out.
The early bird gets the worm but its the second mouse that gets the cheese.
It looks a little better now after I fixed the beard. I would put in on my chevalet front, but it will be gifted to my son, the one who did the original artwork. Besides, my chevy front is so close to the wall that I really can’t get around it to look at it. Maybe I will eventually do an inlay marquetry for the seat instead.
Mike, an American living in Norway