


Share your craft projects
Make new craft buddies
Ask craft questions
Blog your craft journey

lanwater
2132 posts
and
35 followers
in over 12 years
in over 12 years
Coffe Table #4: Rib Cage Glue Up
This is
part 4
in a
6 part
series:
Coffe Table
...
-
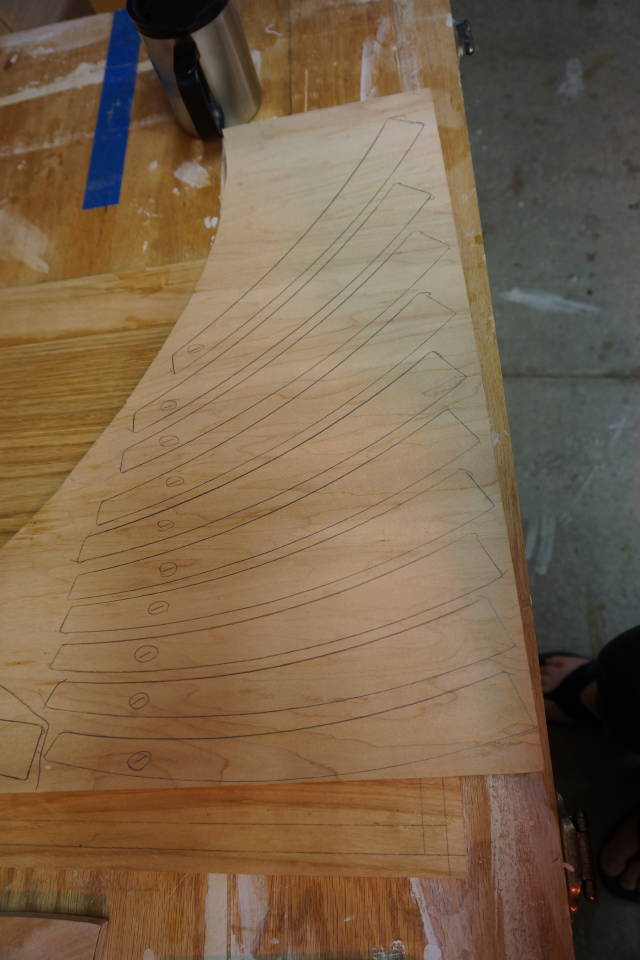
Cutting the ribs
-
Rib Cage Glue Up
-
Covering the rib cage with 1/4 " plywood
...
- Cutting the ribs
- Rib Cage Glue Up
- Covering the rib cage with 1/4 " plywood
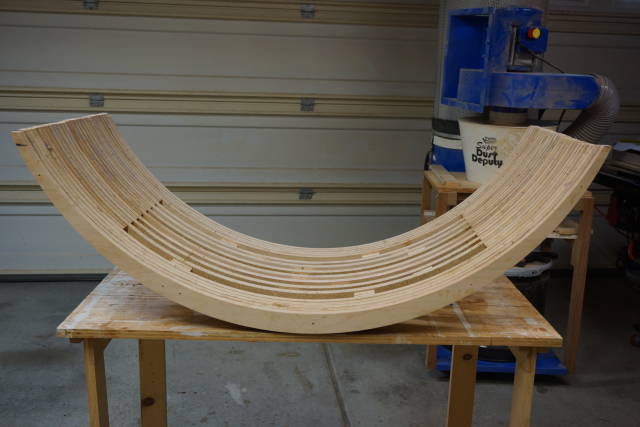
In the previous installment of this blog, I left off with the ribs cut and pattern routed.
It is time to glue them up.
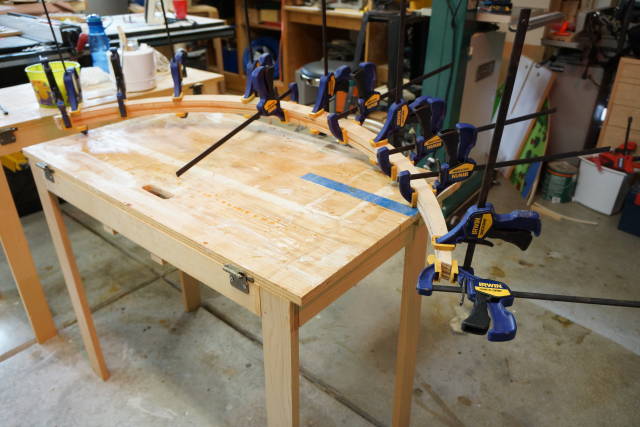
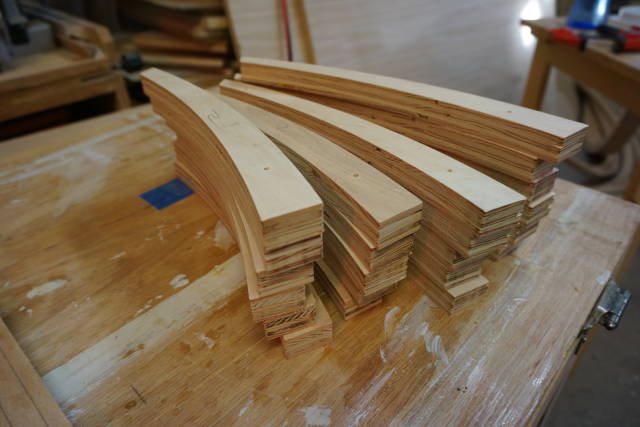
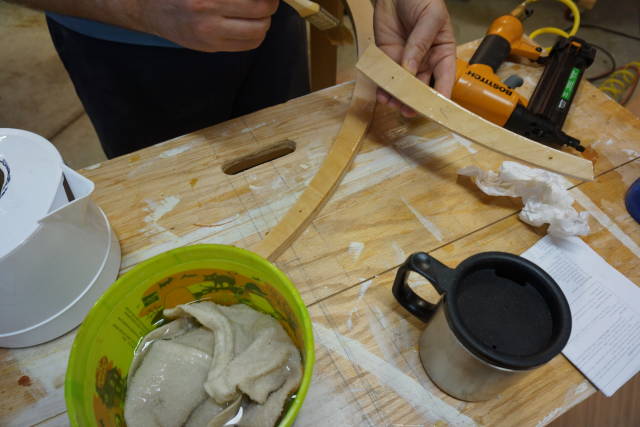
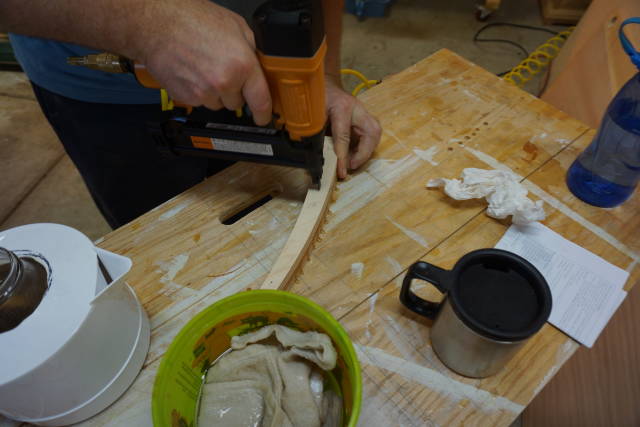
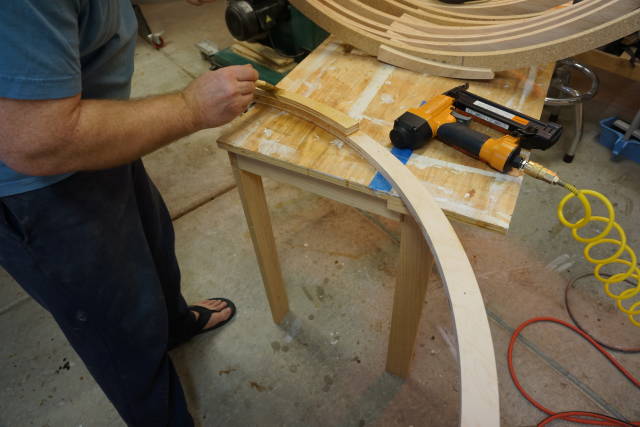
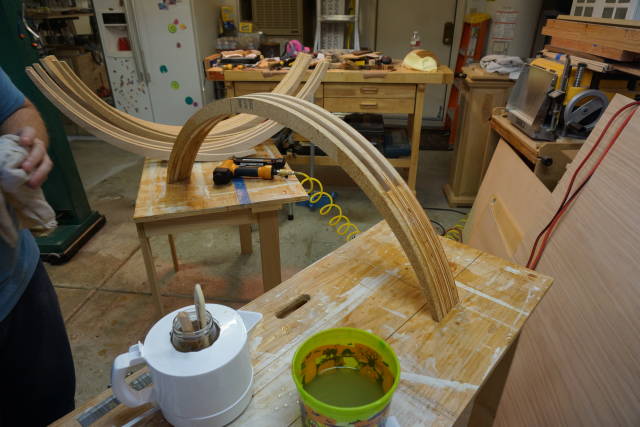
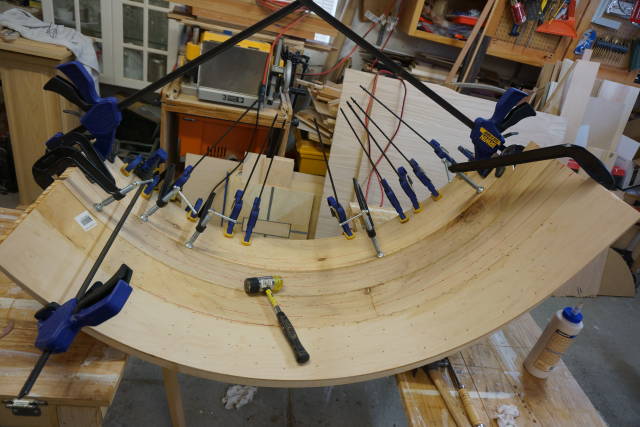
I decided that the first 5 ribs on each side will be glued and clamped and the rest glued and pin nailed as opposed to clamped.
The reason is I will be cutting a profile on the sides and the nails might damage the tools.
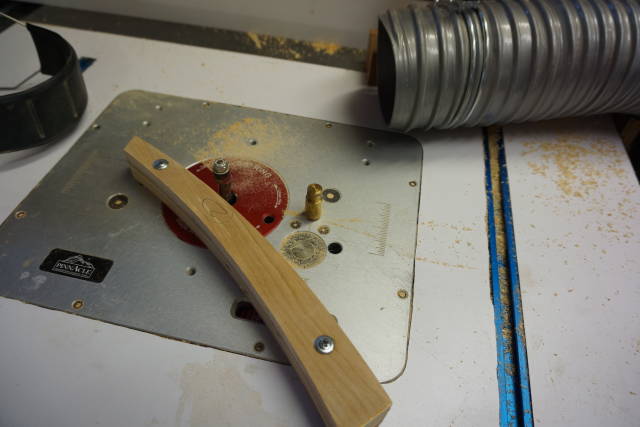
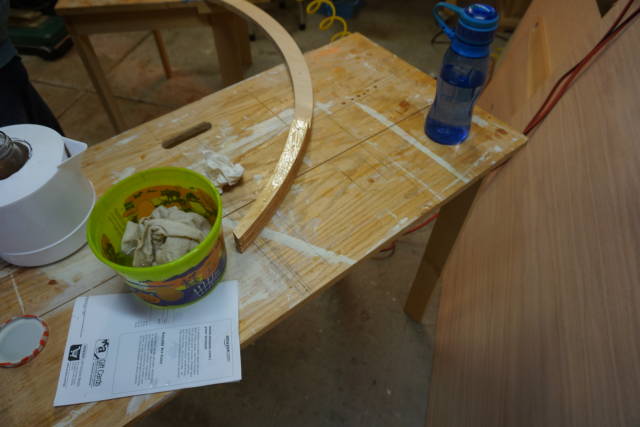
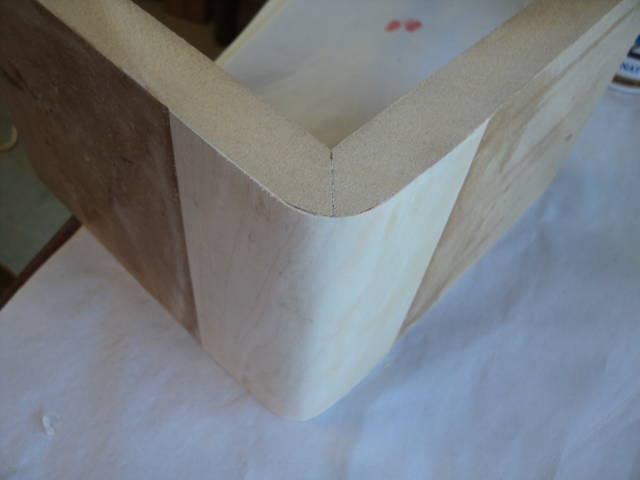
Before we start clamping we need to cleanup the dimples created by the screws I used to secure the template on for pattern routing. If you flush trim router bit is dull like mine then we also need to clean some fuzz; all that with a lite spot sanding.
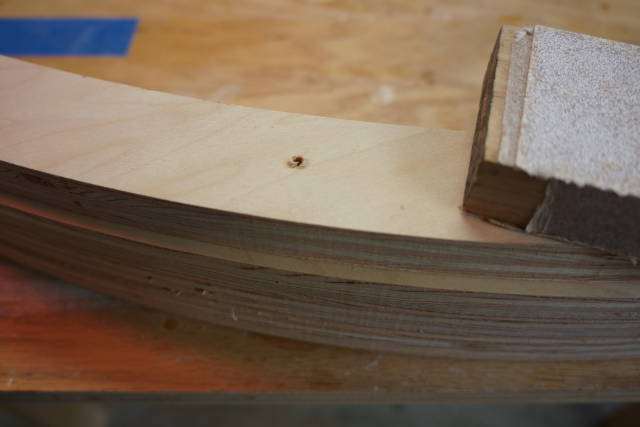
I used hot hide glue to glue the rib cage. That allowed me to get a little more familiar with it.
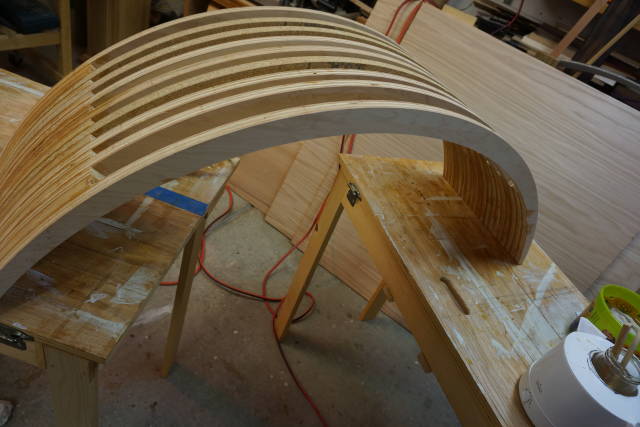
The 2 set of five ribs side by side.
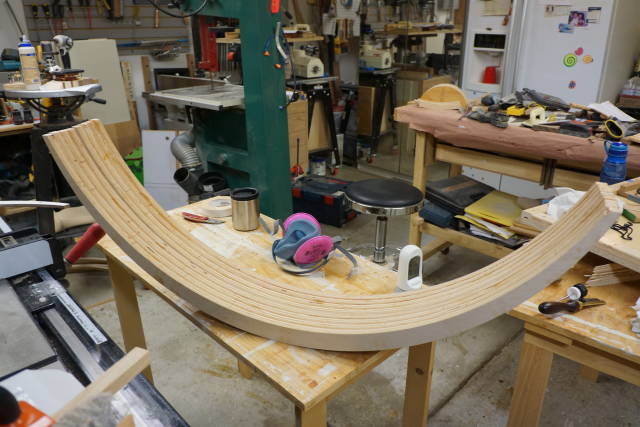
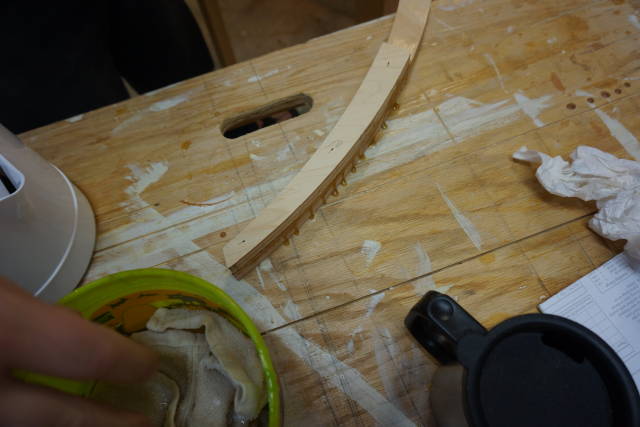
I then went on to glue the rest of the cage.
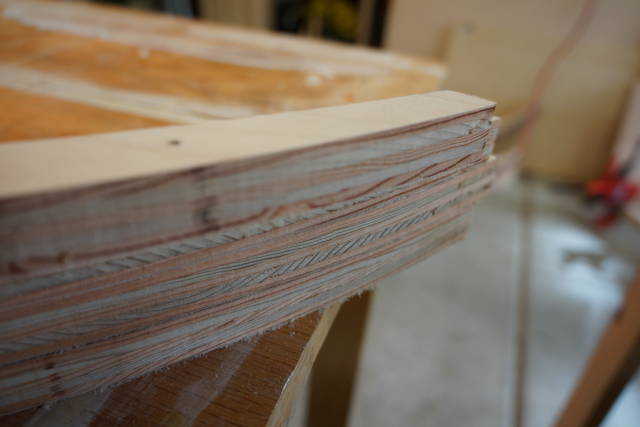
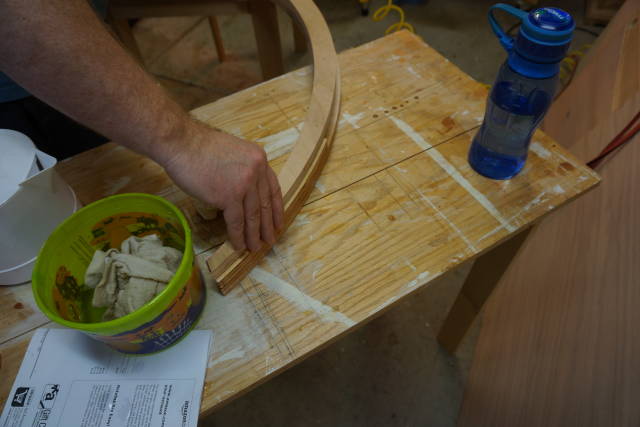
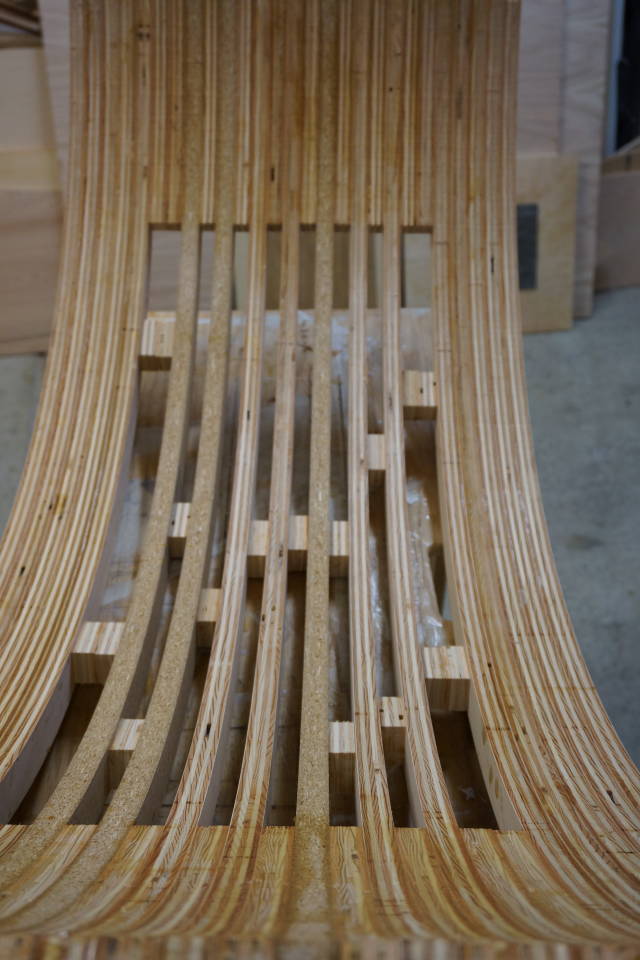
Like I mentioned I will also be cutting a profile on the top of the cage, a small arc. In order no to have a void I needed to make sure these ends were solid. for that I used the same template to cut 20 small pieces to fill in between ribs
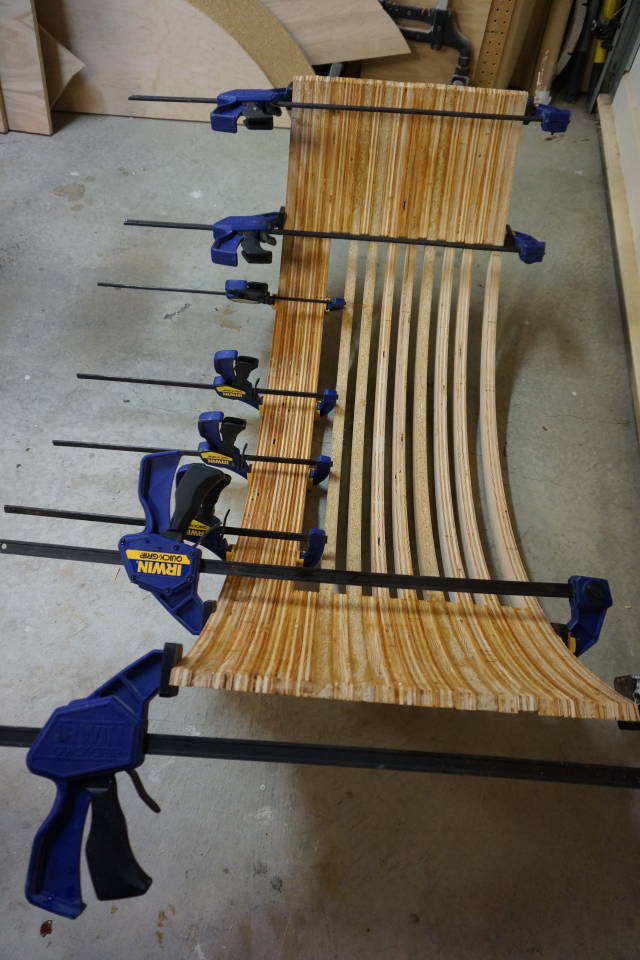
for those who notice the different numbering on the small pieces, 1 an 2, when I re-cut my template, I was a little off the center line. That translated in one side of the template being a little slimmer than the other. 1/16 to be exact. That’s why I cut 10 small pieces for each side. I could have fixed the template but I decided to move forward.
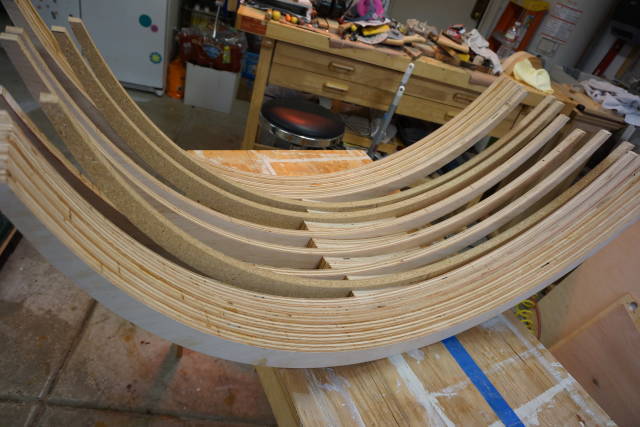
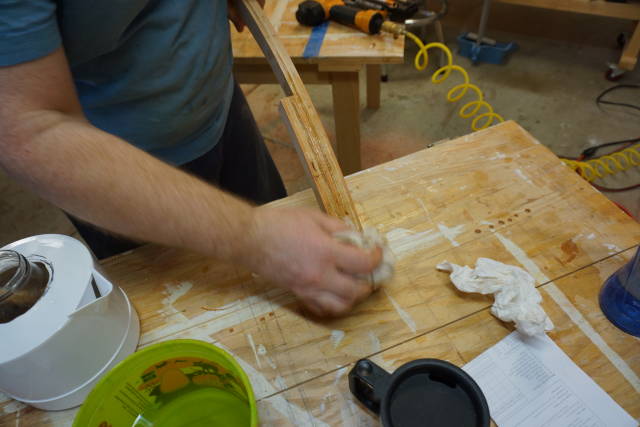
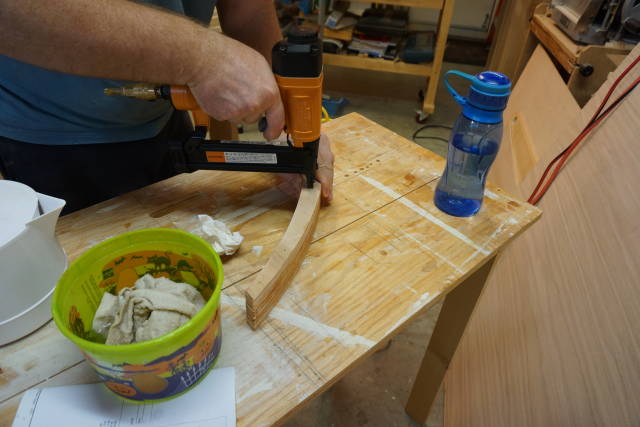
Now I glue the set of five pieces on each side. Clamped no nail.
I am sure the carbide will go through the nail fine but..
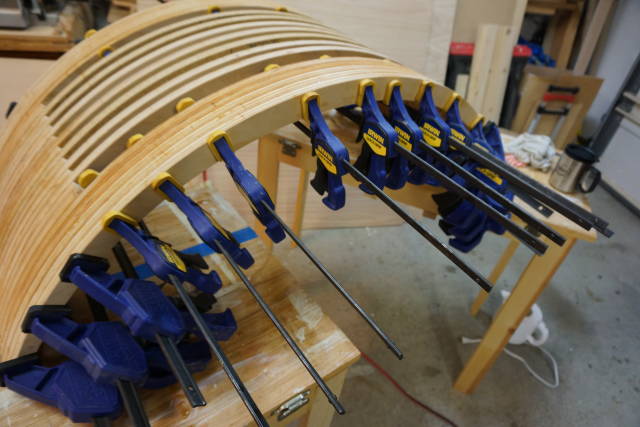
I added some small pieces between the ribs here and there for no real reason. It is plenty solid without.

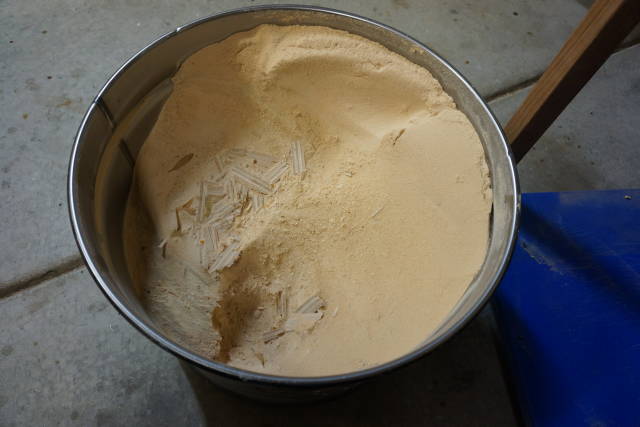
Dust so far this project :)
A couple of notes:
1- there was plenty of space between my fingers holding the pieces to be nailed. I was very concerned about a nail going out sideways. that’s an area to pay attention.
2- I talked about 16 ribs and 20 filler pieces. 10 for each side top. those numbers come from the decision to have the width at 20". Since the ply is about 0.75", 20/.75= 26.66. so 26 should get me 19.5" for the width.
Abbas, Castro Valley, CA
12 Comments

Great man! Excellent work, and nice and easy to follow along, with great pictures.
CHRIS, Charlottetown PEI Canada. Anytime you can repurpose, reuse, or recycle, everyone wins!

That looks like real progress Abbas. My only concern is the weight. Considering that it will have a double 1/8" pw skin, it seems overbuilt to me. …….but that is of course better than underbuilt. You shouldn’t have to worry about it breaking anyway.
Your work and description are first class. This is going to be a very nice piece.
The early bird gets the worm but its the second mouse that gets the cheese.
Thanks Thorrean!
Thanks Paul! You are going to laugh but I am thinking it’s too light; seriously. I never done rib cage before so I am not use to seeing voids. All the pieces I have done so far has been solid wood.
The final outcome is going to hang on the veneer step. I ordered some backer veneer to practice on. same size plywood as the flat size of the curve of the table: 20″×58′
I am also thinking I veneer the 1/8 ply then glue it on the cage. It will be a headache to hammer the veneer on the inside curve, I think.
Abbas, Castro Valley, CA
In boat building there is always a balance between the amount of framing and the thickness of the skin. More framing = thinner skin, less framing = thicker skin. I usually build as light as I can within strength guidelines. That said, I wouldn’t want to run into your table with my boat ……. I might not win the day. Two layers of 1/8 pw laminated in a curve like this will be very strong all by itself. I’m just guessing really but I think maybe five ribs would have been fine.
Hammer veneering with thin veneer on a big curve like that should be no harder than on flat. I did a practice piece once to see how hammer veneering on a curve would work. It was actually really easy and I had about as much experience then as you have now …. and a home made hammer. :-)
How were you planning to clamp the 1/8" pw to the frame?
The early bird gets the worm but its the second mouse that gets the cheese.
Well the first 1/4 ply went on with a combination of clamps and lots of nails and lots of frustration as I underestimate the spring back force and the bend radius of the 1/4 ply. It went on but not pretty.
The good news is that I planned to cover that with 1/8 ply with the veneer on top.
I tried the a piece of 1/8 and it seems fine. However clamping it in place is the challenge. Cauls across are not going to cut it as I would not have a good distribution of pressure.
I was able to locate 1/8 bendy ply and bought a sheet. It does bend effortlessly. That stuff is dynamite. I rolled it and stuff it in my car without any problem. I wish I found it before I applied the 1/4 ply.
I am thinking contact cement for the 1/8 ply and roll it on.
The veneer will go with Hot Hide Glue.
The reason I am thinking to hammer the veneer flat is that it would be hard to use the hot iron to re-activate the glue on the concave surface. It’s easier on the convex surface.
I thought about bending the sole of my hot iron but I have yet to dismantle my iron to see how the heating element runs to see if it is feasible.
Abbas, Castro Valley, CA

Honestly it looks great with the ribs exposed. That’s a nice design feature. I’m going to keep that in mind for the future.
Losing fingers since 1969
I agree Brian. I like it too with the middle ribs exposed.
It would have interrupted the flow of the veneer grain and with the little experience I have it would be very hard for me to veneer properly.
Maybe that section only in hardwood plus a couple inches more for glue surface.
Edit: Laminates would probably work.
Abbas, Castro Valley, CA

It looks fantastic Abbas. Great work on this. It will be fine, but as Paul mentioned pretty heavy. I doubt you needed the 1/4" ply at all for this as you are basically making a torsion box which is a tremendously strong construction even with extremely light and thin materials. No matter, this will be a wonderful table base and the extra weight will just make it that much more stable. Your blog is very thorough with excellent photos and good explanations. Even I might be willing to tackle this having your good example here.
Mike, an American living in Norway
Thanks Mike,
The extra weight is due to inexperience and fear really but mainly inexperience…
It is a great learning experience for me. The veneer part alone is worth the journey.
Veneering has been a dark area for me and still is to a great extent but there is a slight ray of light now :) I am sure I will continue to experiment with veneers one way or another. We will see where it takes me.
Abbas, Castro Valley, CA
It can be a slippery slope Abbas. It took me to France!
The early bird gets the worm but its the second mouse that gets the cheese.
I have thought about that.
I have been watching a lot of marquetry videos. I actually re-read your blogs and those of Elaine.
Who knows, After I finish my veneer box I will need to find something else to do. Hammering is fun but Marquetry is much more powerful-:)
Abbas, Castro Valley, CA
Nop. nothing, nada, rien du tout etc…
My wife is on trip to china.
-Drop the kid
-Go to work
-Pickup the kids
-Feed the kids
-cleanup
you got the picture…
Few more days -:)
Abbas, Castro Valley, CA