


Share your craft projects
Make new craft buddies
Ask craft questions
Blog your craft journey

MsDebbieP
1395 posts
and
54 followers
in over 12 years
in over 12 years
More from MsDebbieP


The Void


(created January 2010)
“In the beginning there was nothing… nothing except the possibility; and if there was the possibility for one thing then there is the possibility for all things” ~ Ojibwe story of creation
One day, several years ago I was given a vision – a vision of a possibility – a vision of a woodworking project depicting “The Void”, the place of all possibilities.
In this sculpture, the centre, the walnut base, represents the Void, from where all possibilities begin, and in the middle of this is a crystal which represents a Possibility.
The layer of maple wood in this sculpture represents the physical world – all the possibilities that Are.
Beyond the veil of the physical is the Void, the source of all possibilities.
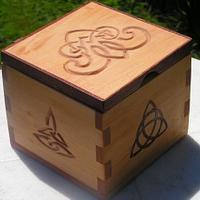
The edges of the sculpture hold elements of the physical world:
- shells, representing the water realm
- pine needles, representing the plant world,
- pebbles, representing Mother Earth
- feathers, presenting the bird/animal world
Yin Yang: the physical and spiritual worlds united creating the whole—all that Is and all that can be.
The Project
Although I had a general idea of what I wanted and what I needed to do to achieve it, the finer details were left to the “make it as you go” strategy. As I prepared the first step of the process, I changed my mind, oh, half a dozen times, as to how I should start—keeping in mind the size of wood I had and the different procedures that I wanted to include in the project.
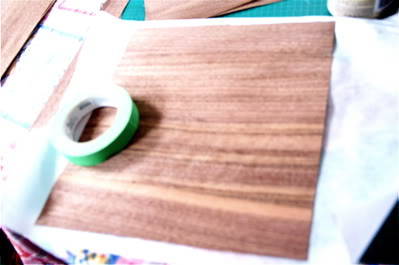
I had a long sheet of walnut veneer that was 9” wide. I also had a sheet of maple that was 12” wide. First I considered the easy way out and just make it 9” but I knew that in the following steps, this reduced size would be causing me grief. So I took the plunge and started cutting the walnut to put together 12” pieces.
I wanted 3 layers of the walnut to create a sturdy base that wasn’t very thick (thus the veneer rather than a piece of wood). I also needed the centre of the walnut pristine so I added the extra inches onto the sides of the top piece.
Now, other than the skateboards that I made for my son (from a kit), I haven’t worked with veneer so again I just jumped in and did what I thought was right.
I taped the bottom and top layers and then just glued the centre pieces in place and hoped for the best.
(and a thank-you to Ted & Norah at Roarockit for the donated maple veneer—from a skateboard that I made with them. I’ve been holding onto the special piece of wood. It had a purpose and it was waiting for the Possibility.)
Inspiration for the sculpture: artwork in a book by Jamie Sams
I then placed them in-between a couple of boards and placed some heavy weight on top of it. Oh and I crossed my fingers.
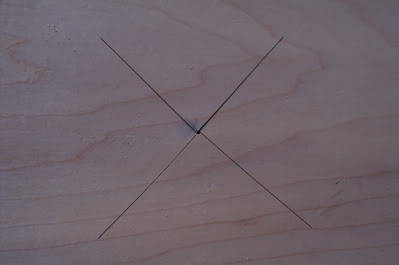
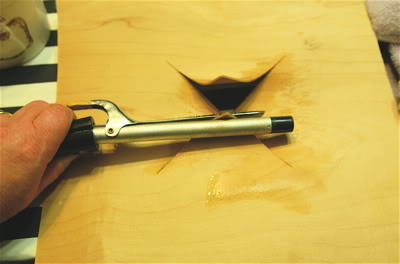
Next, I had to work with my maple. Again, I knew what I wanted to achieve but didn’t know how to do it so I just jumped in and started working. I drilled a hole in the centre of the piece and, using the scrollsaw, cut a big “X” in the centre of the piece. So far so good. (The new glasses worked really well, by the way).
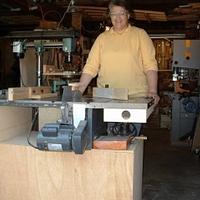
Next was the process I really wanted to try—this really is what the entire project was about! I got the idea from the video The Wood Whisperer posted showing a woodworking building a guitar. When I got the idea for my Awards project I remembered the video and thought, “Hmmm .. would it work?” I should say that, while the walnut veneer was really thin, the maple was not. It would have worked much better with thin stuff but this was successful so I shouldn’t complain. I took the wood into the bathroom and got ready to play.. I mean create. Here’s my set-up. Notice the ironing board? See? I DO use it! Ha. My family would get that joke. And the curling iron – well it hadn’t been used for decades either. I’m so glad I’m a packrat! They both came in handy today.
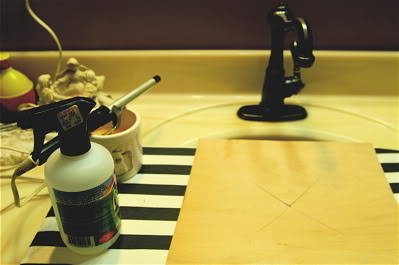
I sprayed the wood with hot water…
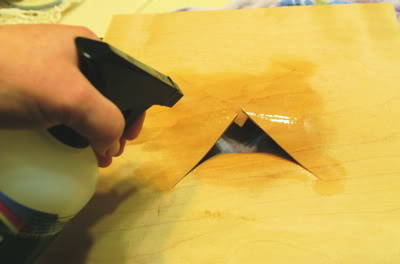
Then I took a curling iron and started bending the wood.
2 sides done
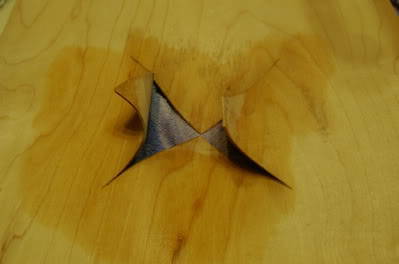
Problem.
The two sides (that I started with thank goodness) were against the grain or with it, depending on how you want to look at it, and curled really well. The other two sides—no way. (I tried it on the thin walnut first and it worked well in both directions). So.. plan B.
Hmmm now what?
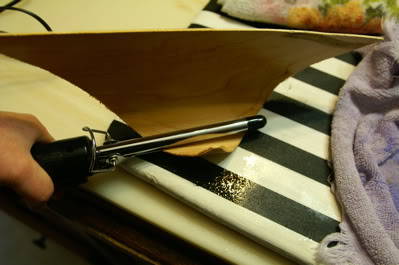
Well, the only way it would work was to cut diagonal pieces to that I was working with the grain on all four pieces. So I cut out four diamonds (not too well, I might add… “should have” been really careful on the corners to get the 45 degree angles. But I didn’t… and I knew it… and I was prepared to work with it.
This was much easier to work with than the full square
In the end I had 4 curly triangles.
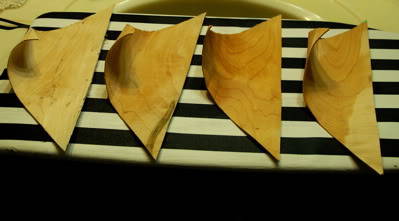
With the pieces prepared, the next step was to try and put them together into a square and get all the four corners to match.
Yah… I had it once, moved the pieces and then couldn’t get it to work again. That was frustrating!
I decided to glue one section onto the walnut and just go from there. Once the one piece was down it was easier for me to adjust the other three and eventually I got it close enough and glued and clamped them.
With the project almost done, I had to clean up the edges. (Originally it was to be round but I thought my wood was wider and would have given me more room to play with. As it was I had to cut the slits quite large in order to get a good curl to the pieces. So—square it is. I can live with that.
When it was glued up I then gave it a couple coats of polyurethane. Next I added a crystal to the centre and the corners with some shells, rocks, pine needles, and feathers.
And there you have it .. my most creative piece of woodworking.
JAGO - just a grandma’s opinion
26 Comments

What a great idea Debbie! You rock :)
-- Michal, http://WoodworkingWeb.com

Wow! That is inspiring!
Thanks :)
It’s a pretty special piece, to me anyway.
JAGO - just a grandma’s opinion
That is a beautiful piece of artwork! Thanks for sharing your process. Loved the curling iron idea for curling the veneer.
Anna
Wow, that really cool. Never would have thought of that way to curl wood. Super creative project, Debbie
I'm the one with the beard
Wow! This project is “deep”. Thanks for sharing the creative process and the story behind it. (Do I need to add curling irons to my list of tools to get?)

Impressive. Lovely. clever. beautiful.
-- Alec (Friends call me Wolf, no idea why)
thanks everyone :)
I guess I should add the curling iron brand to Martin’s list.
JAGO - just a grandma’s opinion

Is there any list out there ? :))
Martin Sojka, Maker of Craftisian
:D
just in case people don’t know what I’m referring to: LINK
JAGO - just a grandma’s opinion
That’s pretty slick MsDebbie. I think after using the wife’s giant soup pot to steam wood in lately, I better stay away from the curling iron ;)
Where are the band-aids?---Pro Libertate!

That’s amazing MsDebbie!
Thanks for describing the process.
I never thought about and curling iron in the shop:)
You did a great job!
Abbas, Castro Valley, CA
thank-you :)
I’m quite proud of it.
JAGO - just a grandma’s opinion
Beautiful interpretation of nothing .
I like how you took all these elements and gave them form.
Yes the old curling iron does the trick and along with steam and a hot air gun even a hot pipe some nice bending forms can easily be archived .
Nicely done. I like it.
Roger
Thank-you
JAGO - just a grandma’s opinion

I love wood sculpture, Well done! Now you have me trying to think of a way to use that process :)
-- Paul--- Creativity is allowing yourself to make mistakes. Art is knowing which ones to keep. — Scott Adams
Wow Debbie. How creative! What I like best is your problem-solving and not letting it stop you. Sometimes I have to think for a long time, and when the solution comes, it seems so obvious. That’s a really good job, and a beautiful piece to show for it.
Might As Well Dance : http://barbsid.blogspot.com/
Thanks everyone :)
JAGO - just a grandma’s opinion
and thanks to everyone who voted for this piece in the Summer Awards 2014.
4th place is very impressive! I’m honoured.
JAGO - just a grandma’s opinion
More from MsDebbieP