


Share your craft projects
Make new craft buddies
Ask craft questions
Blog your craft journey

shipwright
2073 posts
and
112 followers
in almost 12 years
in almost 12 years
Marquetry Jewellery Box #10: Ten days of cutting, but the end motifs are done.
This is
part 10
in a
17 part
series:
Marquetry Jewellery Box
...
-
Just Pretty Pictures
-
Ten days of cutting, but the end motifs are done.
-
Mounting the end motifs
...
...
- Just Pretty Pictures
- Ten days of cutting, but the end motifs are done.
- Mounting the end motifs
...
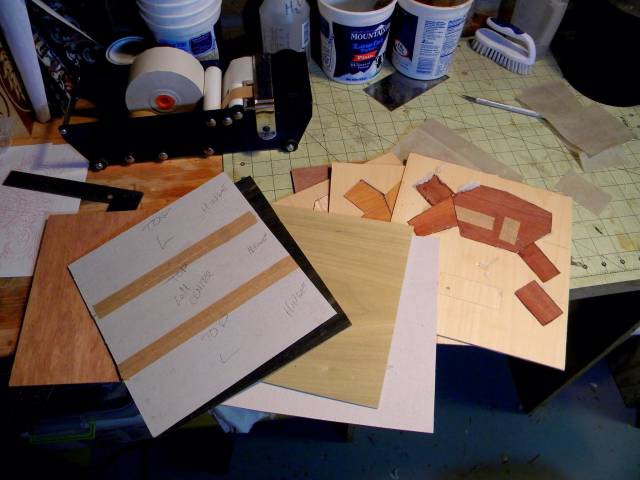
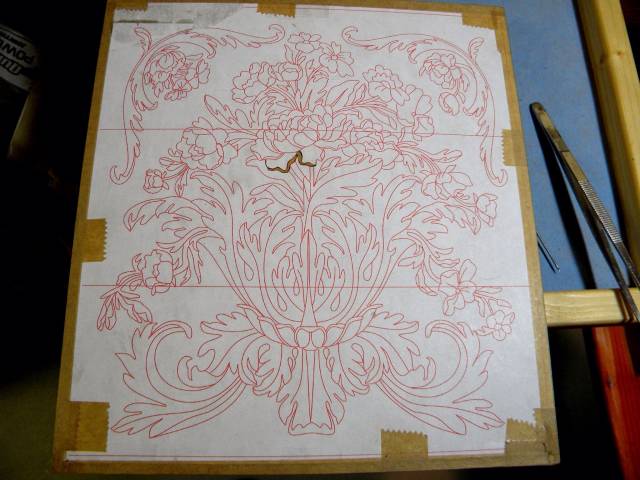
With the design decided and the drawer front marquetry installed the time finally came to tackle the cutting of the end motifs. This is by far the most ambitious motif I have ever attempted and I can say in all honesty, I wasn’t all that sure I could do it.
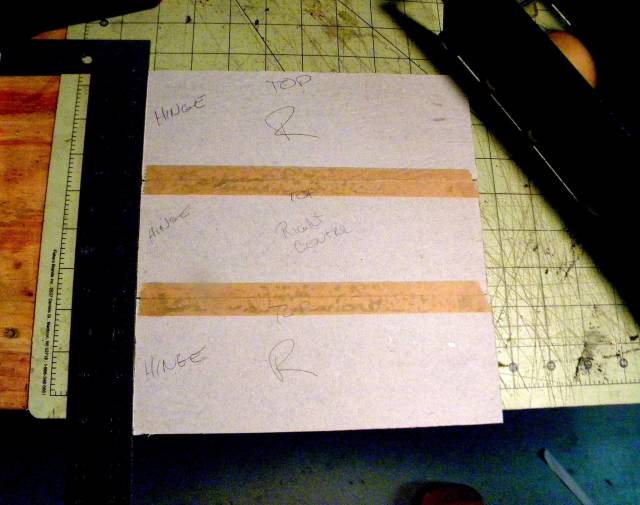
I decided to use the painting in wood technique as the motif lends itself to the style and there were to be only two copies. I made up a packet with two layers of Poplar face to face, two layers of Ebony face to face and three layers of basswood waster to carry the other components. The two Ebony layers were made up of the previously fitted drawer side components veneer taped together. The flower and basket parts were added to the wasters and were Araracanga, Bloodwood, and Curly Maple.
Very careful alignment of the layers to each other, and even more importantly to the pattern, was absolutely essential.
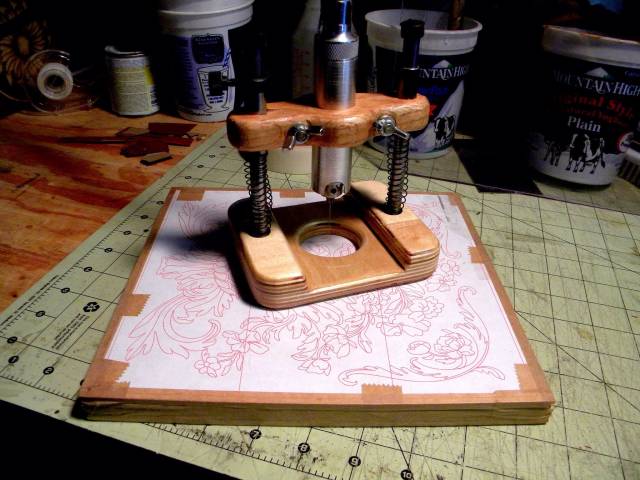
Then, at last, it was time to drill a hole (three actually) and start cutting.
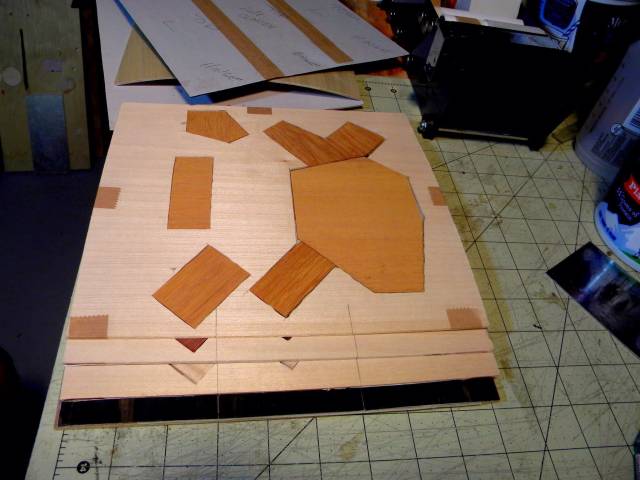
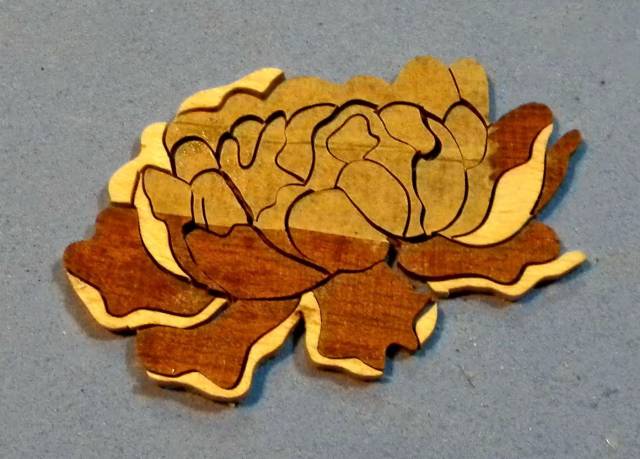
This is the first piece that I cut. What you see is the bottom plywood piece from the cut placed in the top plywood hole. This is a check that I repeat often during stack cutting to be sure I’m not getting conical.
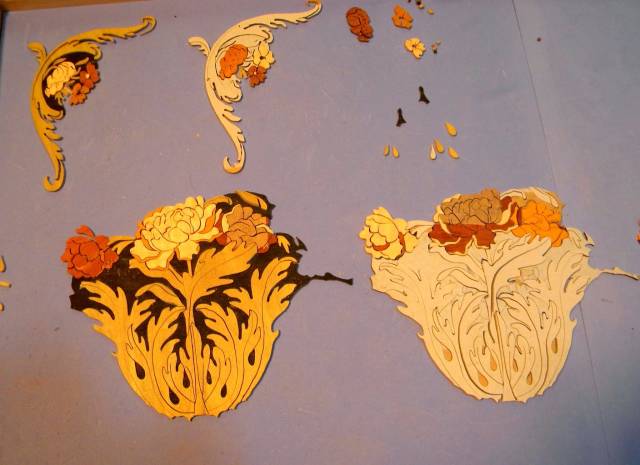
As I cut, I assembled the parts in a drawer, closely fitted because there were so many tiny parts, many that looked very much alike. This was quite scary as the picture grew because all it would take would be to bump the tray and I would be spending hours trying to reassemble the parts. I took lots of pictures, one every time I moved a group of parts from my working tray to the storage tray.
…. You get the idea.
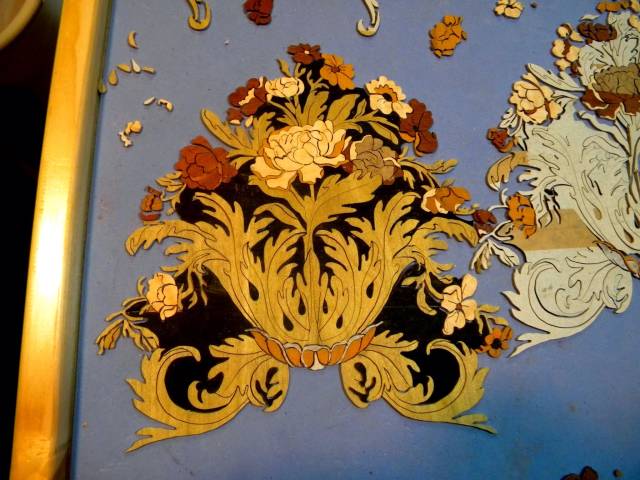
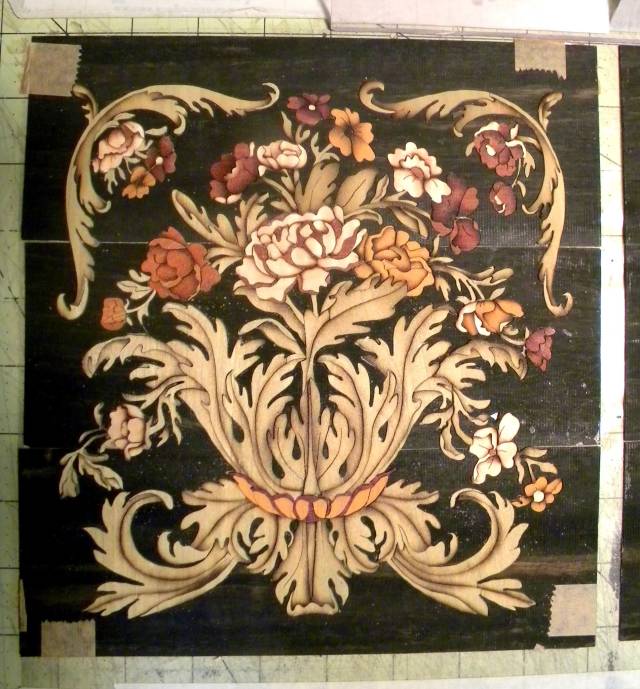
Finally, after ten days and ~ 40 hours of cutting, it was done and I could at last open the packet and remove the backgrounds. This meant I could move the “loose” assemblies into the enclosure of the Ebony grounds and breathe a small sigh of relief.

At this point, if you are Patrice or Patrick, you shade all the pieces and then assemble on a paper mounting board with HHG but since I’m not and I’m nowhere near as confident in my shading, I pre-assembled on clear adhesive backed shelf liner. This gives me a chance to look at my motifs and make changes if I want and it also allows me to remove the pieces, one at a time, sand shade them, and replace them. I like to be able to see how the shading looks and maybe adjust my technique a little as I go.
Here are the two motifs as first assembled.
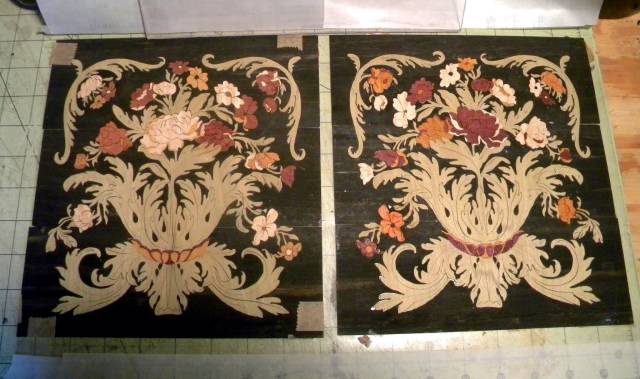
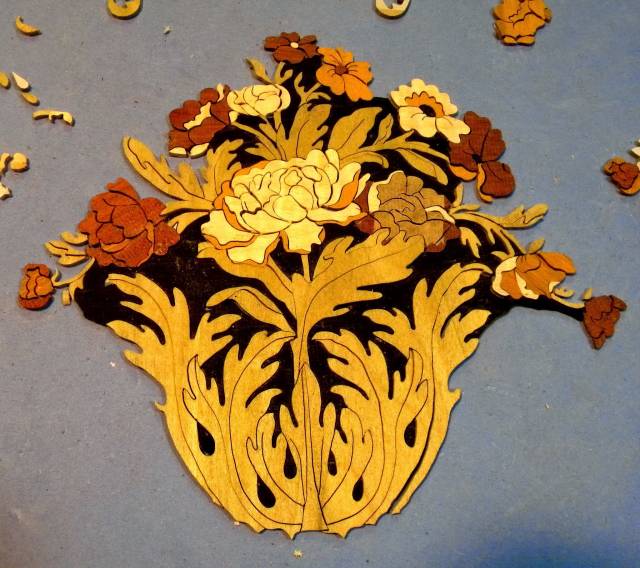
Here I have changed some of the flower colors. I had three colors for each part and only needed two assemblies so I could make changes after seeing the finished pictures.
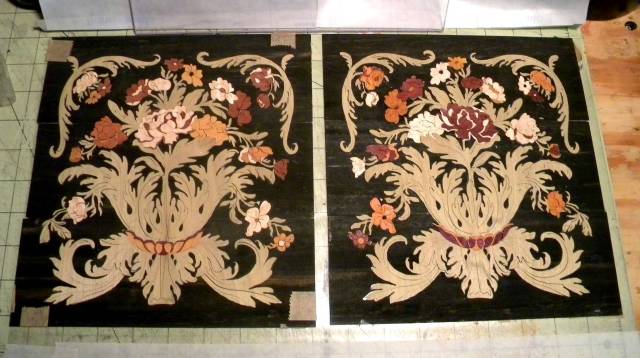
And after taking all that time to cut, shading only took about four hours for the first one. This photo shows dramatically how much difference can be made by sand shading.
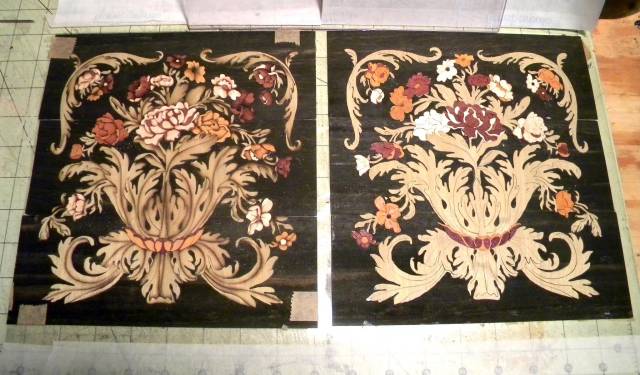
All and all, I am very pleased to have gotten this far without losing a single tiny piece and with no serious mishaps. It is by no means perfect but I feel like I have crossed a line in my marquetry journey with this cut.
I still have to shade the second one, mount them on paper mounting boards, fill with black mastic, and separate them into threes before they get near the drawer sides, but I feel like the hardest part is done …… for this part.
Thanks for looking in.
Paul
The early bird gets the worm but its the second mouse that gets the cheese.
7 Comments

C’est magnifique Paul!
I see what you have done to the flower. I had to look for the subtle changes.
Do you glue the smaller veneer to the basswood carrier or just tape them?
Why use a carrier and not attach directly to the other pieces like the poplar?
What do you mean “face to face”?
How do you prevent the top layer from breaking especially with a reverse tooth blade? I realize you use the chevalet and probably different blade.
Sorry for all the questions but you are a wealth of knowledge.
Thanks!
Abbas, Castro Valley, CA
OK one at a time.
The small pieces of precious (read expensive) veneer are cut into the basswood which serves to fill out the layer so that there isn’t a bump where the pieces are.
By face to face I mean that the glue sides are facing each other and the paper reinforced sides are on the outsides. It allows me to cut mirror images with the glue sides un-papered. If you look at the assemblies in the storage tray, they are not mirror images but one side shows paper. In the actual assemblies both are un-papered and are mirror images.
.
In Boulle style and PIW style packets I use a layer of 1/8" plywood top and bottom.
I never use reverse tooth blades
I use 160 mm 2/0 blades from Germany. The ones I use most are about 30 tpi. I also have some that are 160mm x about 60 tpi. The standard blades available here are all 130 mm. The longer stroke is a great advantage on the chevalet.
I used about three dozen blades on this motif. The Ebony and Bloodwood are particularly hard on them but the Araracanga is pretty hard too.
Never worry about asking questions.
:-)
The early bird gets the worm but its the second mouse that gets the cheese.
Thanks for the detailed answer. I understand much better now.
Abbas, Castro Valley, CA

Your artistry, attention to detail, and patience are unsurpassed by anything I have ever seen before. Thank you so very much for letting us follow along. Fantastic!
CHRIS, Charlottetown PEI Canada. Anytime you can repurpose, reuse, or recycle, everyone wins!

Paul,
Your blogs are a whole lot more entertaining than Hollywood!
L/W
“Those who would give up essential Liberty, to purchase a little temporary Safety, deserve neither Liberty nor Safety.” Benjamin Franklin
So very impressive. Well done, Paul. I love seeing your art as you go along.
Might As Well Dance : http://barbsid.blogspot.com/
Very nice!! Such a fine touch.