


Share your craft projects
Make new craft buddies
Ask craft questions
Blog your craft journey
Blog Series
logging trailer
Part 1: homemade logging trailer build
Im starting this blog for my trailer project. I decided to do a trailer build to save wear and tear on my truck box. Ive searched the internet for ...
Part 2: getting started
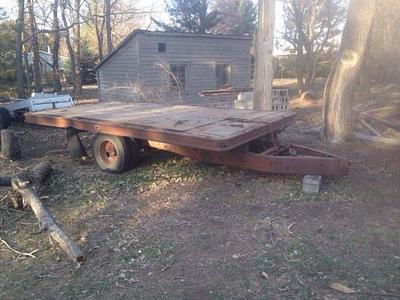
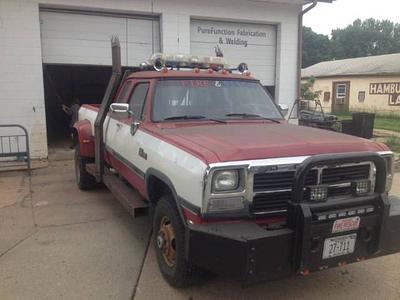
Part 1 was a general intro. Now i will talk a little bit about my progress so far. I started obviously by choosing a trailer. This being a low budg...
Part 3: tear down progress
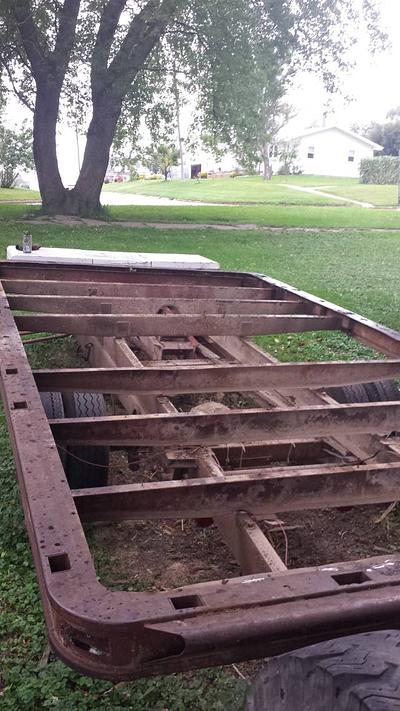
So Got a chance to rip into today. Got metal floor off and keeping it off. Could only register this trailer for 9,999 lbs. The metal floor and the ...
Building Some Chevalets, a Class Action
Part 6: Slow Progress ..... but progress none the less
When I left off last time I said that the “furniture” was done. That wasn’t quite true and it took quite a while to finish the job. Because I will ...
Part 7: Saw Frames, Clamp Springs, and Height Adjustability
Just a bunch of photos from the last few days to bring the project up to date. When I left off I was about to make the saw frames and the clamp spr...

Part 8: More To It Than Just Pretty Chevalets
When I last posted in this blog, I had almost finished the chevys and was feeling about ready for the classes to begin. Well ……. that may have been...
$100 Favorite Technique Challenge

Part 1: Announcement
Marquetry, wood carving, scroll sawing or …? Your choice. Post a blog entry about your favorite technique for a chance to win $100. Include techniq...
Part 2: And the Winner Is ...
Thank you to everyone who participated in our Favorite Technique Challenge. You can see the entries here. And the winner of the random draw is: Cin...
carving space and homemade setup

Part 1: carving space intro
So ive been looking online to find a good set up for chainsaw carving area. Ive had no luck so im going to get creative and share anything i come u...

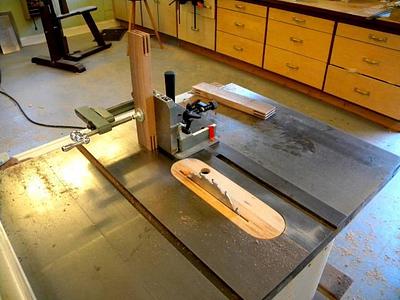
Part 2: homemade log carving equipment
Started the day making the upright log holder. The blocks move and straps hold the log against block so when im carving the log dont turn and tip. ...
For the Sailors and Boat Lovers

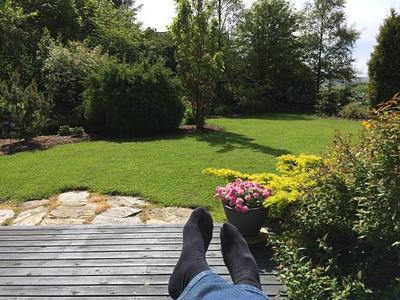
Part 1: Cowichan Bay Regatta from My Deck
(That is the front deck of the house not my boat.) Every year on BC Day weekend we are treated to a major sailing event that we can watch from our ...
WoodworkingWeb Awards - Backyard Bling
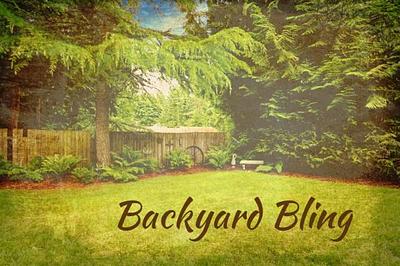
Part 1: Announcement
Theme: Backyard Bling Your backyard is your oasis, so why not create something special, this summer, to enhance it, to celebrate it, to give it a l...
Part 2: Cast Your Votes
Backyard Bling Awards entry period is over and we ended up with 11 entries. Now it’s time to pick your top 5 list and cast your votes. Voting deadl...
Part 3: And the Winners Are ...
Our 6th WoodworkingWeb awards are over and we ended up with 11 entries. I would like to thank you all who participated by submitting entries or vot...
Wooden Games
Part 1: Get Me Out
I am starting a series about wooden games. Some made by me, some by others, some copied and other. These are for the young the old and the other. F...
Bring Your Buddy Challenge

Part 1: Announcement
We are ready to grow by leaps and bounds. And we need your help to spread the word. As a bonus, you can win $100 cash prize. Here are the simple ru...
BUTTERFLY CONSTRUCTION BLOG
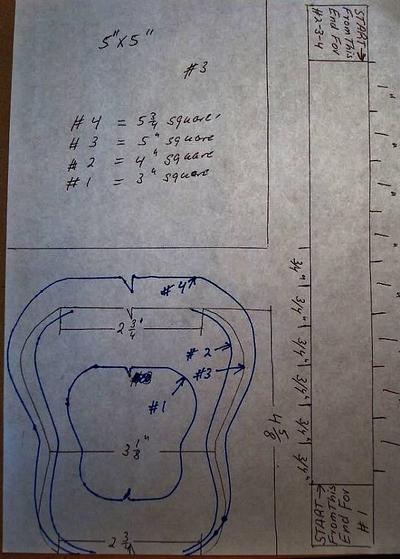
Part 1: BUTTERFLY CONSTRUCTION PART ONE
Here is the first part of the promised BUTTERFLY Blog to go with the project post . I will start with a sketch of the clear plastic templates which...
A STORAGE SHED FOR MY BBQ GAS GRILL
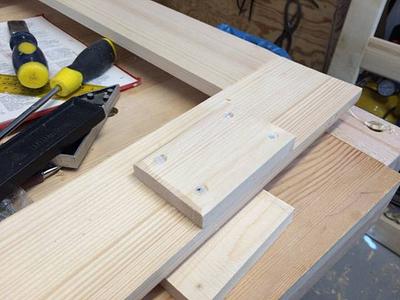
Part 8: Door Hinges
I didn’t get much done today as this is our shopping day. I did manage to get the hinges installed on the door frames though. Yesterday after takin...
Part 9: Hanging the Doors
I didn’t get as much done as I thought I would today. I’m not sure why, but I think it had something to do with the sun, which made an unexpected, ...
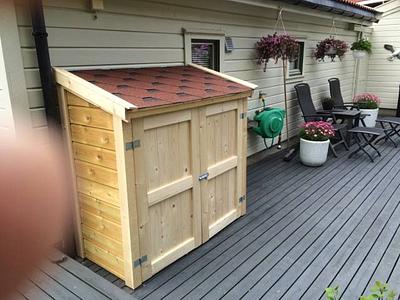
Part 10: Finishing Up
The carpentry work is finished and only the painting remains. I enjoyed this project and I hope it will be a convenience for us in the years to com...