


Share your craft projects
Make new craft buddies
Ask craft questions
Blog your craft journey

shipwright
2073 posts
and
113 followers
in over 12 years
in over 12 years
Marquetry Jewellery Box #15: Top Sand Shading and Assembly
This is
part 15
in a
17 part
series:
Marquetry Jewellery Box
...
-
The promised pretty pictures
-
Top Sand Shading and Assembly
-
Glue-Up and Details
...
- The promised pretty pictures
- Top Sand Shading and Assembly
- Glue-Up and Details
Warning: Lots of photos!
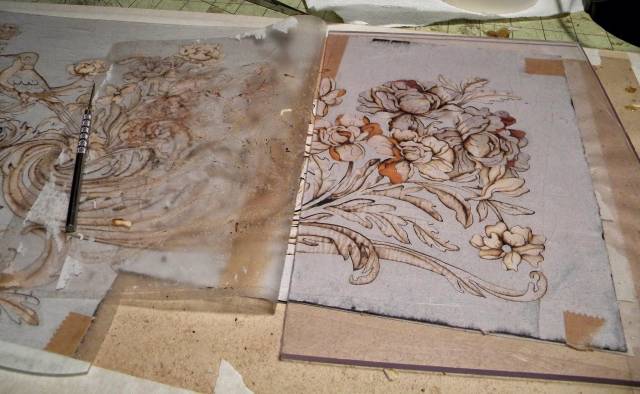
Here’s my setup for sand shading one piece at a time. The marquetry has been preliminarily assembled on sticky shelf paper, a sheet of thin acrylic covers most of it, and the sand is hot.
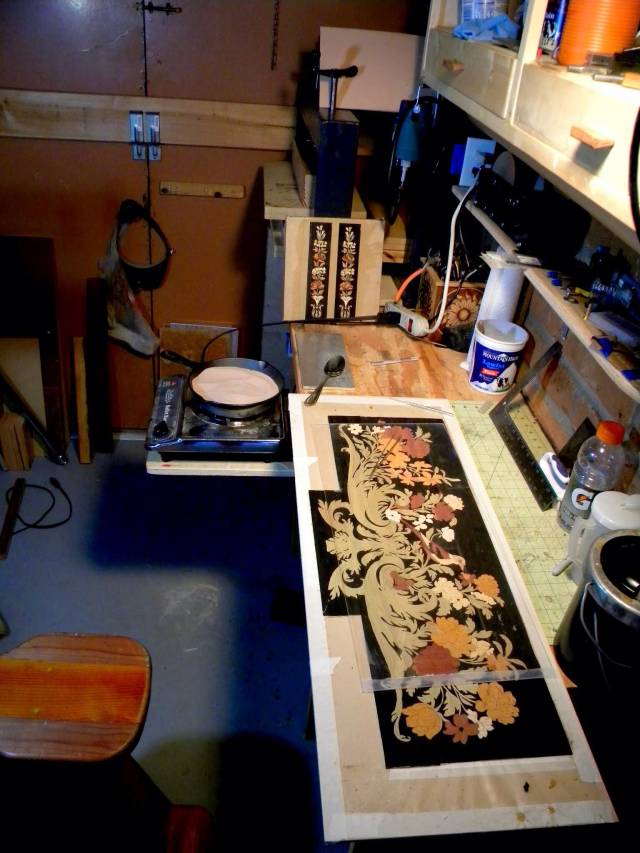
I remove one piece, shade it in a spoon of hot sand, and return it. Then I repeat a thousand times (give or take). I am still developing this way of doing things but it is working very well and I have complete control of how the picture grows as I am shading.
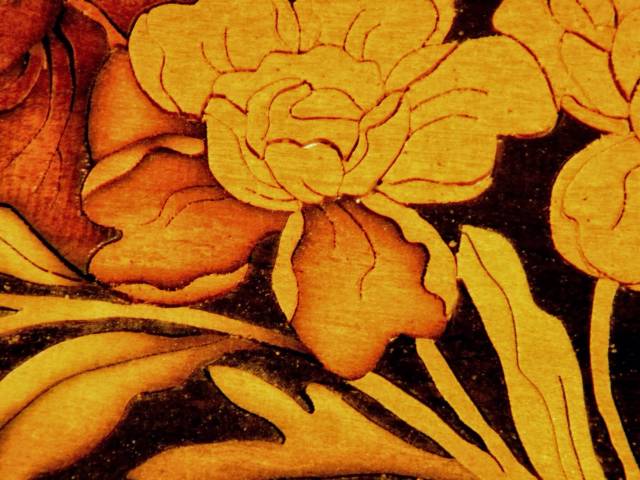
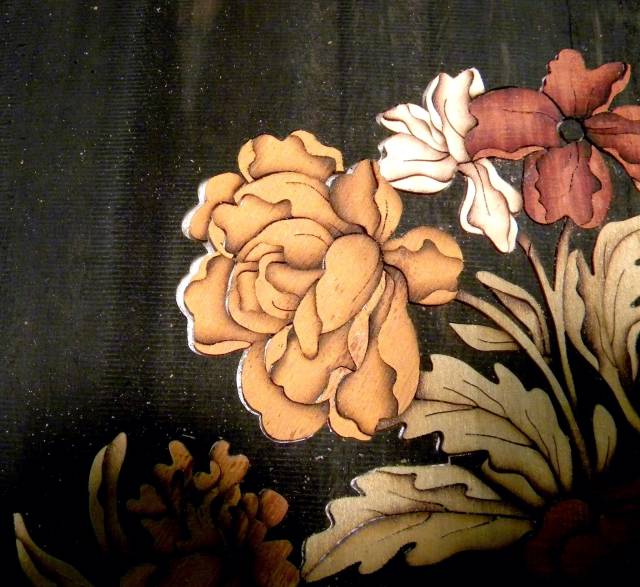
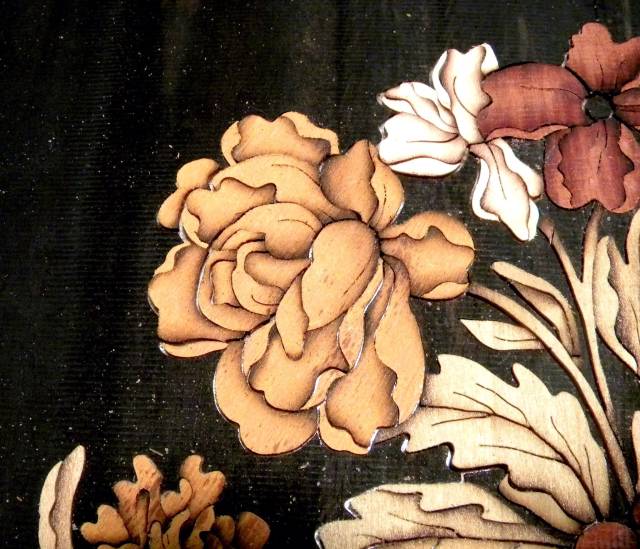
Here’s an example. The curled edges here look flat so I shaded the outer edges a bit and now (second photo) it looks better. I ended up shading almost every piece and all of them seemed to add to the three dimensional effect.

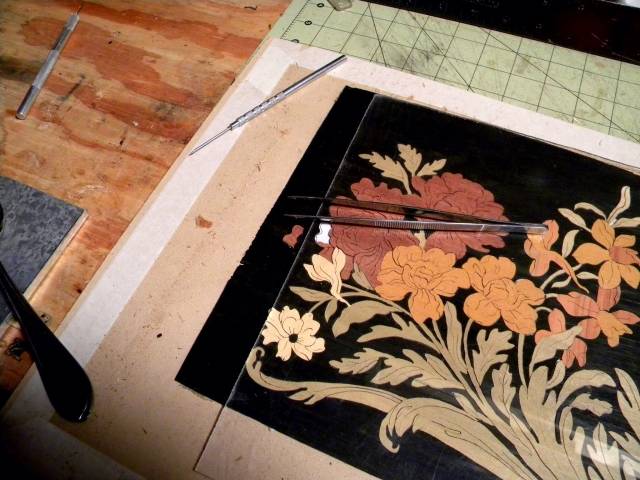
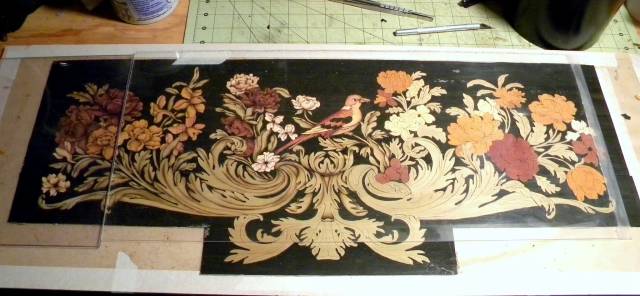
This is the end of day one, about 4 1/2 hours.
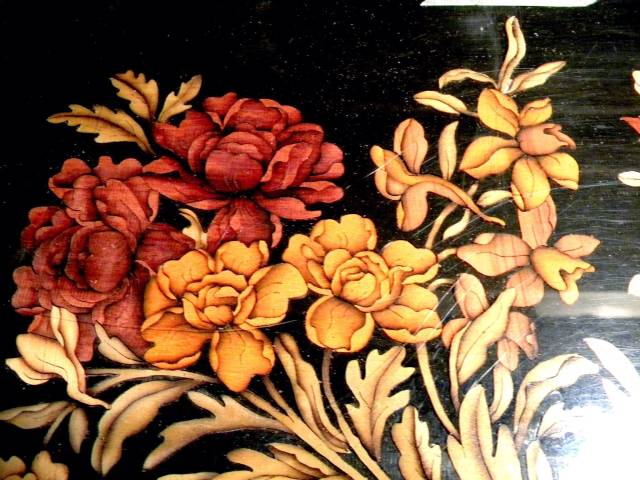
A detail at that stage
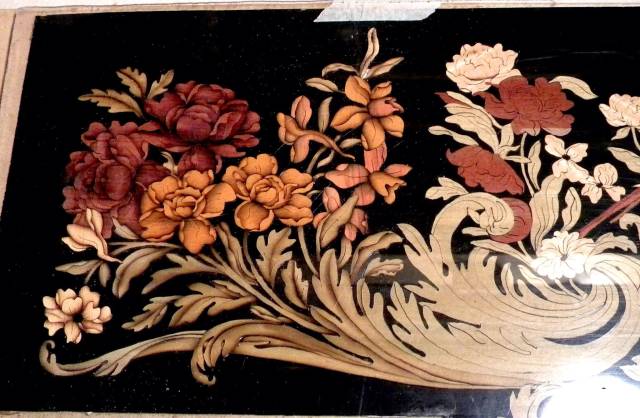
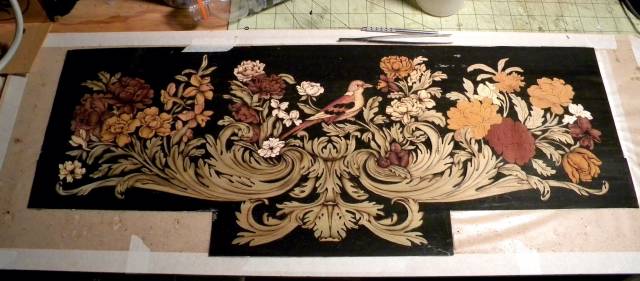
Day two
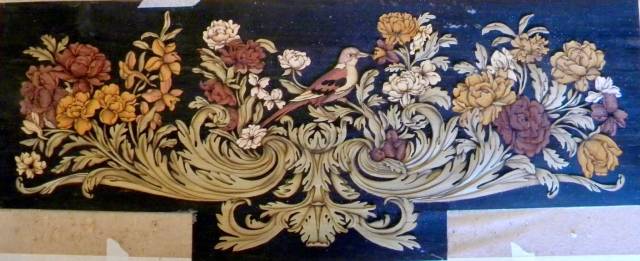
Day three
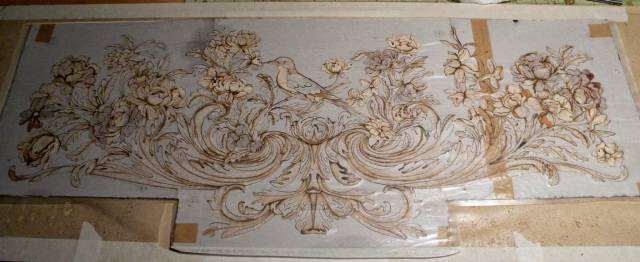
And day four, around twenty hours total shading time.
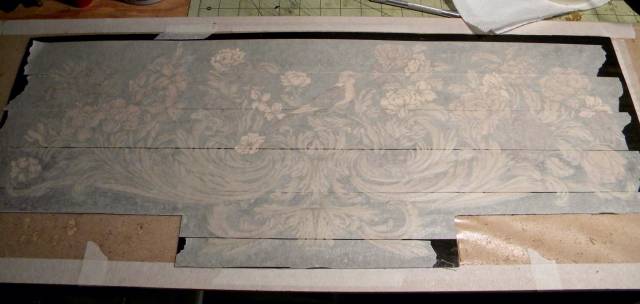
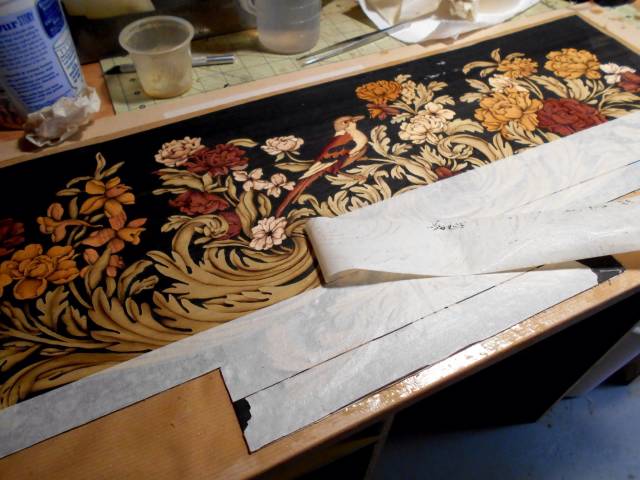
One of the advantages of this technique in painting in wood style is that the unavoidable kerf spaces can be managed. In the first photo I’ve moved all the pieces tightly together against one edge. If the marquetry were glued up this way it would look awful.
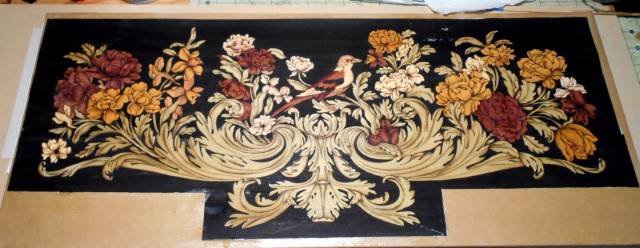
But the shelf paper has a soft adhesive that allows me to slide the pieces around. Here I have arranged the kerfs to be evenly spaced. These kerfs are 1/100" and can be either disguised with matching mastic or (as will be the case here) emphasized with a black mastic, adding to the shadow effect and creating a “trap line” to isolate the elements of the marquetry.
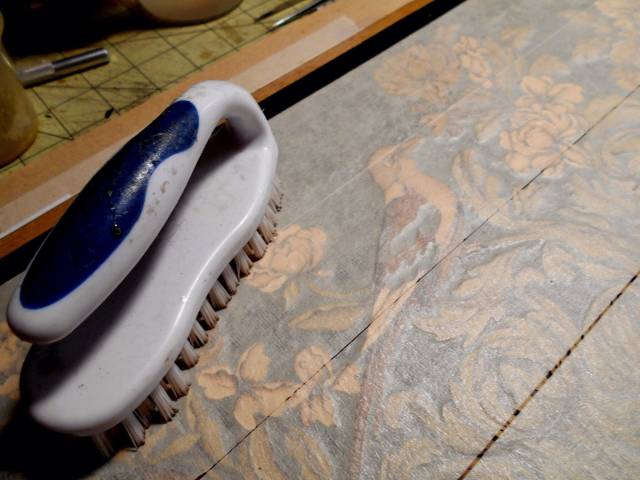
Once the shading Is to my liking and the spacing has been adjusted I apply a layer of cheap masking tape. I really like the cheap stuff because I can see through it. That helps when you are trying to brush it down to contact the thinner pieces, in my case the ebony. The nail brush does a nice (if not perfect) job of this.
All taped up, the whole thing is turned good side up and the shelf liner is removed carefully. I find that sliding the acrylic along as I peel the shelf liner helps control the pieces that want to lift.
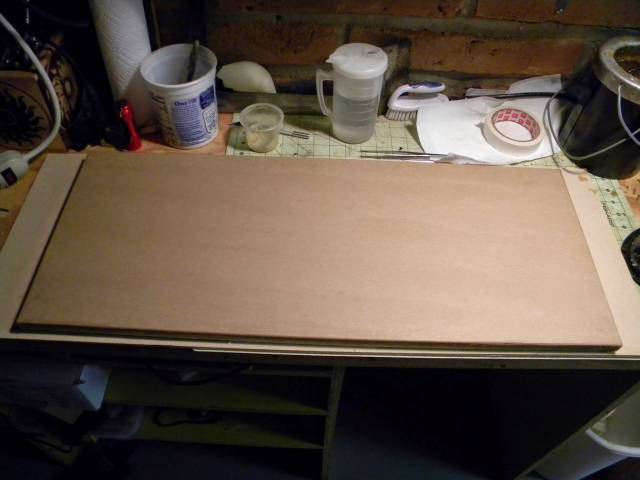
Now I have placed my prepared assembly board (French kraft paper) on top of the marquetry. I coated it with hot hide glue and inverted it onto the marquetry. Sorry no time for photos in the process. After turning it back over I once again used the brush to press the thinner pieces down onto the glue……
And carefully peeled the tape.
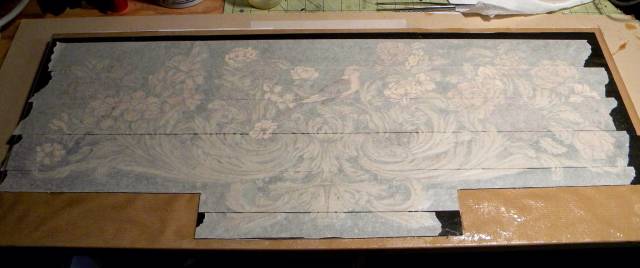
Here all the tape is off and it looks ready to fill and apply to the substrate but there is still the matter of different thicknesses. Even though I am using veneers that are marketed as 1.5 mm and 1/16", which should be quite even there is a good discrepancy between the thickest (poplar) and the thinnest (ebony).
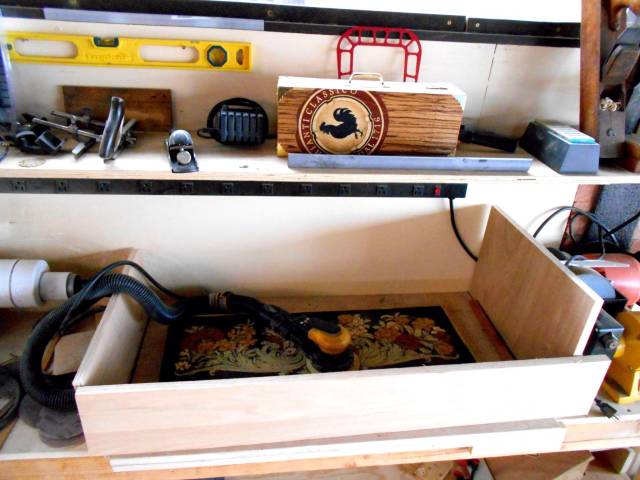
I set up this enclosure and carefully sanded it to near flush with my Ceros. The enclosure proved a good idea as I blew out about fifteen tiny pieces and found all but one or two which were easy to re-make.
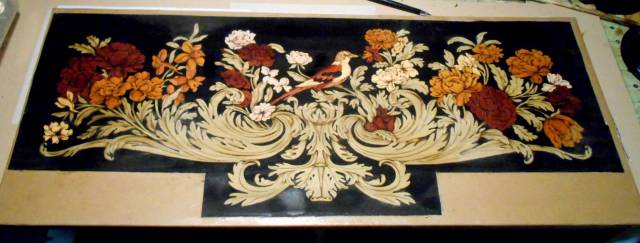
With the sanding and repairs complete I get my first idea of how the shading will look when sanded and finished on the good side. I couldn’t resist a splash of alcohol to see the real colors.
I sort of can’t believe I did this.
Here are a couple of shading videos I made for anyone who has survived all of this lengthy explanation.
Thanks for looking in
Paul
The early bird gets the worm but its the second mouse that gets the cheese.
13 Comments

Absolutely awesome. And a great blog with great pics. Thank you so much for sharing with us and what a great piece this is turning out to be.
CHRIS, Charlottetown PEI Canada. Anytime you can repurpose, reuse, or recycle, everyone wins!

Paul, no matter how many times you post these things, I will never cease to be amazed. It truly is special and you deserve to be very proud of the amazing work you’ve done here.
Is this still going to your wife? I imagine this box will fetch a pretty good sum if sold through the right channels.
Losing fingers since 1969
Thanks guys,
Brian,actually this was never for my wife. She isn’t a jewellery person. It is primarily for the challenge but will be for sale when finished. Unfortunately the market is very small and narrow for things like this.
The early bird gets the worm but its the second mouse that gets the cheese.

I got exhausted just thinking what you went through with the shading:)
1 piece at the time…
Well the result is amazing. The shading add a nice contrast and make it become alive.
Thanks for taking the time and posting your work Paul. I gives us an insight into the high end of marquetry.
Abbas, Castro Valley, CA
The shading is what really makes it “POP”, without it it’s a great piece of work, with shading its a stunning piece of art work. You Paul, are a masterpiece creating artwork for all to enjoy. Thank you very much for showing us the project step by step, not many artists would share as you do.
CHRIS, Charlottetown PEI Canada. Anytime you can repurpose, reuse, or recycle, everyone wins!

Wow. I been following and im just amazed! The shading is so awesome it truly makes everthing come to life. It looks so real. I believe if you truly take your time and put your mind to it you can accomplish anything. True craftsmanship. Great job.
Jeff Vandenberg aka "Woodsconsin"

Paul you are a true inspiration. I look at your work and know that there cannot be but a handful of people, if that many, that have your talents. Thank you for all the photos.
Jack

Paul,
My first amazement was that all the photos actually opened this time on dial-up, but what a treat to the eyes it is! You have such an artistic ability to know just where to shade to make the pieces look alive.
Just how large is this box? (You may have already said, but I didn’t want to struggle through your blogs with dial-up to check.)
L/W
“Those who would give up essential Liberty, to purchase a little temporary Safety, deserve neither Liberty nor Safety.” Benjamin Franklin
L/W, it is about 10" high,X 10" (Plus two inch bump out) deep X about 30" long.
The early bird gets the worm but its the second mouse that gets the cheese.
Paul,
Another question: How do you preserve the shading when you sand it? Is the shading consistent throughout the piece? Or is that the back side you sanded?
L/W
“Those who would give up essential Liberty, to purchase a little temporary Safety, deserve neither Liberty nor Safety.” Benjamin Franklin
The burn goes in at the edge of the veneer and penetrates inward to produce a reasonably even shading all the way through, however it also scorches the surface and that will sand off. For that reason you have to shade what appears to be too hard knowing that the surface scorching will mostly sand off.
The side I sanded almost level was the glue side. When pressed the poplar will still stand a little proud, enough to sand down the surface scorch but not as much as you see in the above photos on the back.
You should be able to see above that the shading is less but still clearly there after the sanding. On the front the sand off will be a little less but similar.
It is a bit of a guessing game when shading to “over-shade” by just the right amount. I think I got it pretty close but won’t really know for sure until the front is sanded and finished.
Keep your fingers crossed. :-)
…… When I checked to make sure you could see the difference I realized that I had the wrong photo at the end. The one there now is the sanded one with alcohol on it. It is much better than the other one. Oops!
The early bird gets the worm but its the second mouse that gets the cheese.
Paul,
Thanks for answering all the questions and giving such thorough explanations. I’ll never be able to do anything like this so it’s really nice to be able to experience it vicariously!
L/W
“Those who would give up essential Liberty, to purchase a little temporary Safety, deserve neither Liberty nor Safety.” Benjamin Franklin

This marquetry has turned out absolutely stunning Paul and a fitting tribute to your dedication and skills, and I for one have learned a lot from the blogs you have posted about it.
Mike, an American living in Norway