


Share your craft projects
Make new craft buddies
Ask craft questions
Blog your craft journey

shipwright
2073 posts
and
113 followers
in over 12 years
in over 12 years
Marquetry Jewellery Box #6: Drawers, Dowels, and Dovetails
This is
part 6
in a
17 part
series:
Marquetry Jewellery Box
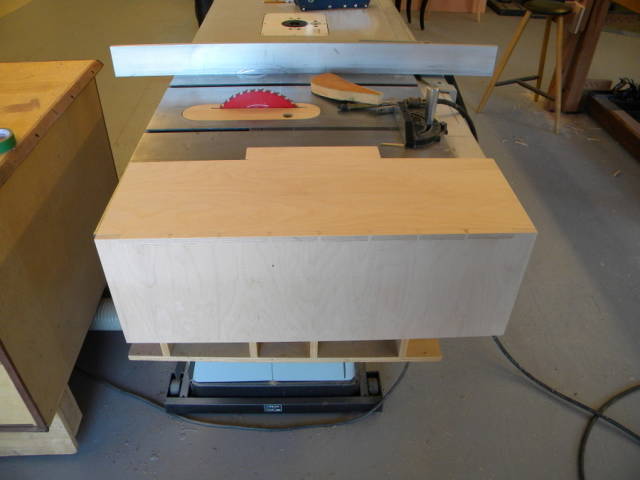
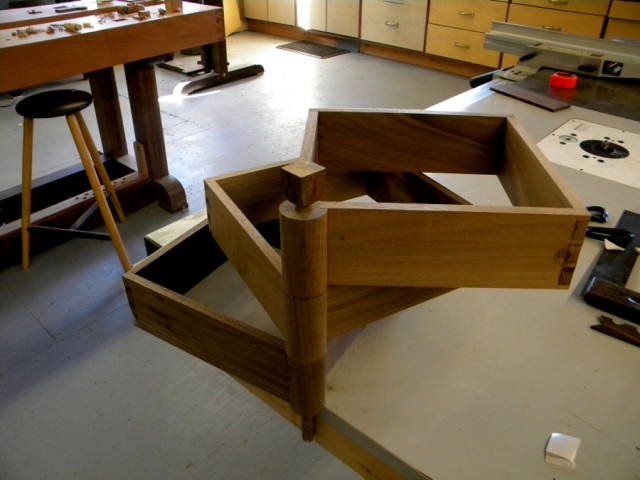
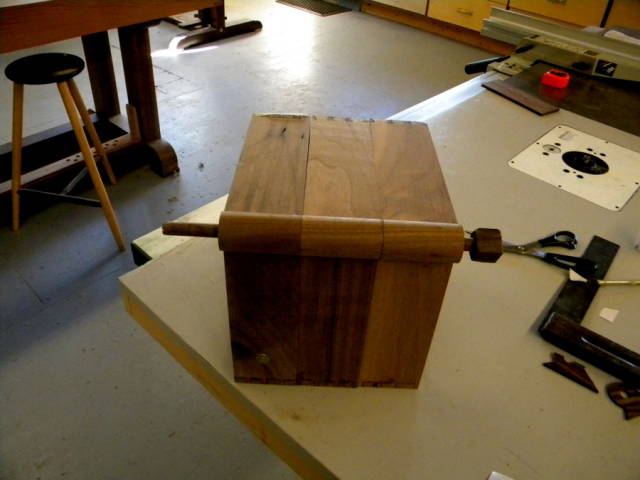
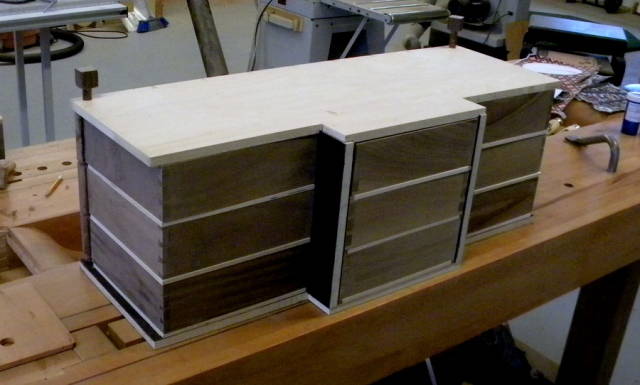
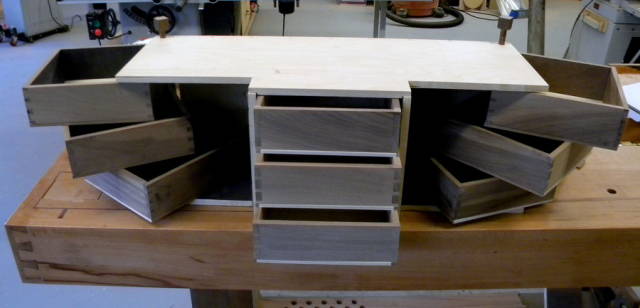
Well all the colour decisions have been made and the flowers are glued in. The next job is to build a jewellery box to glue them onto. I have decided on Baltic Birch plywood for the carcase because it is very important that the top and bottom do not warp. With no ends on the carcase itself the outer reaches of both are supported only on the back and inner edges.The bottom, back, and top are dovetailed and the dividers are in dados. I veneered both sides of the bottom and dividers but won’t do the inside of the top until I can apply the top marquetry at the same time. The veneer is Walnut and , like the drawers, will be ebonized.
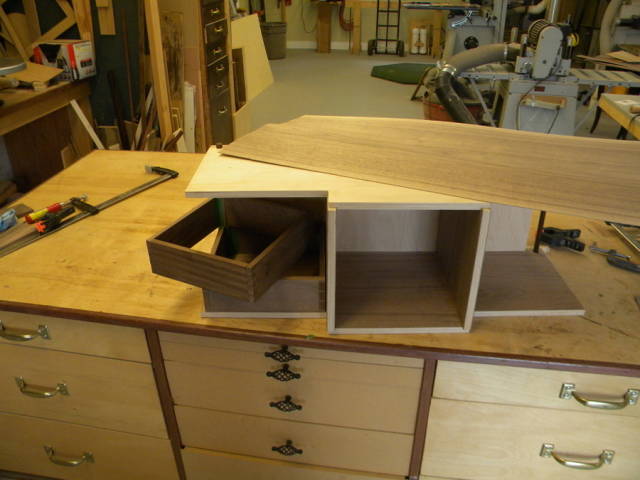
The drawers are solid Walnut with three corners dovetailed and the fourth attached to the hinge barrel.
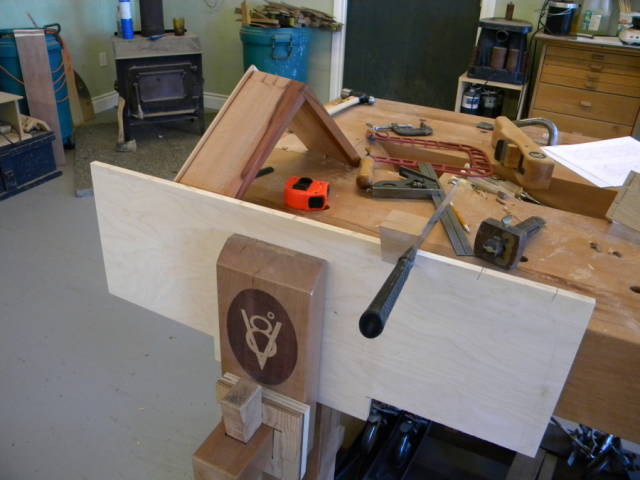
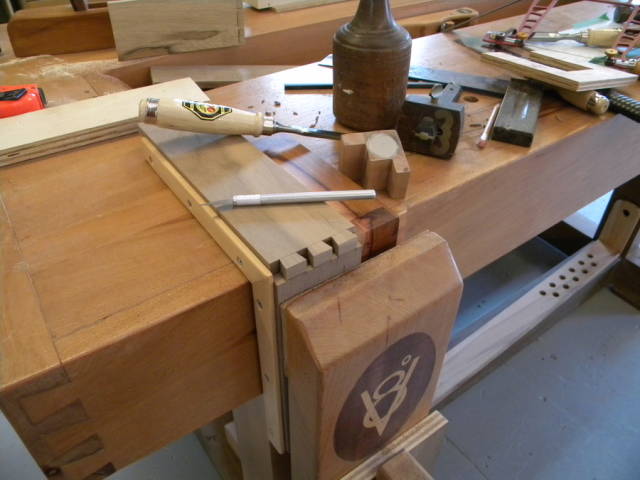
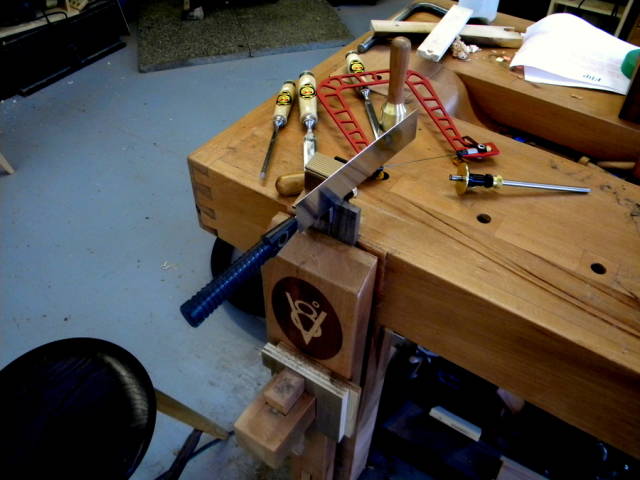
In the first photo above and in the next one I am using a sawing jig that I made from David Barron’s design.
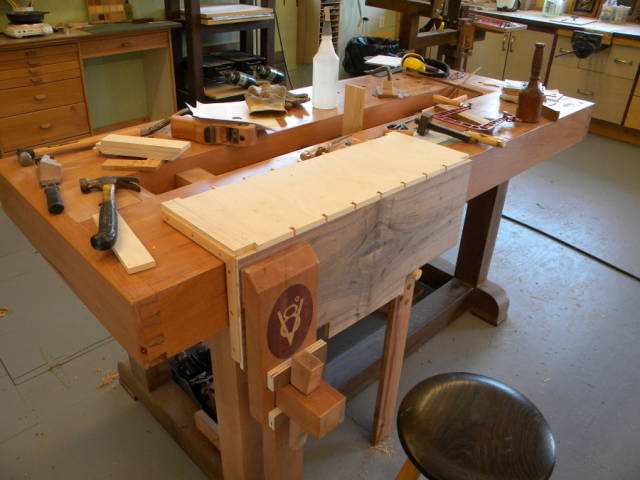
In the article I used he suggested 7/8" magnets and I made the mistake of reading “Rare Earth” between the lines. The jig didn’t work as well for me as I had hoped, partly because the magnets were WAY too strong and partly because my somewhat arthritic thumbs are not. In the subsequent photos below I have switched to the Veritas jig which works exactly the same except that the magnets aren’t as strong and the screw clamp does the holding. My dovetails are better and my thumbs are much happier.
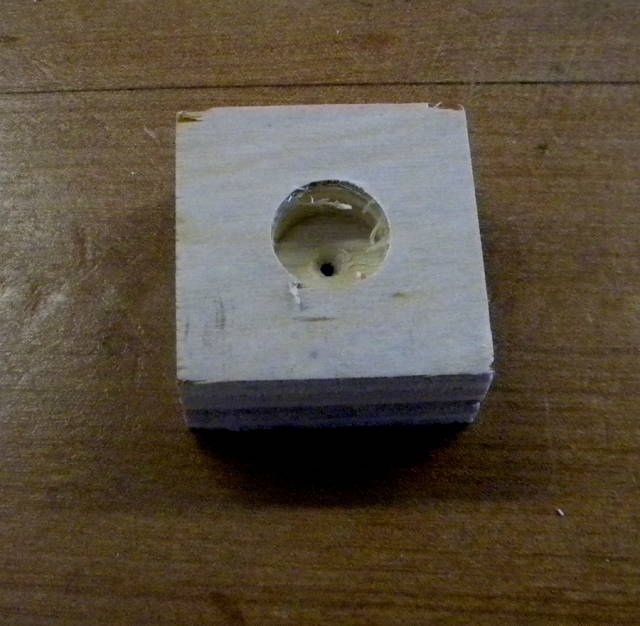
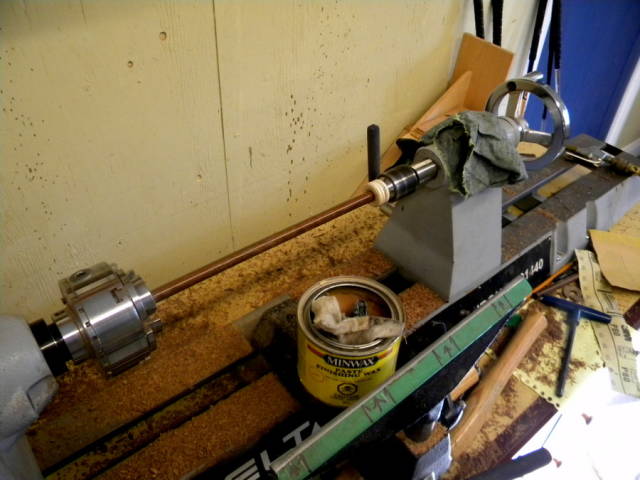
The hinge pins must be a very close tolerance to keep the drawers from drooping when open and resting on each other when closed. I know lots of people work with precision measuring tools and many are better turners than I am but I have always been a “measure from the work” kind of guy so this is how I achieved the necessary close tolerance. (The wood is Queen Ebony and I’m not expecting it to swell up at all.)
I cut a square of 3/4" plywood and drilled a 1/8" hole in the middle.

Then I made a 1/2" hole half way through centering on the 1/8" hole.
I roughed out a shaft and turned one end to 1/2", gauged with a 1/2" wrench, cut off the oversize end …
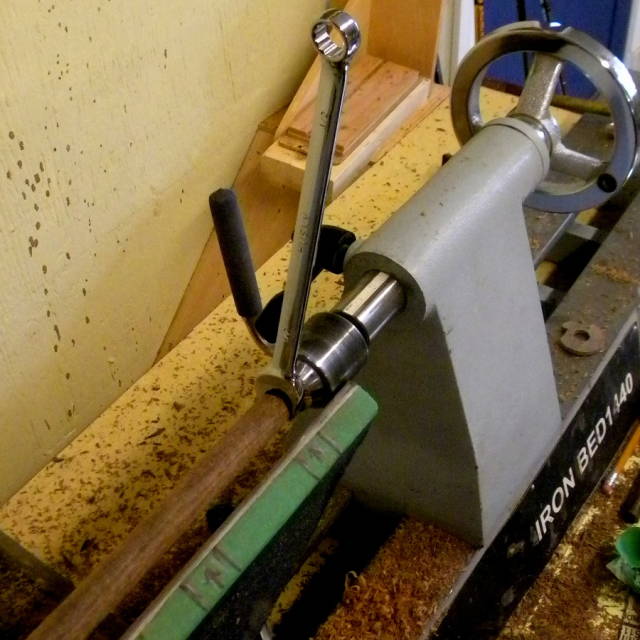
…. and fitted it in the block, now mounted on the live center. This allowed me to fit a cut off segment of one of my actual hinge barrels onto the shaft and move it along as I reduced the shaft.
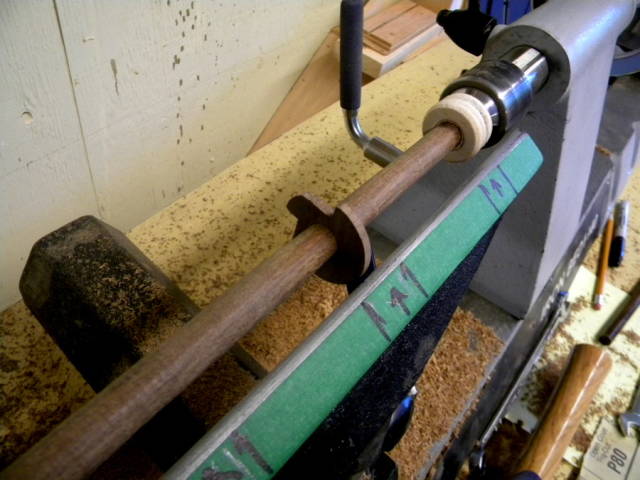
Doing it this way I was able to remove the dowel from the lathe and check for fit in the actual barrels and still return it to the lathe if it was too tight.
When I was satisfied, I applied a little wax.
Here’s a rough assembly. It still knocks apart and that’s a good thing because it has to travel to Az. at the end of the week. There is minimal play in the hinges and no noticeable droop despite the appearance in the last photo. The apparent droop there is “wide angle droop”. It corresponds to the apparent arc in the perfectly flat top. :-)
That’s all for now. My next entry will be from sunny Az. where I will be getting on with the rest of the marquetry.
Thanks for looking in.
Paul
The early bird gets the worm but its the second mouse that gets the cheese.
8 Comments

You got a nice clean shop Paul.
I was really hopping you will be making it in time for the quarterly award, but I am sure They will be many more opportunity here or elsewhere as the project will speak for itself.
Thanks for all the steps. I am sure it will come handy someday.
Making one own hinges is a must for special project and I am sure one day I will be making hinges as well.
I am going to check the veritas jig as my own did not work well at all.
Abbas, Castro Valley, CA
Awesome Work Paul it looks like its coming along great.
Here’s the link Abbas. If you look closely you will also see that I upgraded the whole setup. Lee Valley can be habit forming ……. not so sure it’s a good idea to have a local store as I do.
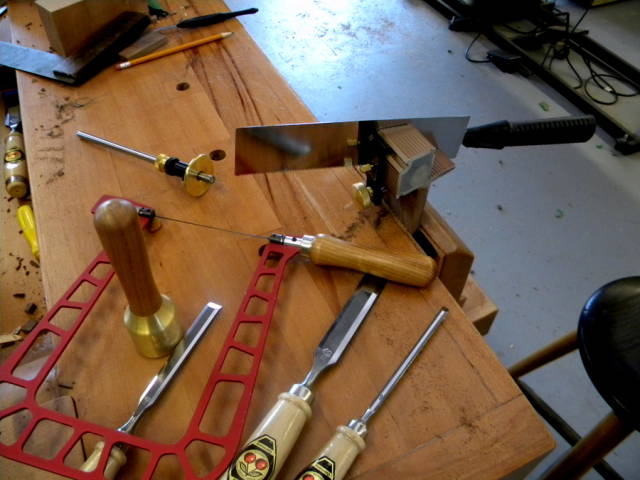
In the first photos you can see my old rosewood marking gauge, my old Gumwood mallet, and my old flush cut Japanese saw. In the later ones, along with the guide, you will see the saw that accompanies it, a new disc style marking gauge, and a lovely little solid brass mallet. They all add to the enjoyment of the experience. After a lifetime of using “good” tools, the odd “fine” tool is a real joy.
The early bird gets the worm but its the second mouse that gets the cheese.
Thanks Paul!
It’s not too expensive either and they ship fast too…
I had my eyes on that marking gauge :)
Abbas, Castro Valley, CA
Paul, as always, excellent craftsmanship and instruction. Thanks Paul, I always look forward to your posts and projects.
Steve Gaskins

Looks wonderful, I can’t wait to see it with the marquetry.
Mike, an American living in Norway

Paul,
You certainly come up with some unique solutions. We, too, had hoped you would be ready for the jewelry box awards but we’ll be excited to see it whenever you finish it.
L/W
“Those who would give up essential Liberty, to purchase a little temporary Safety, deserve neither Liberty nor Safety.” Benjamin Franklin
This is going to be one awesome box with all the marquetry. I love the fine details that you put in the construction of the box. and I have to admit to being a little jealous of your workshop. :)
Anna