


Share your craft projects
Make new craft buddies
Ask craft questions
Blog your craft journey

shipwright
2135 posts
and
113 followers
in almost 12 years
in almost 12 years
Marquetry Jewellery Box #5: Drawer front marquetry assembly
This is
part 5
in a
17 part
series:
Marquetry Jewellery Box
...
-
Sand Shading and Organization
-
Drawer front marquetry assembly
-
Drawers, Dowels, and Dovetails
...
...
- Sand Shading and Organization
- Drawer front marquetry assembly
- Drawers, Dowels, and Dovetails
...
With all the cutting and sand shading done and all the pieces properly organized, it’s time to have some fun. If you’ve done everything right up to this point, the assembly really is fun as you get to see the marquetry image materialize before your eyes.
Before I get into that however, a couple of notes on things I’ve learned so far on this project.
The first is the eyesight / cutting accuracy issue that I had when started using this hard veneer. I did a little research online on the subject of magnifiers and realized that the reason my headband magnifier wasn’t working for me was that the focal length was wrong for the work I was doing. Further, that the strength of the magnifier could be altered with reading glasses worn in conjunction with it. It turns out that my headgear, although not marked, is probably a 3 diopter magnifier with a focal length in the 12" area. By adding 1.25 reading glasses I get a 4.25 with a focal length of about ten inches and better magnification. More importantly, once I could see, the cuts got better.
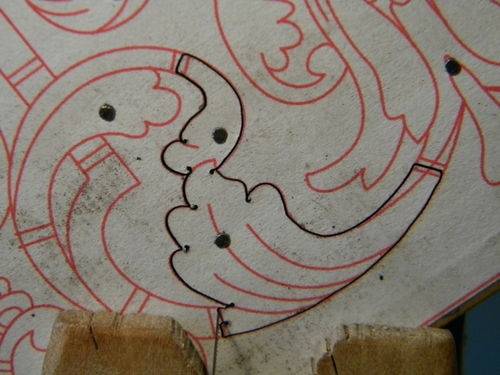
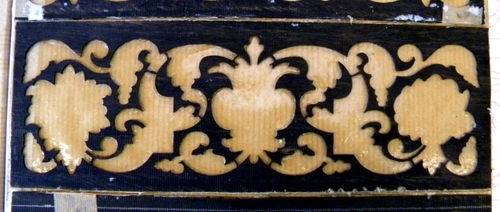
The second was that removing bridges, especially those that supported very small “islands” was difficult and in many cases counterproductive. The photos below show the first background I cut and the last. You can see that I used fewer bridges and smaller bridges in the second. These were much easier and quicker to remove.

As for the assembly itself, I used French kraft paper type mounting boards and hot hide glue, working from my two previously organized trays. It all went quite smoothly with only a few pieces needing a little filing to fit. I glued in all the parts except the flowers which I assembled dry. I’ll explain why they aren’t glued later.
Here’s a little video of some of the assembly.
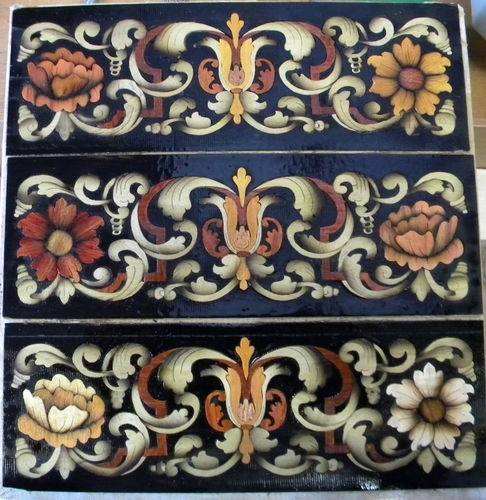
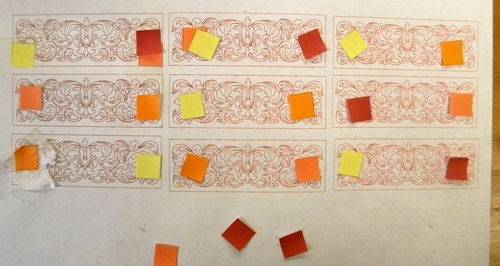
Each mounting board carries three drawer fronts. They represent the three backgrounds with the three flowers, each set has two flowers so the sets are AB,AC,BC. I will now print the pictures below, cut the individual drawer fronts apart and arrange them in the actual order that they will be installed. Here’s the part about not gluing the flowers ………. when I get them arranged I will for the first time get a real look at how well the flower colors are distributed and I will be able to change any that I don’t like.
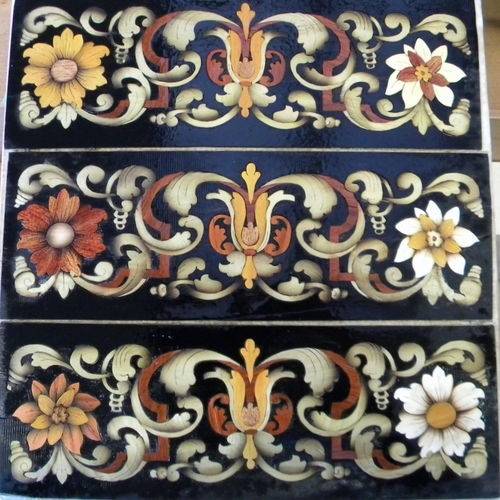
I did do a color distribution exercise upon which I based the colors I used but I still want to see the real thing before I glue things down. I’ve included a photo of the preliminary distribution exercise.

That’s it for now. Next up is to make final decisions on the flowers and get them glued in and then on to making some drawers for them to mount on.
Thanks for looking in.
Paul
The early bird gets the worm but its the second mouse that gets the cheese.
7 Comments

The video makes it look like a walk in the park:)
You do not seem to pause and think where each small piece goes, yes the video is in time lapse; but you seem to remember where every small piece is.
That’s going to look terrific.
Abbas, Castro Valley, CA
All the pieces are organized in the trays in an exploded version of the actual motif so finding the pieces is very easy. As I said, if your cutting and organization were good, the assembly is easy and fun.
(Actually for the purpose of the video, I had the pieces pulled out and placed beside the layup because I didn’t have room for the big tray and the camera. It was probably more confusing that way than from the tray.)
Thanks for the comment.
The early bird gets the worm but its the second mouse that gets the cheese.

Wow. Your marquetry work never fails to amaze! I was also wondering how you keep track of all those small pieces. Amazing!
Losing fingers since 1969

Wonderful work Paul, and though I have admired your marquetry skills right from the start, I think it is amazing how far you have come in such in such a short time. Besides the precise cutting you’ve done here I think your sand shading looks terrific too. The color distribution exercise was also quite interesting and a good thing to be aware of. I’m glad to see that you have gotten your magnifying issues under control, really important, especially for classic style cutting.
Mike, an American living in Norway
Nice job Paul, I found a video on YouTube by WoodWorkWeb that showcased the table you made. Here is the link. http://youtu.be/qUVlD2LdT3w?t=4m35s
Thanks Bob!
I hadn’t seen that. It was obviously shot at our Vancouver Island Woodworkers Guild show last spring. The table didn’t sell but one of my wall art versions of my Friendship marquetry did.
The early bird gets the worm but its the second mouse that gets the cheese.
You did do a great job on both I like the table myself.