


Share your craft projects
Make new craft buddies
Ask craft questions
Blog your craft journey

shipwright
2073 posts
and
113 followers
in over 12 years
in over 12 years
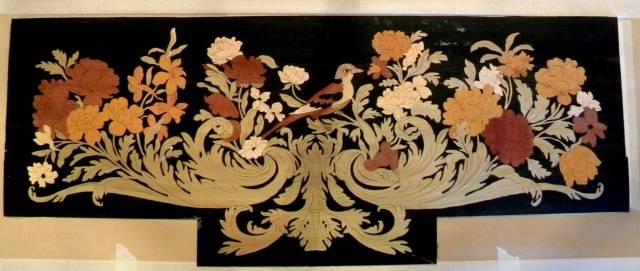
Sand Shading, my Favourite Technique
I have a lot of favourite techniques but for sheer “wow” effect it is hard for me to think of one that beats sand shading marquetry. My favourite way to do it is one piece at a time rather than the more common method of shading several pieces at once.
Here’s my setup for sand shading one piece at a time. The marquetry has been preliminarily assembled on sticky shelf paper, a sheet of thin acrylic covers most of it, and the sand is hot. (~600 degrees F)
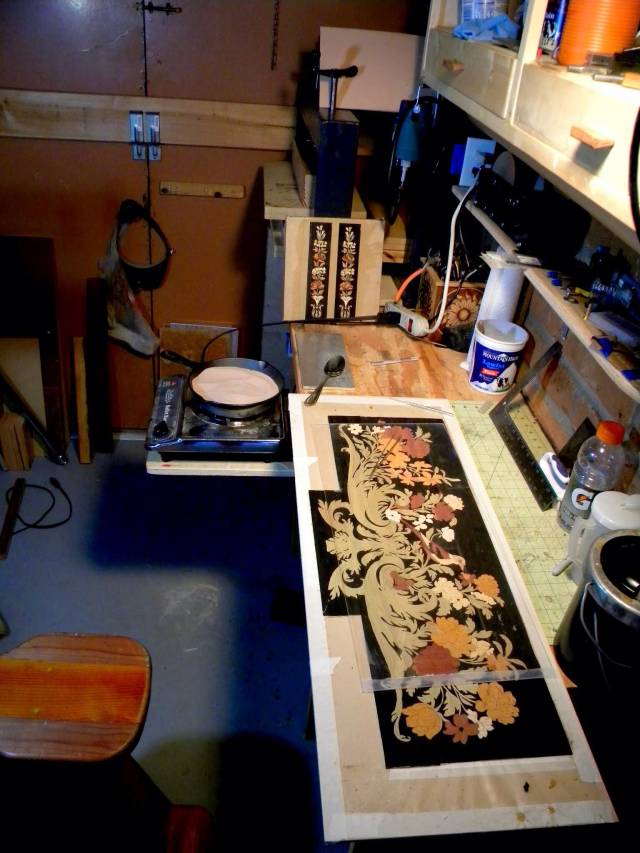
I remove one piece, shade it in a spoon of hot sand, and return it. Then I repeat a thousand times (give or take). I am still developing this way of doing things but it is working very well and I have complete control of how the picture grows as I am shading.
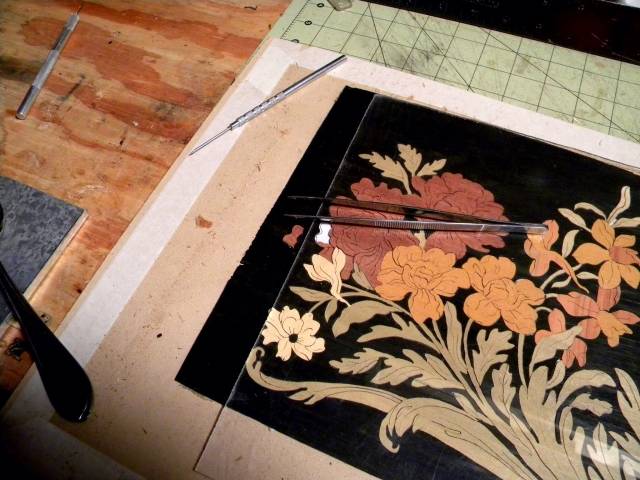
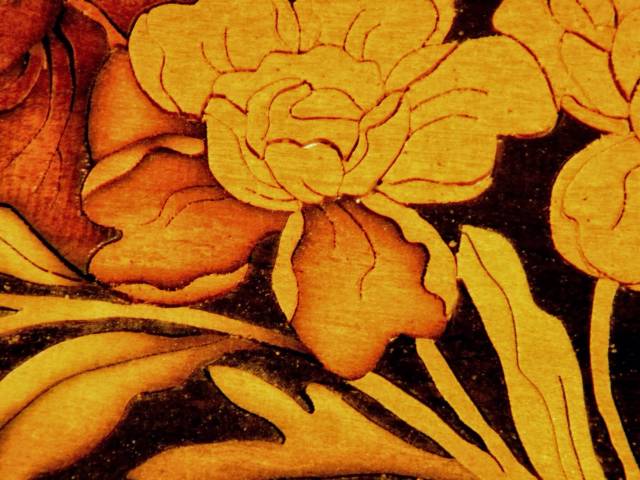
Here’s an example. The curled edges here look flat so I shaded the outer edges a bit and now (second photo) it looks better. I ended up shading almost every piece and all of them seemed to add to the three dimensional effect.

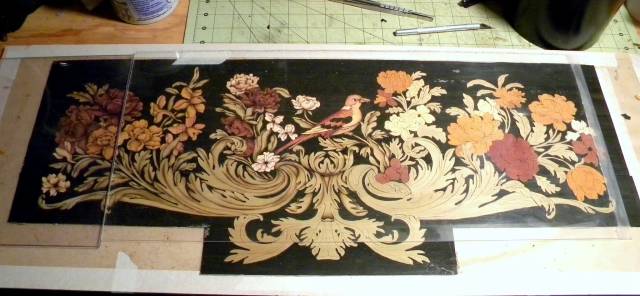
This is the end of day one, about 4 1/2 hours.
A detail at that stage
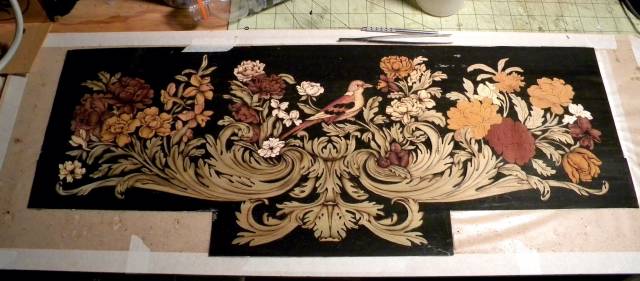
Day two
Day three
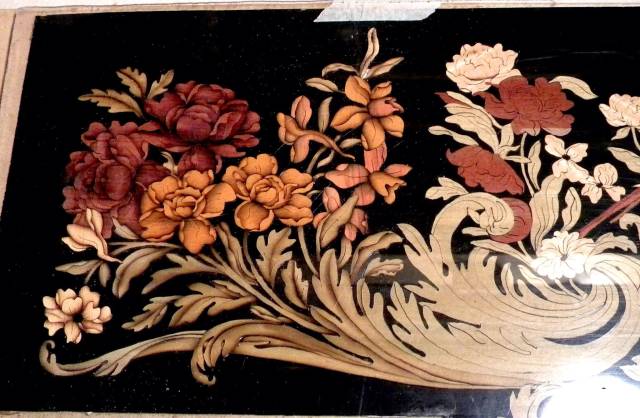
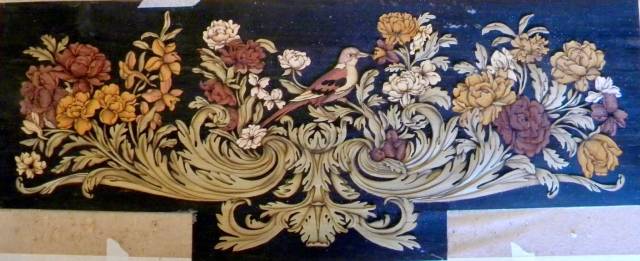
And day four, around twenty hours total shading time.
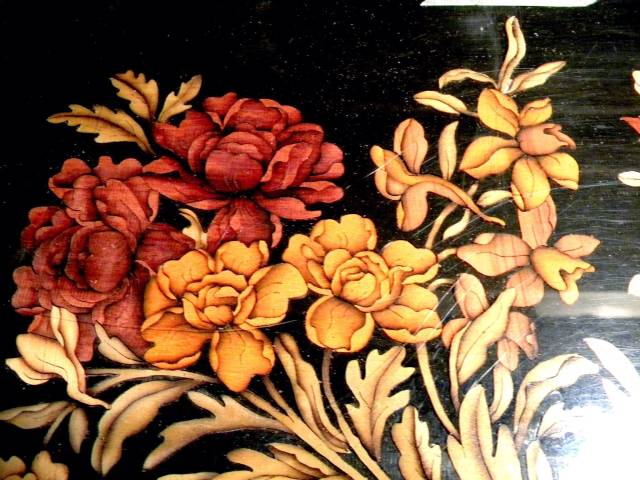
This is the same marquetry before shading. The transformation amazes me every time.
Thanks for looking in
Paul
The early bird gets the worm but its the second mouse that gets the cheese.
9 Comments

Sand Shading Does add a lot to any marquetry project.
One piece at the time… For sure nothing will beat that:)
The pictures brought back some great memories.
Abbas, Castro Valley, CA

Such a simple process with an incredible impact.
Losing fingers since 1969

I am impressed , never seen a marquetry project till I joined this site
Wheaties

Here is another example of the power of creativity. Very very nice. Such a dramatic difference.
Jamesw

A phenomenal difference after shading, turning it from a sketch-like picture into a piece of art.
It’s one thing to say sand shading is a great technique, but quite another to do it as well as you have done here Paul. I guess like anything else in woodworking it is a skill that has to be learned from experience and good tips from folks like yourself.
My first attempts have been pretty crude. I was just glad that I learned to remoisten the pieces a little after shading so they would swell back up to pre-shading size for a good fit. I realize it isn’t rocket science, but I still don’t feel very comfortable with it. I guess I will just have to pay my dues as I assume you must have done.
Mike, an American living in Norway
Beautiful, I will have to try this some day:)

Beautiful!

All I can say is AWESOME.
Madts.
Tor and Odin are the greatest of gods.
Nice set-up. Nice work. I just learned the hard way, about why I should be working with 1/16 veneer for sand shading. LOL The thin stuff is just a problem waiting to happen. Both you and Patrick told me so. I should have listened.
Roger