


Share your craft projects
Make new craft buddies
Ask craft questions
Blog your craft journey

shipwright
2135 posts
and
113 followers
in almost 12 years
in almost 12 years
Marquetry Jewellery Box #4: Sand Shading and Organization
This is
part 4
in a
17 part
series:
Marquetry Jewellery Box
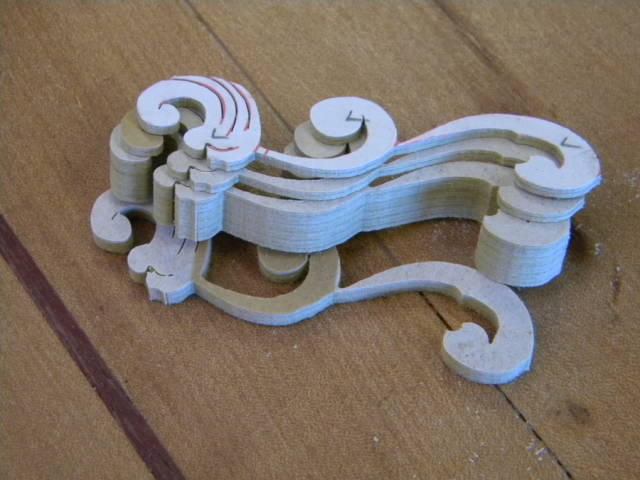
With my colors mostly decided I went about cutting the pieces and dividing them into two groups. One group contained all the “universal” pieces. Those are the pieces that occur in all nine panels. The were assembled in one tray while the pieces that differ from flower to flower were organized in another tray. This second group includes the flower parts themselves and the parts of the leaves that directly contact the flowers. As each flower is different so are the contacting pieces.
The universal tray is mostly the green Poplar leaves and I had a little problem there in that my Poplar was not as thick as the other veneer. It is actually quite thick at 1/28" but that’s just not enough. I decided to experiment with laminating two layers. I knew this would work fine as I’ve done it before but I wasn’t sure about the heat of sand shading it.
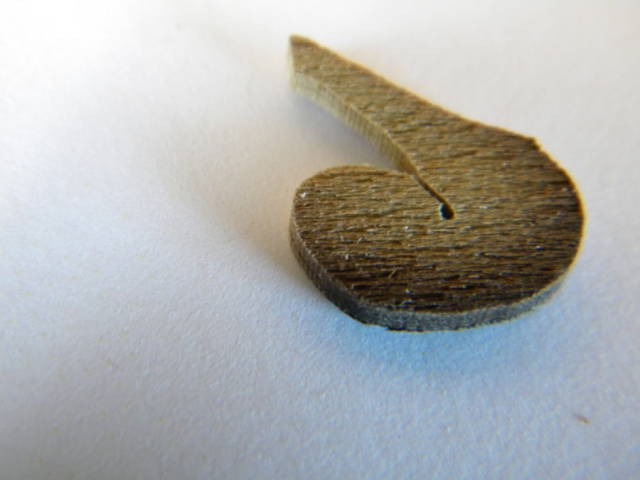
This is what the laminated pieces look like cut.
Here’s a shot of a scrap piece that I practiced on to see if the Poplar would shade before the glue popped. I was happily surprised. it was just fine.
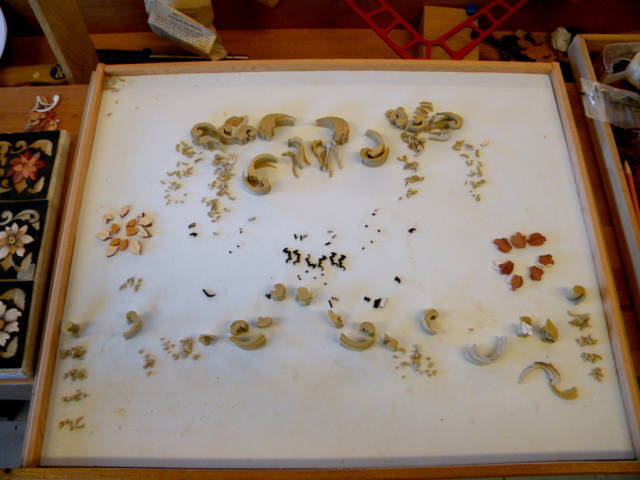
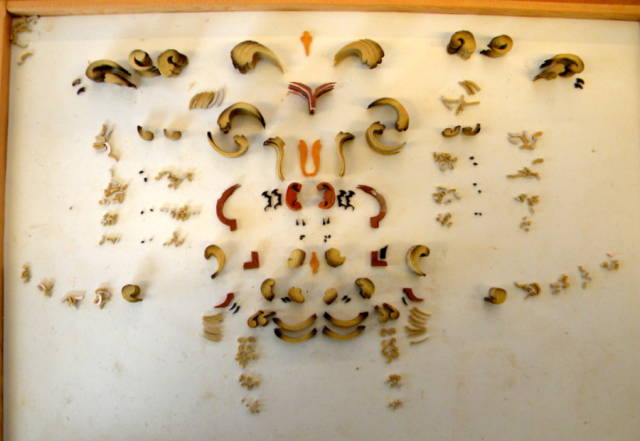
So on to the shading itself. I have to say that much of the organization and segregation of the pieces really took place during the shading exercise. Here is a look at most of the parts organized (poorly at this point) in a storage tray.
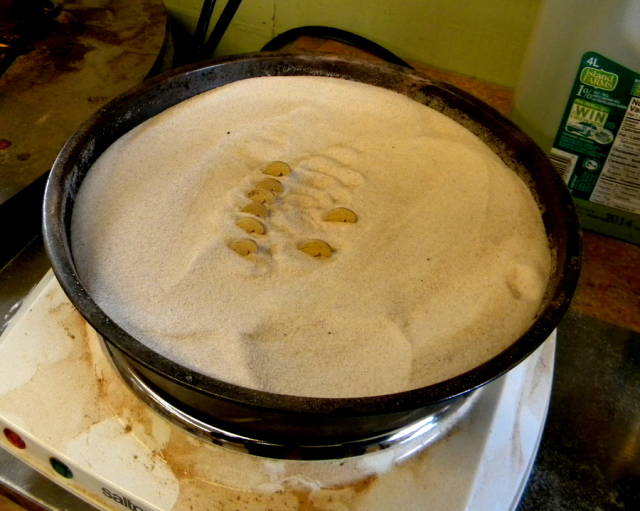
Most of the shading was done in the sand tray as shown below. The temperature varies around the tray, hottest in the center so more delicate parts stay to the outside.
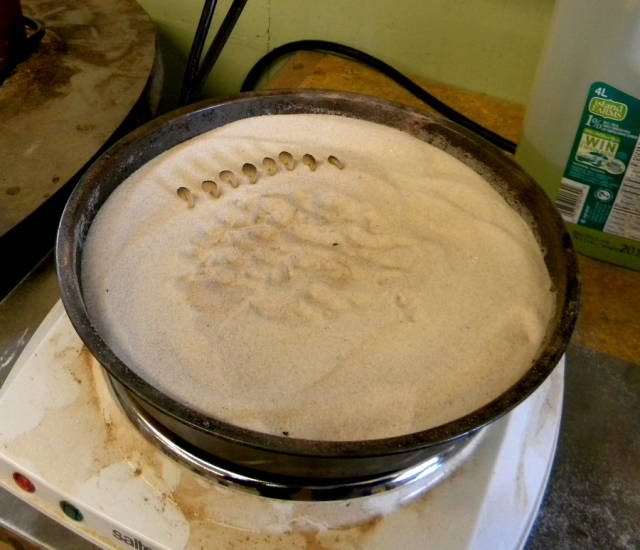
I also shade some of the trickier and more delicate pieces with a spoon. using this method you can bring very hot sand up from the bottom of the tray and do lots of damage very quickly. You have to be careful.
I made this little video to show how I shade some of the very smallest bits. I generally don’t do this at the same time as the other shading. I like to do it during assembly so I can take the piece directly from the sand and while still on the pick, touch it to the glue brush and install it. I was too busy with the video to do that here.
When all the pieces are shaded the tray looks more like this. This is now the universal tray and only has pieces that will be in all panels.
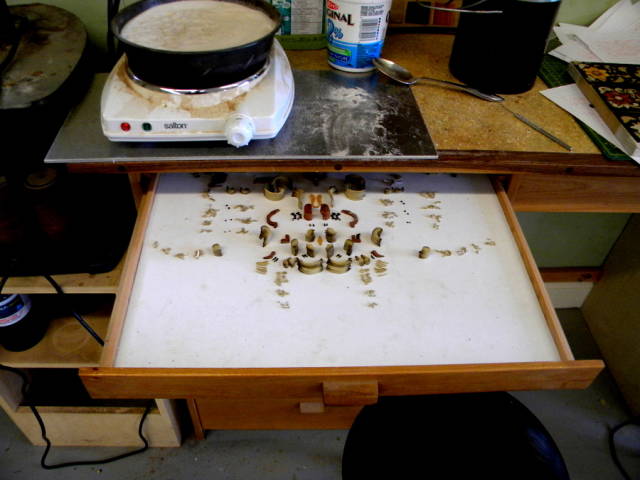
Then it is put away to await assembly.
If you are thinking that the shading looks awfully severe in places, it does but when the surface is sanded much of that will go away and they wont look as “burned”. ……… I hope ……. :-)
Enough for tonight.
Thanks for looking in.
Paul
The early bird gets the worm but its the second mouse that gets the cheese.
10 Comments

Just looking at that tray full of confetti makes my hands shake. I can’t ever imagine my right hand could manage them alone and there’s no point asking my stupidly shaky left to help.
-- Alec (Friends call me Wolf, no idea why)
Keeping track of all those pieces must need lots of organization and planning ahead. Some of those pieces are minute! Great video. Thanks for sharing the process.
Anna

That’s micro surgery Paul.
I can’t even see these small pieces.
What burning plate do you use?
Abbas, Castro Valley, CA
Thanks,
Some of the pieces are pretty small all right. In a few the greatest dimension is the thickness (1/16").
Abbas, I’m using uncoloured reptile sand from the pet store on a cheap but powerful hot plate. It takes about a half hour to achieve heat and then needs to be backed off a bit. Shading takes place at around 600 degrees F.
The early bird gets the worm but its the second mouse that gets the cheese.

I can’t wait to see this beautiful work finished Paul and I’m enjoying learning how you deal with the problems encountered underway.
Mike, an American living in Norway

I’m speechless. Holy cow that is truly an exercise in patience.
Losing fingers since 1969
Thanks Paul!
Abbas, Castro Valley, CA

COOL “working drawer” to keep layout / parts under control!!
… I think this is the first time I’ve seen it…
Way to GO!
Thank you!
Have Fun! ... www.woodworkstuff.net
Thanks Joe, not like you to miss one. Have a look here.
The early bird gets the worm but its the second mouse that gets the cheese.

I confess I had never even heard of this technique until i saw this post. I will be researching more on it later.Inspiration for future projects. Your work is excellent, very artistic.