


Share your craft projects
Make new craft buddies
Ask craft questions
Blog your craft journey
Blog Series
Laser Veneer Parquetry Panel, start to finish

Part 1: Fun and Easy!
I've done a previous blog on a similar item, but this time I'm including the design process for those of you who are interested.
Making another pa...
Mobile Sewing Thread Storage Rack

Part 9: Building the Triangular Support Brace
[02.07 Design - Cart Details.jpg]
The support brace is a large open triangle that connects the cart’s base and rear panel. The top of the brace ...

Part 10: Finishing and Final Assembly
[12.13 - Finish and Assembly - Finished Rack.jpg]
With the brace finished, the rack was almost ready to assemble. I started by adding the top cap...

Part 11: Stabilizing the Rack, and Making Some Final Tweaks
[13.03 Fixes - Base Weight Rebar in Base.jpg]
When I brought the assembled rack inside, I was pleased to see that it was quite stable when the...
How I Sharpen
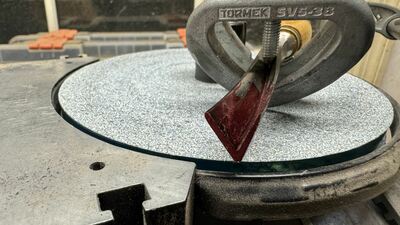
Part 4: V Tool - Part 2
I intended to do this all in one entry but I ran into a bit of a dilemma. The tool I'm working with is an Ashley Iles 60 degree, 1/2" inch tool wi...
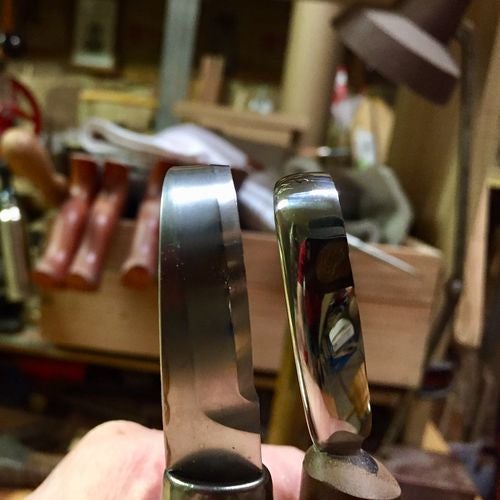
Part 5: A Hook Knife for Spoon Carving
This one isn't exactly on sharpening but it does have to do with using abrasives on a tool blade so I thought I'd throw it in here. This is a copy...

Part 6: Knives with Power Sharpener
Haven't had a chance to get back to carving tools but I had a couple pocket knives that needed a refresh this weekend so I thought it would be wort...
Shop Dust Collection

Part 1: PVC Dust Collection System for a Supercell
Rather than drag the 4" hose around from machine to machine for my Oneida Supercell I decided to install a 4" PVC dust collection system. The 4" h...
Making Another Shop
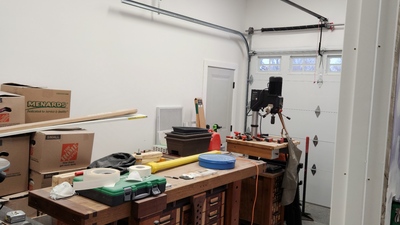
Part 1: Better Late Than Never to Start a Blog
I've been AWOL for almost a year. Like a lot of other folks, I migrated over here from the other wood working forum a year or so back. About the...

Part 2: Finish Details
I'm going to start off by admitting I'm guilty of procrastinating on getting this posted. I kept telling thinking of one more thing that I wanted ...
A Pair of Side Tables

Part 7: The Fumigator
Ok. Here is the primary reason I'm building these side tables.
Plans were to keep the tables stupid-simple to avoid any drama. I violated my goal ...

Part 8: It takes some steel nuts to do this.
[IMG_9043.jpeg]
Best laid plans.....
Anyhoo, busy weekend with car work so I couldn't get as far as intended (finish applied), but wait, there's m...

Part 9: This is the End.
Apologies to the Doors!
[IMG_0165.jpeg]
Finally the finish has been sprayed.
Base coat is Mohawk vinyl sealer, top coat satin pre-cat lacquer.
Pr...
VW Logo Blank

Part 6: Outer Ring Blanks
The outer ring is made up of 4 blanks. The first one is shown below.
[image.png]
The blank is a rectangle in cross section with a trough cut do...

Part 7: Fitting the Outer Ring Blanks
I had put steps on each side of the outer ring blanks. These steps were to be used to have a reference surface parallel to the trough axis. But af...

Part 8: Final Turning
This last step is pretty straightforward – especially compared to the previous steps. I just need to get a cylinder that looks good.
First I d...
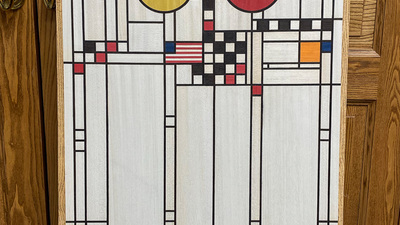
Parquetry in a Stained Glass Pattern
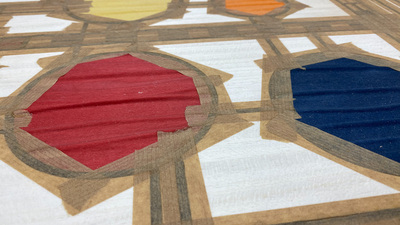
Part 10: Hot off the Press
After 4.5 hrs in the press, this is what greeted me when I pulled-out the panel. At first I thought the ripples were the result of too much glue, ...
Sliding Modular Display Shelf
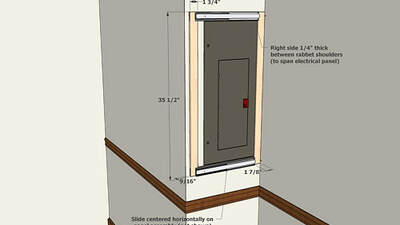
Part 7: Building the Mounting Bracket and Attaching the Drawer Slides
[03.05 Design - Mounting Bracket.jpg]
Theoretically, I could mount the drawer slides directly to the wall above and below the breaker box and attac...
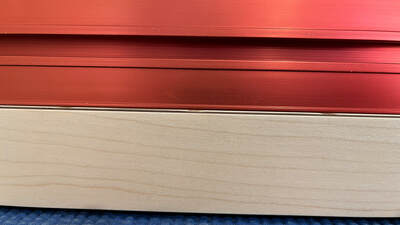
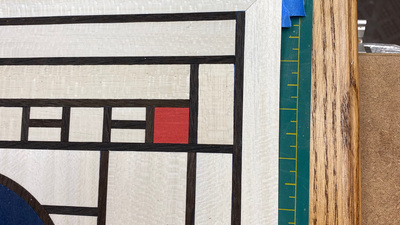
Part 8: Adding a Stiffening Brace
When I “finished” the project two months ago, I noticed that the panel face was very slightly concave. Here, I’ve placed a 36” long straight edge ...
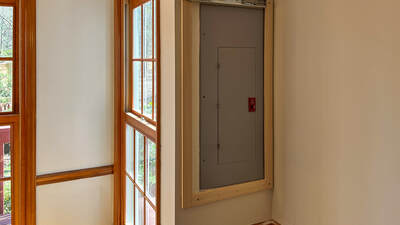
Part 9: Installation
I installed the shelf in my daughter’s house last week. I knew I had measured, and re-measured the wall and electrical panel the last time I was t...
Military Retirement Shadowbox

Part 5: Making Progress
When I left off, I had the case members cut, box joints cut and the case dry fit. Next up was the plywood back. I cut it the first piece to lengt...
Part 6: Running Down to the Wire... As Usual
Seems like no matter when I start a project it never gets done before it has to... Progress has been slow the past couple weeks. One weekend we h...
Part 7: Final Stages
I got the bulk of the work finished up this weekend. I started with a dry fit of the case and then used it to cut the door members to length. The...